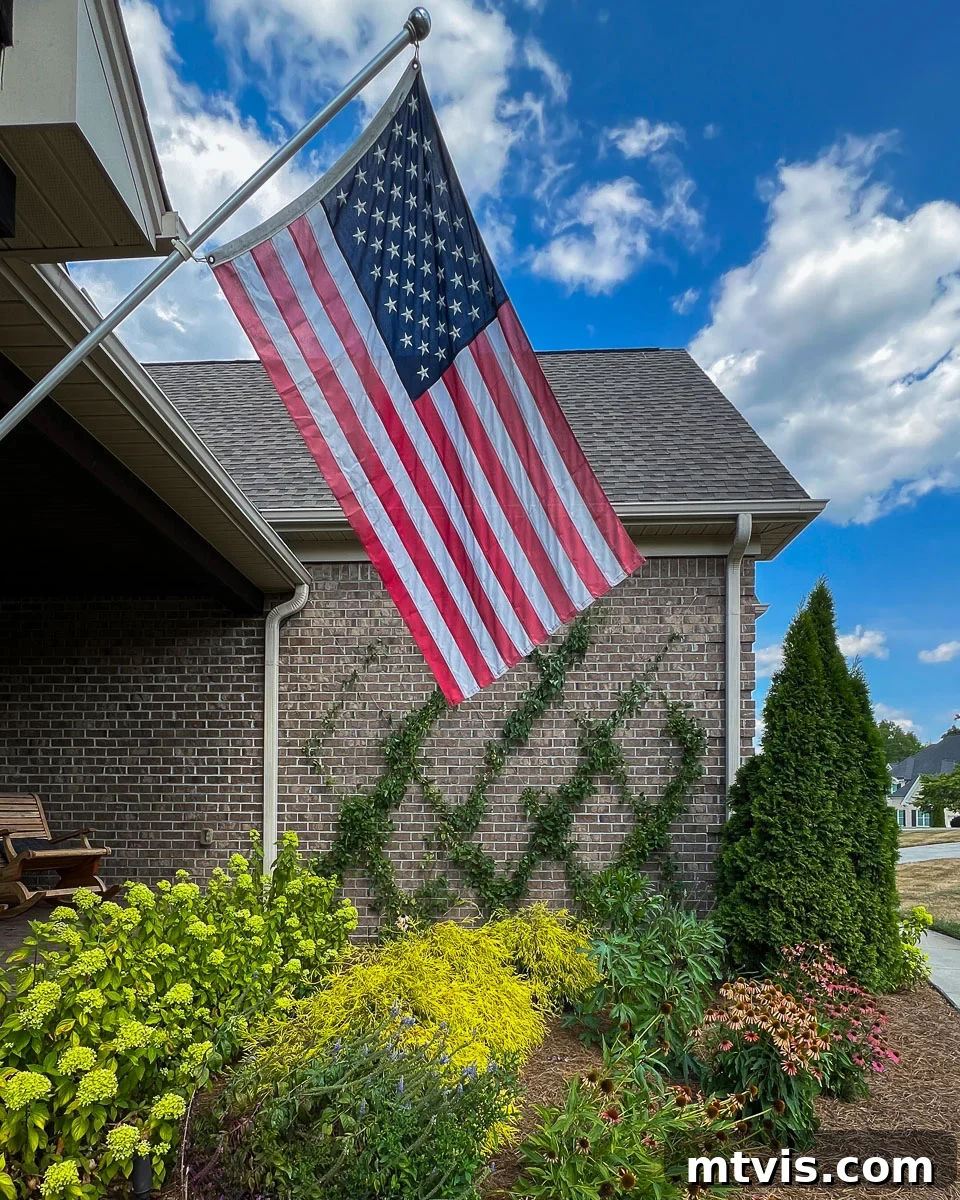
Transforming the exterior of your home doesn’t have to be an expensive or complicated endeavor. One of the most enchanting, affordable, and impactful ways to add visual intrigue and natural beauty is by installing a DIY wire trellis adorned with a flourishing climbing vine. We recently tackled this project, turning a large, uninspiring brick wall on our home into a captivating focal point with a custom-designed diamond-patterned wire trellis. The result has us absolutely thrilled, and we’re excited to share our step-by-step journey, making this very achievable DIY project accessible for you.
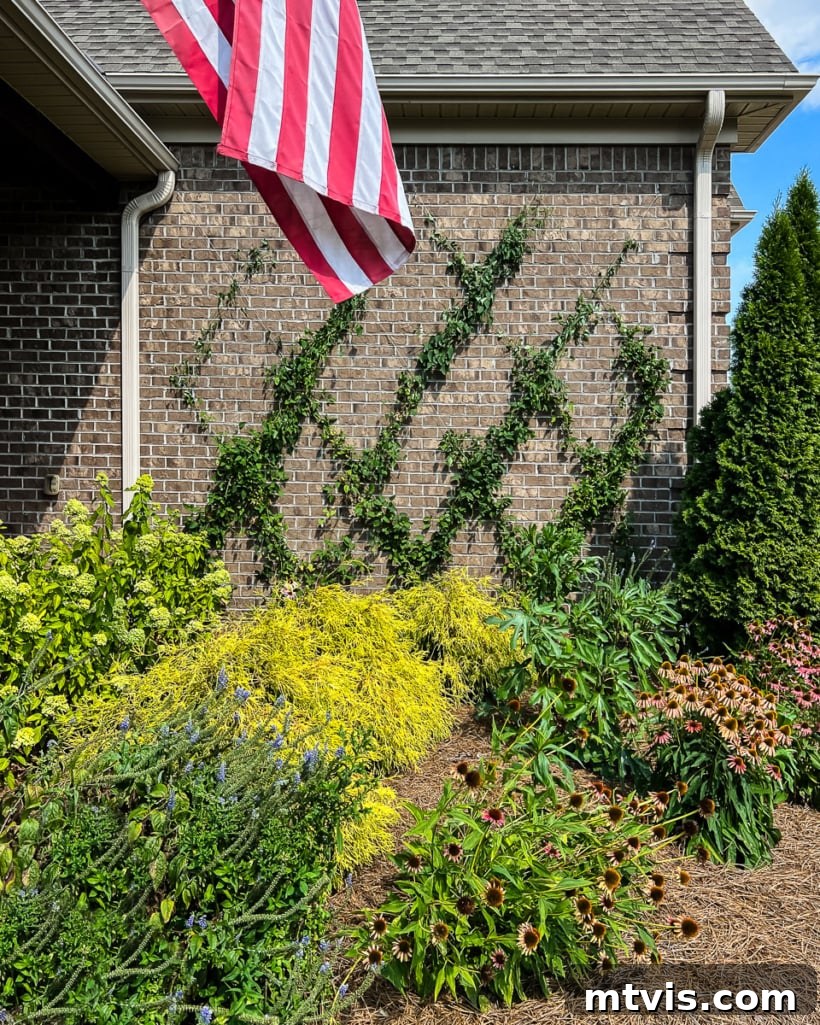
Why a DIY Diamond Wire Trellis is the Perfect Exterior Upgrade
I must confess, the existing brick color of our home has never been my favorite. For a long time, we considered options like limewashing to change its appearance, but after receiving several quotes, we quickly realized it was an investment beyond our current budget. This prompted us to brainstorm more affordable yet equally effective ways to enhance our home’s curb appeal and add a touch of personality to its facade.
It was during this brainstorming phase that we rediscovered our admiration for diamond-shaped wire trellises supporting climbing vines, similar to stunning examples we’d seen online. The idea instantly resonated. Adding a custom wire trellis to the expansive, blank brick wall adjacent to our front porch seemed like a remarkably cost-effective and relatively straightforward solution to introduce beauty, texture, and architectural interest. The decision proved to be a brilliant one, and we couldn’t be more delighted with the transformation it brought to our home’s exterior.
Before we delve into the comprehensive tutorial, take a moment to appreciate the remarkable before and after. This visual comparison perfectly illustrates the profound impact a simple DIY project can have on the overall aesthetic and charm of your outdoor living space. Get ready to be inspired!
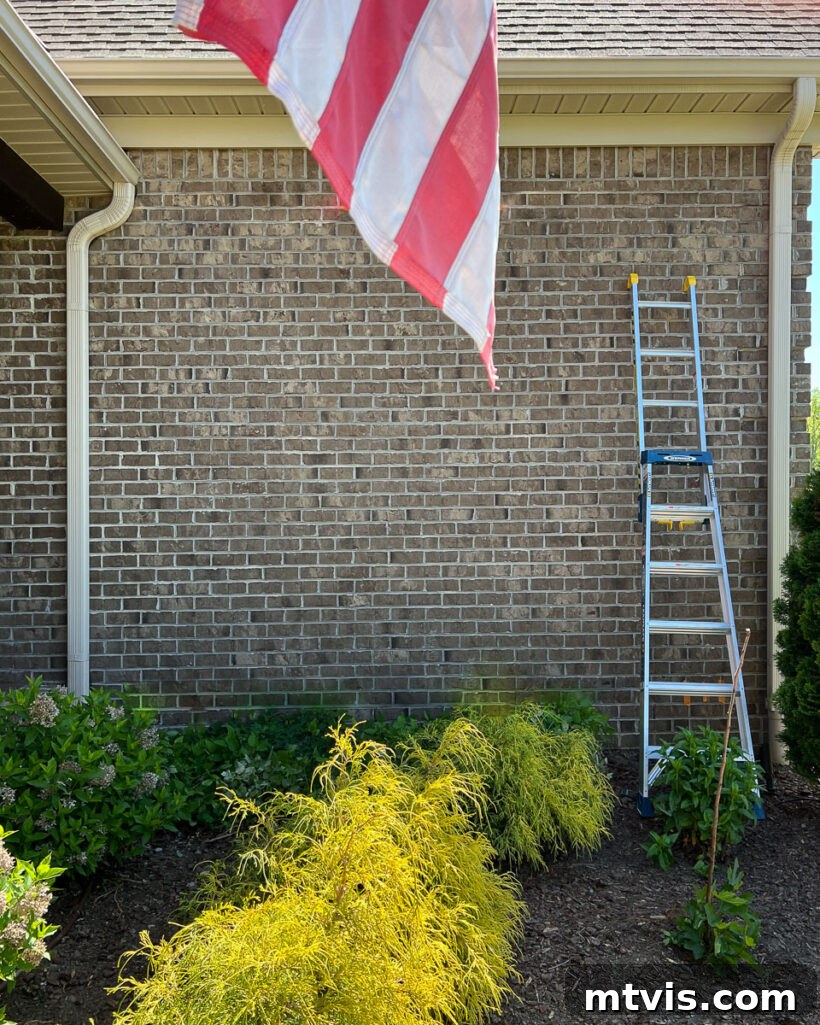
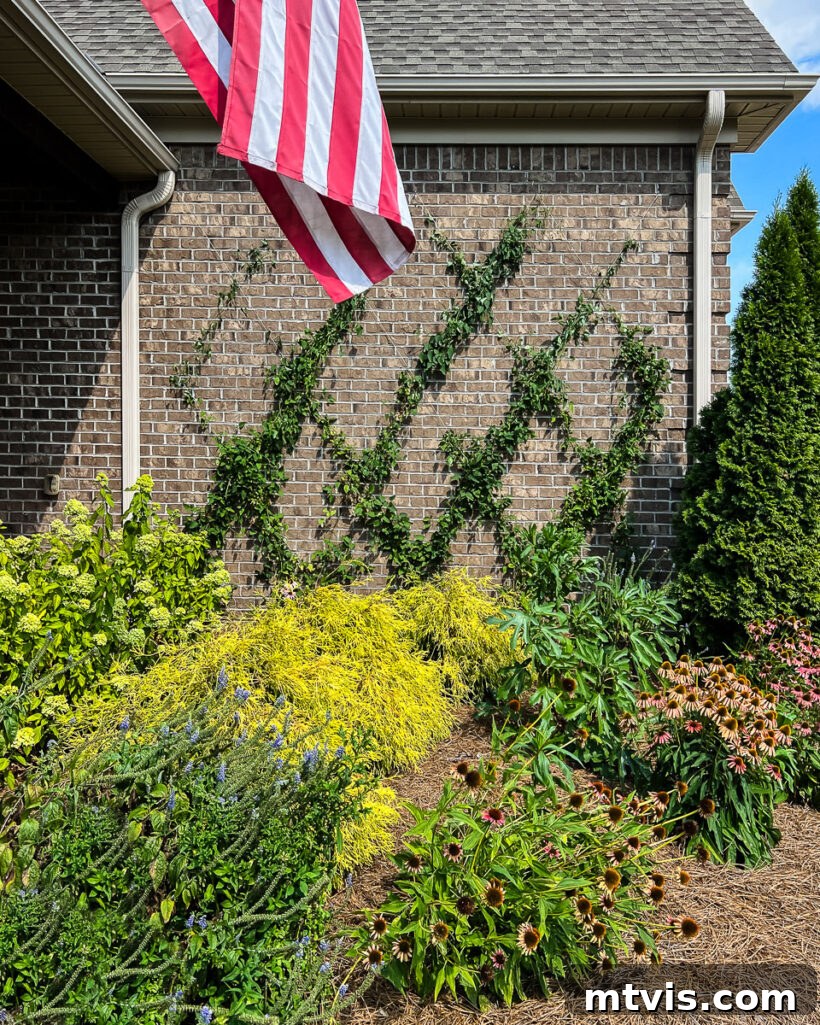
How to Build Your Own Diamond-Shaped Wire Trellis
To provide a clear overview and context for the materials and written instructions that follow, we’ve prepared a concise video guide that visually walks you through this DIY trellis project. It’s a great way to see the steps in action before you begin. The video will play after a brief advertisement.
This post contains affiliate links for your convenience. Click here for my full disclosure policy.
Essential Materials and Tools for Your DIY Wire Trellis
While ready-made wire trellis kits are available (you can explore kit options here), we opted for a more customized approach by purchasing individual components. This method offers greater flexibility in design and sizing, though a kit might appeal to those seeking maximum simplicity. Below is a comprehensive list of what we utilized for our successful trellis installation:
- Measuring Tape: Crucial for accurate planning and precise placement of your trellis design.
- Painter’s Tape for Rough Surfaces: Essential for visualizing your design on the wall before drilling, especially on brick or textured surfaces where regular tape might not adhere well.
- Drill & Masonry Drill Bits: A powerful drill paired with the correct size masonry bits is vital for cleanly drilling into brick and mortar. Ensure the bit diameter matches the recommended size for your concrete anchors.
- Hammer: Used for gently tapping concrete anchors securely into pre-drilled holes.
- Screwdriver: A standard screwdriver is useful not just for its intended purpose but also for leverage when screwing in the eye hooks.
- 1/16th Galvanized Wire Rope + Aluminum Ferrules: We chose galvanized wire for its durability and resistance to rust, perfect for outdoor exposure. The 328-foot length we purchased was more than sufficient, leaving us with plenty for future projects. Aluminum ferrules are key for securely crimping the wire ends.
- Wire Cutters: Absolutely ensure these are sharp and robust. Dull cutters will make cutting the galvanized wire rope incredibly challenging and frustrating.
- Pliers: Heavy-duty pliers are essential for firmly clamping the aluminum ferrules onto the wire rope, creating secure loops and connections.
- Screw Eye Hooks: These provide the anchor points for your wire rope, allowing you to create the desired trellis pattern.
- Concrete Anchors: Select anchors that precisely fit the diameter of your screw eye hooks. We successfully used these concrete anchors, designed for secure installation into masonry.
- A Climbing Vine: The living heart of your trellis! Choose a vine suitable for your climate and desired aesthetic.
Step 1: Meticulously Plan Your Wire Trellis Layout
This initial planning phase is undeniably the most critical and, often, the most challenging part of the entire project. Begin by accurately measuring the dimensions of the exterior wall where your beautiful wire trellis will reside. Next, arm yourself with graph paper and choose a suitable scale to represent your surface area. This allows you to experiment with various diamond patterns and configurations until you achieve a design that is aesthetically pleasing and functional. This stage required several iterations for us, as evident from our numerous sketches and adjustments!
Our primary design goal was to ensure the diamonds were sufficiently large and wide. This is crucial so that the distinctive diamond shape remains clearly visible even after the climbing vine has fully matured and filled in the trellis. We also aimed for a more elongated diamond aesthetic, preferring it over the more square-shaped patterns commonly seen. Another key consideration in our planning was strategic placement: we intentionally designed the anchor points to align with the mortar lines, knowing it would be considerably easier and safer to drill into the mortar rather than directly into the brick itself. While it involved a fair bit of “mathing” and careful calculation, investing this time upfront paid off immensely in the execution phase.
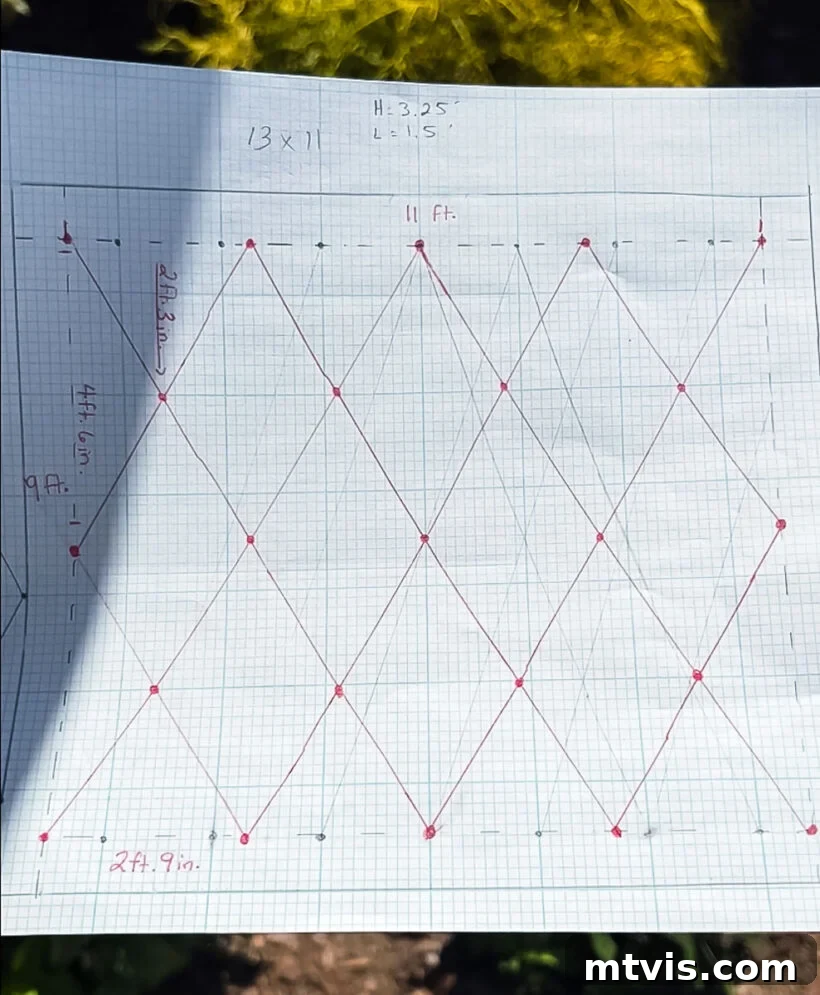
Step 2: Visualize and Refine Your Design on the Exterior Wall with Tape
Never assume that a design that looks perfect on paper will translate flawlessly to a real-world application. This is where the rough surface painter’s tape becomes your invaluable ally. We meticulously taped out our planned wire trellis design directly onto our exterior brick wall. This often-overlooked step is a true time-saver, as it allows you to visualize the pattern, assess proportions, and make any necessary adjustments before committing to drilling. For instance, after taping, we decided to tweak the exact placement of the trellis’s bottom edge for a more balanced appearance. While we didn’t tape out every single diamond, we used a Sharpie to accurately mark the precise locations where each screw eye hook needed to be installed, ensuring accuracy and symmetry across the entire design. This step truly helps confirm your aesthetic choices and prevents costly mistakes.
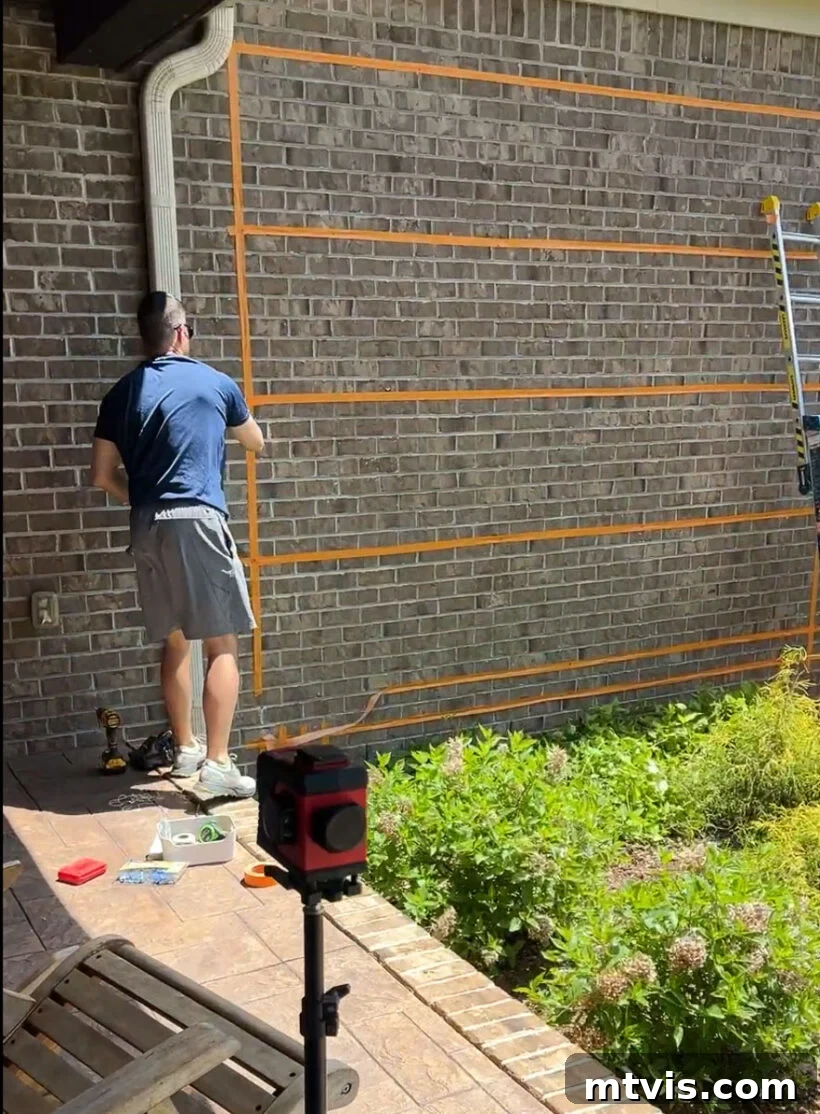
Step 3: Securely Install Your Anchors and Screw Eye Hooks
With your design finalized and marked, it’s time to begin the installation. Using your drill and the appropriate masonry drill bit – sized specifically for the concrete anchors you’ve chosen – carefully drill holes at all the marked points. It’s crucial to drill straight and to the correct depth specified by your anchor manufacturer for maximum holding power. Once the holes are drilled, gently tap the concrete anchors into place using a hammer until they are flush with the wall surface. Finally, screw your eye hooks into the installed anchors. We discovered a helpful trick here: if the eye hooks become stiff or difficult to turn by hand, using the neck of a screwdriver inserted through the eye can provide extra leverage, making it much easier to twist them fully and securely into place. Ensure all eye hooks are firmly set and oriented correctly to guide your wire rope.
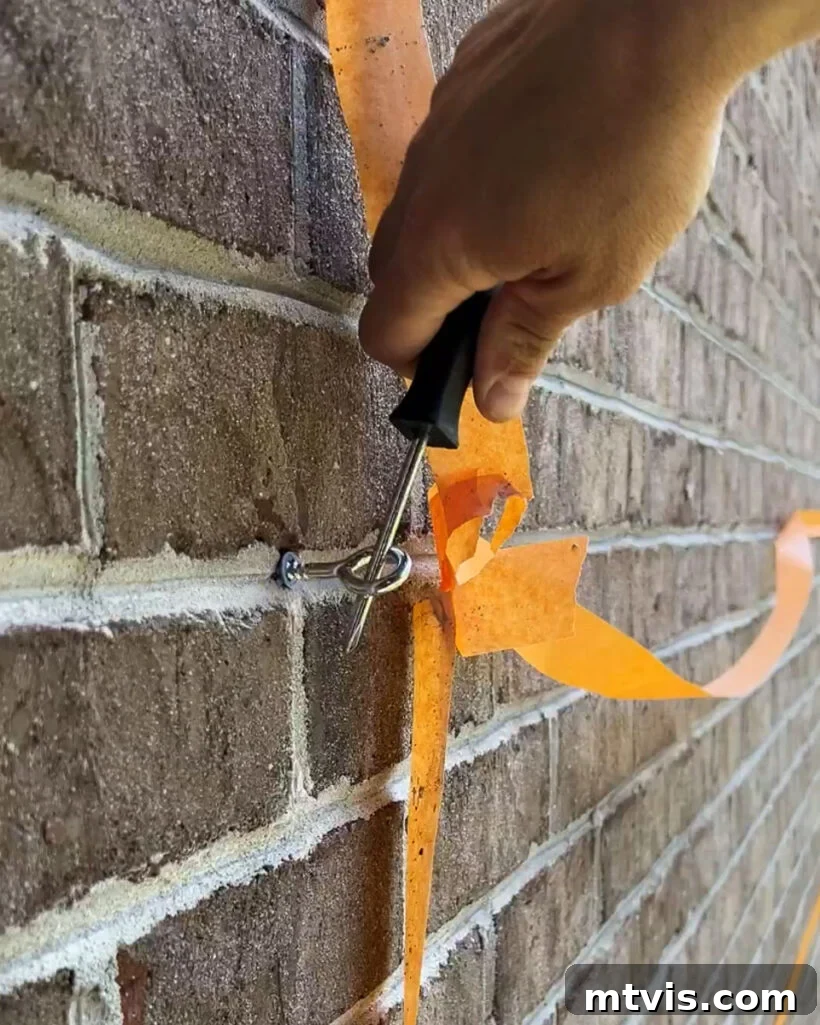
Step 4: Precisely Install Your Galvanized Wire Rope
The core of your DIY trellis comes to life in this step as you install the galvanized wire rope. As mentioned in our materials list, we used a 1/16th galvanized wire rope kit, which included a generous 328 feet of wire and numerous aluminum ferrules – ample for this project and future endeavors. While you could theoretically use a separate length of wire for each segment of your diamond pattern, my partner, Joe, devised a clever method. He carefully threaded the wire rope to minimize cuts and anchor point attachments, resulting in only three distinct lengths of wire for the entire diamond trellis. Frankly, his intricate threading pattern was a marvel to watch, almost like a puzzle! The key is to follow your meticulously planned diamond pattern, guiding the wire through the screw eye hooks. Although the thin wire rope can be subtle against the brick, a closer look at the photo below reveals the emerging beauty of the diamond design.
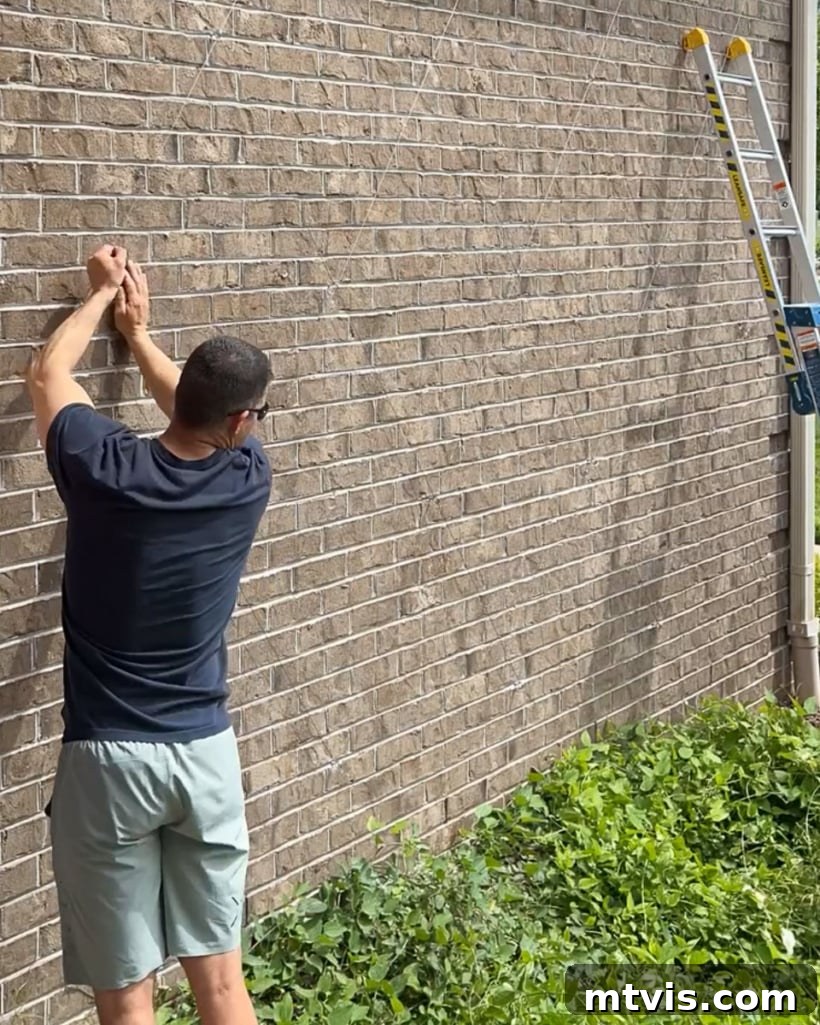
Regardless of your threading strategy, you will inevitably need to cut the wire rope at certain points. For this task, it is absolutely crucial to use sharp, high-quality wire cutters. Our initial experience with dull cutters was quite challenging, making the cutting process much harder than it needed to be. Investing in a good pair of cutters will save you considerable frustration.
To secure an end of the wire rope to a screw eye hook, follow these steps: First, thread the end of the wire rope through an aluminum ferrule. This small metal sleeve will be vital for creating a strong loop.
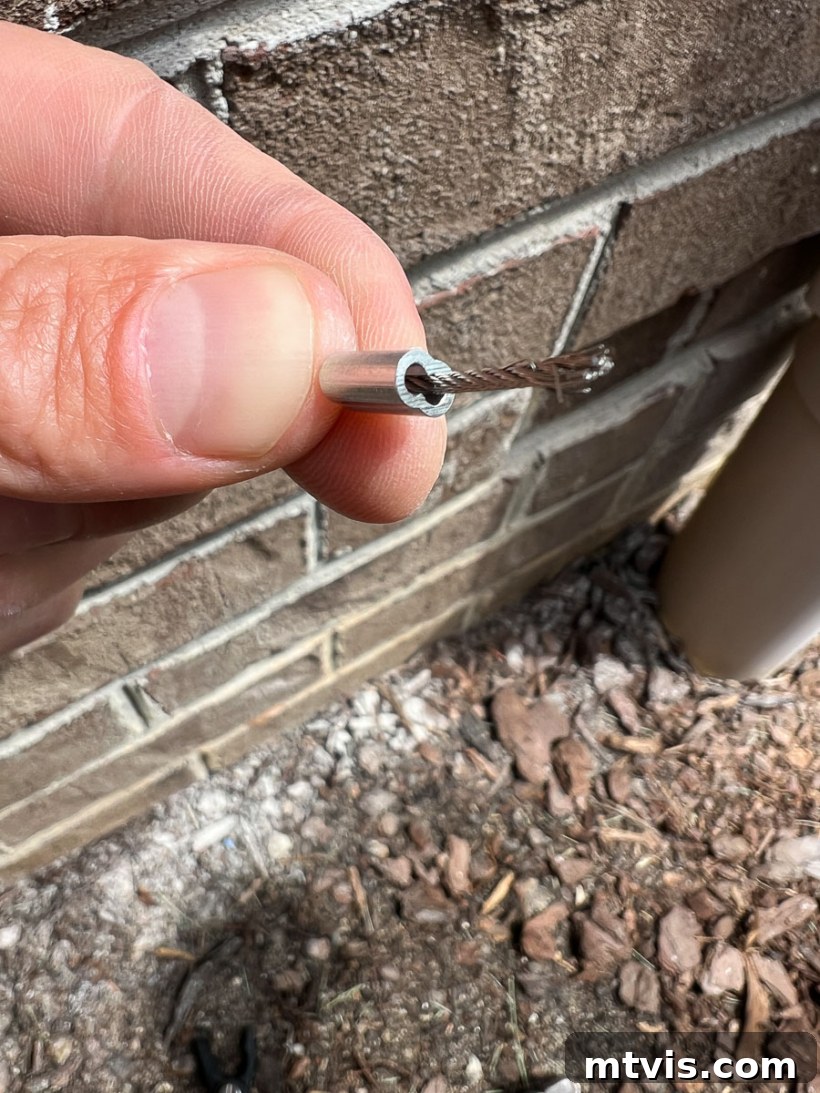
Next, pass the wire rope through the screw eye hook, then loop it back and thread it through the aluminum ferrule once more, creating a closed loop around the hook. At this juncture, the primary goal is to pull the wire rope as taut as possible. A taut wire not only looks better but also provides optimal support for your climbing vine. Once you’ve achieved satisfactory tension, use a pair of robust pliers to firmly clamp down on the aluminum ferrule. This action crimps the ferrule onto the wire rope, securely locking the loop in place. This particular task is significantly easier and more effective with two people: one to maintain the wire’s tension and the other to apply firm, even pressure to clamp the ferrule. We found this collaborative effort ensured a strong and neat finish.
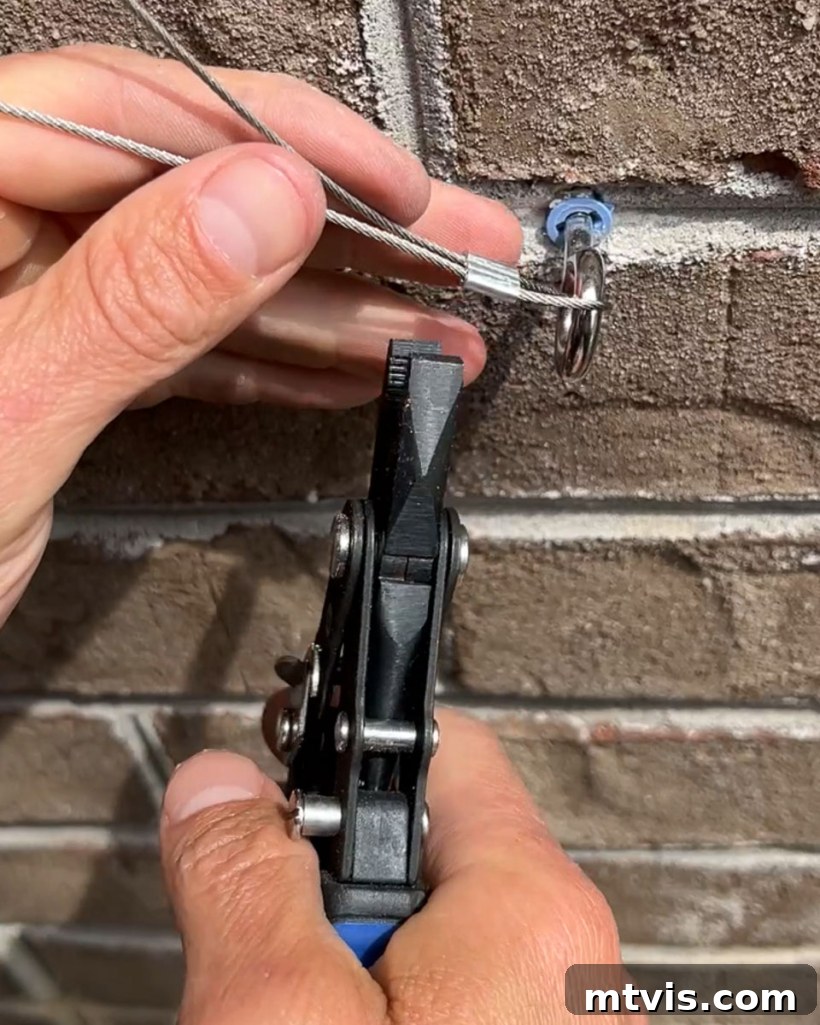
Continue repeating these threading, tensioning, and anchoring steps until your entire diamond trellis pattern is fully assembled and securely attached to all designated eye hooks. With each section you complete, you’ll see your vision transform into a functional and beautiful structure.
Step 5: Introduce and Train Your Climbing Vine to the Wire Trellis
With your robust and elegantly designed wire trellis in place, it’s time for the final, living touch: introducing your climbing vine. Living in Zone 7b of North Carolina, vine selection was an important consideration for us. Initially, we were drawn to a fragrant Jasmine vine, but concerns about its hardiness during infrequent but harsh freezes led us to re-evaluate. Ultimately, we decided on a Sweet Autumn Clematis Vine, known for its vigorous growth and beautiful clusters of fragrant white flowers in late summer and fall. It’s a reliable choice for our climate.
*A vital note regarding timing:* Due to unforeseen delays, we actually planted our Clematis vines approximately nine months before we installed the wire trellis. I strongly advise against this sequence of events! By the time the trellis was ready, the vines had already grown significantly, resulting in a considerable amount of untangling, pruning, and wasted growth. For optimal results and ease of training, ideally, plant your chosen climbing vine once your wire trellis is completely installed and ready to receive it. This ensures the young vine can be immediately guided along the trellis, establishing its growth pattern efficiently.
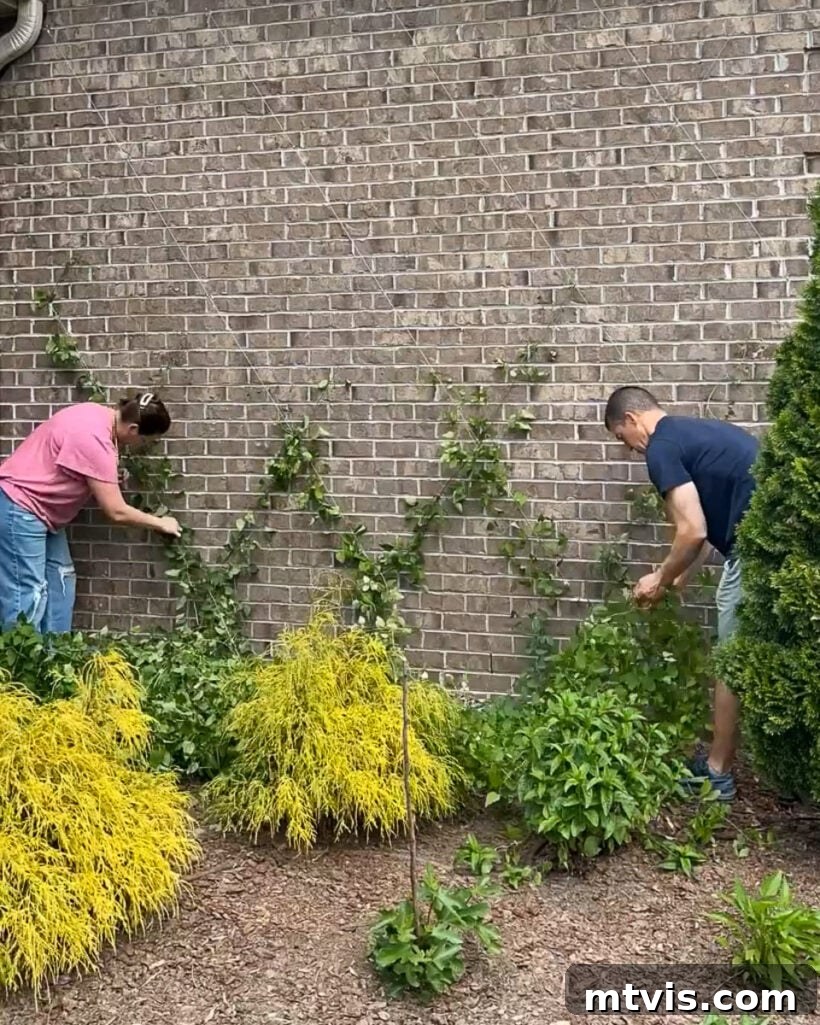
We completed the installation of this DIY wire trellis at the end of April. It has been an absolute delight to witness the Clematis vine gradually fill in the diamond pattern, transforming the once-blank wall into a living tapestry. The growth is surprisingly swift, and the visual impact is truly stunning. Here’s a look at how it has beautifully matured, providing natural charm and character to our home!
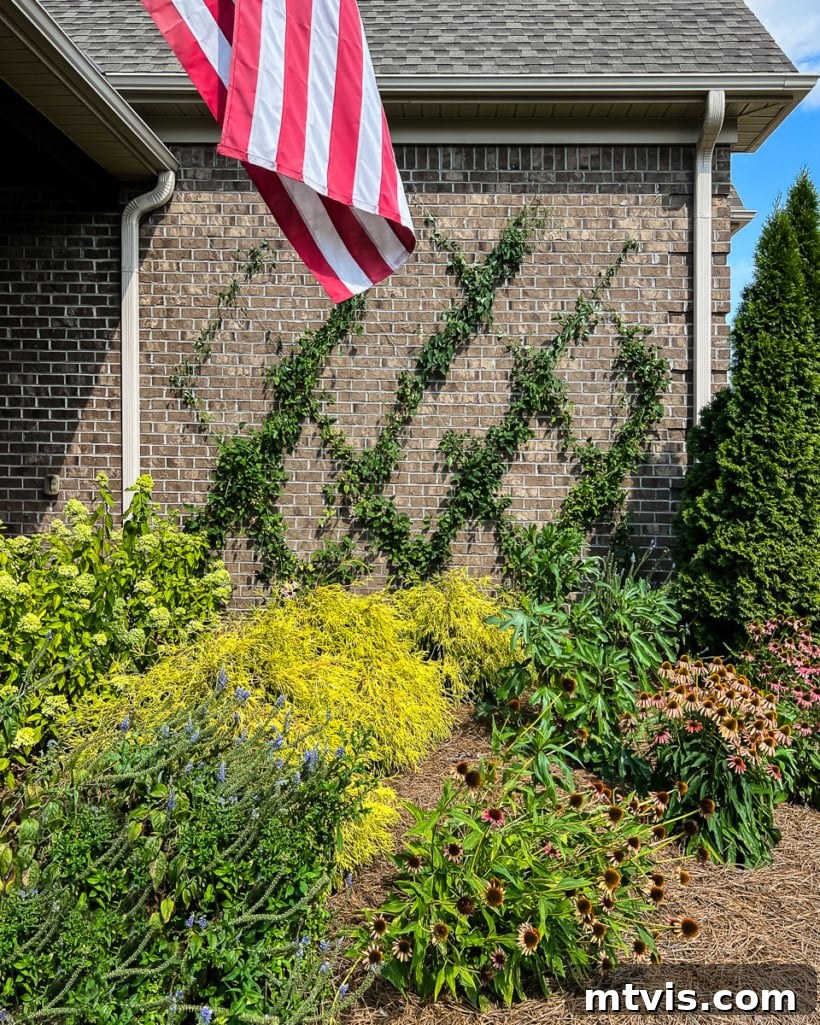
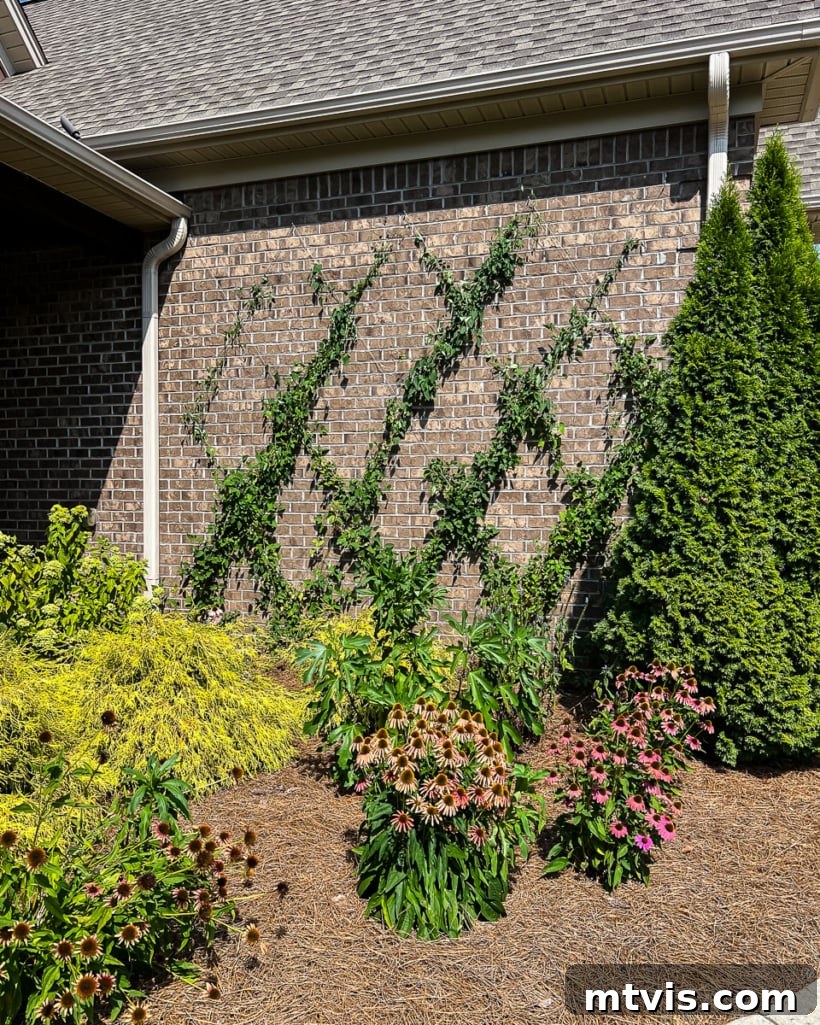
We are utterly thrilled with the significant enhancement this trellis and climbing vine have brought to our home’s exterior. It has added immense beauty, texture, and visual interest to a previously underutilized space. The positive feedback from our neighbors, many of whom have expressed a desire to replicate the project on their own homes, truly validates its success. What are your thoughts on this charming and practical exterior upgrade?
If you’re looking for more unique ways to elevate your garden spaces, don’t miss our tutorial on creating DIY garden trellises from sturdy metal fence panels. They offer a gorgeous, modern aesthetic perfect for any contemporary garden!
MORE OUTDOOR IDEAS
SEE ALL OUTDOOR POSTS
-
Fire Pit Ideas for Every Outdoor Space
-
How to Make a DIY Outdoor Chandelier
-
Modern DIY Garden Trellis
-
DIY Outdoor Electrical Box Cover
-
DIY Diamond Wire Trellis for a Vine
-
A Complete Review of Vego Garden Beds: Pros, Cons, and Everything In-between
Curious about my approach to transforming rooms and spaces within our home? Explore Designer in a Binder® for an accessible and effective method to decorate your living spaces.
For exclusive content, behind-the-scenes glimpses, and design insights, be sure to subscribe to our newsletter before you leave!