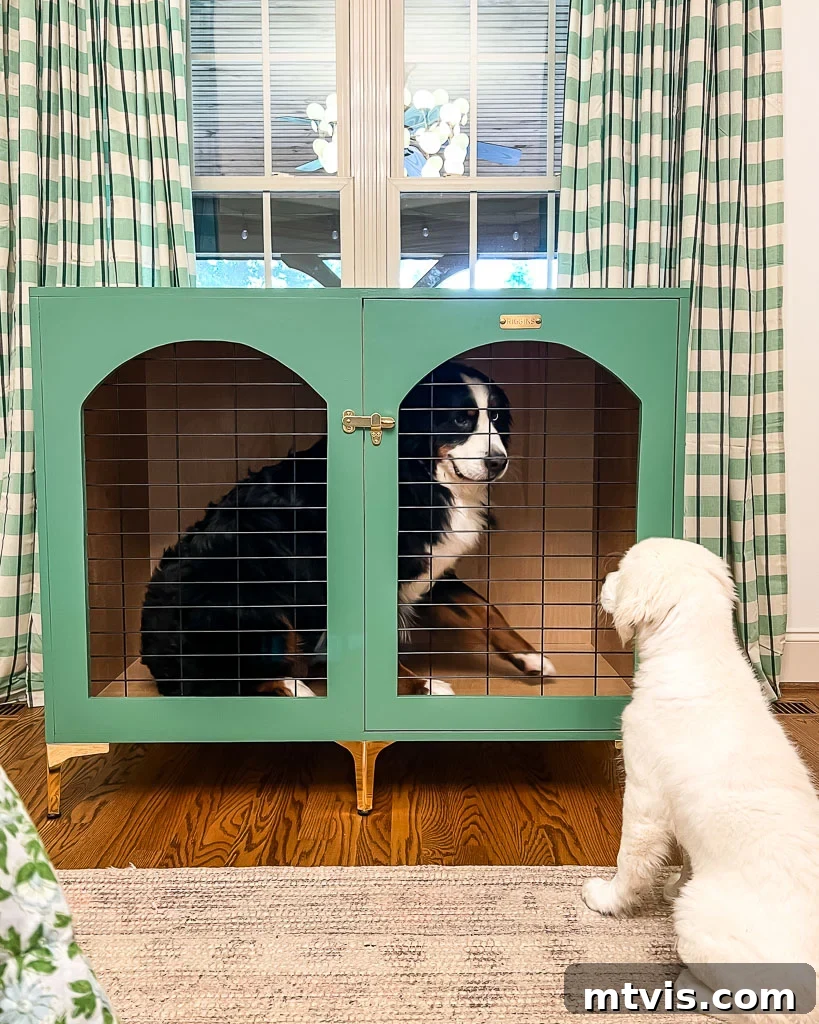
Let’s face it – standard metal dog crates, while functional, often clash with the carefully curated aesthetic of our homes. For many pet owners, these unsightly enclosures become a constant design dilemma, especially when they need to reside in prominent living spaces. If you’ve ever felt that your furry friend’s living quarters detract from your home’s decor, you’re not alone. We were in the exact same predicament, tired of the bulky metal crates disrupting the ambiance of our primary bedroom. This frustration sparked a creative solution: building custom DIY wood dog crates that seamlessly blend into our interior design, appearing as beautiful pieces of furniture rather than utilitarian cages. In this comprehensive guide, we’ll walk you through the step-by-step process of constructing a gorgeous, furniture-style dog crate that’s as charming and beloved as your canine companion.
A special thank you to DAP Products for sponsoring this post. This post contains affiliate links for your convenience. Click here for my full disclosure policy.
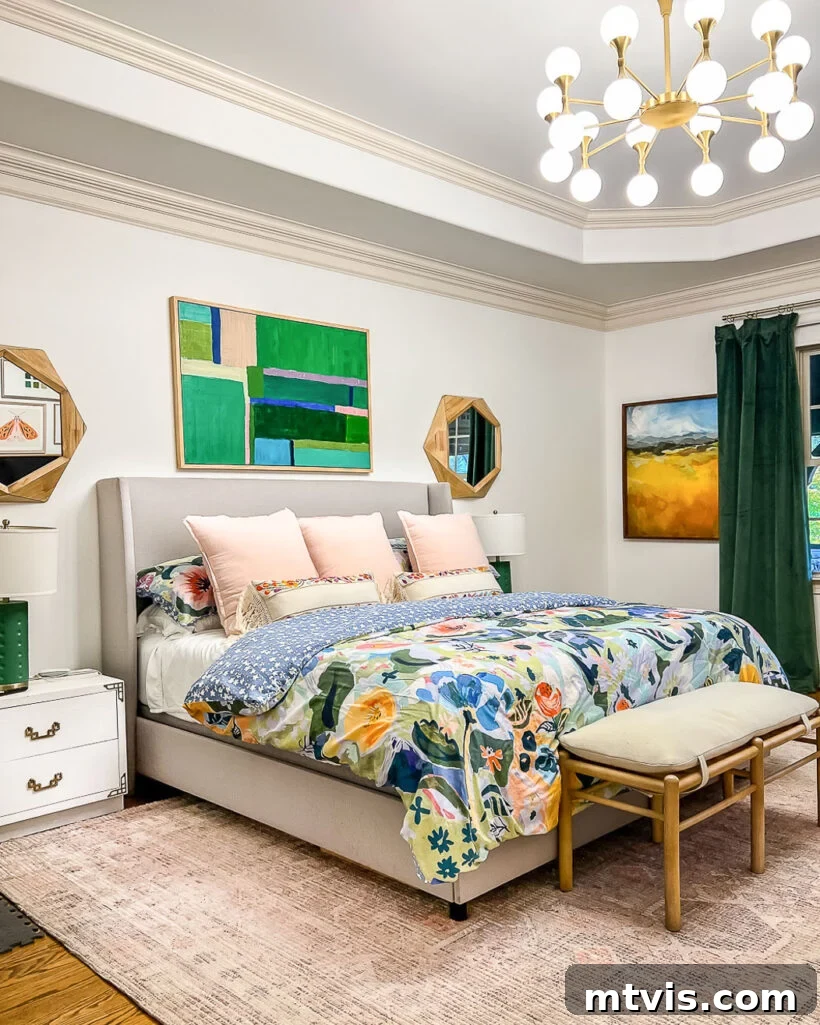
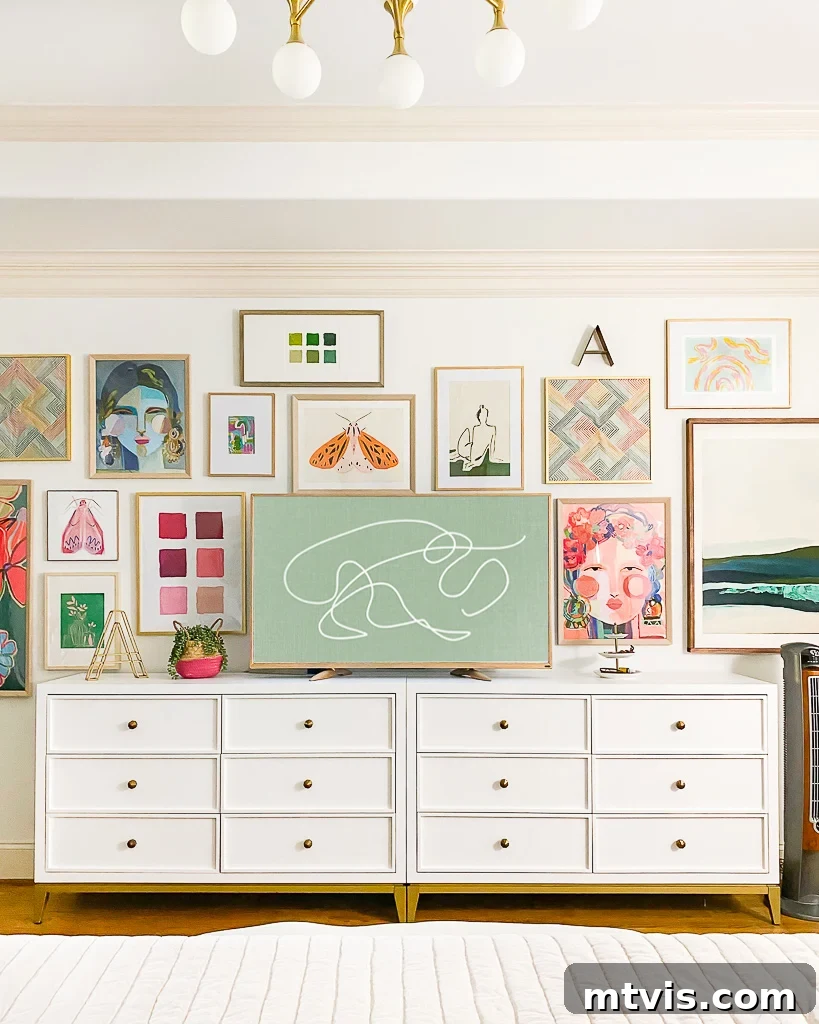
The quest for stylish pet solutions is a common challenge for dog lovers. Traditional wire crates, while essential for training and safety, often fall short when it comes to aesthetics. In our home, the most practical location for our dog crates has always been our primary bedroom. For years, we endured the presence of Riggins’ enormous, unappealing metal crate. The situation became even more pronounced a few months ago when we welcomed our new puppy, Chief 👨🏻🚒, into the family, instantly doubling the visual impact of those industrial cages. These functional but unattractive crates severely detracted from the carefully chosen design elements of our bedroom, including our vibrant gallery wall. We believe that pet essentials can and should contribute to, rather than detract from, your home’s overall design. Below, you can see glimpses of our bedroom’s “pretty” design views, followed by the stark contrast of the old metal crates.
And here they are – the previous dog crates that simply did not align with the inviting atmosphere we aimed to create in our bedroom. Their industrial look clashed dramatically with every other carefully chosen element in the space, serving as a constant reminder that form and function don’t always go hand-in-hand in pet furniture.
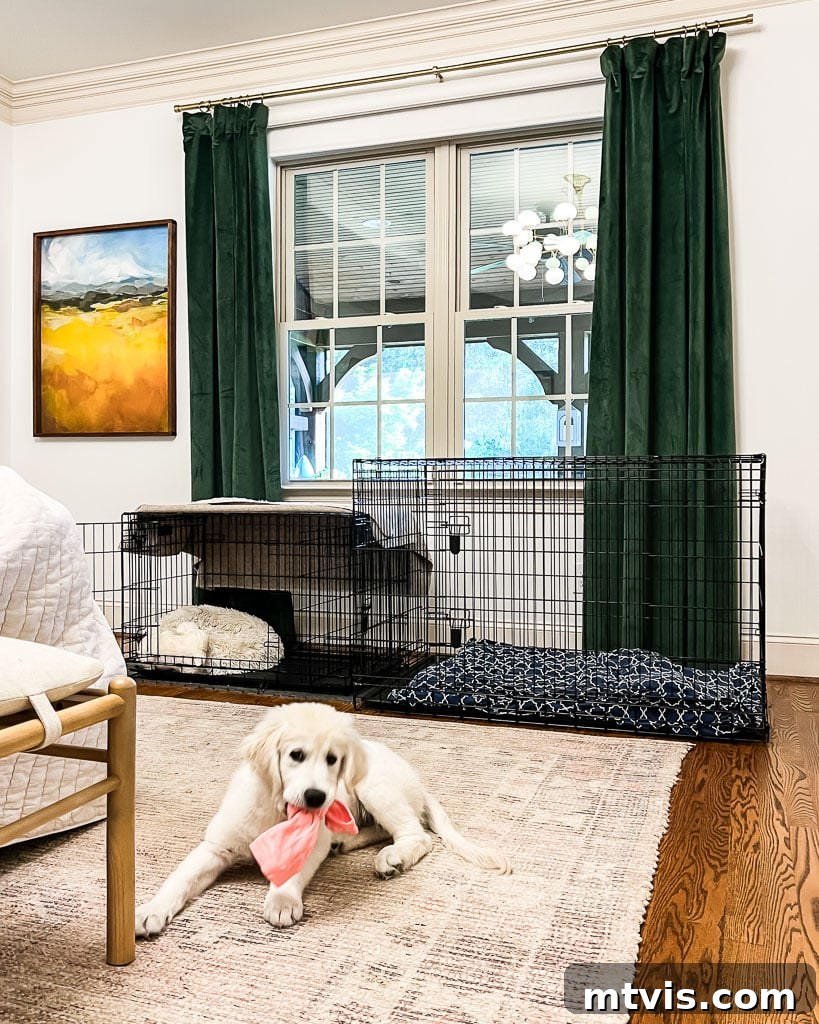
The difference is undeniable, isn’t it? If you’re ready to transform your dog’s crate from an eyesore into a stylish, integrated part of your home, then let’s get started! This comprehensive tutorial will guide you through every step of building a beautiful wooden dog crate that truly looks like a piece of furniture.
Level of Difficulty for This DIY Dog Crate Project
This step-by-step tutorial is quite detailed and extensive, simply because there are numerous important steps and specific considerations involved in building a furniture-grade dog crate. While the process itself isn’t inherently complex, it’s not what we would typically label as “beginner-friendly.” We highly recommend having a few simpler furniture-building projects under your belt before embarking on this one. Familiarity with basic woodworking tools, measuring techniques, and assembly processes will significantly enhance your experience and the quality of your finished custom dog crate.
To give you a clear visual overview of the project and how all the components come together, we strongly recommend watching the short (just 1-minute long) video below before diving into the detailed written instructions. This quick preview will provide a valuable frame of reference for the entire build. The video will play after a brief advertisement.
Essential Tools and Equipment for Your Custom Dog Crate
Having the right tools is paramount for the success and safety of any woodworking project, especially one like building a DIY dog crate. Here’s a list of the essential tools and equipment you’ll need. Investing in quality tools will not only make the process smoother but also yield more precise and professional results.
- Circular Saw: This is a versatile tool for making long, straight cuts in plywood. We highly recommend and love this particular model for its reliability and precision.
- Circular Saw Guides: While optional, these guides are incredibly beneficial for achieving perfectly straight and accurate cuts, which are crucial for a furniture-grade finish. We regularly use these two for our DIY projects:
- Kreg Rip Cut Guide: Ideal for quickly and accurately ripping plywood sheets.
- Kreg Accu-Cut Guide: Excellent for making precise cross-cuts and breaking down larger sheets.
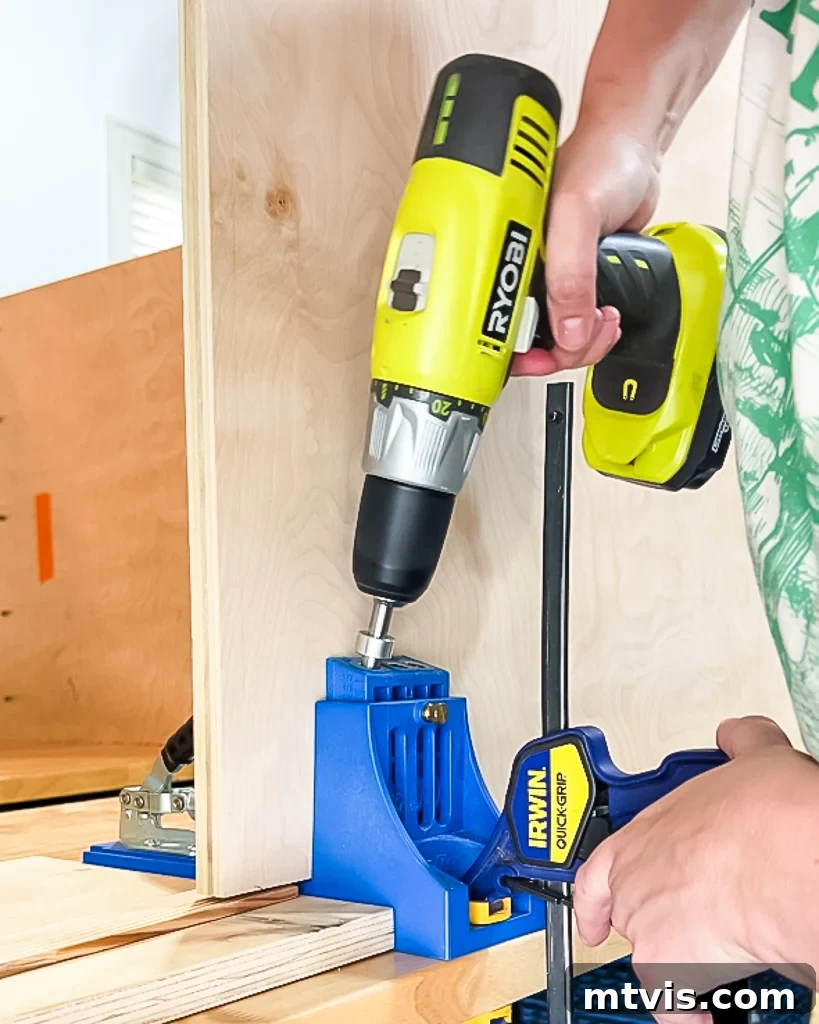
- Kreg Pocket Hole Jig: An indispensable tool for creating strong, concealed joints. We’ve used this model for years, though newer versions are available.
- Jig Saw: Essential for cutting curves and intricate shapes, particularly when creating the arched door details.
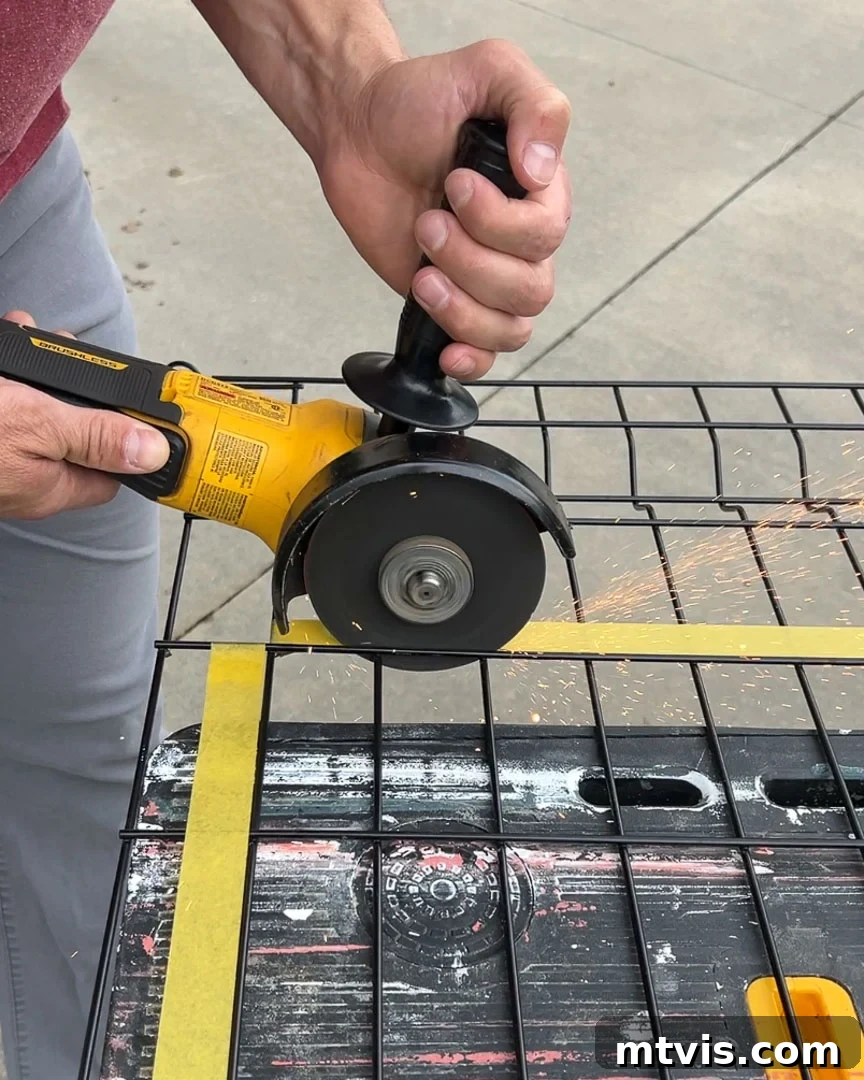
- Metal Grinder or Hack Saw: Needed if you choose to use metal fence panels for the crate inserts. A metal grinder offers faster, cleaner cuts, but a hacksaw is a viable alternative for smaller tasks.
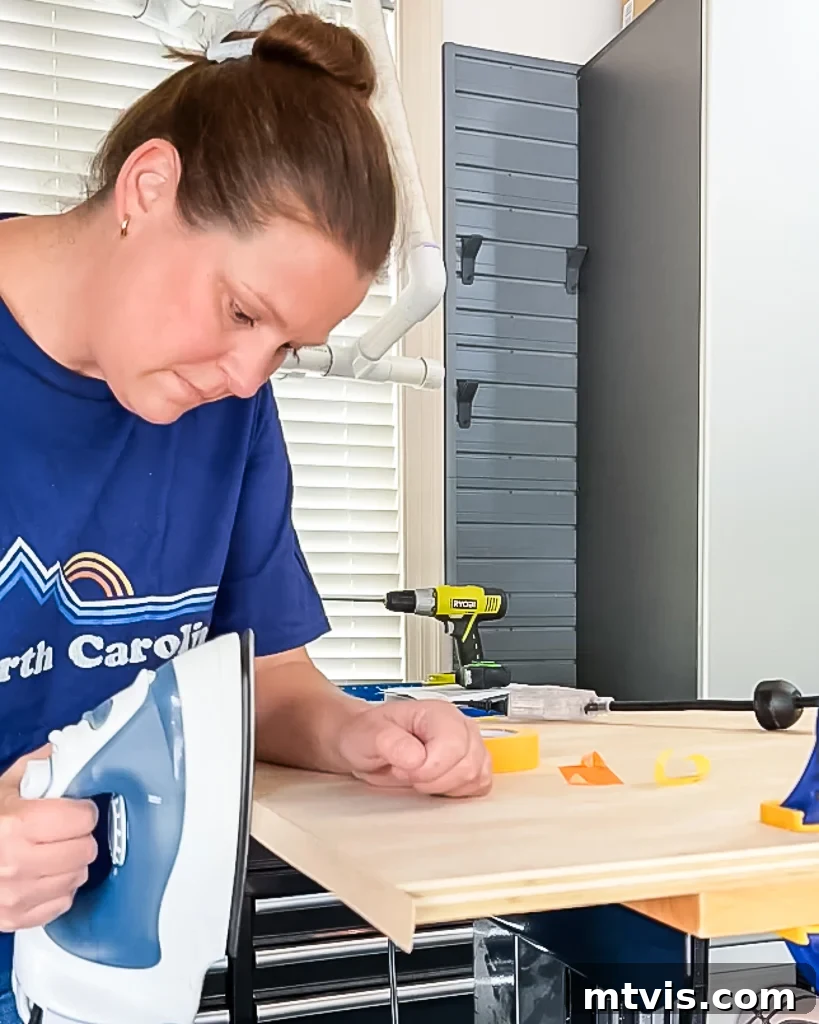
- Iron: For applying iron-on edge banding to achieve a finished look on plywood edges.
- Drill: A cordless drill is versatile for pre-drilling holes and driving screws.
- Measuring Tape: Accuracy is key – a reliable measuring tape is a must.
- Speed Square: For marking accurate 90-degree angles.
- Safety Glasses and Ear Protection: Always prioritize safety when working with power tools.
- Sandpaper: Various grits for smoothing wood surfaces and preparing for finishing.
Materials Needed for One Custom Wooden Dog Crate
The specific quantities of materials will vary based on the desired size of your DIY dog crate. Given that Riggins is a large Bernese Mountain Dog, our crates are quite spacious, measuring 34 inches tall (excluding legs) by 48 inches long by 28 inches deep. Your crates will likely be smaller, so adjust your material list accordingly. For consistency and aesthetic balance in our bedroom, we decided to make both crates the same size, even though our Golden Retriever puppy won’t grow to be as large as our Berner.
- ¾ inch x 4 ft x 8 ft sheets of plywood: We opted for high-quality birch plywood from Home Depot for its smooth finish and durability, but you can choose another type based on your budget and desired look.
- 6” furniture legs: We used 6 legs per crate due to their large size; for smaller crates, 4 legs should be sufficient for stability.
- (1) brass cabinet latch: For securely closing the crate door. Choose a style that complements your home decor.
- Hand-punched brass name plate: An optional but highly recommended decorative touch to personalize your crate.
- (2) inset concealed hinges: For a clean, modern look on the crate door.
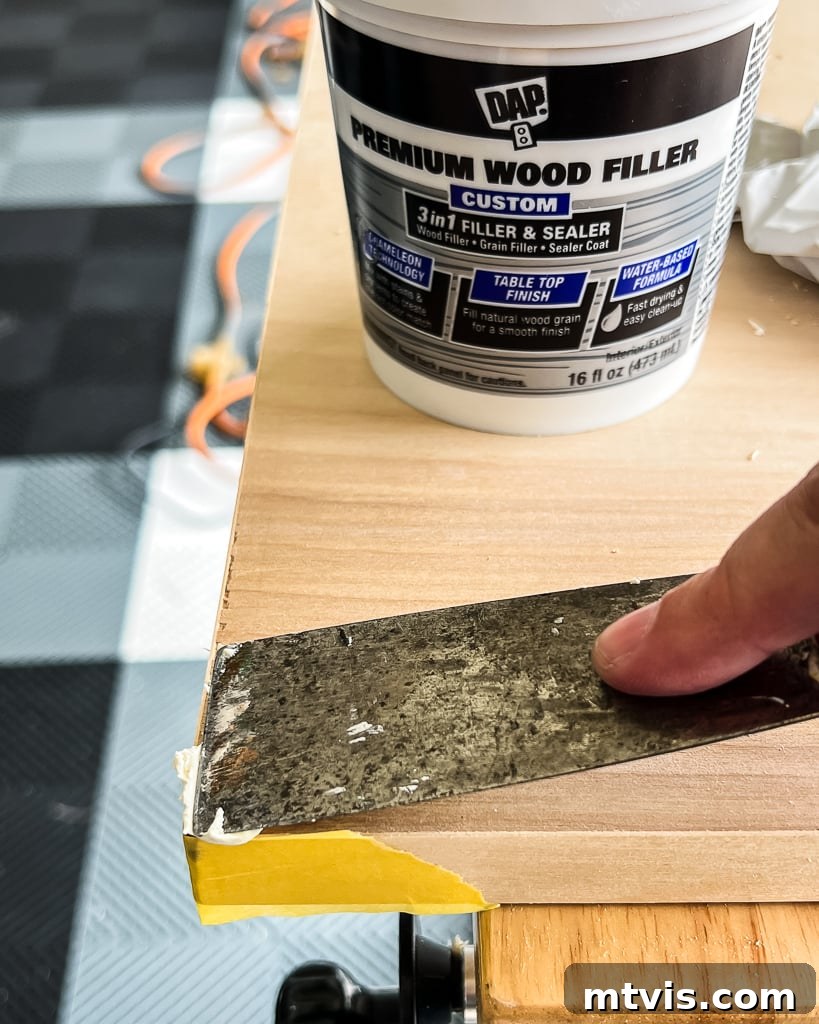
- DAP Premium Wood Filler: Excellent for filling imperfections on surfaces you plan to paint.
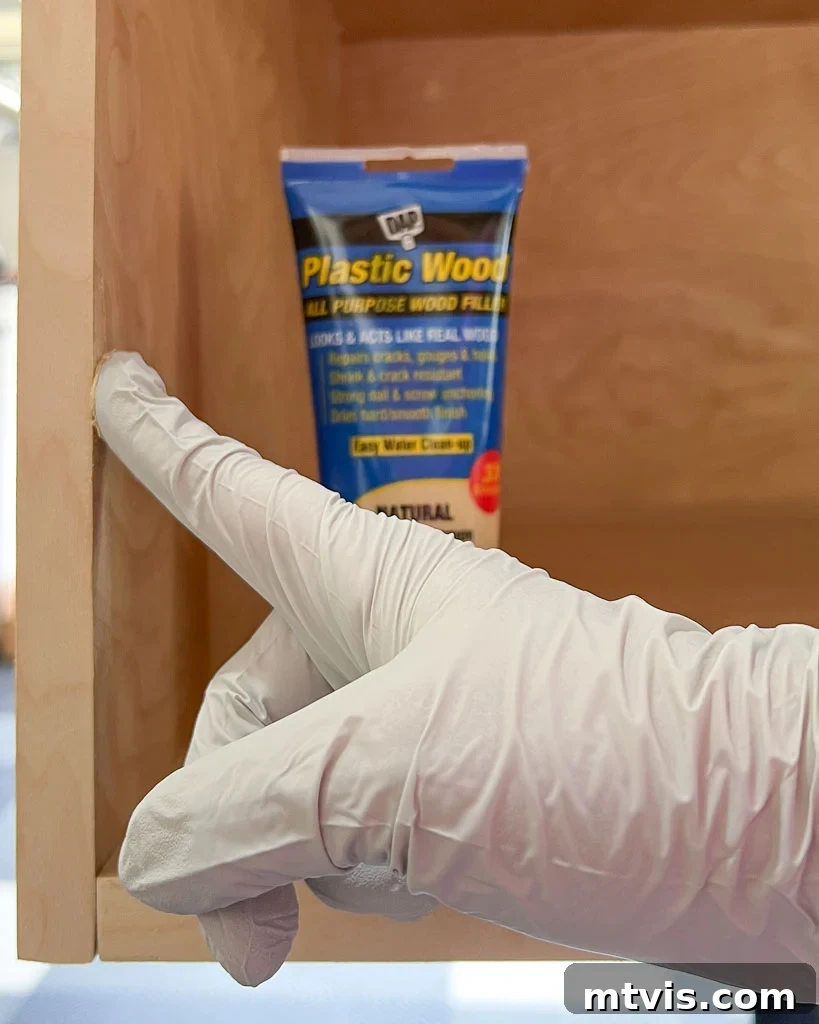
- DAP Plastic Wood All Purpose Wood Filler: A natural-colored filler ideal for areas you plan to clear coat or stain.
- 3/4 inch edge banding to match your plywood: For finishing exposed plywood edges, giving them a solid wood appearance.
- Edge banding trimmer or utility knife: For cleanly trimming excess edge banding.
- Sandpaper: Various grits (e.g., 120-220) for smooth surfaces.
- 1.25″ softwood Kreg screws: Specifically designed for pocket hole joinery in ¾ inch plywood.
- Wire clamps: For securing the metal fence panels or dowels into the crate door/frame.
- Steel fence panel(s): Our choice for the door and stationary panel inserts, providing ventilation and security. Wooden dowels are an alternative.
- Clear Polycrylic (optional): To finish and protect the inside of your dog crate, offering a durable, scratch-resistant surface.
- Stain or paint: To finish the outside of your custom dog crate. We selected Jadite by Sherwin-Williams for a chic, sophisticated look.
Steps to Build a Stylish Wooden DIY Dog Crate
Time needed: 8 hours
Building one of these DIY dog crates, alongside a coordinating bench, was a project we spread over several days. We estimate that constructing and finishing a single custom dog crate (including painting or staining) will take approximately 8 hours. This time estimate can fluctuate based on your experience level and the tools available, but with careful planning and execution, you’ll have a stunning piece of pet furniture in no time.
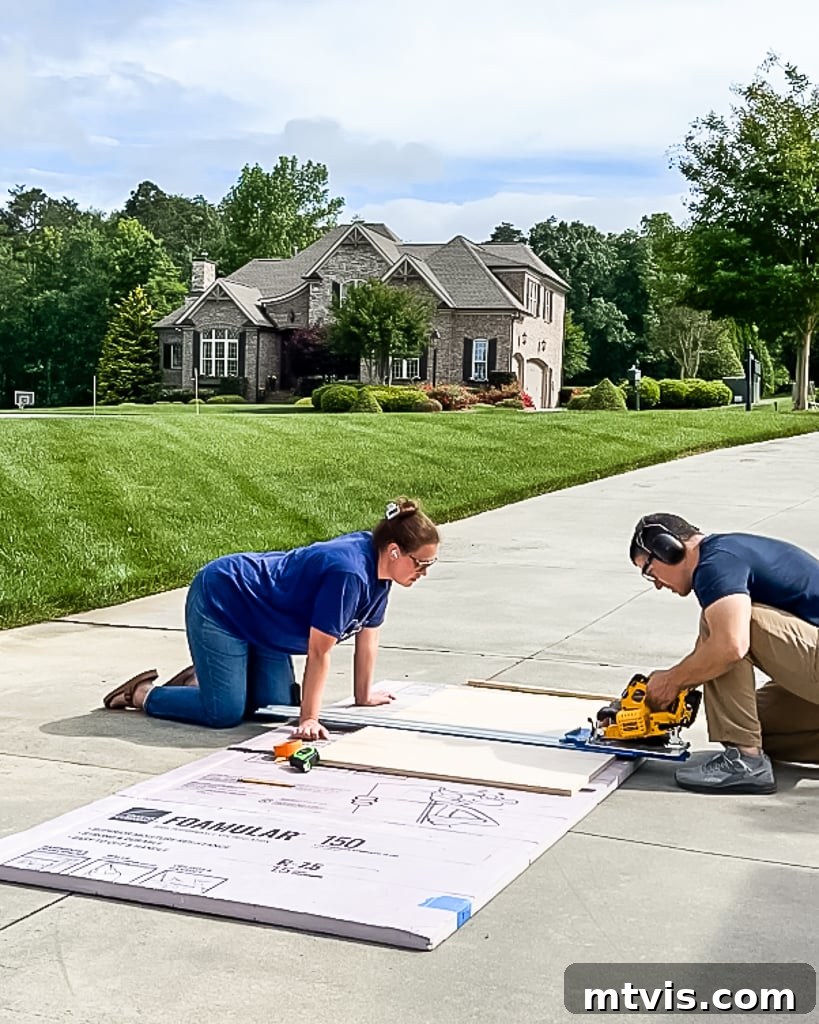
- Cut the top and side panels of your crate to size.
Begin by precisely cutting the main components of your dog crate: the top and two side panels. We achieved excellent accuracy using a combination of our Kreg Rip Cut and Kreg Accu-Cut cutting guides with our circular saw. These guides are invaluable for making straight, clean cuts in plywood, ensuring your crate’s frame is perfectly square. Remember, the exact dimensions of your pieces will depend entirely on the desired size of your custom dog crate. Measure twice, cut once!

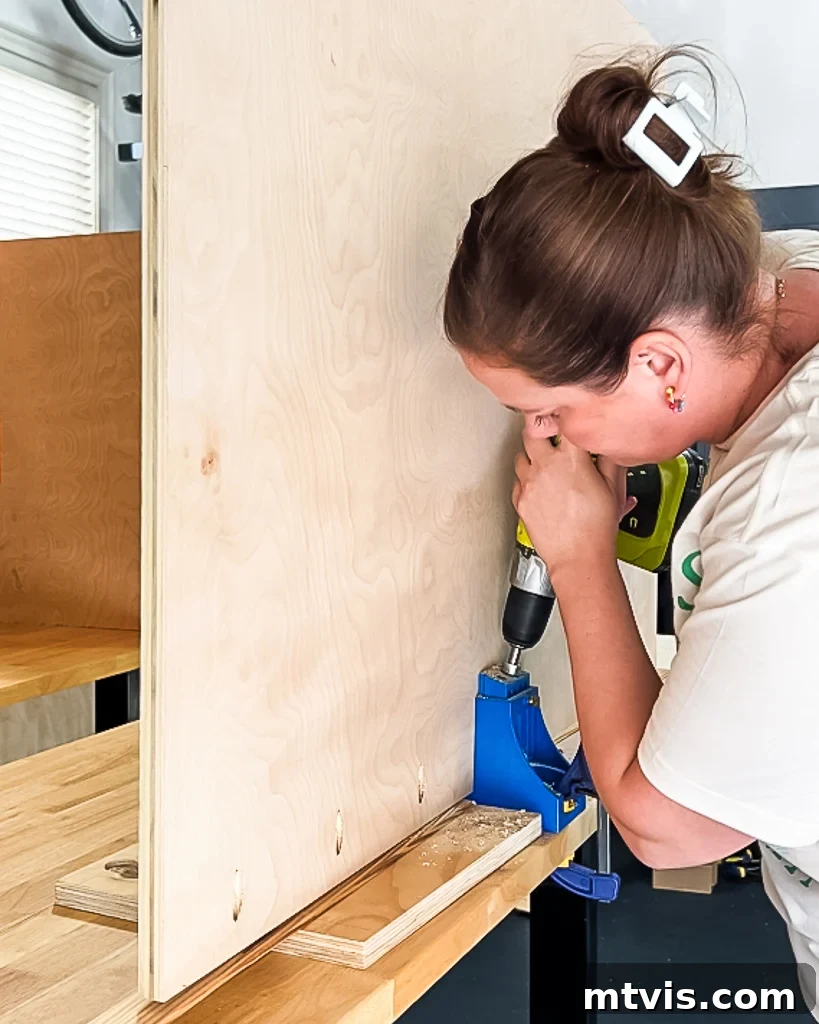
- Drill pocket holes for robust joinery.
With your side panels cut, set your Kreg Pocket Hole Jig to the ¾-inch plywood setting. Drill pocket holes into one short edge of each side panel. These holes will allow you to create strong, hidden joints when assembling the crate. The top panel does not require any pocket holes at this stage as it will be joined differently.
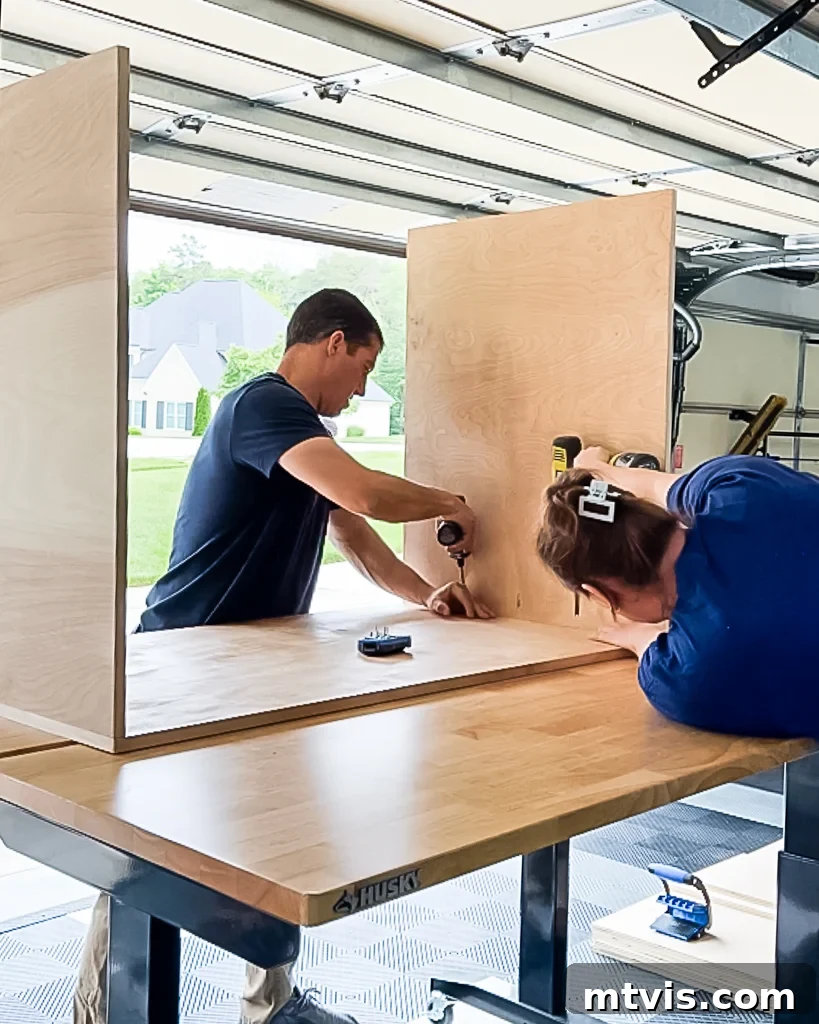
- Temporarily attach the side panels to the top panel.
This step involves a temporary assembly to aid in accurate measurement for other components. Use your Kreg screws to attach the side panels to the top panel. It’s crucial not to use wood glue at this point, as you will need to disassemble these pieces again shortly to cut the remaining panels and apply edge banding. This temporary fit-up ensures that your subsequent measurements are exact for a seamless final assembly.
- Measure for the bottom and back panels of your dog crate.
With the top and sides temporarily assembled, you can now take precise measurements for the bottom and back panels. The bottom panel will sit *between* the two side panels, meaning its width will be less than the top panel, which overlaps the side panels. The back panel should be measured to fit *inside* all other assembled panels, creating a flush interior. Accuracy here is vital for a tight, professional fit. Once you have your measurements, carefully disassemble the top and side pieces.
- Cut the bottom and back panels to size.
Just as with the initial panels, use your circular saw in conjunction with the Kreg Rip Cut and Kreg Accu-Cut cutting guides to cut the bottom and back panels to your precisely measured dimensions. These guides will ensure perfectly straight edges, which are essential for a professional-looking finished product and easy assembly.
- Drill pocket holes into the bottom and back panels.
Return to your Kreg Pocket Hole Jig, set to ¾ inch. Drill pocket holes into *both* short edges of the bottom panel. For the back panel, drill pocket holes into *all four edges*. These strategically placed pocket holes will facilitate the strong, concealed connections needed when you permanently assemble the crate frame.
- Apply edge banding to all exposed plywood edges.
Plywood edges can look unfinished and reveal the internal layers. To create a clean, solid wood appearance, apply iron-on edge banding to all edges of the plywood panels that will be visible once the crate is assembled. Use a standard household iron to activate the adhesive, pressing firmly and evenly. After cooling, use an edge banding trimmer or a sharp utility knife to carefully trim any overhang for a perfectly flush finish. This step significantly elevates the furniture-like quality of your dog crate.
- Fill any imperfections with wood filler and sand smooth.
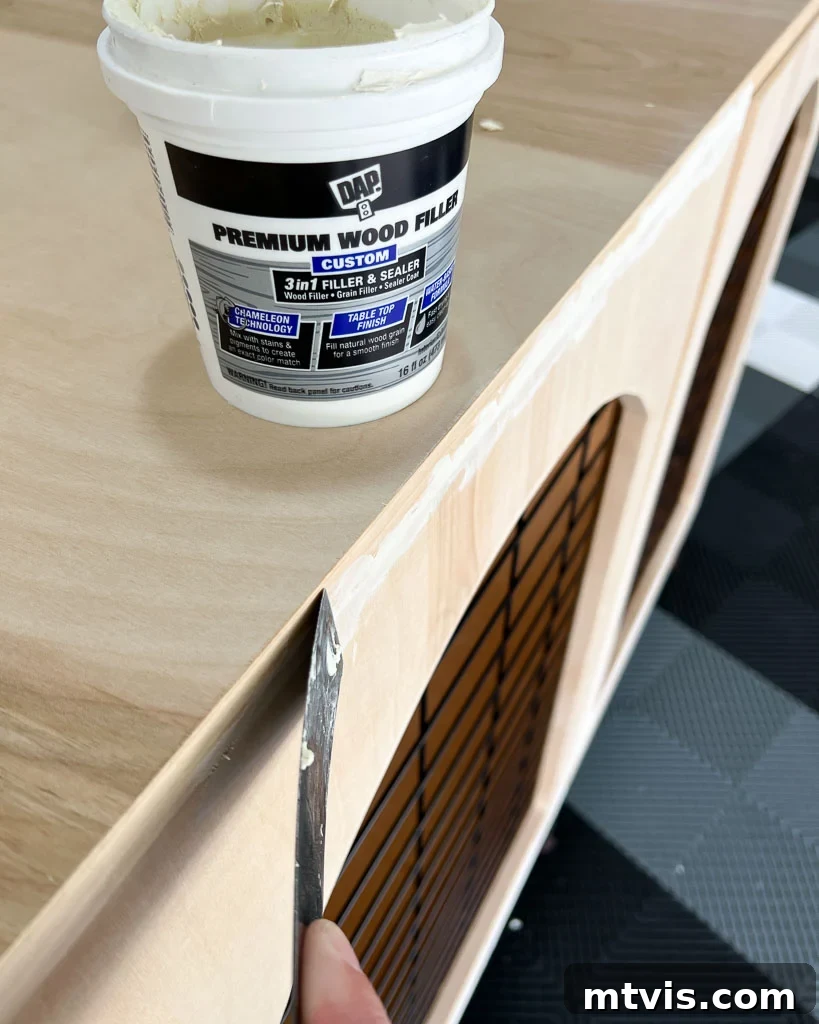
Despite careful selection and cutting, plywood often has minor tear-out or imperfections. This is where wood filler becomes your best friend. For the outer surfaces of the crate that will be painted, we used DAP Premium Wood Filler. It’s incredibly smooth and easy to work with, providing a flawless surface once dry. Apply it with a putty knife, ensuring it’s slightly proud of the surface, then sand it perfectly smooth once cured.
For the interior of our crates, which we intended to clear coat with Clear Polycrylic, we opted for DAP Plastic Wood All Purpose Wood Filler. This particular filler dries to a natural wood tone, blending seamlessly with the natural color of the plywood. A helpful tip: if you plan to stain your wood, you can mix the wood filler with a small amount of stain before application to achieve an even better color match. However, since we were only applying a clear coat, this wasn’t an option for us.
- Assemble your crate permanently and measure for the front panel and door.
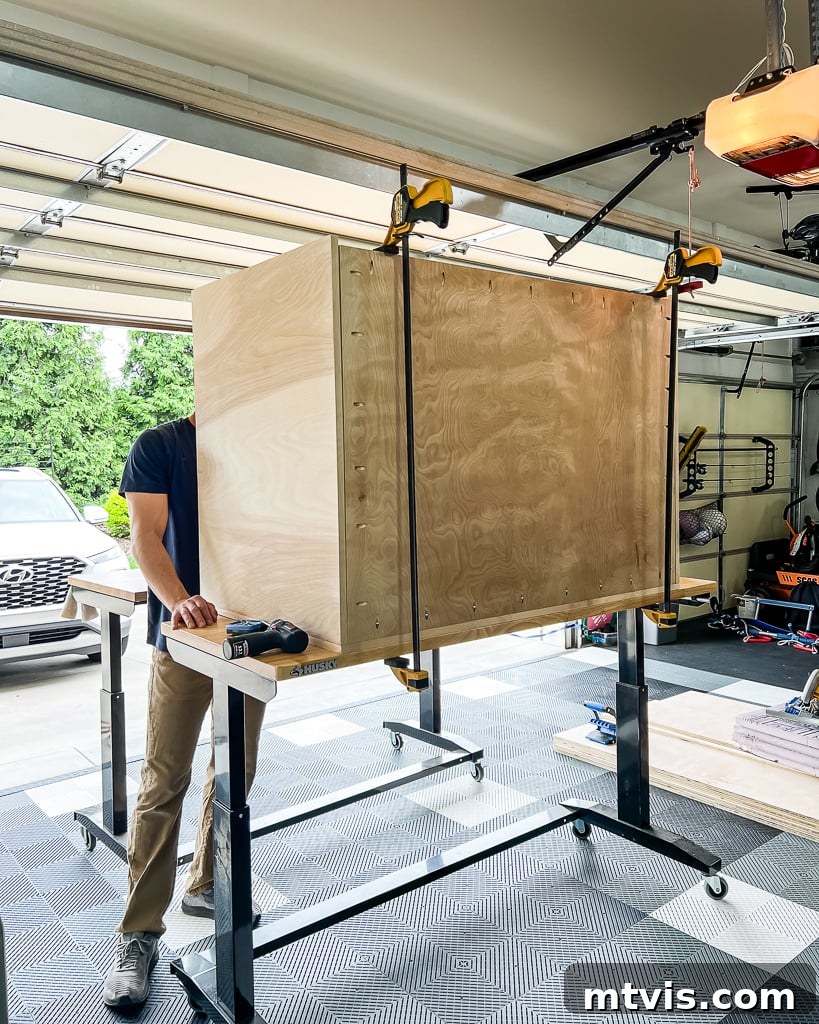
Now it’s time for the permanent assembly of your dog crate’s main frame. Reassemble the top, side, bottom, and back panels, applying wood glue to all mating surfaces before driving in your Kreg screws. Use clamps to hold the back panel firmly in place as you secure it. We oriented the pocket holes on the back panel to face outward since our crates would be pushed against a wall, making these holes invisible. This ensures a strong, concealed structure. Once the main frame is fully assembled and secure, take precise measurements of the entire front opening. This measurement is critical for cutting the front stationary panel and the door.
- Cut a panel to the size of the crate’s opening, then prepare for the door.
With the crate frame complete, cut a single plywood panel that precisely fits the entire front opening of the crate. This piece should fit *into* the opening without any overhang. Once this panel is cut to the full size of the opening, carefully cut it in half widthwise. One half will become the stationary front panel, and the other will be transformed into the functional crate door. This initial cut ensures that both components start with a perfect fit.
- Refine the door panel dimensions.
To allow for smooth operation and the addition of edge banding, the door panel needs slight adjustments. Trim ¼ inch off the height of the door and ¼ inch off its width. These small reductions will create adequate clearance on all sides of the door, preventing rubbing and allowing for the thickness of the edge banding, ensuring your custom dog crate door opens and closes effortlessly.
- Add pocket holes to the stationary front panel.
For the stationary half of your front panel, drill pocket holes into three of its edges. The edge that will meet the door in the center of the crate does *not* require pocket holes. These holes will be used to securely attach the stationary panel to the crate’s frame, providing a robust and clean connection.
- Craft elegant arches for your door and stationary panel.
Adding an arch detail will significantly enhance the furniture-like appearance of your dog crate. Follow these steps to create perfectly symmetrical arches:
- First, decide on the dimensions for your door frame. We chose a 2.5-inch width for the side and bottom edges and a 3-inch width for the top edge. You’ll also need to determine the starting height of your arch; we selected 8 inches from the top of the door.
- Use a level to mark your desired cut line along the bottom of your door, establishing the base of the arch opening.
- Next, use a level to draw two vertical lines, 2.5 inches in from each side of your door. Ensure these vertical lines stop precisely at the chosen arch starting height (we used 11 inches from the top of the door). Then, find and mark the exact center point between these two vertical lines.
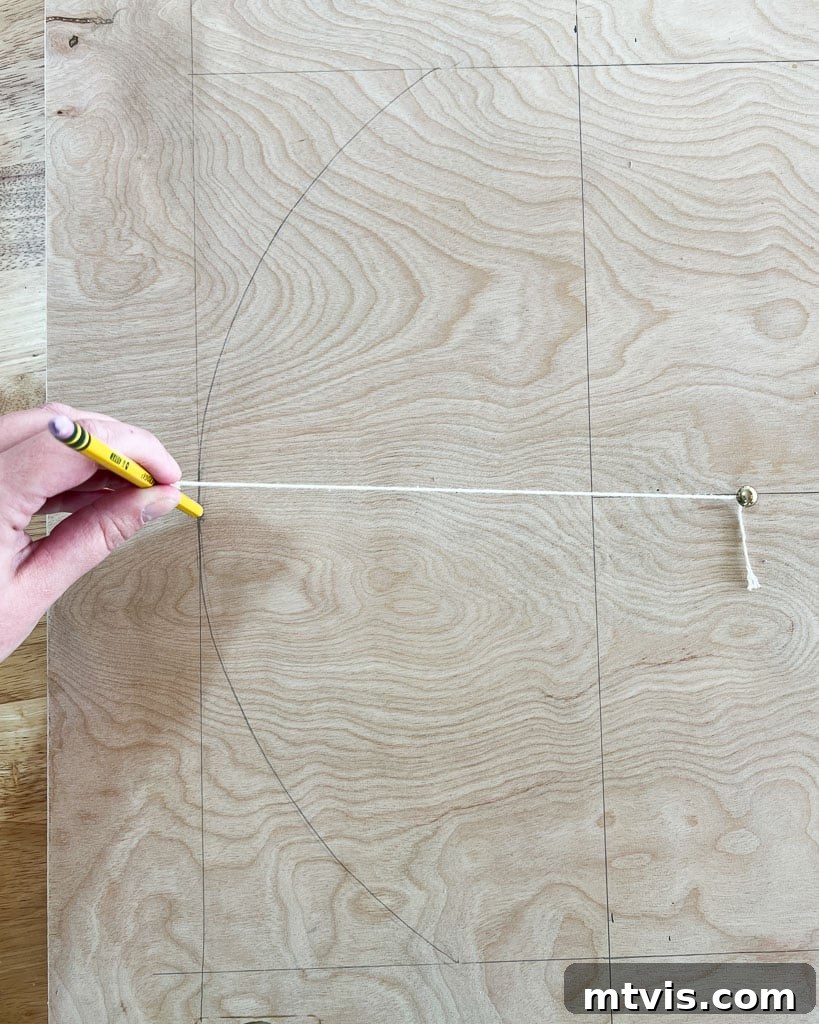
- To draw the perfect arch, tack or nail a piece of string to this center point. Tie a pencil to the other end of the string. Adjust the length of the string so that when pulled taut, the tip of your pencil touches the top of one of your vertical lines.
- Keeping the string taut and your pencil perfectly upright, draw a smooth arch from the top of one vertical line, meeting in the center, and continuing to the top of the other vertical line. This method ensures a beautiful, symmetrical curve.
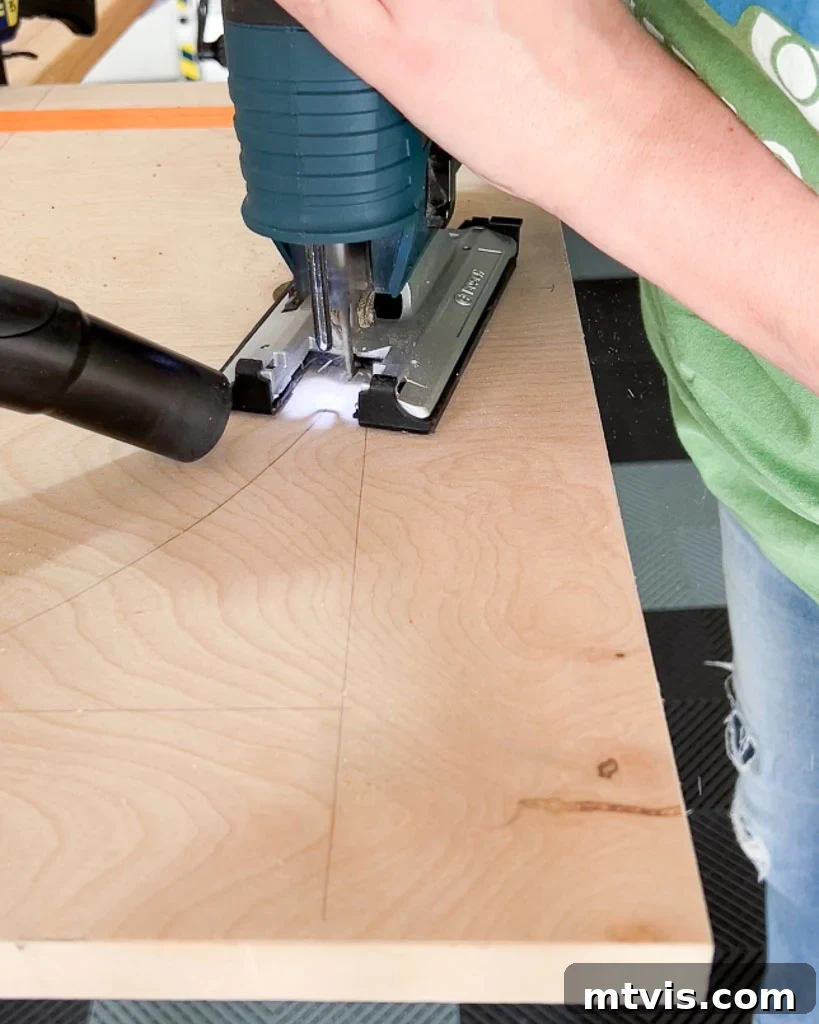
- Cut out the arches using a jigsaw.
Carefully use your jigsaw to cut along the arch lines you’ve drawn on your crate door. Take your time to ensure a smooth, clean cut. Once the arch is cut from the door, you can use this finished door piece as a template. Place the door precisely centered on your stationary front panel (remember, the stationary panel is ¼ inch taller and wider). Trace the exact arch shape onto the stationary panel. Then, use your jigsaw again to cut out this second arch. This method guarantees that both the door and the stationary panel will have identical and perfectly aligned arch details.
- Apply edge banding to the door and stationary panel.
To give your door and stationary panel a refined, finished look, apply iron-on edge banding. Cover all four edges of the door panel, including the newly cut arch. For the stationary panel, apply edge banding to its exposed edge (the one without pocket holes) and along the inside of its arch. This step is crucial for concealing the raw plywood edges and achieving a professional, furniture-quality appearance for your custom dog crate.
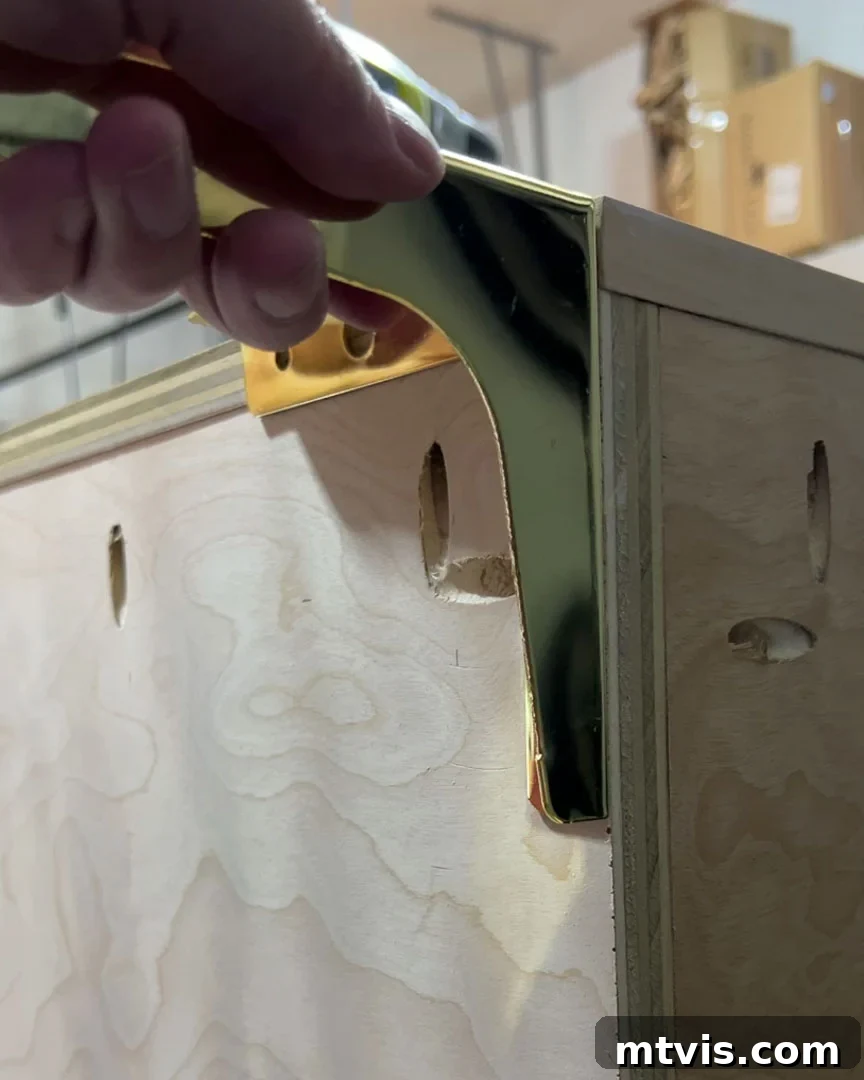
- Attach the furniture feet/legs.
Elevate your dog crate and add a touch of elegance by installing the furniture legs. We used these pre-made 6-inch furniture legs, securing them with the provided screws. For larger crates like ours, we installed four legs in the corners for primary support. Due to the significant width and depth of our crates, we also added two additional legs in the middle of the front and back for enhanced stability and to prevent sagging over time. For these middle legs, we rotated them 90 degrees so that the decorative arch detail on each side was not visible, maintaining a clean, understated look. You can observe this detail in the finished project photos at the end of this post.
- Secure the chosen material for the door and stationary panel centers.
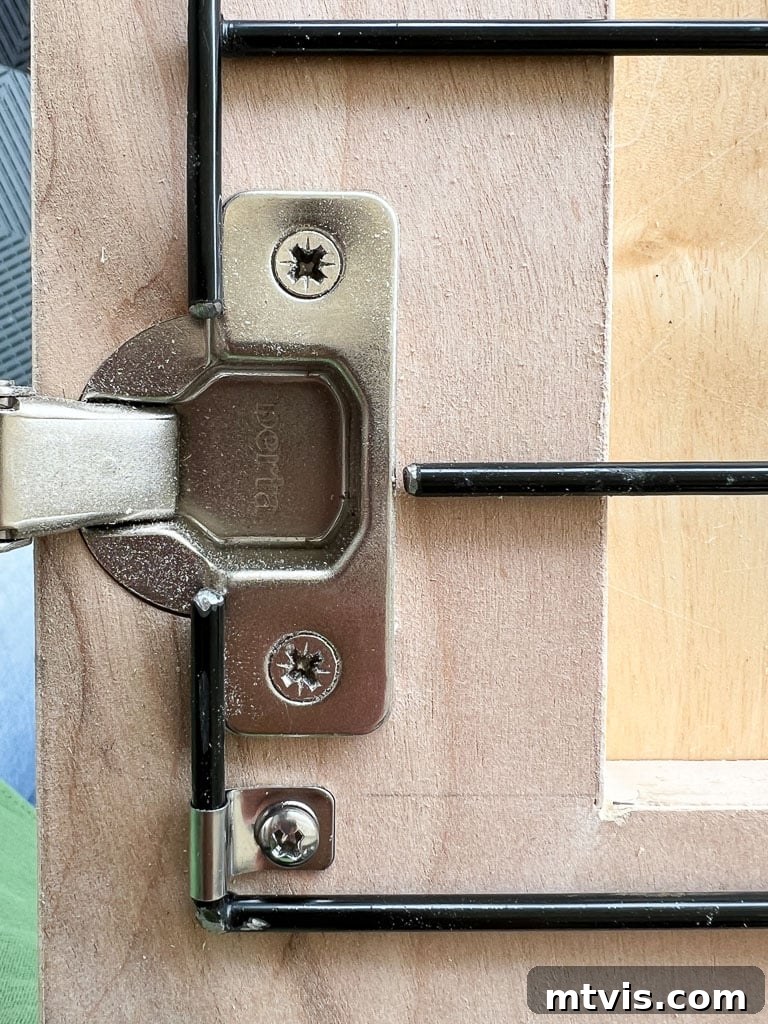
A critical aspect of any dog crate is adequate ventilation and security. You’ll need to choose a material to fill the arched openings of your stationary panel and door. We opted for these sturdy steel fence panels, which provide excellent air circulation and strength. Alternatively, you could use wooden dowels or even decorative metal rods to match your desired aesthetic. If using steel panels, cut them to size using a metal grinder for efficiency, or a hacksaw for smaller adjustments. After cutting, it’s essential to file down any sharp edges to ensure your dog’s safety. We then attached these panels to the crate door and stationary panel frames using these wire clamps. Pay close attention to the hinge areas on the door panel; you may need to make small cuts to the steel panels to prevent them from interfering with the smooth operation of the hinges.
- Install your stationary front panel.
Align the stationary panel precisely within the crate’s front opening and attach it securely to the crate frame using your pocket screws. Once installed, we observed a few small gaps between the stationary panel and the crate frame. To achieve a perfectly seamless and polished look, we used DAP Premium Wood Filler to fill these minor discrepancies. While this step is optional, it significantly contributes to the overall refined, furniture-like finish of your DIY dog crate, making the stationary panel appear as an integral part of the structure rather than an insert.
- Install the crate door with concealed hinges.
The next crucial step is installing your beautifully crafted crate door using concealed hinges. These hinges provide a sleek, uninterrupted aesthetic, as they are hidden when the door is closed. If you need detailed guidance on how to install concealed cabinet hinges and perfectly hang cabinet doors, we highly recommend checking out this very helpful post by our friend Zoe, which provides a comprehensive walk-through: Installing Cabinet Hinges & Hanging Doors. Follow her instructions carefully for a flawless installation.
- Apply paint or stain for the final finish.
With the structure complete, it’s time to personalize your DIY dog crate with your chosen finish. We found it easier to remove the door for painting. For the interior surfaces, we applied Clear Polycrylic. This provides a durable, protective layer that can withstand the wear and tear from a dog’s toenails, ensuring the interior remains pristine. For the exterior, we used paint to match our bedroom decor. While you could paint or stain both the inside and outside, we believed that paint on the interior might not hold up as well against the constant friction from large, active dogs. Choose a high-quality paint or stain in a color that complements your home, like our choice of Jadite by Sherwin-Williams, for a truly integrated piece of furniture.
- Install door stop(s) and cabinet latch.
Once your door is reinstalled and the finish is dry, you’ll need to add mechanisms to ensure its proper function. First, install a door stop to prevent the door from swinging inward into the crate, which could injure your dog. A simple method is to glue a small piece of scrap wood to the top of the crate frame, set back ¾ inch to accommodate the door’s thickness. We opted for magnetic door catches installed on the top of our crate frame; these cleverly serve as both door stops and help keep the door securely closed when desired. Finally, install your chosen cabinet latch, providing a secure closing mechanism for your custom dog crate.
- Add any optional finishing details and personalization.
This final step allows you to add unique touches that truly make your dog crate special. For us, the highlight was adding a hand-punched brass nameplate to each crate. This small detail, costing only about $8, transformed a functional item into a personalized heirloom. Instead of basic screws, we used decorative brass tacks we fortunately discovered in our screw organizer, which perfectly complemented the brass nameplates. These subtle enhancements make all the difference in achieving a high-end, custom look for your new furniture-style dog crate.
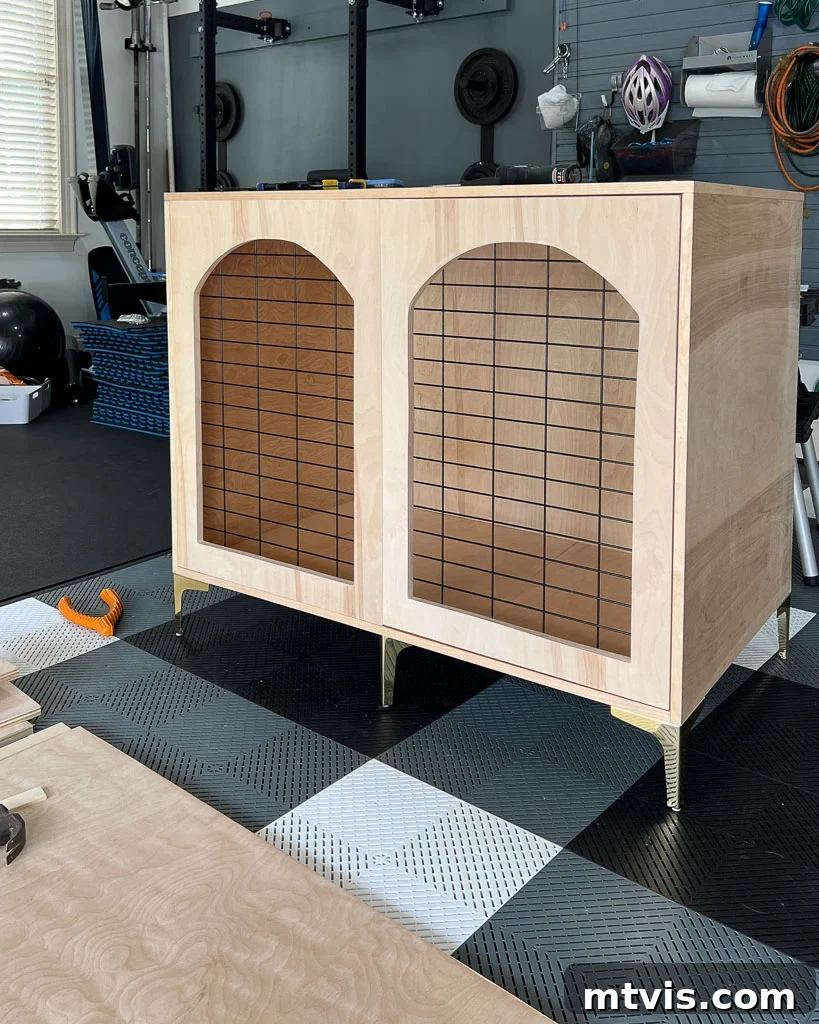
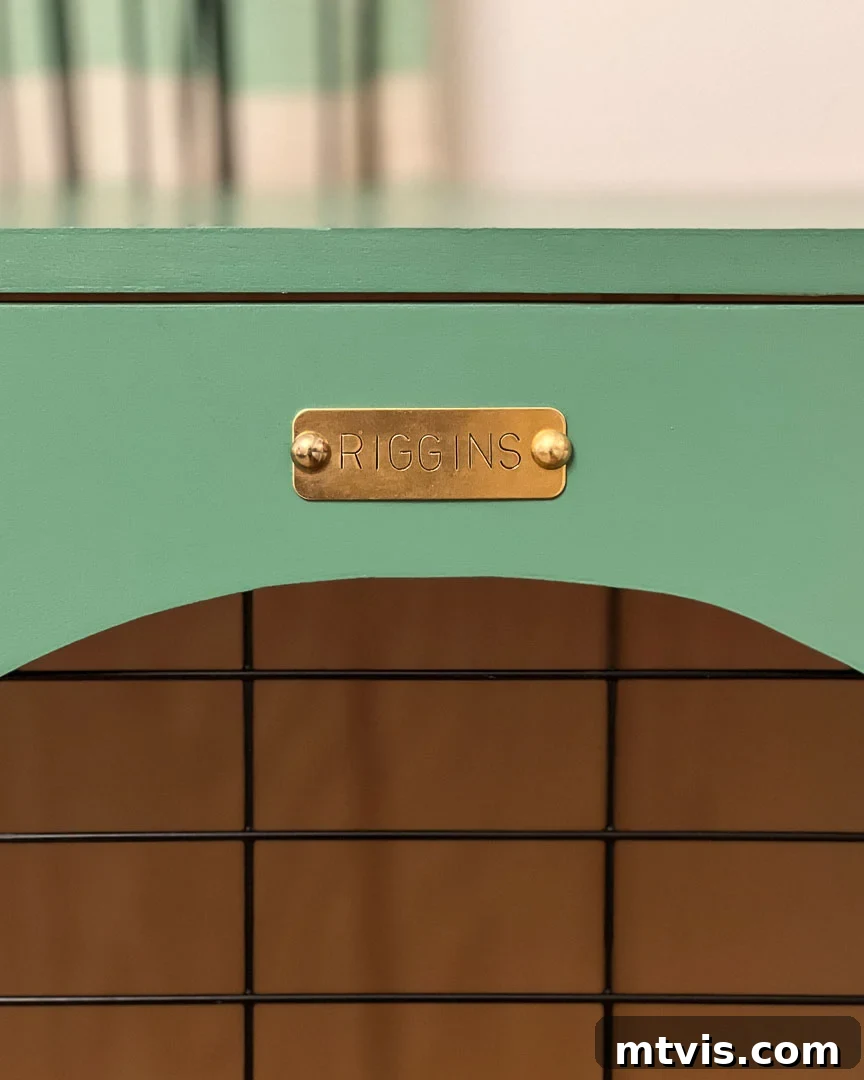
Here’s a first look at how our custom wooden dog crate turned out, complete with its fresh coat of green paint and elegant brass accents. We’ve also included a sneak peek at the new curtains we hung to complement the space. What do you think of this transformation?
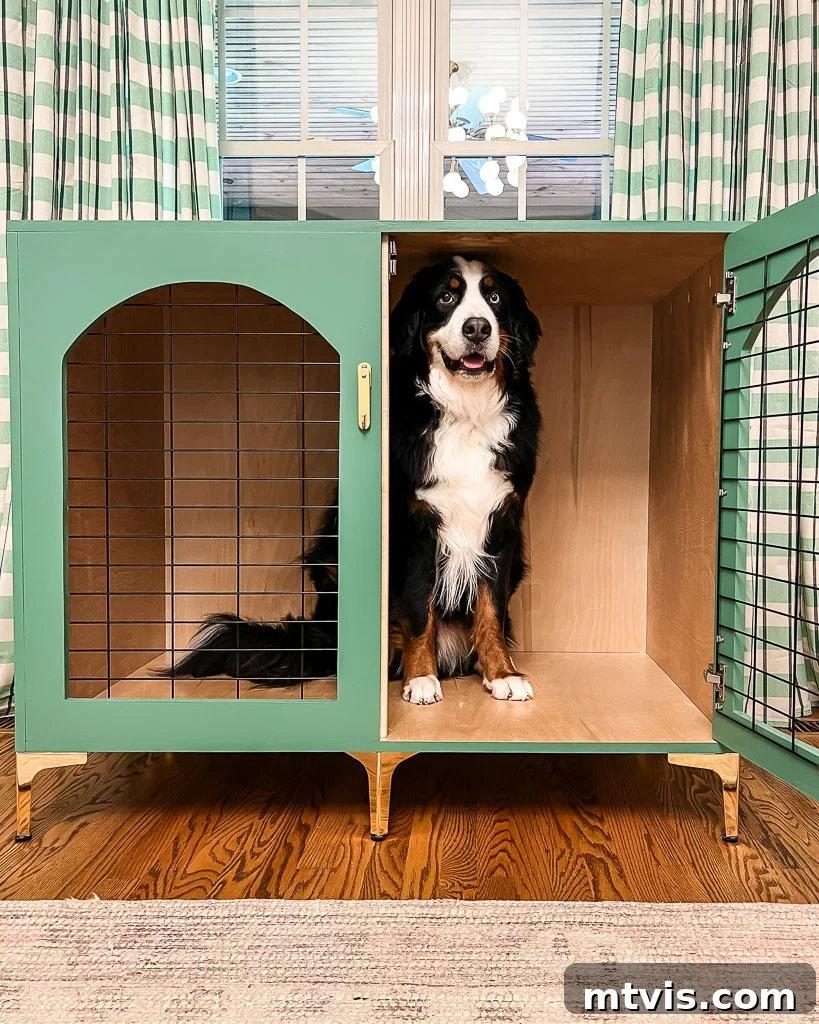
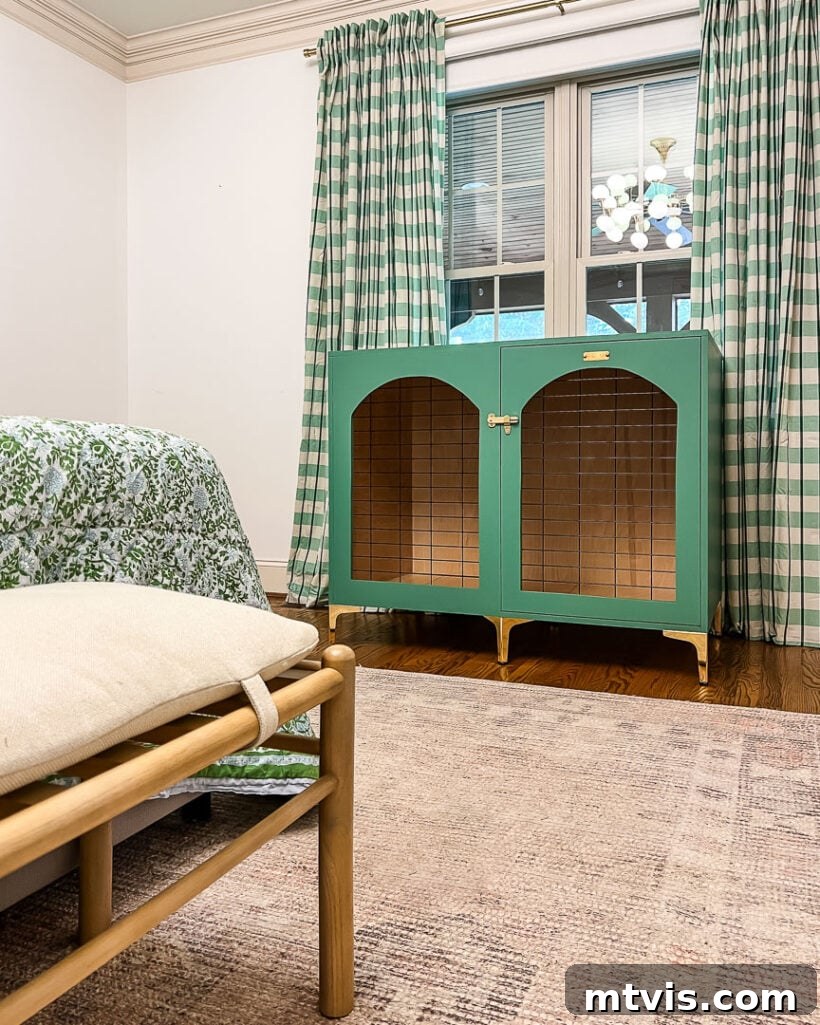
We’re still in the process of completing the second crate and constructing the custom bench that will sit between the two dog crates, adding a cohesive and stylish element to this area. Be sure to check back soon to see the final reveal of this beautifully transformed space, complete with all the finishing decor touches!
More DIY Furniture Posts
SEE ALL DIY POSTS
-
Easy DIY Floating Shelves & Desk for an Awkward Nook
-
How to Paint IKEA Furniture and Mistakes to Avoid
-
How to Make a DIY Dog Crate that Looks Like Furniture
-
How to Decoupage Furniture With Fabric
-
IKEA Lack Hack – A High-End Look on a Dime!
-
Easy and Gorgeous Ikea Desk Hack
Are you looking for more guidance on transforming rooms and spaces in your home? Dive into our acclaimed resource, Designer in a Binder®. It provides an affordable and straightforward method for decorating your home with confidence and style.
For exclusive content, behind-the-scenes sneak peeks, and fresh DIY inspiration delivered straight to your inbox, be sure to subscribe to our newsletter before you leave!