
Thank you to Dap Products for sponsoring this post. As always, all opinions are 100% my own based on personal experience.
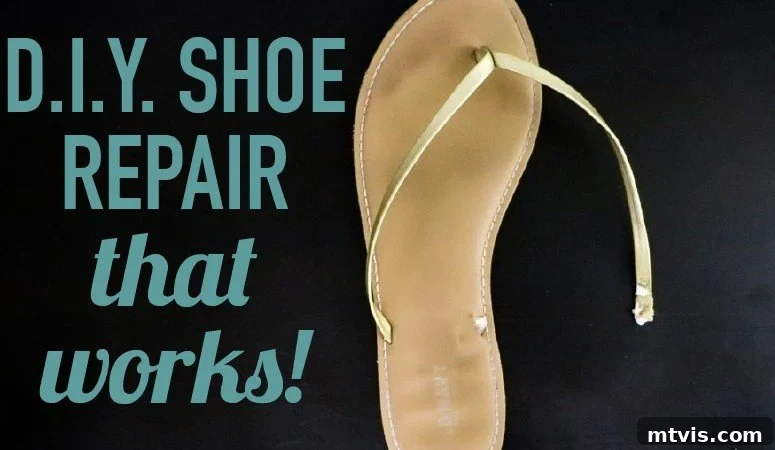
There’s nothing quite as frustrating as stepping out for a casual stroll, an important event, or even a simple errand, only to have a shoe strap snap or a sole peel away. Whether it’s your favorite pair of flip-flops, stylish wedges, or comfortable sandals, unexpected footwear failures always seem to happen at the most inconvenient times. I’ve personally experienced the embarrassment and inconvenience, from navigating the sprawling aisles of a superstore with a broken sandal to making an awkward entrance at a sophisticated conference event.
For years, these moments meant either a premature trip to the shoe store for a new pair or the futile attempt to temporarily fix them with subpar glues that inevitably failed. But no more! I’ve discovered a reliable, DIY solution that works every single time, saving both my shoes and my sanity. The secret lies in having the right shoe repair supplies on hand and knowing how to use them effectively. This method is so quick and practical, you’ll be able to fix your shoes on the fly, ensuring you’re never caught off guard again. This post contains some affiliate links for your convenience. Click here to read my full disclosure policy.
The Ultimate Guide to DIY Shoe Repair: Fix Your Favorite Footwear Fast
Don’t let a broken shoe ruin your day or your budget. With a few simple tools and the right adhesive, you can easily repair many common shoe damages right at home. This comprehensive guide will walk you through everything you need to know to give your beloved shoes a second life, focusing on effective techniques and the best products for a lasting fix.
Why Embrace DIY Shoe Repair?
The benefits of repairing your own shoes extend far beyond just saving a few dollars. Here’s why you should consider becoming your own shoe cobbler:
- Cost-Effective: Professional shoe repair can be expensive, and buying new shoes every time a strap breaks or a sole loosens can quickly add up. DIY repair is a fraction of the cost.
- Time-Saving: No more trips to the cobbler or endless online browsing for replacements. A quick repair at home means your shoes are back in action in no time.
- Sustainability: By extending the life of your shoes, you’re reducing waste and contributing to a more sustainable lifestyle. Less in landfills, more wear from your existing wardrobe.
- Convenience: Keep your essential repair kit handy, and you can tackle unexpected shoe emergencies wherever you are.
- Empowerment: There’s a genuine satisfaction in fixing things yourself. You gain a practical skill and the confidence that comes with it.
Understanding Common Shoe Damages and Why Most Glues Fail
Before diving into the fix, it’s important to understand the typical culprits behind shoe failures. Straps often break where they connect to the sole or upper, usually due to stress or material fatigue. Soles can detach from the upper, especially at the toe or heel, due to wear and tear, moisture, or poor original adhesion. Embellishments can also fall off, leaving your shoes looking incomplete.
Many people reach for common household glues like standard super glues or even wood glues, only to be disappointed. Super glues, while strong initially, tend to dry rigid and brittle, making them unsuitable for flexible materials like shoe straps or soles. They crack under the constant bending and flexing of footwear. Gorilla Glue, a popular choice for many DIY projects, expands as it cures, which can create a messy, uneven bond and isn’t ideal for precise shoe repairs where flexibility is crucial.
The key to a successful shoe repair lies in using an adhesive specifically designed for flexibility, strong bond, and multi-material adhesion.
The Essential DIY Shoe Repair Supplies Needed:
To ensure a robust and lasting repair, you don’t need an arsenal of tools. Just a few key items will suffice:
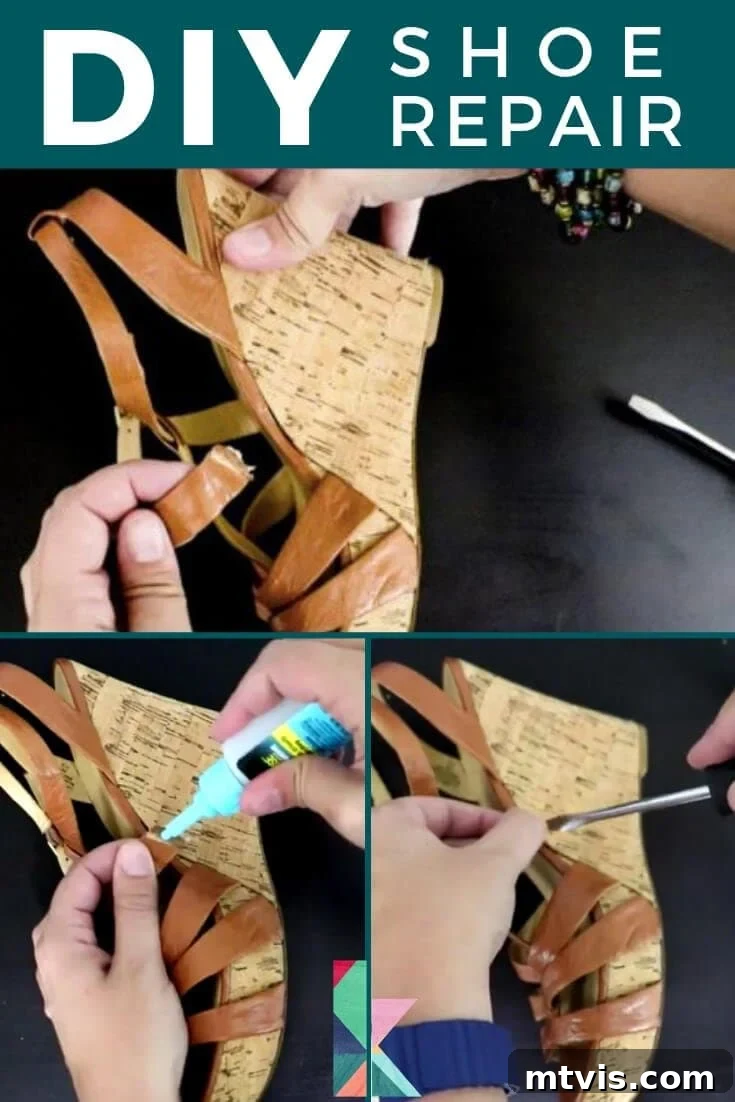
- Dap All Purpose Rapid Fuse: This is the cornerstone of effective shoe repair, and frankly, the only glue I confidently recommend. Over the years, I’ve tried numerous adhesives – from generic super glues to Gorilla glue – and they have consistently failed to provide a long-term solution for footwear. Dap Rapid Fuse stands out because it’s a hybrid adhesive that combines the strength of epoxy with the rapid curing time of super glue, while maintaining essential flexibility. It forms an incredibly strong, durable bond on a wide variety of materials commonly found in shoes, including leather, rubber, fabric, and various synthetics. This flexibility is critical for shoes, as they are constantly bending and moving with your feet. Unlike brittle super glues, Rapid Fuse can withstand the stress and motion without cracking or breaking apart. I’ve used it successfully to reattach broken straps, as demonstrated in many instances, and my husband and I have also relied on it to firmly reattach the soles of two pairs of his shoes where they had come loose. Every single pair of shoes repaired with Dap Rapid Fuse has held strong, proving its superior performance and reliability. Its quick-setting formula means less waiting and more wearing!
- Flat Head Screwdriver: A small flat head screwdriver is surprisingly versatile in shoe repair. It can be used to gently pry apart detached soles, making it easier to clean the old adhesive. It’s also invaluable for pushing stubborn straps back into their slots or for clearing out debris from small crevices. Its thin, flat edge can help apply pressure in hard-to-reach areas or lift edges for better glue application.
- Clamps (optional, but highly recommended): While not always strictly necessary, clamps provide consistent, even pressure on the repaired area while the glue cures. This pressure is vital for creating the strongest possible bond, especially for larger repairs like reattaching a sole or a wide strap. Small spring clamps or even binder clips can work wonders. If you don’t have clamps, heavy books or strong rubber bands can serve as makeshift alternatives, but ensure they apply firm and even pressure across the entire glued surface.
- Rubbing Alcohol or Acetone (optional): For optimal adhesion, the surfaces to be glued must be clean and free of dirt, oil, and old glue residue. A cotton swab dampened with rubbing alcohol or a small amount of acetone (test on an inconspicuous area first to ensure it doesn’t damage the shoe material) can be very effective for thorough cleaning.
- Small Piece of Sandpaper (optional): For repairs involving rubber soles or smooth plastic surfaces, lightly sanding the surfaces before applying glue can create a rougher texture, providing more grip for the adhesive and resulting in a stronger bond.
Learn the Repair Process with Our Video Tutorial
Ready to see these supplies in action? Our comprehensive video tutorial visually demonstrates each step of the shoe repair process, from preparing the damaged area to applying the adhesive and securing the repair. You’ll learn the best practices for using Dap All Purpose Rapid Fuse to fix common issues like broken straps and detached soles, ensuring you achieve a professional-quality repair every time. The video provides clear, close-up instructions to guide you through repairing your shoes yourself with confidence.
Learn to repair your shoes at home with just a few shoe repair supplies!
Step-by-Step Guide to Repairing Your Shoes
While the video provides a visual guide, here’s a detailed breakdown of the general steps for most shoe repairs:
- Assess the Damage: Clearly identify where the shoe is broken. Is it a snapped strap, a detached sole, or a loose embellishment? Understanding the extent and type of damage will help you plan your repair.
- Clean the Surfaces: This is perhaps the most crucial step for a long-lasting repair. Use a flat head screwdriver or a thin tool to scrape away any old, brittle glue or debris. Then, thoroughly clean both surfaces that will be glued together with rubbing alcohol or acetone to remove dirt, oils, and grease. Ensure the surfaces are completely dry before proceeding. For rubber or smooth plastic, a light sanding can improve adhesion.
- Apply Dap Rapid Fuse: Apply a thin, even layer of Dap All Purpose Rapid Fuse to one of the surfaces to be joined. Avoid over-applying; a little goes a long way, and too much glue can lead to a messy, weaker bond.
- Join the Pieces: Carefully align the broken pieces and press them together firmly. If you’re reattaching a strap, ensure it’s properly seated in its original slot. If it’s a sole, match the edges precisely.
- Apply Pressure with Clamps: Once the pieces are aligned, immediately apply firm, consistent pressure using clamps. If using rubber bands or heavy objects, ensure the pressure is distributed evenly across the entire glued area. Maintain this pressure for at least 30 minutes, or longer if the instructions on the Dap Rapid Fuse packaging recommend.
- Allow to Cure: While Dap Rapid Fuse sets quickly, allowing it to fully cure is essential for maximum strength. Refer to the product’s instructions for the recommended full cure time, which is typically 24 hours. Resist the urge to test the repair or wear the shoes before the glue has fully hardened.
- Inspect and Trim (if necessary): Once fully cured, remove the clamps and inspect the repair. If any excess glue has squeezed out, you can carefully trim it with a sharp craft knife or razor blade once it’s completely dry.
Tips for Long-Lasting Shoe Repairs
- Don’t Rush the Cleaning: A clean surface is paramount for a strong bond. Take your time to remove all old glue and dirt.
- Less is More with Glue: A thin, even coat of adhesive is more effective than a thick, gloopy layer.
- Patience During Curing: The full cure time is there for a reason. Allow the glue to achieve its maximum strength before wearing the shoes.
- Store Shoes Properly: Keep shoes in a cool, dry place, away from extreme temperatures and direct sunlight, which can degrade adhesives and materials over time.
- Address Issues Early: Don’t wait for a small tear to become a major break. Promptly repair minor damages to prevent them from worsening.
Beyond Repair: Proactive Shoe Care and Maintenance
Preventing damage is always better than repairing it. Here are some tips to keep your footwear in top condition:
- Regular Cleaning: Keep your shoes clean according to their material. Dirt and grime can wear down materials and stitching over time.
- Proper Storage: Use shoe trees to maintain shape, especially for leather shoes. Store sandals and flip-flops in a way that prevents straps from getting bent or crushed.
- Rotate Your Footwear: Give your shoes a rest! Wearing the same pair every day puts constant stress on them. Rotating your shoes allows them to air out and recover, extending their lifespan.
- Waterproofing and Protection: Apply appropriate waterproofing sprays or protective treatments to shield your shoes from moisture and stains, which can degrade materials and glues.
With Dap All Purpose Rapid Fuse and a few basic tools, you’re empowered to tackle common shoe mishaps with confidence. Say goodbye to uncomfortable walks in broken shoes and hello to extending the life of your favorite footwear. This DIY approach is not only practical and economical but also a rewarding skill that will serve you well. So next time a shoe crisis strikes, remember your trusty repair kit and get those soles back on the streets!
