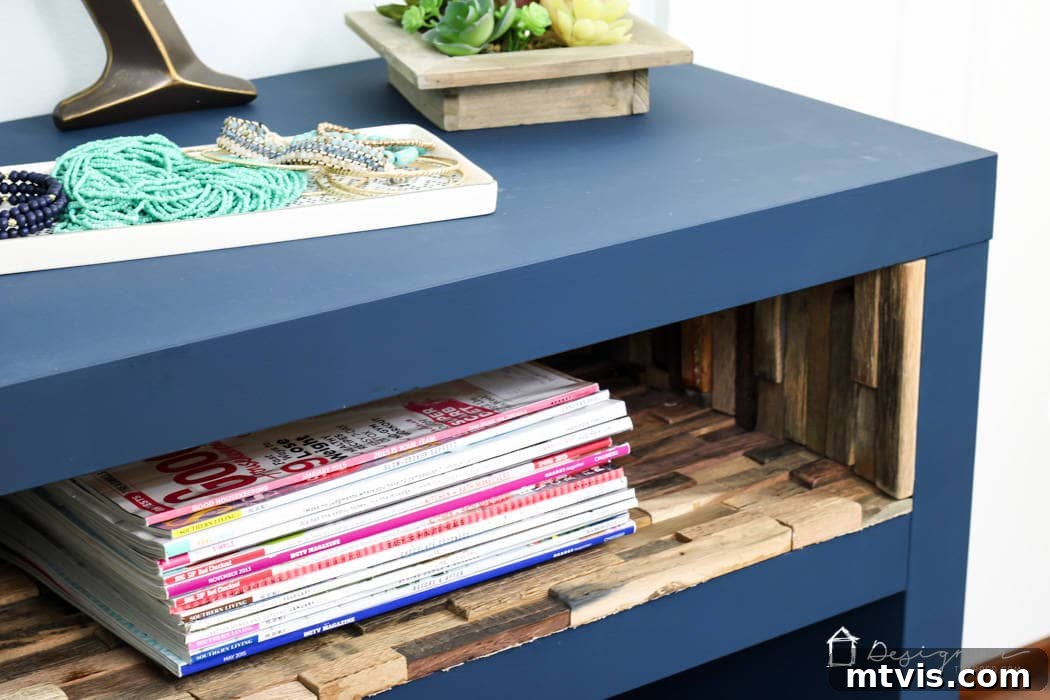
Transforming your living space doesn’t have to be an extravagant affair. In fact, with a touch of ingenuity and the magic of an IKEA hack, you can elevate even the most ordinary, budget-friendly furniture into breathtaking, custom-designed pieces that captivate and inspire. This guide unveils an extraordinary IKEA Lack hack project, meticulously crafted to instill a deep sense of pride in your DIY accomplishments and leave your guests marveling at your refined taste. You’ll embark on a journey to convert a simple, unassuming IKEA Lack sofa table into what appears to be a bespoke, high-end furniture statement – a testament to the power of creative customization. This particular IKEA hack stands out not only for its elegant result but also for its remarkable simplicity and exceptional affordability. It proves unequivocally that achieving a luxurious aesthetic in your home doesn’t necessitate a lavish budget. So, prepare to unleash your inner designer, roll up your sleeves, and dive headfirst into this exciting, rewarding DIY project that promises to redefine your home decor with a sophisticated, personalized touch.
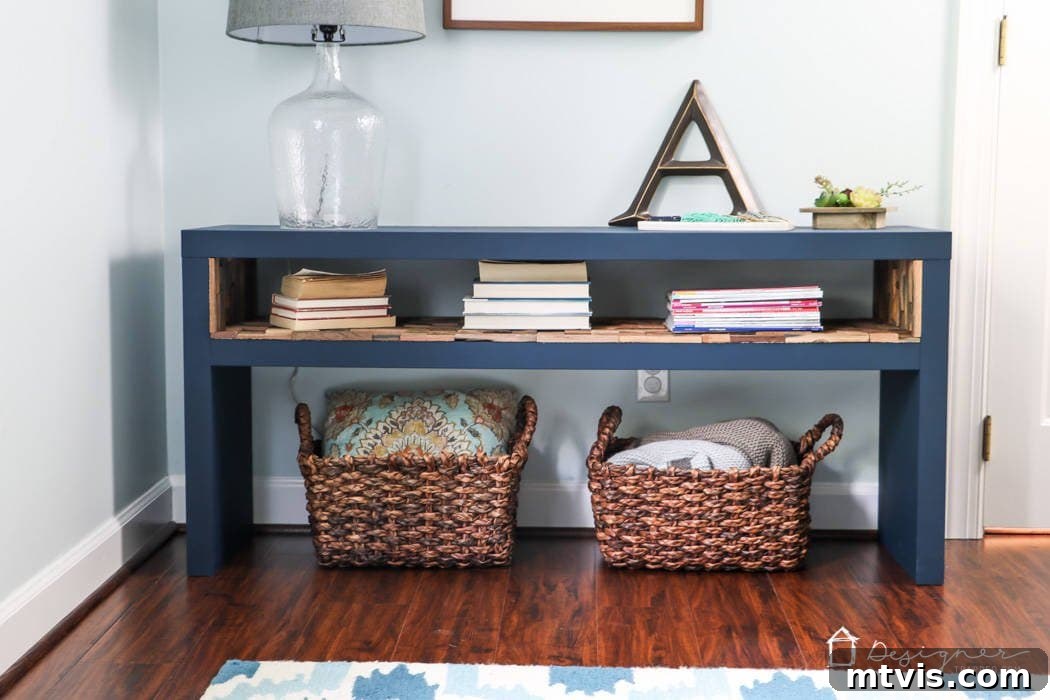
Table of Contents
A big thank you to DAP for sponsoring this Ikea Lack hack project. As always, all opinions are 100% my own based on my experience. This post contains some affiliate links for your convenience. Click here to read my full disclosure policy.
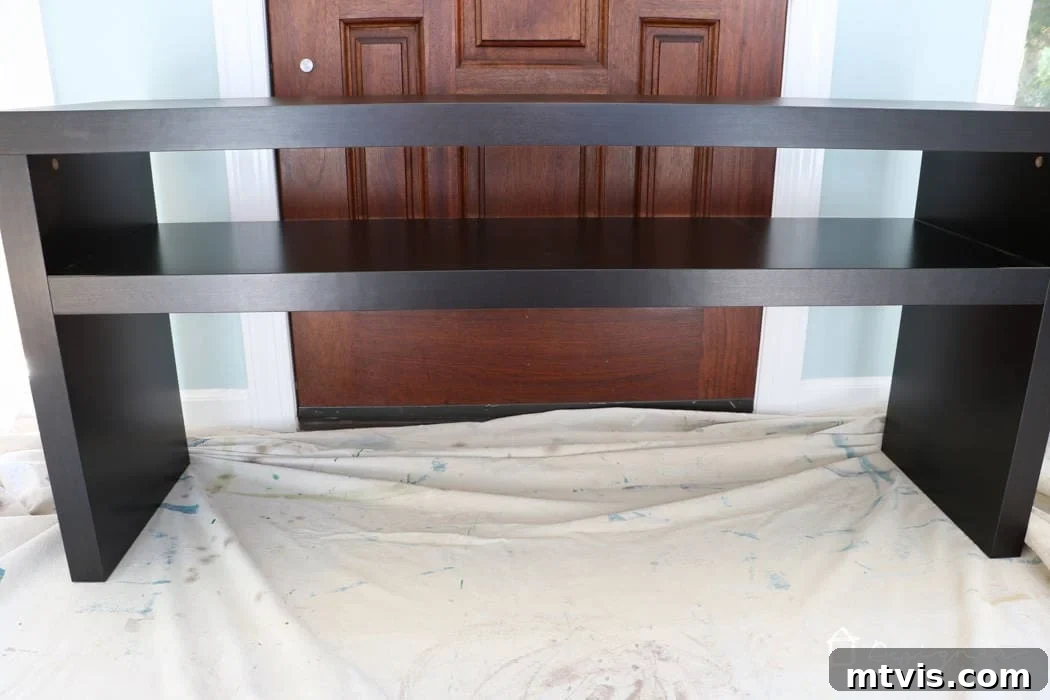
Before we delve into the exciting step-by-step transformation, let’s take a moment to appreciate the humble beginnings of our project: the ubiquitous IKEA Lack sofa table. This piece is renowned worldwide for its ultra-minimalist design, lightweight construction, and incredibly accessible price point, often costing less than a fancy coffee. Its simplicity, however, is precisely what makes it an unparalleled canvas for creative customization. Understanding its basic form and cost truly highlights the dramatic and high-value impact of our upcoming hack. It’s a powerful testament to how even the most unassuming and inexpensive items can be reimagined into something extraordinary, reflecting personal style and elevating a space.
Our particular IKEA Lack sofa table, acquired back in 2016, had served its purpose faithfully as a reliable, understated piece of furniture. While its basic aesthetic was beginning to feel a bit too plain for our evolving home style, its remarkable quality and surprising durability truly impressed us, consistent with our overall positive experiences with IKEA products. Despite its low cost, the Lack table’s inherent sturdiness and clean lines make it an ideal and forgiving candidate for a DIY project, promising a long-lasting and resilient transformed piece that will continue to serve you for years to come.
The pivotal inspiration for this sophisticated transformation struck me quite unexpectedly when I stumbled upon an image of a truly exquisite, albeit prohibitively expensive, bookshelf. Its design featured captivating pieces of wood meticulously arranged on the inside of the shelves, creating a rich textural depth and an undeniable visual interest that instantly drew me in. I was completely enamored by its unique character and knew, at that moment, that I wanted to replicate that high-end, custom-crafted feel in an accessible, budget-friendly way. This vision – transforming an affordable piece into something resembling a designer original – sparked the innovative idea for our IKEA Lack hack. It became a personal mission to capture the essence of luxurious furniture without the accompanying hefty price tag, making sophisticated style attainable for every DIY enthusiast.
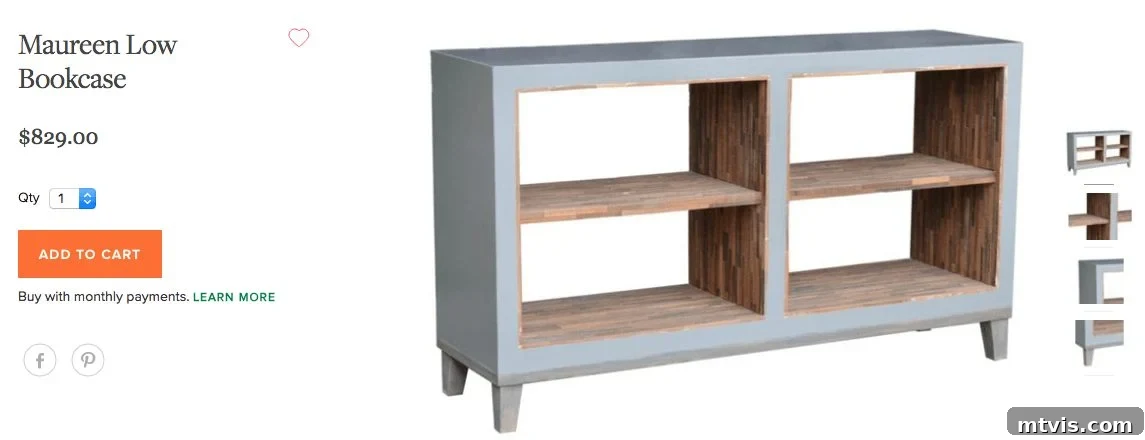
Prepare to be amazed as you read on to discover precisely how this ingenious IKEA Lack hack project transformed a plain, utilitarian sofa table into my own personalized, affordable rendition of that breathtaking, high-end bookcase. Get ready to unlock the secrets to creating a stunning, custom-look furniture piece without the hefty designer price tag, proving that luxury and DIY can indeed go hand-in-hand!
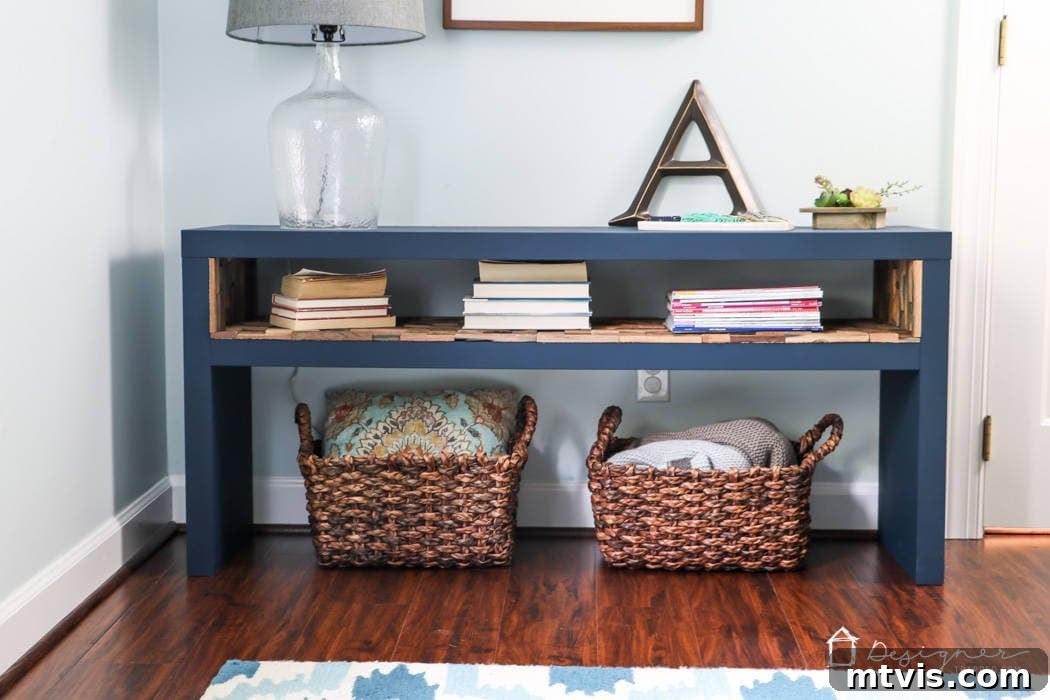
IKEA Lack Hack Tutorial: Elevate Your Furniture Game with Custom Style
This comprehensive tutorial is meticulously designed to guide you through every essential step of transforming your IKEA Lack sofa table into a designer-inspired showstopper. The process is broken down into manageable stages, ensuring it’s accessible and enjoyable for DIY enthusiasts of all skill levels, from beginners to more experienced crafters. Our goal is to ensure a successful and deeply satisfying outcome, culminating in a piece of furniture that looks far more expensive than its actual cost. Let’s gather our supplies, embrace our creativity, and get started on this exciting furniture metamorphosis that promises to bring a touch of bespoke elegance to your home!
Materials and Tools Needed for Your IKEA Lack Transformation
Before embarking on any successful DIY project, particularly one involving painting and precise cuts, it’s absolutely crucial to have all your materials and tools meticulously organized and within easy reach. This careful preparation not only streamlines the entire process, making it more efficient and less frustrating, but also significantly enhances safety. For this particular IKEA Lack hack, you’ll need the following:
- Paint of your choice: The selection of paint can dramatically influence the final aesthetic and durability of your piece.
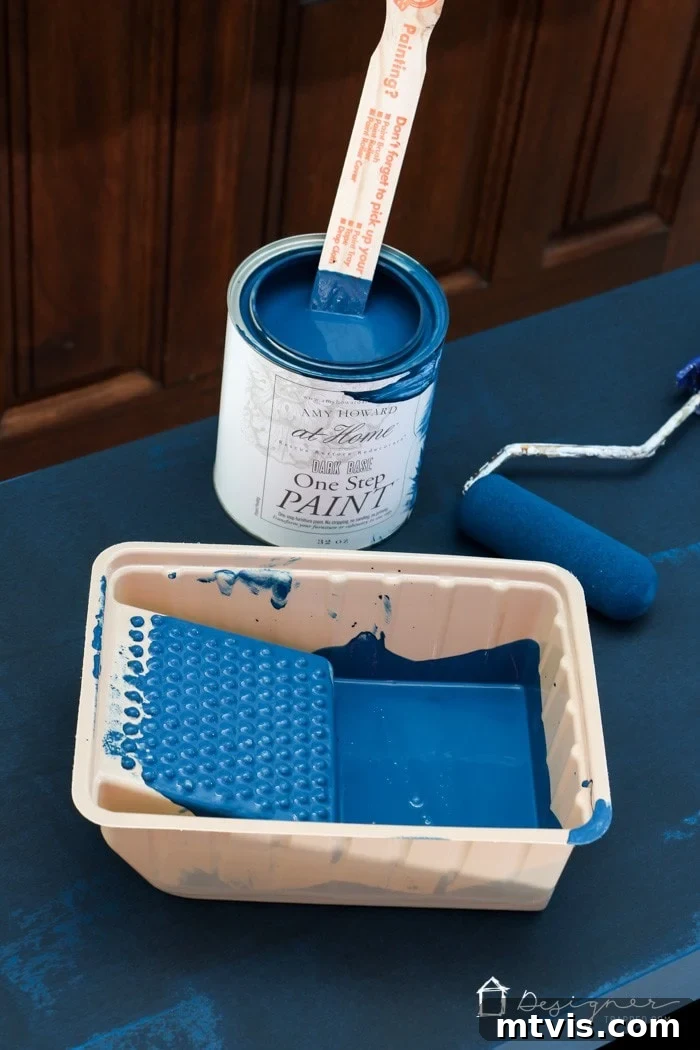
- For optimal results and to significantly minimize preparatory work such as priming or extensive sanding, I highly recommend opting for a chalk-based paint. Its superior adhesion properties typically allow it to bond beautifully with laminate surfaces. I personally achieved fantastic results using Lady Singing the Blues One-Step Paint by Amy Howard At Home, which delivers a lovely, velvety finish. When choosing your color, consider the existing palette of your room and the overall mood you wish to create – a bold statement, a subtle accent, or a calming tone.
- DAP Rapid Fuse Wood Adhesive: This adhesive is a cornerstone of this project, crucial for the secure and invisible attachment of your wood mosaic tiles.
- Traditional fastening methods, like nails, are impractical here as they would undoubtedly detract from the clean, sophisticated aesthetic we’re striving for. A high-quality, fast-setting wood adhesive provides a strong, durable bond that will ensure your decorative wood accents remain perfectly in place for years to come. The “rapid fuse” property is particularly beneficial, as it significantly reduces clamping time and allows you to progress through the project more quickly.
- Wood mosaic tiles: These textured tiles are the key to mimicking that high-end, custom-built look that inspired this entire hack.
- While I initially sourced my specific tiles from a local specialty store, a wide array of similar and equally beautiful options are readily available online and at major home improvement retailers. For instance, these wood mosaic tiles from Home Depot are very comparable in style and often prove to be even more budget-friendly. You’ll need just over 6 square feet for this project, although meticulous planning and efficient cutting can potentially bring that down to exactly 6 square feet, minimizing material waste. A significant advantage of these mosaic tiles is that individual wood pieces come pre-adhered to a flexible mesh backing, which makes installing larger sections surprisingly fast and straightforward.
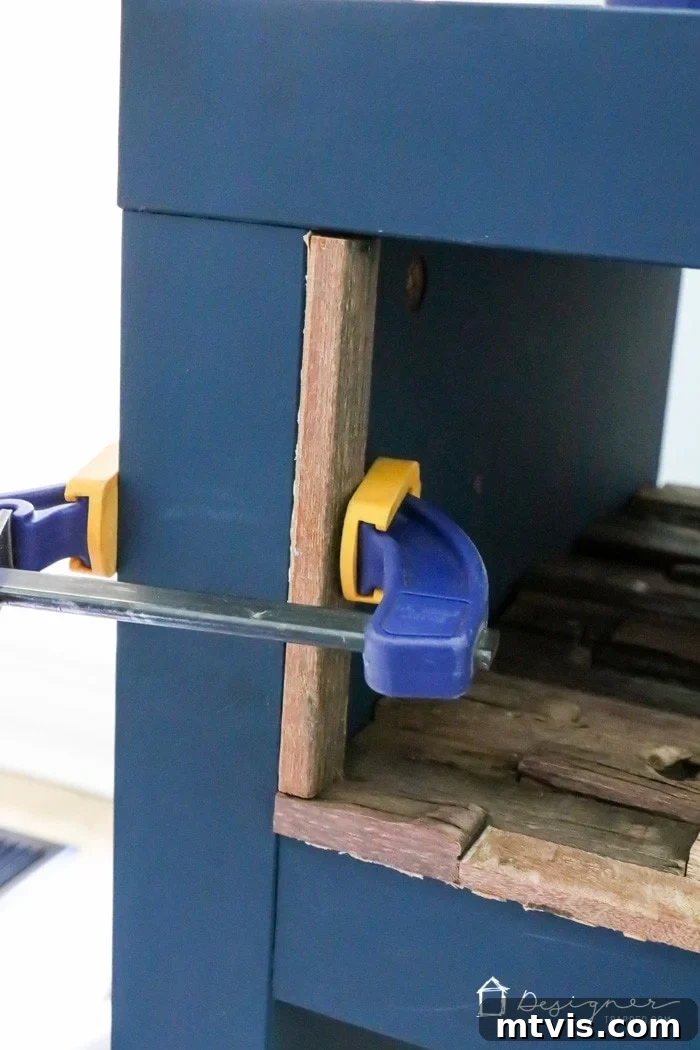
- Clamps: An assortment of clamps is absolutely essential for holding the freshly glued pieces firmly in position while the adhesive cures. Having a variety of sizes will allow you to secure different sections effectively.
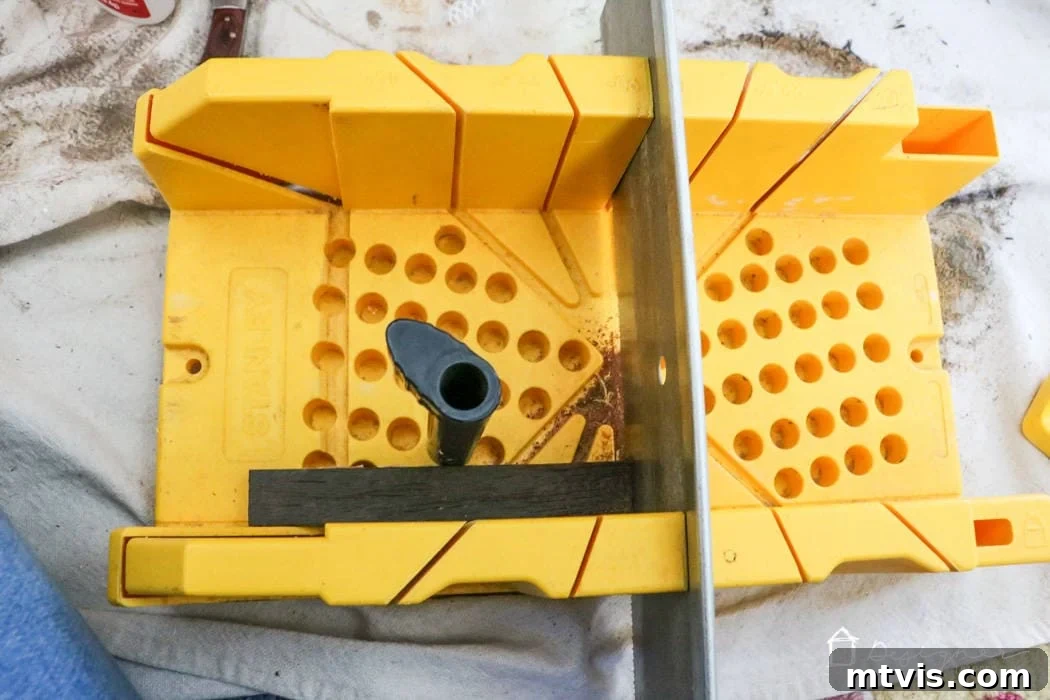
- Clamping Miter Box with Saw: This tool will prove invaluable for making precise, clean, and often angled cuts on smaller, individual wood pieces, ensuring tight, professional-looking joints.
- Table saw or circular saw with a straight edge: For making accurate, consistently straight cuts on your larger wood mosaic sheets. A table saw offers the highest level of precision and ease for repetitive cuts. If you’re using a circular saw, investing in or improvising a reliable straight edge guide is paramount for achieving clean, professional lines and ensuring safety.
- Utility knife: An indispensable tool for delicate trimming, scoring, and precisely cutting the mesh backing of the mosaic tiles, allowing for custom sizing and intricate fitting.
- Measuring tape and pencil: For accurate measurements and marking cuts.
- Safety goggles and gloves: Always prioritize personal safety when working with tools and adhesives.
Step-by-Step Tutorial: Crafting Your Custom IKEA Lack Bookcase with Ease
Time needed: 3 hours (excluding drying time)
This IKEA Lack hack project is designed to be completed within a focused few hours of active work, not including the crucial drying times required for paint and adhesive. With careful preparation and diligent execution, you’ll soon unveil a stunning, custom-look furniture piece that adds significant character and elegance to your space.
-
Step 1: Prepare and Paint Your IKEA Lack Table.
Begin your furniture transformation by thoroughly cleaning your IKEA Lack table. Use a mild degreaser or cleaner to remove any dust, grime, oil, or fingerprints that might hinder paint adhesion. While chalk paint is renowned for its excellent bonding properties on laminate surfaces, a light scuff sand with fine-grit sandpaper (around 220-grit) can further enhance adhesion, especially if your table has a particularly slick finish. After sanding, wipe away any dust with a tack cloth. Apply your chosen paint in thin, even coats, allowing each coat to dry completely according to the manufacturer’s instructions before applying the next. This prevents tackiness and ensures a durable finish. Depending on your paint color and the original finish of the table, you may need two to three coats to achieve full, opaque coverage and a beautifully smooth, professional-looking finish. For comprehensive guidance on how to effectively paint laminate furniture and avoid common mistakes, consult our detailed guide here. Remember, patience during drying times is absolutely critical for a flawless, long-lasting result.

-
Step 2: Prepare Your First Wood Mosaic Tile for the Shelf Base.
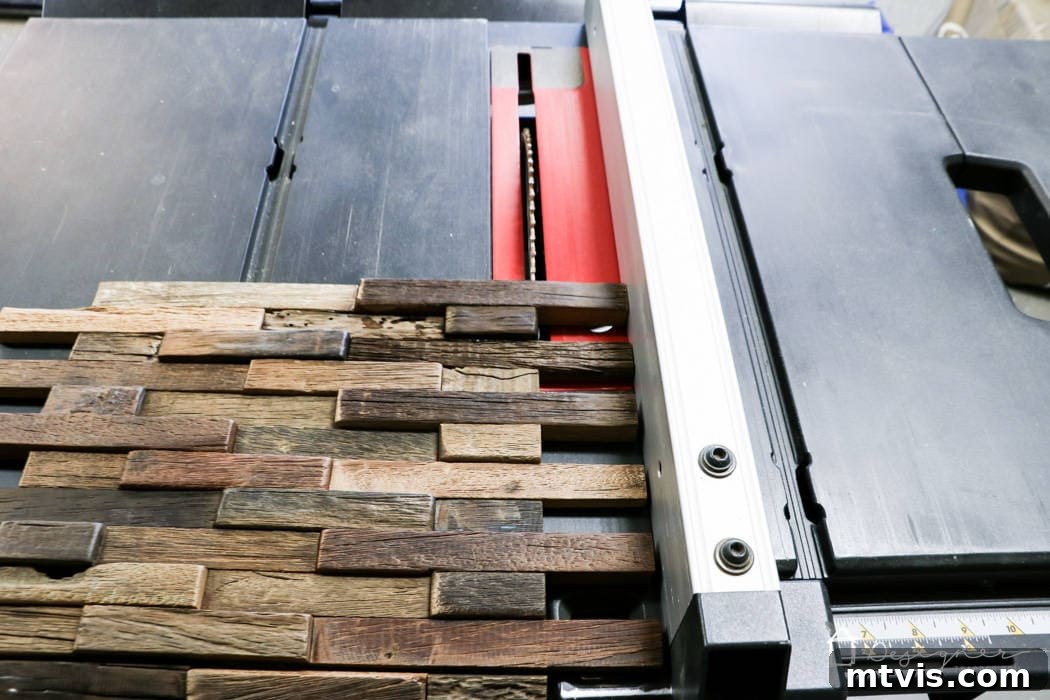
Once your table is painted and fully cured, it’s time to begin working with the wood mosaic tiles. Take one full sheet of your wood mosaic tile and carefully position it against the inside left edge of your table’s shelf. You will need to make a precise cut along the left edge of this tile so that it sits perfectly flush against the interior side panel of the table. A table saw offers the most precise and safest method for achieving a perfectly straight, clean cut. If a table saw isn’t accessible, a circular saw paired with a reliable straight edge guide or even a sturdy hand saw and miter box can be used. Always prioritize your personal safety by wearing appropriate eye protection and ensuring your work surface is stable and secure before making any cuts. For those tackling power tools solo, a friendly reminder from personal experience: always use the protective blade guard! Safety first!
-
Step 3: Dry Fit the Bottom Shelf Tiles for Perfect Placement.
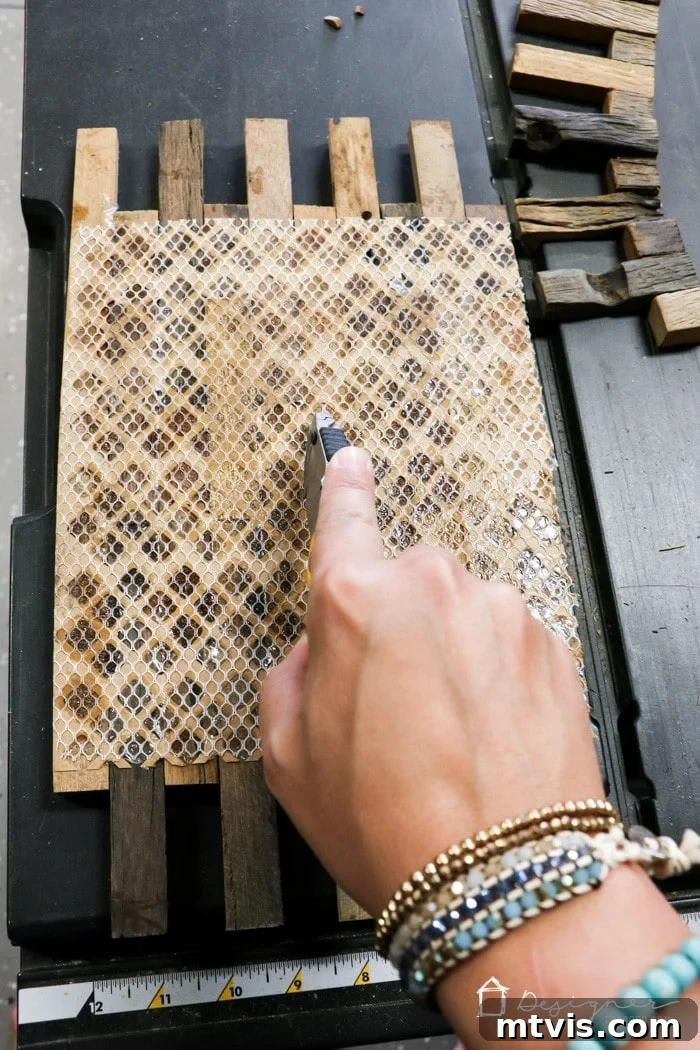
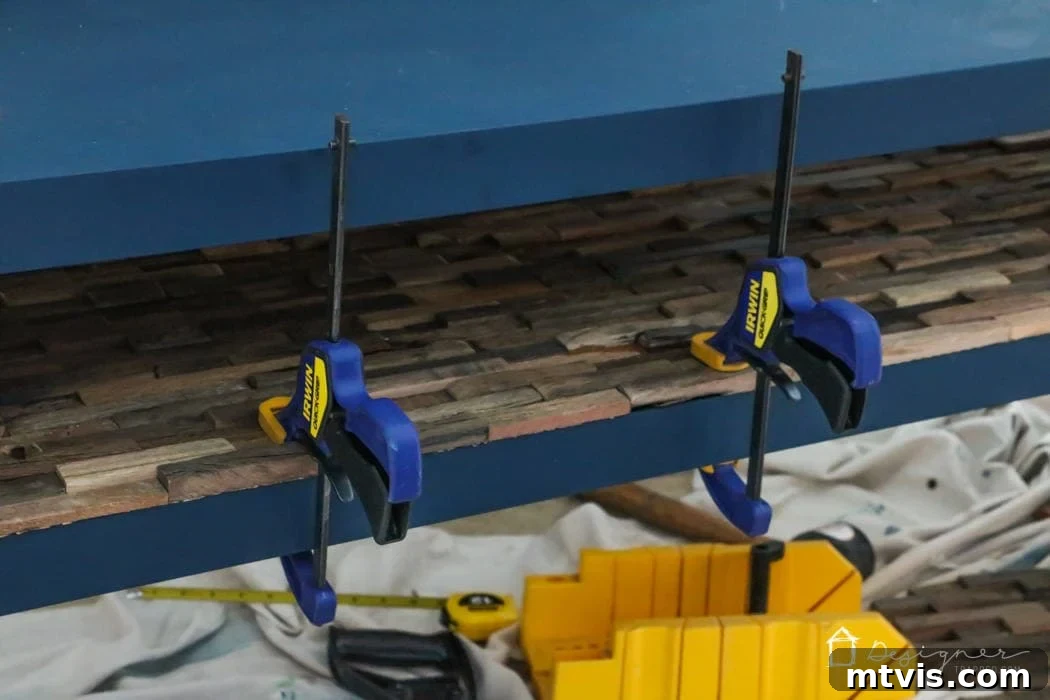
Before applying any adhesive, meticulously dry-fit all the large wood mosaic tile squares for the bottom of the table shelf. This critical step allows you to identify and rectify any measurement or cutting errors before they become permanent. Begin by placing your pre-cut tile on the far left and work your way across to the right, laying down full sheets. As you approach the right-hand edge, carefully measure the remaining length required for the final tile piece in that row. Trim this last piece to size using the same precise method as described in Step 2, ensuring a perfectly snug fit against the side panel. You’ll likely discover that the depth of the table shelf is greater than a single tile sheet. This is easily resolved: use a sharp utility knife to score and cut the mesh webbing on the back of the tiles, allowing you to separate them or trim them to the exact depth needed for additional rows. Continue this iterative process until the entire bottom shelf is thoroughly covered with dry-fitted wood tiles. Remember, do not glue anything into place yet! This careful dry-fitting guarantees a seamless and professional finish when you move on to permanent adhesion.
-
Step 4: Dry Fit Individual Pieces for the Side Panels of the Shelf.
With the entire bottom of your shelf now perfectly dry-fitted with mosaic tiles, it’s time to meticulously tackle the more intricate side panels. This stage demands a heightened level of patience and precision. Carefully peel individual pieces of wood from their mesh backing. You’ll quickly realize that you cannot simply trim long, uniform strips for the sides with your table saw. Instead, each individual wood piece needs to be cut to a specific, varying length to interlock seamlessly, almost like a puzzle, with the non-uniform, natural edges of the bottom tiles. Imagine this process as a real-life game of Tetris, where each piece finds its unique fit! Achieving this precise fit against the bottom tiles is crucial for creating that beautifully integrated, high-end wood-lined effect. This is undoubtedly the most time-consuming and detailed part of the project, but the attention to detail here will directly contribute to a truly stunning and professional result. To make this meticulous dry-fitting process more enjoyable, consider putting on an engaging audiobook, your favorite podcast, or a curated playlist. Take your time with each cut, always measuring twice before cutting once, to ensure perfect alignment.
-
Step 5: Secure the Side Pieces with Adhesive.
Now that all your side pieces are perfectly dry-fitted and ready, it’s time to bring out the adhesive. To maintain proper spacing and alignment during this stage, temporarily place a wood tile on the bottom of the shelf (it’s crucial to NOT glue this piece in place yet; it serves purely as a spacing guide). Begin by applying a small, consistent, but not excessive, amount of DAP Rapid Fuse Wood Adhesive to the back of each individual wood strip destined for the side panels. For the very first piece on each side, strategically use a clamp to hold it firmly in position while the adhesive begins its rapid setting process. This initial clamp ensures a strong, immovable anchor point from which to build. Allow this first clamped piece to fully cure as per the adhesive’s specific instructions before proceeding with adjacent pieces. As you work your way further into the shelf area, clamps might become impractical or impossible for every single piece. In such instances, I found that applying steady, firm pressure for approximately 10 to 15 seconds per piece was more than sufficient for the Rapid Fuse adhesive to create a strong initial bond. Continue carefully cutting and gluing the side pieces into place, meticulously working through both side panels until they are completely covered. The precision from your earlier dry-fitting will truly pay off here, resulting in a beautifully integrated finish.
-
Step 6: Glue the Bottom Tiles into Place Permanently.
With the side panels now beautifully adorned with their custom wood tiles, it’s time for the final adhesion step: permanently securing the bottom mosaic sheets. A distinct and convenient advantage of having already installed the side pieces is that they naturally provide a physical barrier, preventing the bottom sheets of wood from shifting forward or backward once placed. Therefore, you only need to strategically focus on gluing down the edges of the bottom tiles to ensure they remain flush, secure, and perfectly aligned. Carefully lift the edges of each dry-fitted bottom sheet and apply a small, continuous bead of DAP Rapid Fuse Wood Adhesive along the corresponding bottom edges of the shelf. Once the adhesive is applied, gently but firmly press the sheets back into their prepared positions. Use clamps along the visible edges where possible, allowing them to cure fully according to the product’s directions for maximum bond strength. This crucial final step brings together all the meticulously crafted elements, completing the stunning wood-lined interior of your transformed IKEA Lack sofa table, making it ready for display and use.
And there you have it! Witnessing the finished IKEA Lack hack in all its glory is truly a moment of immense satisfaction and pride. I am absolutely head over heels in love with the sophisticated transformation; it now looks and feels like a bespoke piece of furniture, designed specifically to complement our home’s aesthetic. This entire project, from initial painting to final tile adhesion, took approximately 3 hours of focused, active work, not including the necessary paint and adhesive drying times. The total cost, encompassing the original IKEA Lack table itself, the chosen paint, the high-quality adhesive, and the beautiful wood mosaic tiles, came in at a remarkable $157. That’s an incredible value for achieving such a high-end, designer-inspired look that would typically cost hundreds, if not thousands, more in a retail setting. The harmonious blend of affordability, relative ease, and stunning results makes this IKEA Lack hack a true winner in the realm of DIY home decor. Take a moment to admire the details and the craftsmanship – a truly custom piece created by your own hands!
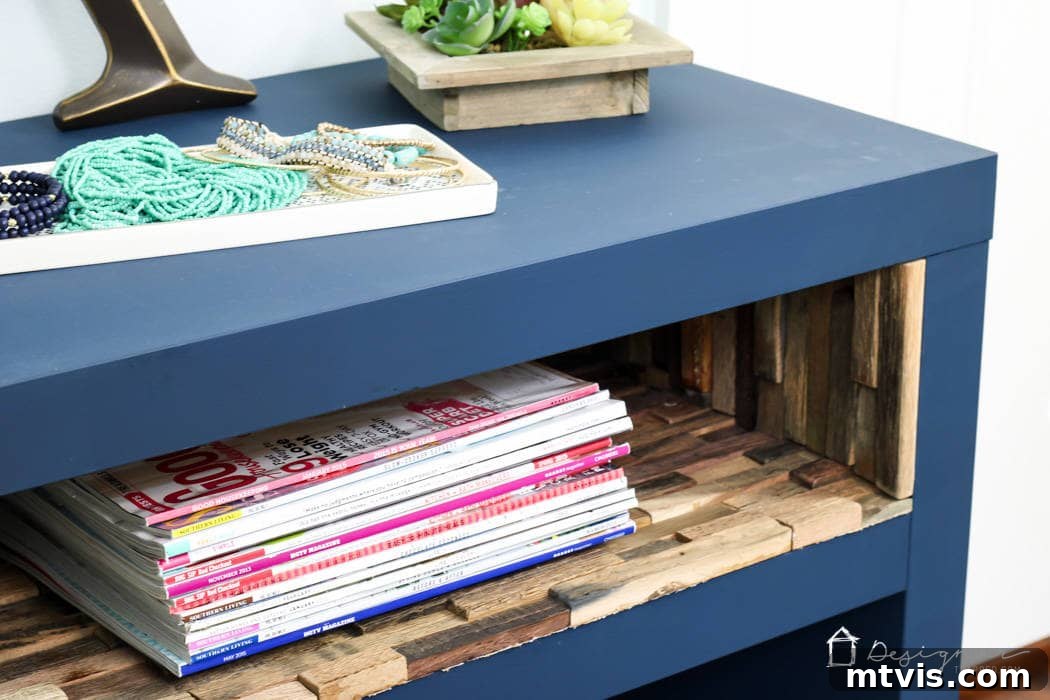
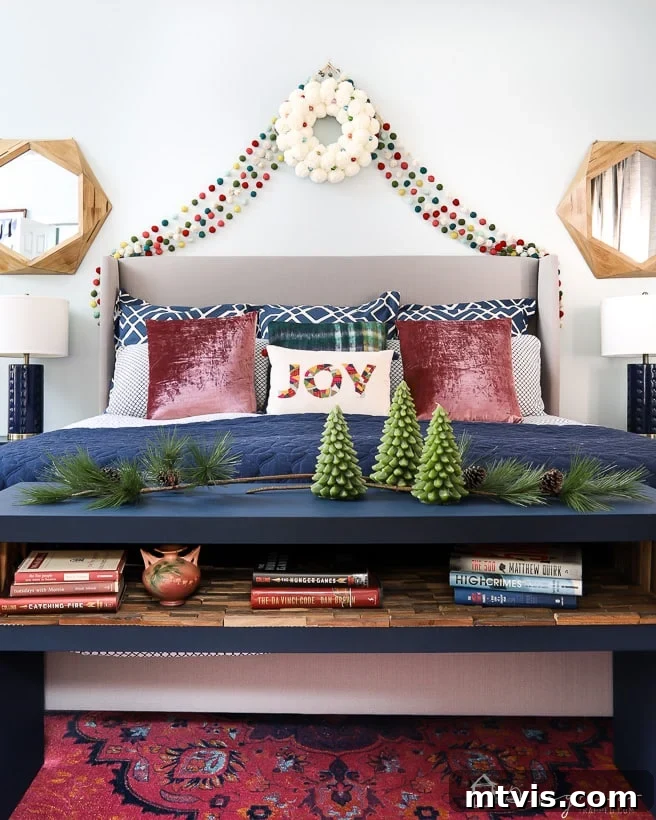
Our newly transformed IKEA Lack table eventually found its perfect and permanent home at the foot of our bed. In this new setting, its stylish new look effortlessly complements the room’s aesthetic, adding a touch of personalized charm and practical elegance. It now serves not only as a functional piece for discreet storage or holding a nighttime read but also as a beautiful decorative element, proving its versatility and enduring appeal in any carefully curated space within the home.
More IKEA Hack Posts to Inspire Your Next Project
SEE ALL DIY POSTS
If you’ve thoroughly enjoyed transforming your IKEA Lack table, you’ll be thrilled to discover the virtually endless possibilities that IKEA furniture offers for imaginative customization. From crafting sophisticated built-in cabinets that appear architecturally integrated to designing unique, ergonomic desk setups for your home office, there’s an ingenious hack for every need, aesthetic preference, and budget. Explore more of our hand-picked favorite IKEA hacks below to spark fresh inspiration and equip you with ideas for your very next home improvement endeavor!
-
Creative Hacks for IKEA Bookshelves and Built-In Cabinets
Discover how to transform basic IKEA bookshelves into high-end, custom-looking built-in cabinets that add significant storage and architectural interest to any room, all with clever DIY techniques.
-
Easy Furniture Repair to Match IKEA Paint Colors!
Learn about an incredibly easy furniture repair system that not only fixes dings and dents in no time but also perfectly matches common IKEA paint colors, extending the life and beauty of your beloved pieces.
-
IKEA Billy Bookcase Hack for Loads of Storage
Explore this incredibly popular IKEA Billy Bookcase hack that transforms simple shelving units into stunning, high-capacity built-ins, perfect for maximizing storage and adding style to any room, from living areas to kids’ bedrooms.
-
Affordable IKEA Desk Hacks You Will LOVE
Desks, especially stylish and functional ones, can often be surprisingly expensive. Dive into this collection of amazing DIY IKEA desk hacks that will equip you with a chic and productive workspace on even the tightest budget.
-
How to Paint IKEA Furniture and Mistakes to Avoid
Unlock the secrets to successfully painting IKEA furniture, particularly tricky laminate surfaces, to achieve durable and beautiful results that last. Learn from common pitfalls and master the techniques for a professional finish.
-
50 IKEA Hacks You Have to See to Believe
Prepare to be inspired by an incredible compilation of 50 of the most creative and jaw-dropping IKEA hacks ever conceived. These transformations will show you how to turn basic, inexpensive IKEA items into absolute showstoppers for every room in your home.
Wondering how to systematically approach transforming rooms and spaces in your home, achieving cohesive and beautiful results every single time without professional help? We invite you to explore Designer in a Binder®. This proven, comprehensive method empowers you to plan, budget, and execute your design visions with confidence and unparalleled ease, effectively eliminating guesswork, costly mistakes, and design paralysis. Take control of your home’s aesthetic and bring your dream spaces to life.
For exclusive content, valuable behind-the-scenes sneak peeks into upcoming projects, and insider DIY and design tips delivered directly to your inbox, be sure to subscribe to our highly curated newsletter before you head out! Join our vibrant community of passionate DIY enthusiasts and design lovers who are constantly seeking to create beautiful, personalized homes.