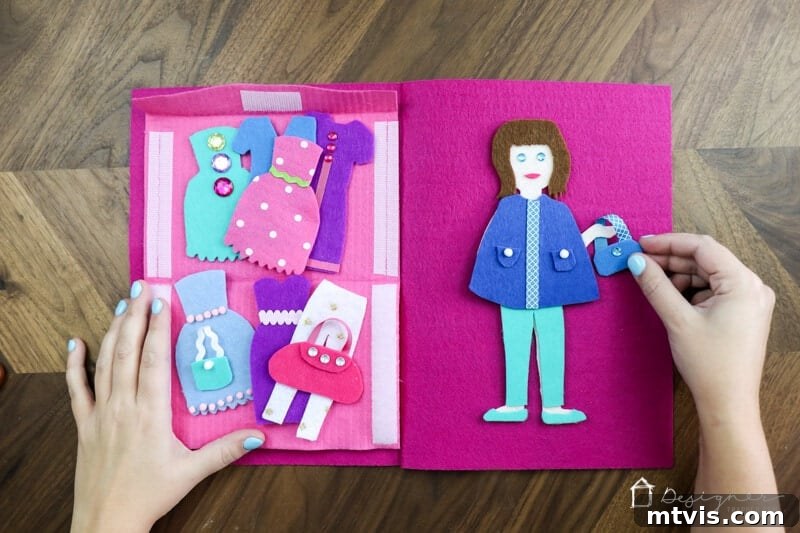
Unleash Creativity with a DIY Felt Doll Kit: A Comprehensive Guide to Crafting Portable Playtime Fun
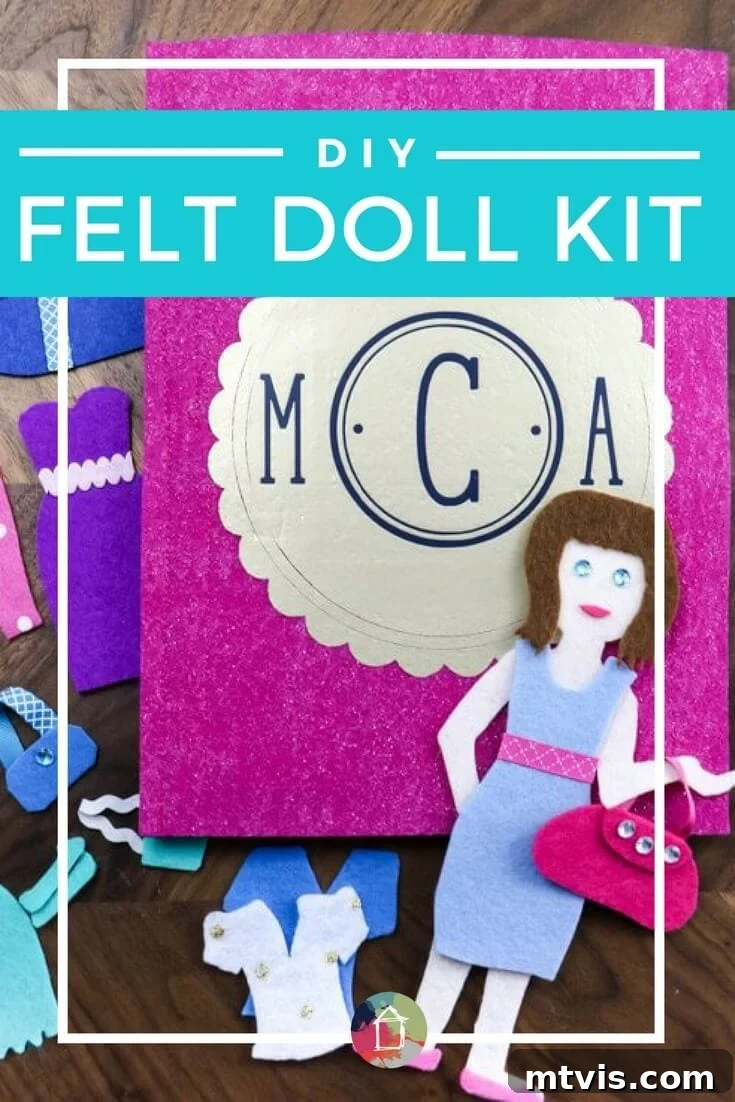
This delightful DIY felt doll kit project was made possible with the generous support of Cricut!
Are you a parent searching for engaging, screen-free activities that can keep your little one quietly entertained, especially when you’re on the go? If so, you’ve come to the right place! As a mother who has navigated the wonderful, sometimes chaotic, world of raising two daughters, I understand the immense value of having accessible, quiet play options for those moments in public settings, whether at a restaurant, church, or during travel. While my girls are now older and their attention spans have grown, I vividly recall how crucial these portable activities were during their younger years.
Years ago, I created a set of charming felt dress-up dolls for them, which they absolutely adored. The joy and imaginative play these dolls inspired were truly heartwarming. So, when a dear friend recently approached me, asking if I could craft a felt doll kit for her almost-three-year-old daughter for Christmas, I enthusiastically accepted the challenge! I immediately began envisioning improvements on my previous design, excited to create something even more special and captivating for her sweet little girl. This detailed tutorial will walk you through every step of making the cutest, most engaging DIY felt doll kit imaginable.
This post contains some affiliate links for your convenience (which means if you make a purchase after clicking a link I will earn a small commission but it won’t cost you a penny more)! Click here to read my full disclosure policy.
DIY Felt Doll Kit: Crafting Quiet and Creative Play
Essential Materials Needed for Your Felt Doll Kit:
- Cricut Maker Cutting Machine: This is highly recommended for precision and ease, especially when cutting intricate felt shapes. While you can certainly use scissors and paper templates (as I did in my earlier projects), the Cricut Maker offers significantly cleaner cuts and saves a tremendous amount of time.
- For an in-depth look at this incredible machine, you can read my full review of the Cricut Maker here. It’s truly amazing how it effortlessly cuts felt, thick leather, wood, and countless other materials.
- If you’re weighing your options for cutting machines, my comparison of Silhouette vs. Cricut can help you decide.
- **Felt Sheets:**
- 1 sheet of felt for the doll’s skin tone (choose a color that best suits your vision).
- 2 sheets of *stiff felt* for the front and back covers of your felt doll kit. This provides durability and structure to your “book.”
- 2 sheets of regular felt in your preferred colors for creating the two storage pockets for clothes.
- A vibrant assortment of regular felt in various colors for crafting your doll’s extensive wardrobe and accessories. Experiment with different textures and shades to bring the outfits to life!
- *Pro Tip:* I’ve used felt from Joann’s, but I particularly enjoyed working with Cricut brand felt. Although slightly thinner, it boasts a smoother texture and a more refined feel, which makes a difference in the final product.
- Felt Glue: Essential for securely attaching small felt pieces and embellishments.
- **Decorative Embellishments:** Get creative here! Consider items like stick-on rhinestones, decorative ribbons, small pom-poms, beads, sequins, or tiny buttons to add flair to your doll’s outfits and the kit cover.
- Fabric Stiffener: This is needed if your chosen skin tone felt isn’t already stiff. Applying stiffener ensures the doll body holds its shape well.
- Iron-on Vinyl: Perfect if you wish to personalize the front cover with a monogram, the doll’s name, or a cute design.
- Sew-on Velcro: Used for the pockets, allowing them to securely open and close.
- Cricut EasyPress: An excellent tool for quickly and evenly applying iron-on vinyl.
- Weeding Tool: Indispensable when working with iron-on vinyl to remove excess material.
- **Sewing Machine & Thread:** For stitching the kit together and securing Velcro.
If you’re using a Cricut Maker to bring your felt doll kit to life, you’ll benefit greatly from the specialized cut files I’ve designed. I initially sketched these files on my iPad Pro, drawing inspiration from the adorable templates found at Smile and Wave, with only minor adaptations. For your convenience, these versatile .png files, ready for import into Cricut Design Space, are available absolutely free for my newsletter subscribers. Simply click on the image below to have them delivered directly to your inbox!
Should you prefer a more traditional approach, using paper templates and scissors to cut your felt pieces, you can find readily printable templates by visiting Smile and Wave. This method, though more time-consuming, yields equally charming results.
Step-by-Step Guide to Assembling Your Felt Doll Kit:
This project is divided into two main parts: creating the “book” cover with its storage pockets and then crafting the doll, clothes, and accessories.
Part 1: How to Create the “Book” for Your Felt Doll Kit
The book serves as both a display board for your felt doll and a clever storage solution for all its delightful outfits. Its robust design ensures it can withstand countless hours of imaginative play and travel.
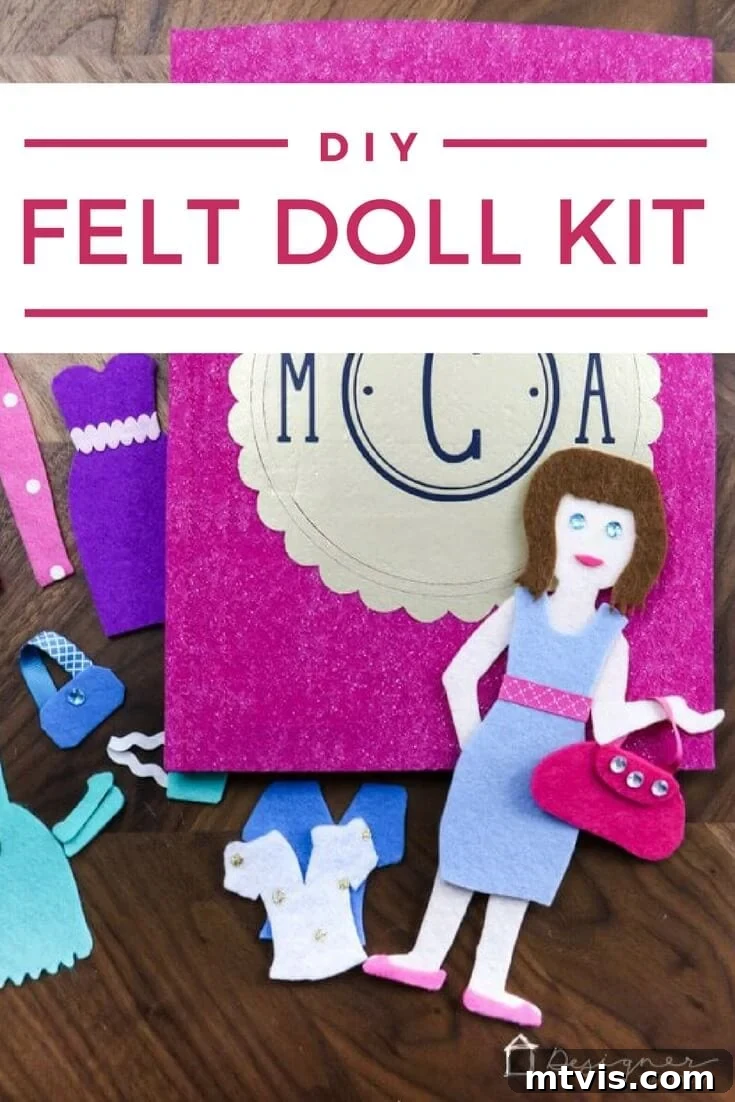
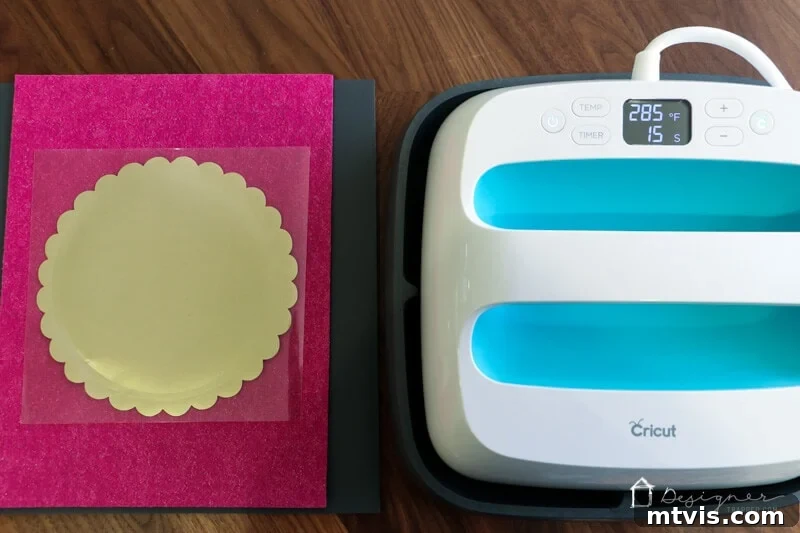
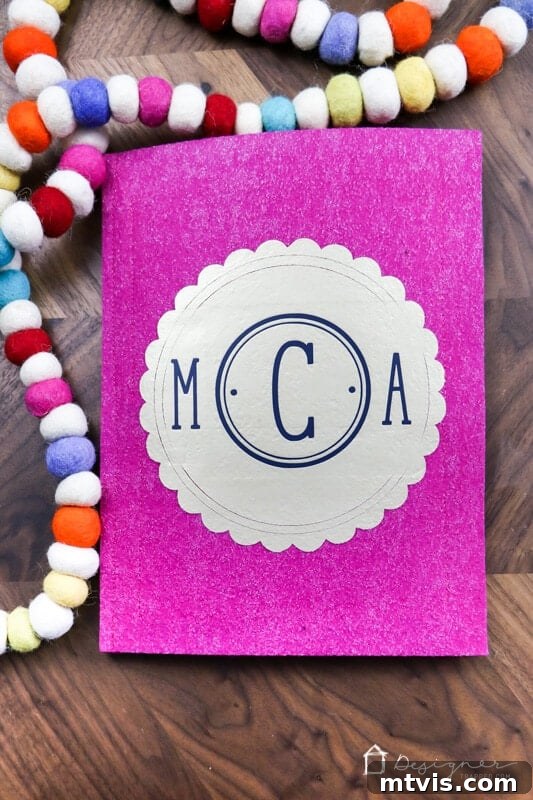
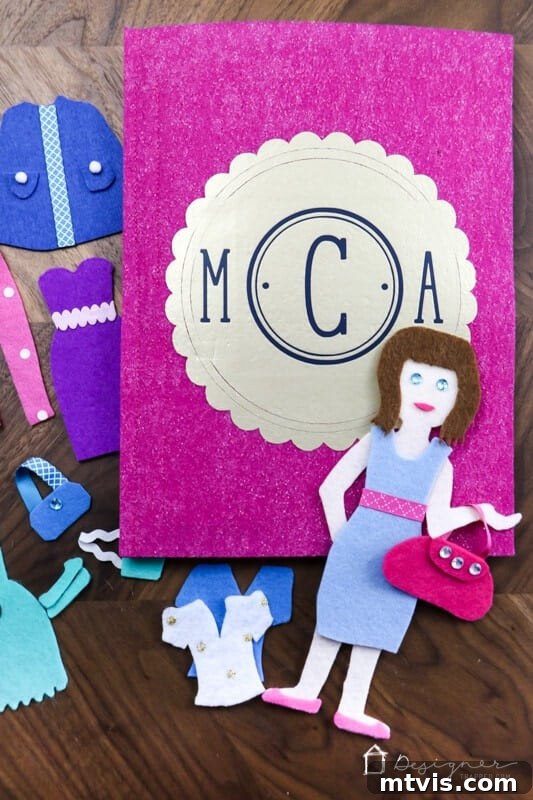
1) Begin by personalizing the front cover of your DIY felt doll kit. I opted for a chic and simple scallop circle and monogram design, cut precisely from iron-on vinyl. First, cut and *weed* your designs – remember to mirror your image in Cricut Design Space before cutting for iron-on vinyl! I used my Cricut EasyPress to apply the vinyl, which makes the process incredibly fast and straightforward, ensuring a professional finish. I started by applying the scalloped circle in gold heat transfer vinyl. Once it had cooled completely, I layered the monogram in navy heat transfer vinyl directly on top. Yes, you absolutely *can* layer iron-on vinyl for more complex designs!
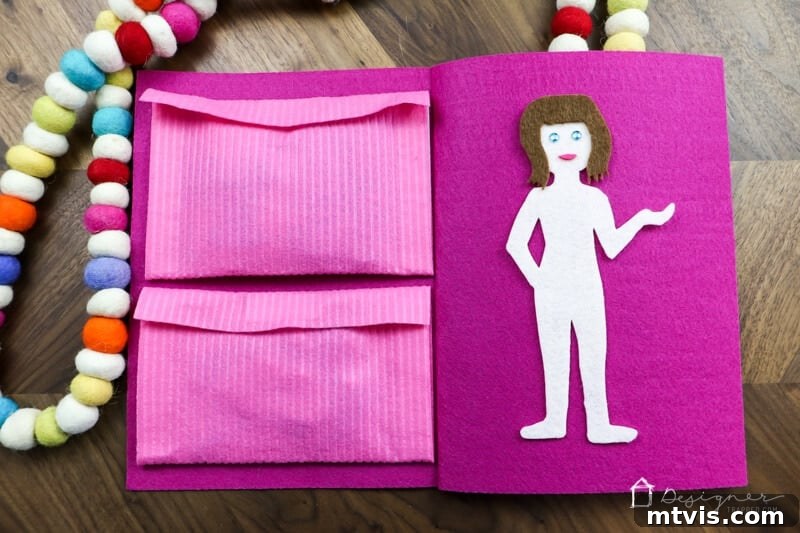
2) Next, you’ll create the practical pockets designed to neatly hold your doll’s clothes and various accessories. For each pocket, I used one piece of regular felt. I carefully trimmed approximately 1 inch off the long edge of the felt. This slight reduction ensures the pocket fits perfectly onto the back of the cover without extending past its edges. Then, I folded the bottom end of the felt upwards, a little less than halfway, leaving ample felt at the top to create a secure flap. To achieve crisp, professional folds, I used my EasyPress to iron the creases into the felt – why bother fetching a traditional iron when the EasyPress is so efficient?
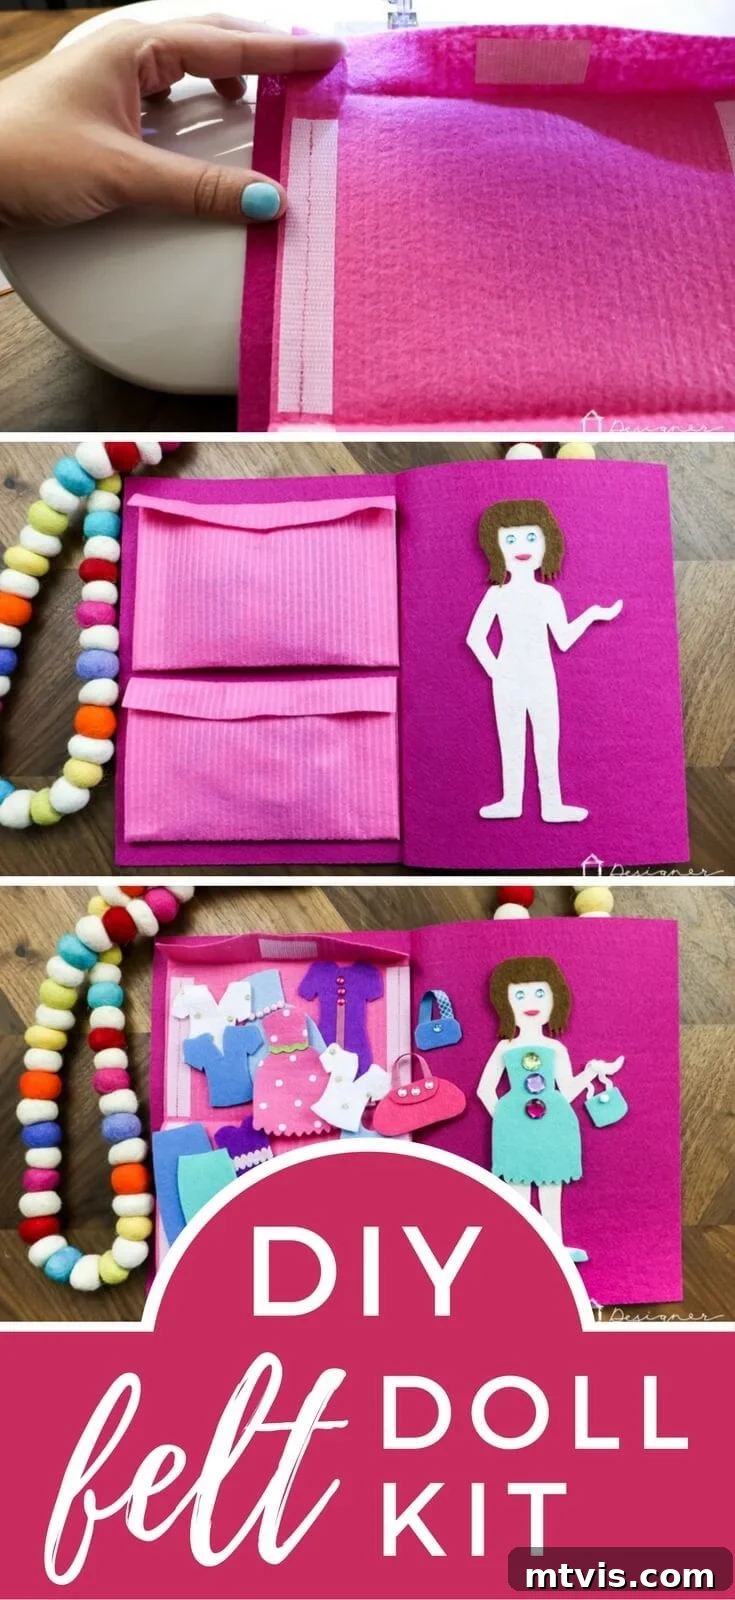
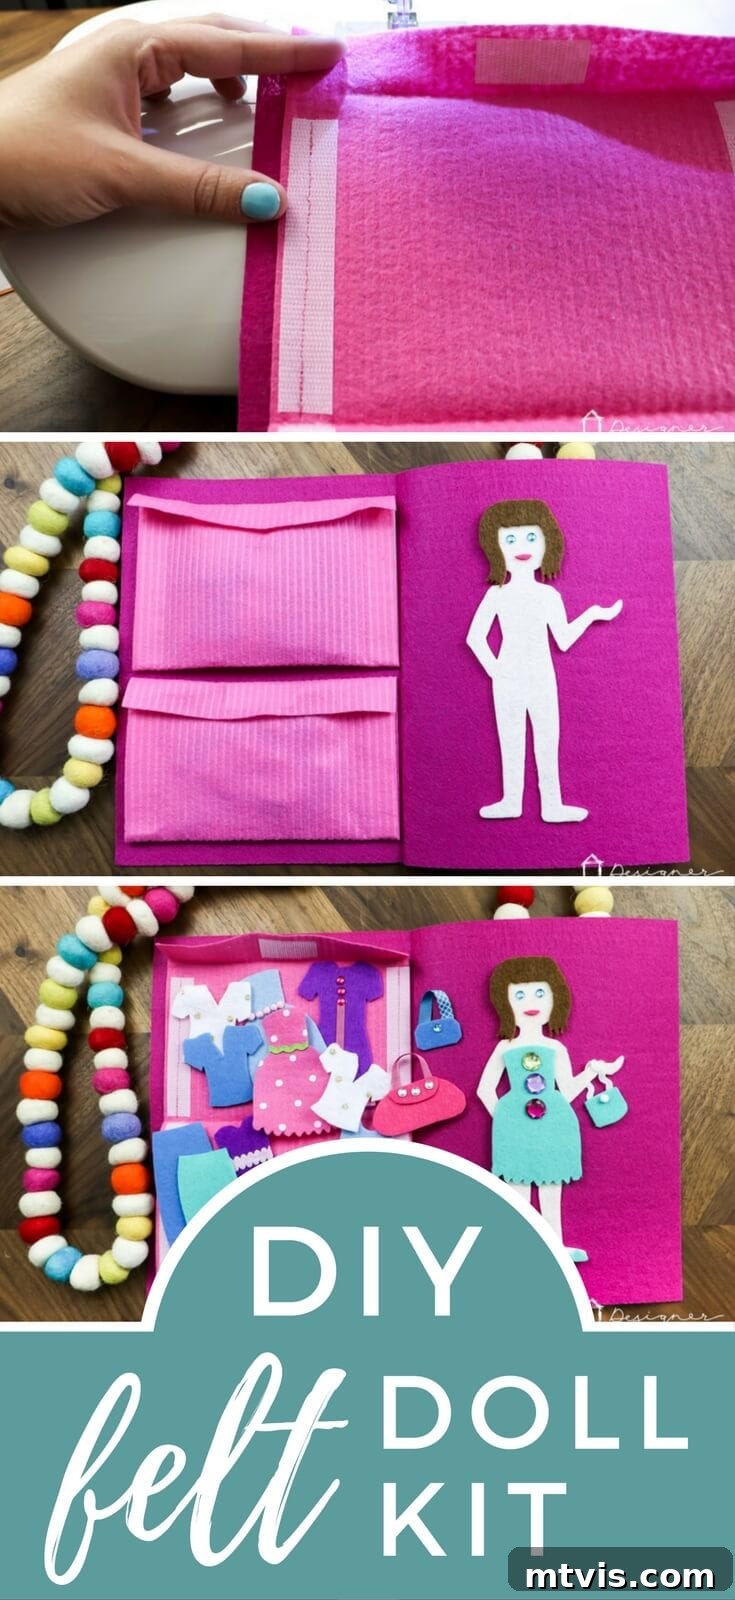
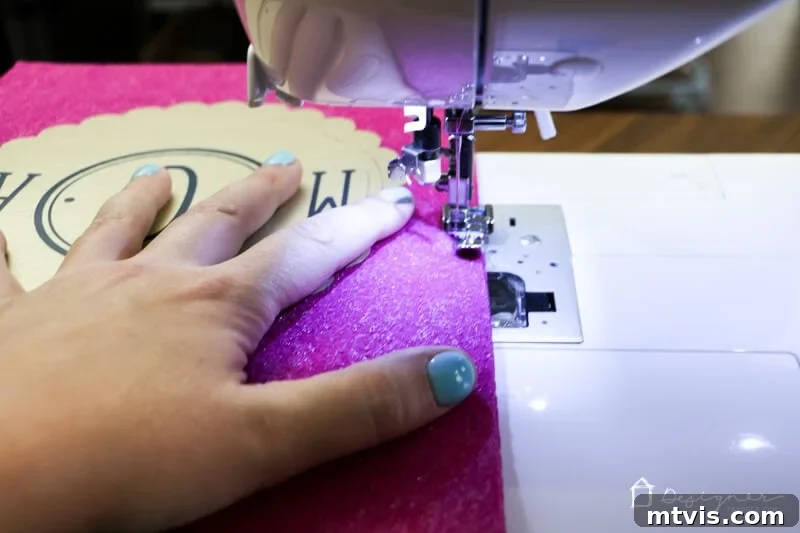
3) With the folds set, the next step involves sewing on the Velcro. I stitched one side of the Velcro along the sides of the envelope-style pocket and the corresponding piece onto the top flap. Additionally, I sewed the other half of the Velcro onto the outside of the pocket, ensuring it would align and secure the flap when the pocket is closed. This creates a secure closure, keeping all those tiny felt outfits safely tucked away. Using a sewing machine makes this step quick and gives a durable finish.
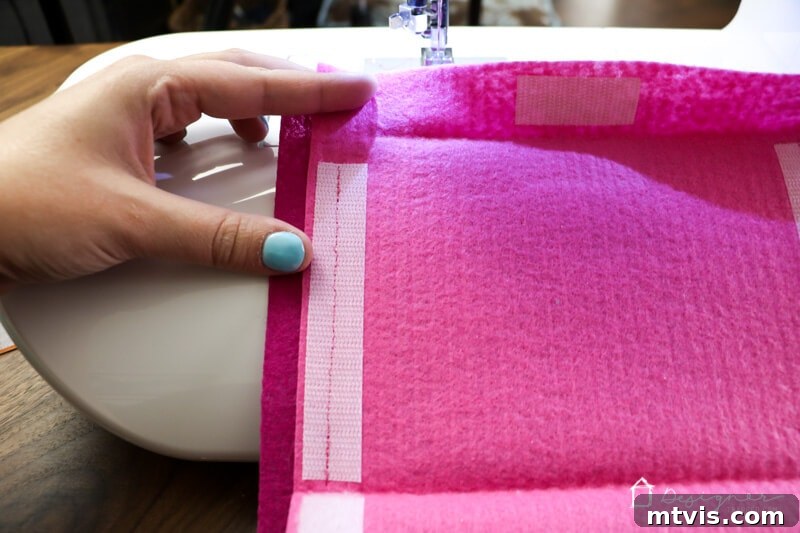
4) After securing the Velcro, I stitched the entire pocket onto the back of the front cover. It’s crucial to follow the same stitch line used for the Velcro, ensuring a neat and unified appearance. This might seem obvious, but remember to only sew the *top half* of the pocket onto the back cover. The bottom half and the flap should remain loose, allowing the pocket to hinge open and closed freely. This design ensures easy access to the stored clothes and accessories.
5) Finally, to complete the book structure, I stitched the front and back stiff felt covers together. This was done by running a neat seam along the outer edge of both pieces, securely binding them into a cohesive “book.” This final stitch provides durability and gives your felt doll kit a polished, finished look.
Once all these steps are complete, your felt doll “book” is ready! It looks incredibly cute and is perfectly designed for travel and imaginative play.
Part 2: How to Make the Doll, Clothes, and Accessories for Your Felt Doll Kit
Now for the most exciting part – bringing your doll and her wardrobe to life! This is where the creativity truly shines.
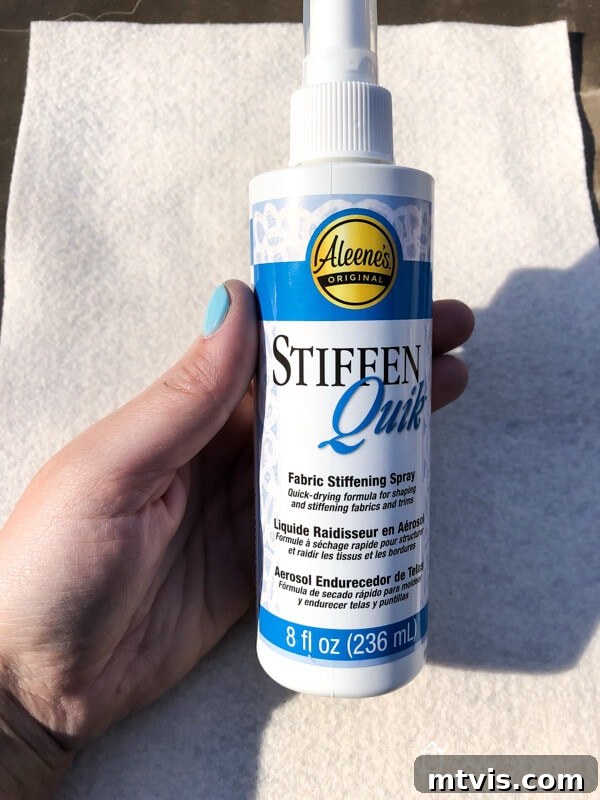
1) If the felt you’ve chosen for your doll’s body isn’t inherently stiff, this is the time to apply fabric stiffener. A stiffened doll body will hold its shape better, making it easier to dress and play with. Allow the stiffener to dry completely *before* attempting to cut the doll shape with your Cricut. When cutting just the doll body, use the “Contour” feature in Cricut Design Space to hide any elements like hair or facial features that you intend to cut from different colored felt. This ensures precise, individual cuts for each component. If you’re new to this powerful tool, this article provides an excellent explanation of how to effectively use the Cricut Contour feature.
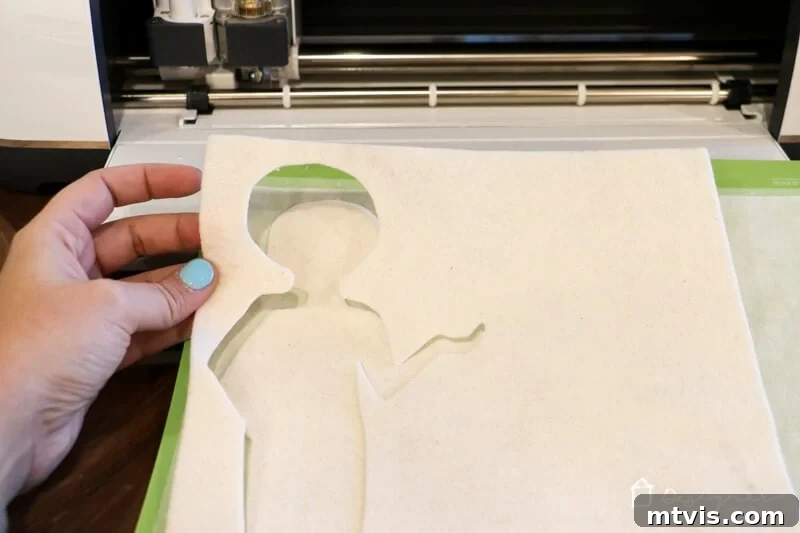
2) Proceed to cut out the doll’s body. I used my Cricut Maker’s rotary blade, specifically designed for fabrics, and set the material to “felt.” The result was perfectly clean and smooth cuts every time.
3) Now, let your imagination soar as you cut out an array of clothes and accessories in as many different colors as you desire! Again, leverage the Contour feature in Cricut Design Space to “hide” any items from a particular .png file that you don’t wish to cut at that moment or from a specific color of felt. This allows for maximum flexibility and creativity in building your doll’s wardrobe. Remember, this article explains the Contour feature really well, helping you master this essential Cricut tool.
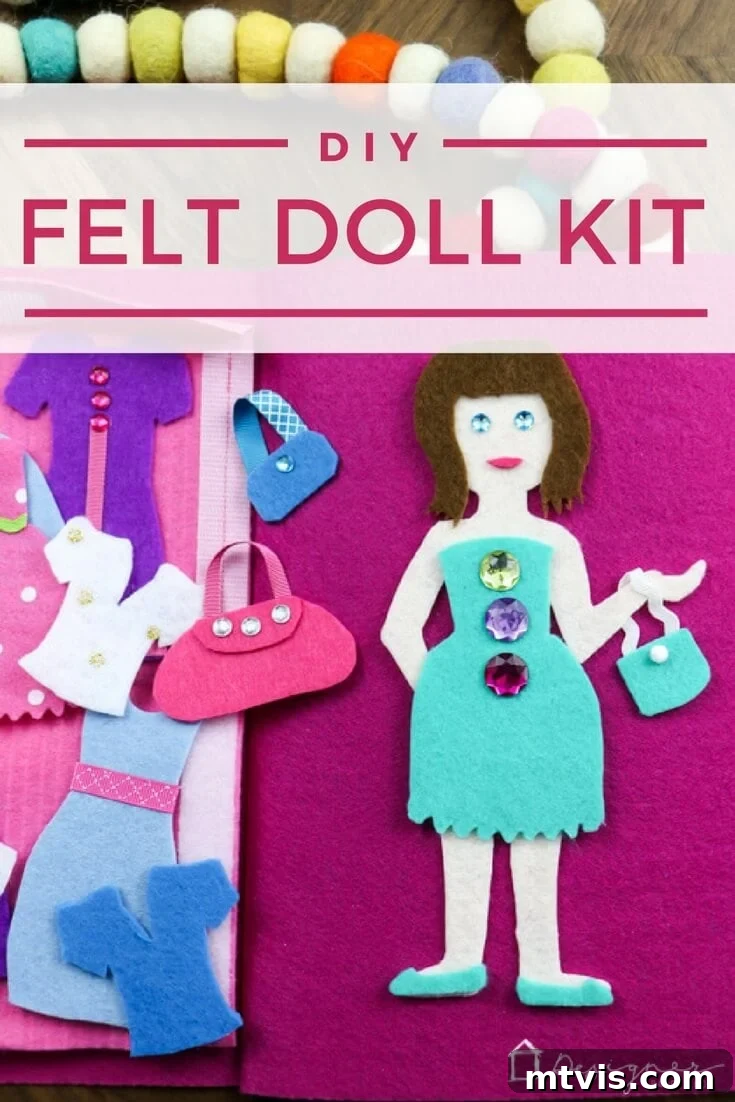
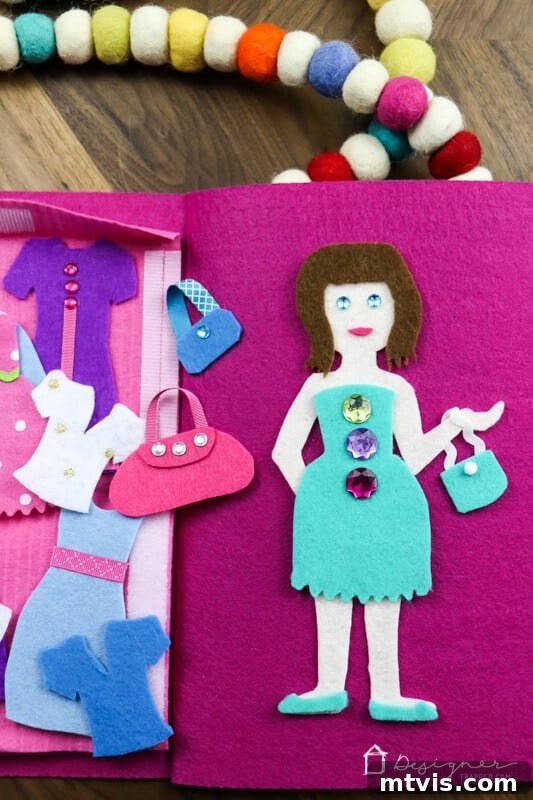
4) Once all your felt pieces are meticulously cut out, begin assembling your doll. Start by gluing the doll’s hair onto its head using felt glue. For the doll’s eyes, you have several options: use small pom-poms for a softer look, stick-on rhinestones for a touch of sparkle, or even tiny beads. For the lips, I hand-cut them from a small piece of pink felt to add a charming smile. Allow the glue to dry thoroughly before moving on.
5) Finally, unleash your inner fashion designer and decorate your doll’s clothes and accessories to your heart’s content! This is the perfect opportunity to use those embellishments you gathered: tiny ribbons for hair bows, mini sequins for dresses, or small fabric cutouts for patterns. Felt glue works wonderfully to hold everything in place, but remember that it requires some time to dry. After applying glue, arrange all your decorated pieces on a flat surface where they can dry undisturbed, ensuring everything adheres perfectly.
I’m absolutely thrilled with how the DIY felt doll kit turned out, and I’m even happier to report that the little recipient absolutely adores it! Her mom also appreciates that it offers a quiet, engaging activity that keeps her daughter’s hands busy and her imagination thriving.
Exploring the Benefits of Felt Doll Play:
Beyond being a fun craft project, a DIY felt doll kit offers numerous developmental advantages for young children:
- **Promotes Fine Motor Skills:** Manipulating small felt pieces, dressing the doll, and arranging accessories helps children refine their hand-eye coordination and dexterity.
- **Encourages Imaginative Play:** Felt dolls provide an open-ended platform for storytelling, role-playing, and creating intricate scenarios, fostering creativity and cognitive development.
- **Develops Independent Play:** These kits are perfect for quiet, solitary play, allowing children to focus and engage without constant supervision.
- **Boosts Problem-Solving Skills:** Deciding which outfit fits which occasion, arranging the pieces, and putting them away encourages logical thinking.
- **Portable & Travel-Friendly:** The compact “book” design makes it an ideal companion for car rides, waiting rooms, or any situation where quiet entertainment is needed.
- **Screen-Free Engagement:** Offers a wonderful alternative to electronic devices, encouraging traditional play and tactile exploration.
Your Completed Felt Doll Kit: A Peek Inside
This is what the completed DIY felt doll kit looks like when all the clothes and accessories are neatly put away, ready for its next adventure.
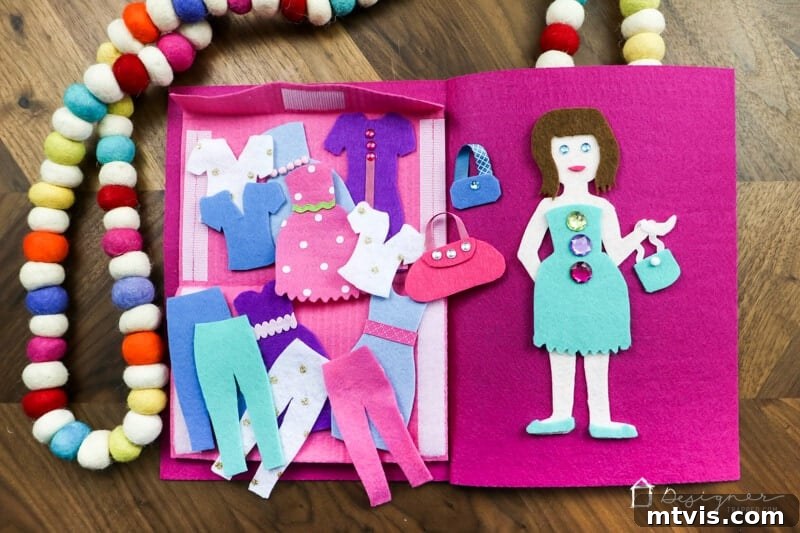
And here’s a glimpse of the felt doll kit in action, with all the adorable outfits and accessories out and being used for imaginative play!
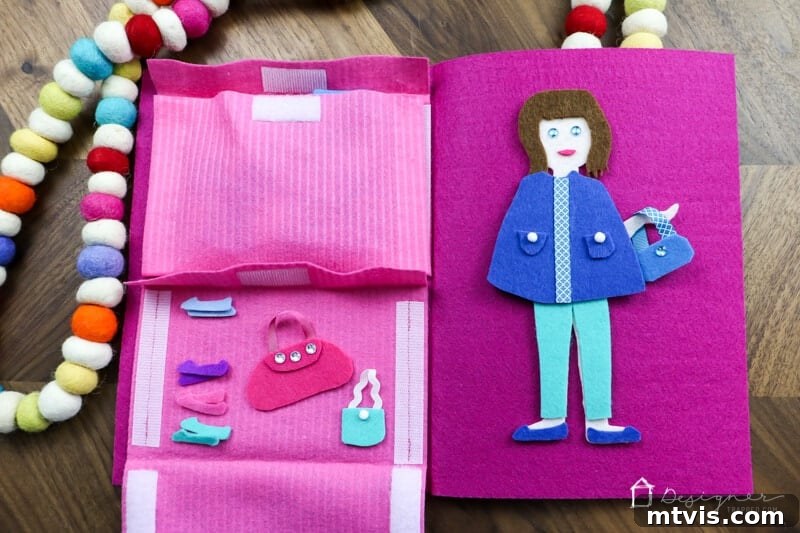
I thoughtfully arranged all of the doll’s clothes in the top envelope pocket, while the bottom envelope was designated for all the charming shoes and delightful accessories, including that absolutely adorable cape! This organized system makes it easy for little hands to find and put away everything.
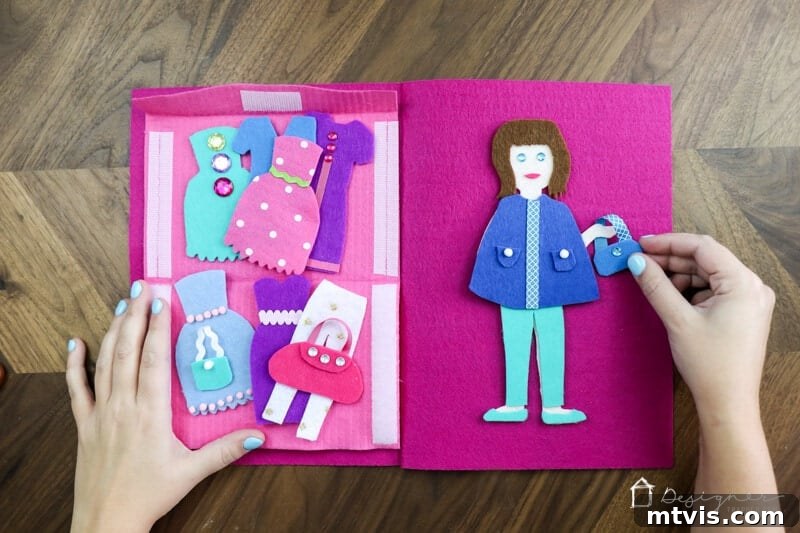
If you know a special little girl who would absolutely adore this handmade felt doll kit, be sure to save this tutorial to Pinterest or share it on Facebook. That way, you can easily find these detailed instructions whenever you’re ready to start crafting this wonderful gift!
And before you go, don’t forget to subscribe to my newsletter! As a subscriber, you’ll gain exclusive access to my FREE printables library, packed with even more creative resources and inspiration for your next DIY project.

This content is a sponsored collaboration with Cricut. All opinions and experiences shared are entirely my own, reflecting my genuine enthusiasm for their products.