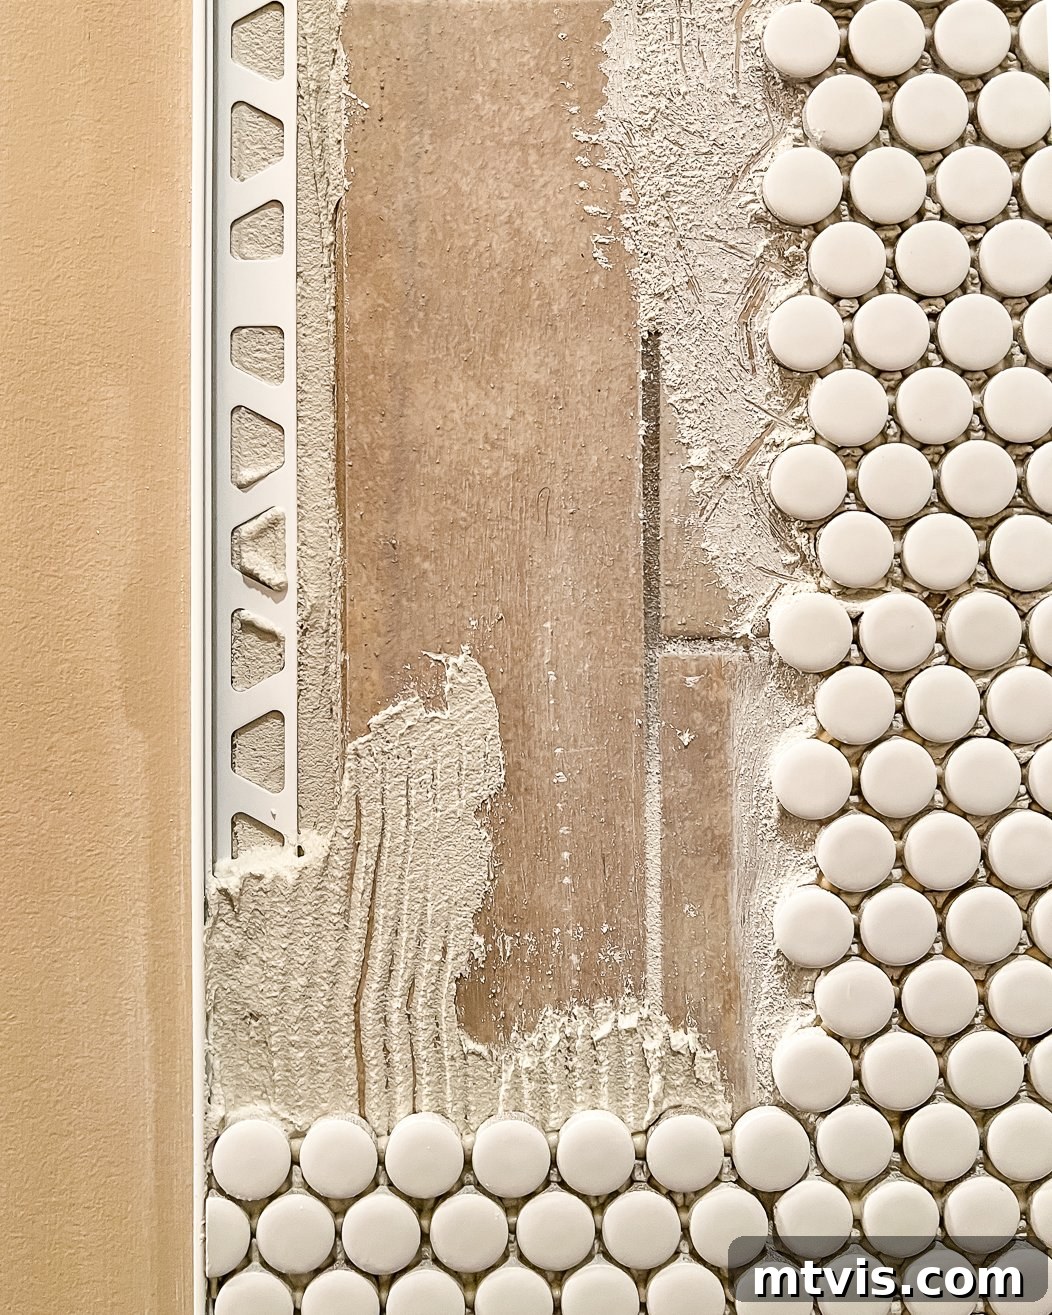
Are you tired of staring at those outdated, dull tiles in your kitchen or bathroom? Do you dream of a refreshed, modern space but dread the monumental task of ripping out old tiling? The good news is, in some specific scenarios, you can tile directly over existing tiles, saving significant time, effort, and expense! This comprehensive guide will explore when tiling over existing tile is a viable option (and more importantly, when it’s not), detail the potential benefits and drawbacks, and provide a clear, step-by-step tutorial to help you achieve a stunning transformation for your home.
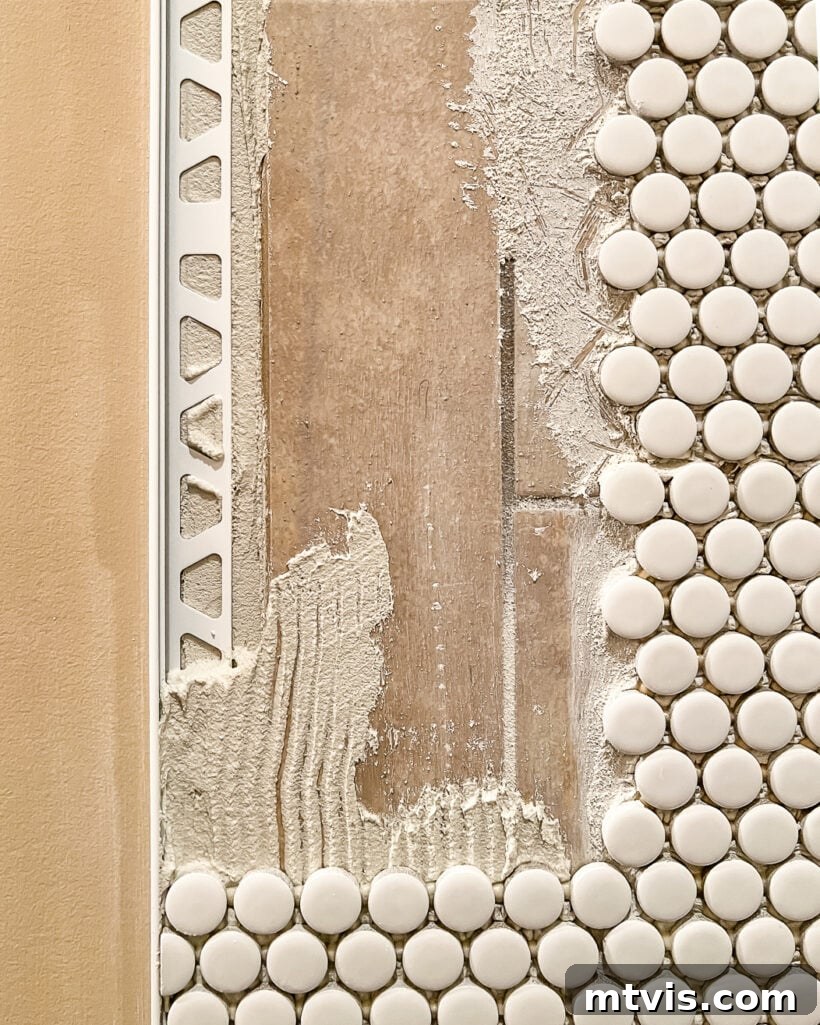
Table of Contents
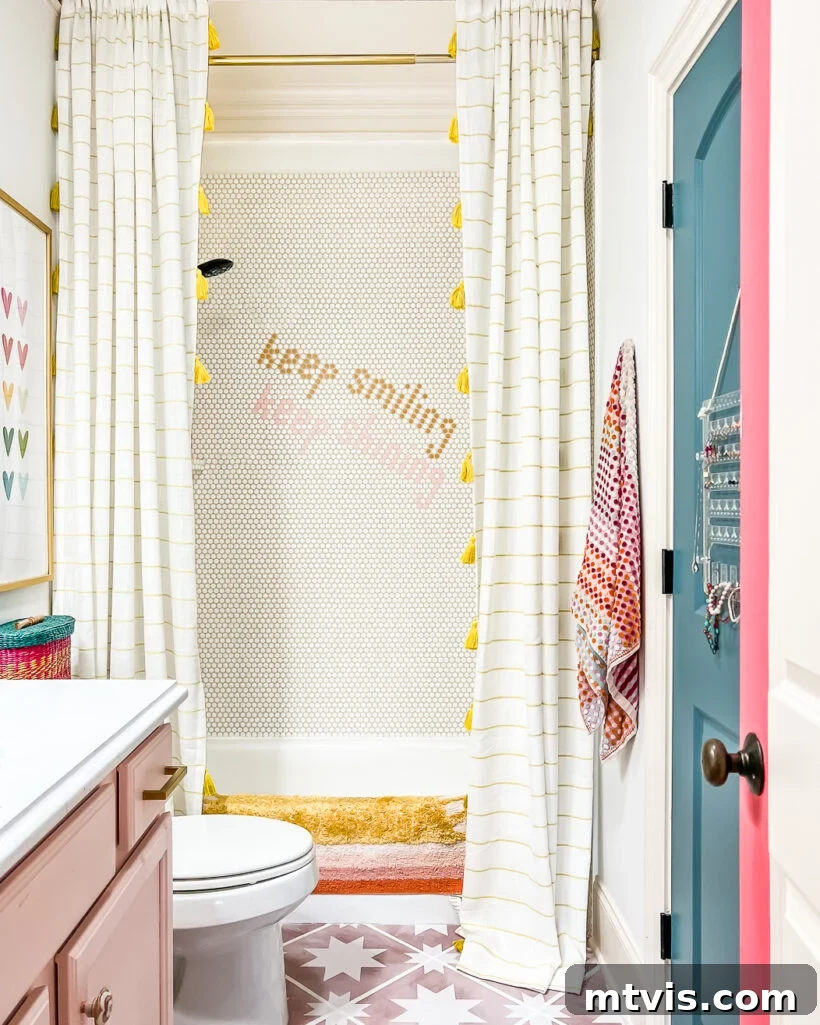
When planning our daughter Attley’s budget-friendly bathroom makeover, the dated shower tiles were a major concern. Removing them seemed like a daunting and costly endeavor. I recalled a friend, Bre from Brepurposed, who successfully tiled over existing tile in one of her bathrooms, guided by her father-in-law, a tile expert. This gave me confidence in the method, though her project wasn’t a shower. Extensive research ensued, and I’m now eager to share all the crucial insights for your own tile-over-tile renovation, ensuring you approach it with both caution and confidence.
Can You Tile Over Existing Tiles? A Definitive Answer
The short answer is yes, tiling over existing ceramic or porcelain tiles is indeed possible. Our personal experience, which we’ll elaborate on shortly, yielded excellent results. However, it’s critical to understand that this is not a universal solution. Tiling over existing tile is only a viable and recommended option under very specific and rigorous circumstances. Ignoring these conditions can lead to costly failures, extensive damage, and structural problems down the line, ultimately costing more than a traditional tile removal and installation.
You should only consider this method if your existing tile surface meets the following stringent criteria:
- Unwavering Stability: Your existing tiles must be absolutely firm and securely bonded to the subfloor or wall. To test this, gently tap each tile with a rubber mallet or the handle of a screwdriver. A solid, dull thud indicates good adhesion, while a hollow sound suggests loose tiles or voids beneath. Any loose tiles must be removed and the substrate repaired before proceeding. Tiling over unstable tiles is a recipe for disaster, as the new tiles will inevitably crack, detach, or create an uneven surface.
- Perfectly Level Surface: The existing tiled surface must be completely level and flat. Use a long level or a straightedge to check for any dips, bumps, or unevenness. Even slight variations can translate into an unsightly, uneven new tile surface, compromising both aesthetics and durability. If your level rocks even minimally, rectifying the subfloor/wall is essential, which often means removing the old tiles and addressing the underlying issue.
- No Cracks or Damage: Ensure none of your existing tiles are cracked, broken, or chipped. Any structural damage to the underlying tiles can compromise the integrity of the entire new installation. The new layer of tile needs a robust and uniform foundation to prevent new cracks from forming or existing issues from worsening.
- Absence of Leaks or Moisture Issues: This is arguably the most critical condition, especially in wet areas like bathrooms, showers, or areas prone to spills. You must be absolutely certain there are no current or historical leaks, and no moisture trapped behind your existing tiles. We highly recommend using a moisture meter to thoroughly check the walls and floor. Any detected moisture necessitates full tile removal and comprehensive substrate repair to prevent mold growth, structural damage, and complete failure of the new tile job. Skipping this crucial check can lead to severe health hazards and costly repairs.
- Sufficient Clearance: An additional layer of tile will inevitably raise the height of your floor or add thickness to your walls. For floors, this means checking door clearances and transitions to adjoining rooms. For walls, consider how the increased thickness will affect trim, fixtures (like shower valves, faucets, or electrical outlets), and built-in elements. Ensure you have adequate space to accommodate the new layer without creating awkward transitions, functional impediments, or requiring extensive modifications to surrounding elements.
Remember, while DIY projects can be incredibly rewarding, tiling requires precision, attention to detail, and adherence to best practices. If you’re unsure about any of these conditions or your ability to perform the job correctly and safely, consult a professional tile installer. Investing in a professional opinion upfront can save you significant headaches, expenses, and potential property damage later.
Is Tiling Over Existing Tile a Good Idea? When to Proceed with Caution
Knowing that you can tile over existing tile naturally leads to the more important question: should you? My honest assessment, based on extensive research and personal experience, is that in most situations, the answer leans towards “no.” This is primarily because most existing tile surfaces don’t perfectly meet all the rigorous requirements outlined above. The allure of saving time and effort is strong, but compromising on thorough preparation and assessment can lead to disappointing and expensive failures that outweigh any initial savings.
Tiling over existing tile is only a truly good idea if, and only if, your project impeccably satisfies every single prerequisite mentioned previously. It’s incredibly tempting to view this method as a “quick fix” – perhaps to prepare a house for sale, to quickly update a rental property, or for a temporary aesthetic upgrade. However, attempting to tile over cracked, loose, or unstable tiles, or a surface with any hint of a leak or moisture problem, is a grave mistake. Such an approach will not only result in premature tile failure, potentially within months, but could also mask severe underlying issues, leading to far more extensive and costly repairs in the long run, including widespread mold growth, foul odors, and significant structural damage to walls or subfloors.
However, when your existing tiles are in excellent, stable condition with no underlying issues, tiling over them can be an incredibly efficient, budget-friendly, and less disruptive way to dramatically update a space. It sidesteps the mess, dust, arduous labor, and disposal costs associated with traditional tile demolition. This method is particularly well-suited for:
- Kitchen Backsplashes: Kitchen backsplashes typically don’t endure heavy impact, foot traffic, or significant moisture, making them ideal candidates for a tile-over-tile update if the existing surface is sound and clean.
- Fireplace Surrounds: Similar to backsplashes, fireplace surrounds are generally stable, dry, and not subject to extreme wear, offering another excellent opportunity for this technique to transform a living area.
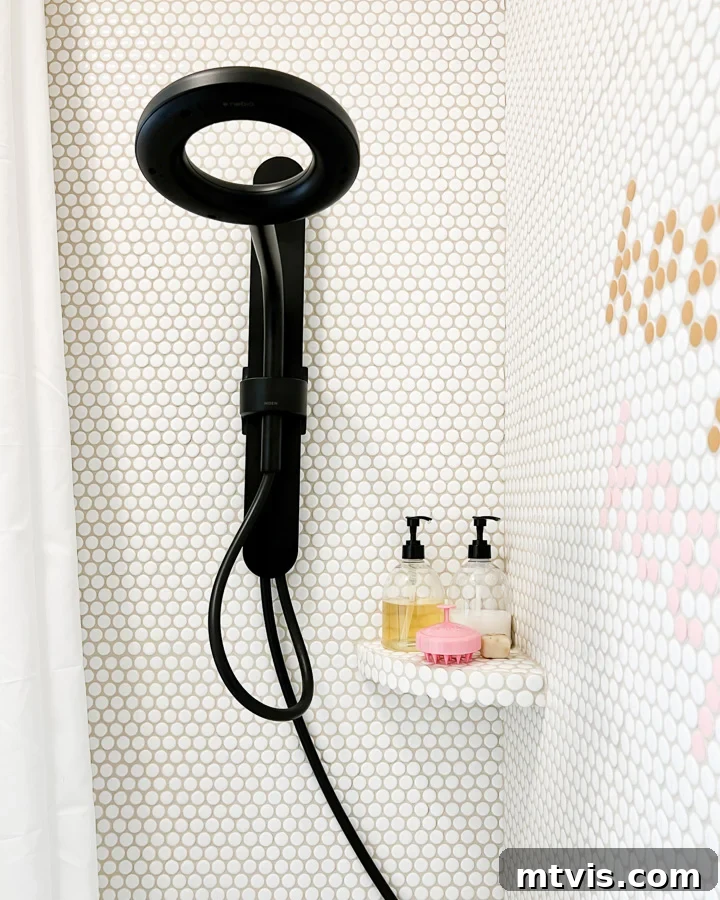
- Bathroom Walls (Specific Cases): As demonstrated by our own project, bathroom walls in showers or around tubs can be suitable, provided all moisture and stability checks pass with flying colors. It’s crucial to be exceptionally meticulous with waterproofing and surface preparation in these high-moisture areas.
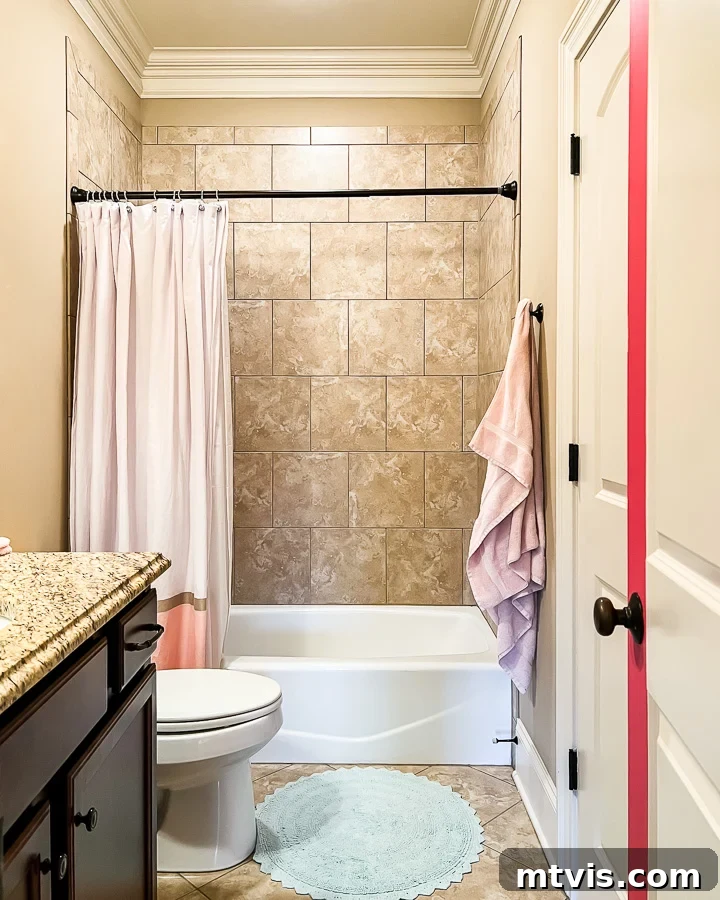
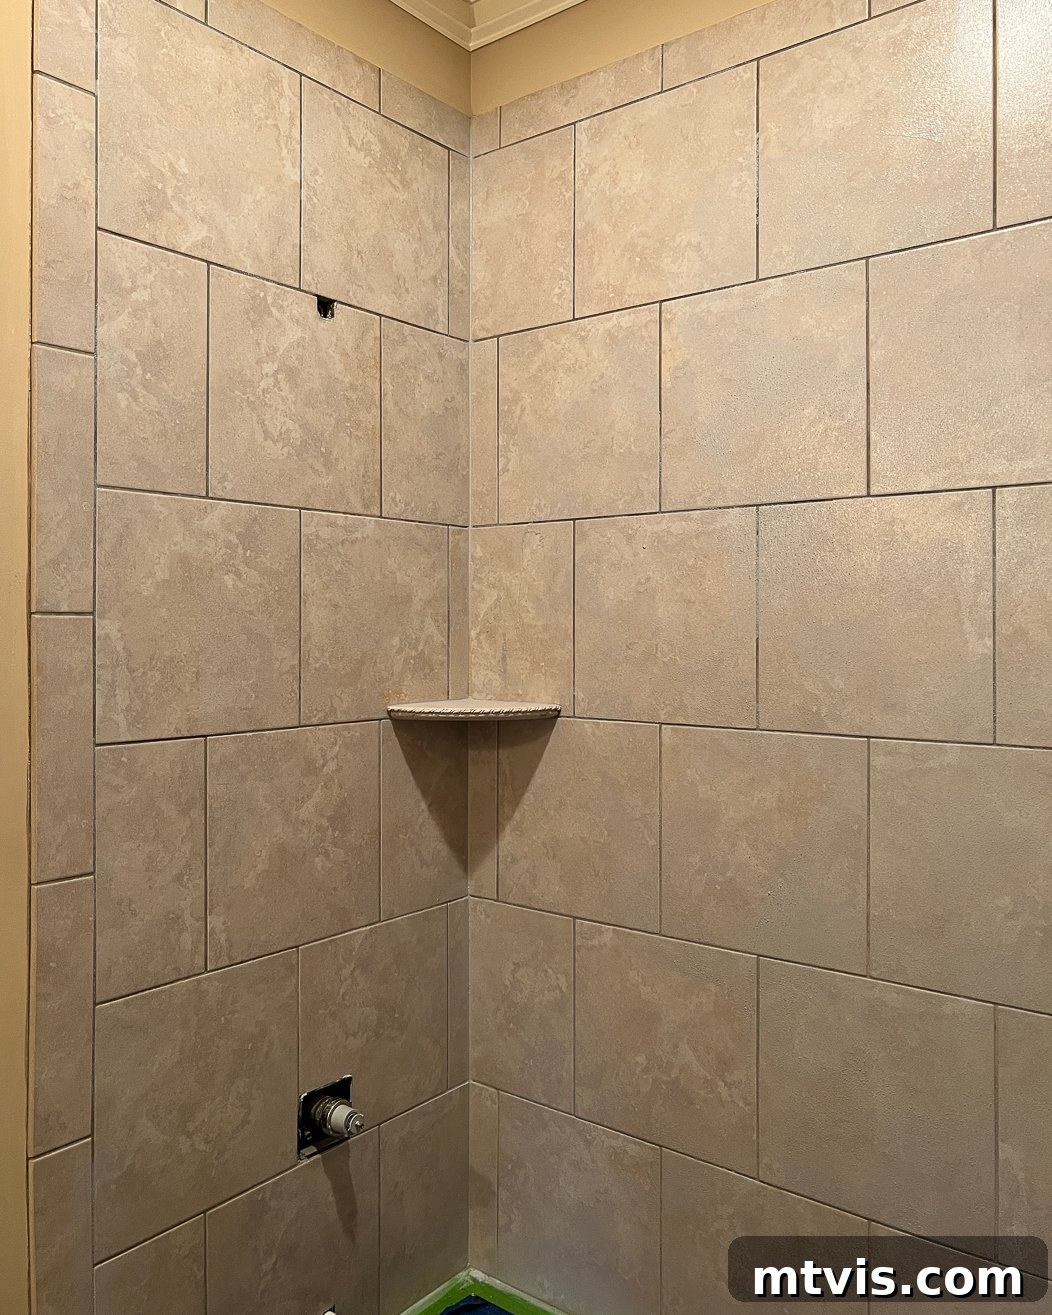
For example, we successfully installed new tile over the existing shower walls in our daughter’s tub/shower combo almost two years ago, and we remain delighted with the durability and appearance. This success was entirely dependent on the existing tiles being perfectly level and having no moisture concerns. Conversely, I would never consider this for our primary bathroom because its existing tiles are not perfectly level – a subtle flaw that would be significantly magnified by a new layer, leading to an aesthetically unpleasing result.
One area where I generally advise against tiling over existing tile is **flooring**. The double thickness created by an additional tile layer can lead to awkward, potentially unsafe, and aesthetically unappealing threshold transitions between rooms. It can also complicate door clearances, necessitating trimming the bottom of doors, and affect the height of baseboards or toilet flanges, making other installations more complex. While we did successfully install a floating vinyl tile floor over a ceramic tile floor in our laundry room, managing the additional thickness there was simpler due to a specific threshold design where the vinyl met hardwood. For updating tile floors, there are numerous other cost-effective flooring ideas I would explore first. For instance, in both of our daughters’ bathrooms, we revitalized the tile floors effortlessly with stylish tile stickers – a fantastic, temporary, and budget-friendly alternative that requires no demolition and no permanent change to floor height!
What Are the Cons of Tiling Over Tile? Understanding the Potential Drawbacks
While tiling over existing tiles offers undeniable appeal in terms of convenience and cost savings, it’s crucial to be aware of its potential drawbacks. A clear understanding of these cons will help you make an informed decision and prepare adequately for your project, ensuring you weigh the benefits against the risks.
- High Risk of Failure if Conditions Aren’t Met: This is by far the most significant disadvantage. If your existing tiles are not perfectly stable, firmly attached, or if the surface isn’t meticulously prepared with the correct bonding primer, the new tiles may not adhere properly. This can lead to loosening, cracking, or complete detachment of the new tile layer over time. The “quick fix” could transform into a much larger, more frustrating, and significantly more expensive problem than if you had simply removed the old tiles from the start. Improper adhesion often results in the need for full demolition of *both* layers, doubling the repair cost and effort.
- Increased Thickness and Height: Adding a new layer of tile, along with the necessary mortar, inherently increases the overall thickness of the tiled surface.
- On Floors: This added height can create an abrupt and potentially unsafe tripping hazard at transitions to adjacent rooms, often requiring specialized, wider, or taller thresholds or custom ramps. It can also reduce clearance for doors, necessitating trimming the bottom of doors, and affect the height of appliances or fixtures like toilet flanges, making their reinstallation more complex and potentially requiring extensions.
- On Walls: Increased thickness on walls can impact how trim pieces (like baseboards or crown molding) fit, make electrical outlets or light switches seem recessed (requiring box extenders), and demand adjustments to plumbing fixtures or shower doors to ensure proper fit and functionality. While usually negligible, it can also make a small room feel slightly more enclosed.
- Compromised Future Renovations: Should you or a future homeowner decide to undertake a full renovation and remove all the tiling, you’ll be faced with the laborious, dusty, and messy task of demolishing two layers of tile and mortar instead of just one. This significantly increases the time, effort, specialized tools, and disposal costs of future demolition projects.
- Added Weight to the Structure: While typically not a critical concern for a single layer of tile, adding a second layer of tile and mortar increases the static load on your subfloor or wall structure. While most modern building codes and robust structures can typically handle this additional weight, it’s a factor to consider, especially in older homes, multi-story buildings, or if there are already existing concerns about structural integrity. Always ensure your subfloor or wall can adequately support the combined weight of both tile layers and the setting materials.
- Potential for Unevenness or Blemishes to Show Through: Even with careful preparation, if the underlying tile has any subtle imperfections in its levelness or flatness that were missed during initial checks, these can be magnified and become more noticeable once a new layer is applied. Achieving a perfectly flat and flawless new surface relies heavily on the original substrate being perfectly true. Any existing deep grout lines might also require additional filling to prevent ghosting or impressions in the new tile layer.
By thoroughly weighing these potential drawbacks against the convenience and cost-saving benefits, you can make an educated and responsible decision about whether tiling over tile is the right choice for your specific renovation project and long-term home improvement goals.
Our Successful Tile-Over-Tile Project & Results
We enthusiastically embarked on the tile-over-tile method for the shower walls in our daughter’s bathroom, and we are absolutely thrilled with the enduring outcome. The installation was completed on November 21, 2021, and as of July 13, 2023, the tiles are holding up perfectly without any issues whatsoever. No cracks, no loosening, no moisture problems – truly flawless performance. This long-term, proven durability is precisely why I waited a considerable amount of time, nearly two years, before publishing this post. I wanted to ensure that our results were not merely a short-term success or initial enthusiasm, but a genuine testament to the durability and effectiveness of the method when executed correctly and meticulously. My confidence in recommending this approach stems directly from nearly two years of continuous, flawless performance in a high-moisture environment.
Essential Materials Needed for Tiling Over Tile
Beyond your standard tiling tools (which we’ll briefly cover), successfully tiling over existing smooth tile surfaces requires a few specialized products. A smooth, glazed tile surface is inherently poor for adhesion because it lacks the porous texture that traditional mortar relies on for a strong bond. Therefore, these specialized materials are critical to creating the necessary mechanical and chemical bond for your new tiles to adhere securely.
- ECO Prim Grip: This Multipurpose Bond-Promoting Primer is a non-negotiable item. It is specifically engineered to enhance the adhesion of thinset mortar to challenging, non-porous substrates, including existing glazed ceramics. Unlike regular primers, ECO Prim Grip contains a fine aggregate (like sand particles) that creates a rough, gritty, sand-like surface, providing the necessary “grip” and mechanical keying for your new mortar and tiles to bond securely.
- Application Tools: You’ll need a painter’s tray, a medium-nap roller for even application, and a disposable paintbrush for corners, edges, and tight spots. Due to the abrasive nature of the primer, these tools may be difficult to clean thoroughly and are often best considered disposable after use.
- Safety Gear: Always prioritize safety. Wear appropriate personal protective equipment, including chemical-resistant latex or nitrile gloves to protect your hands, safety glasses to shield your eyes, and potentially a respirator, especially if working in a poorly ventilated or confined space, to avoid inhaling fumes or fine particles.
In addition to the specialized primer, you will need to consider how to finish the edges of your new tile installation wherever it meets an adjoining surface. Since your new tile layer will have double the typical thickness, standard trim pieces may not suffice, and careful planning is required for a seamless and aesthetically pleasing transition.
- For Floor Installations: If you are installing tile over an existing tile floor, the increased height can be significant. You will need to find a robust and appropriately sized threshold or transition strip that can effectively manage the transition in height between the new, elevated tiled surface and the adjacent flooring (e.g., hardwood, carpet, or another tiled area). Look for transition strips designed for varying floor heights and thicknesses.
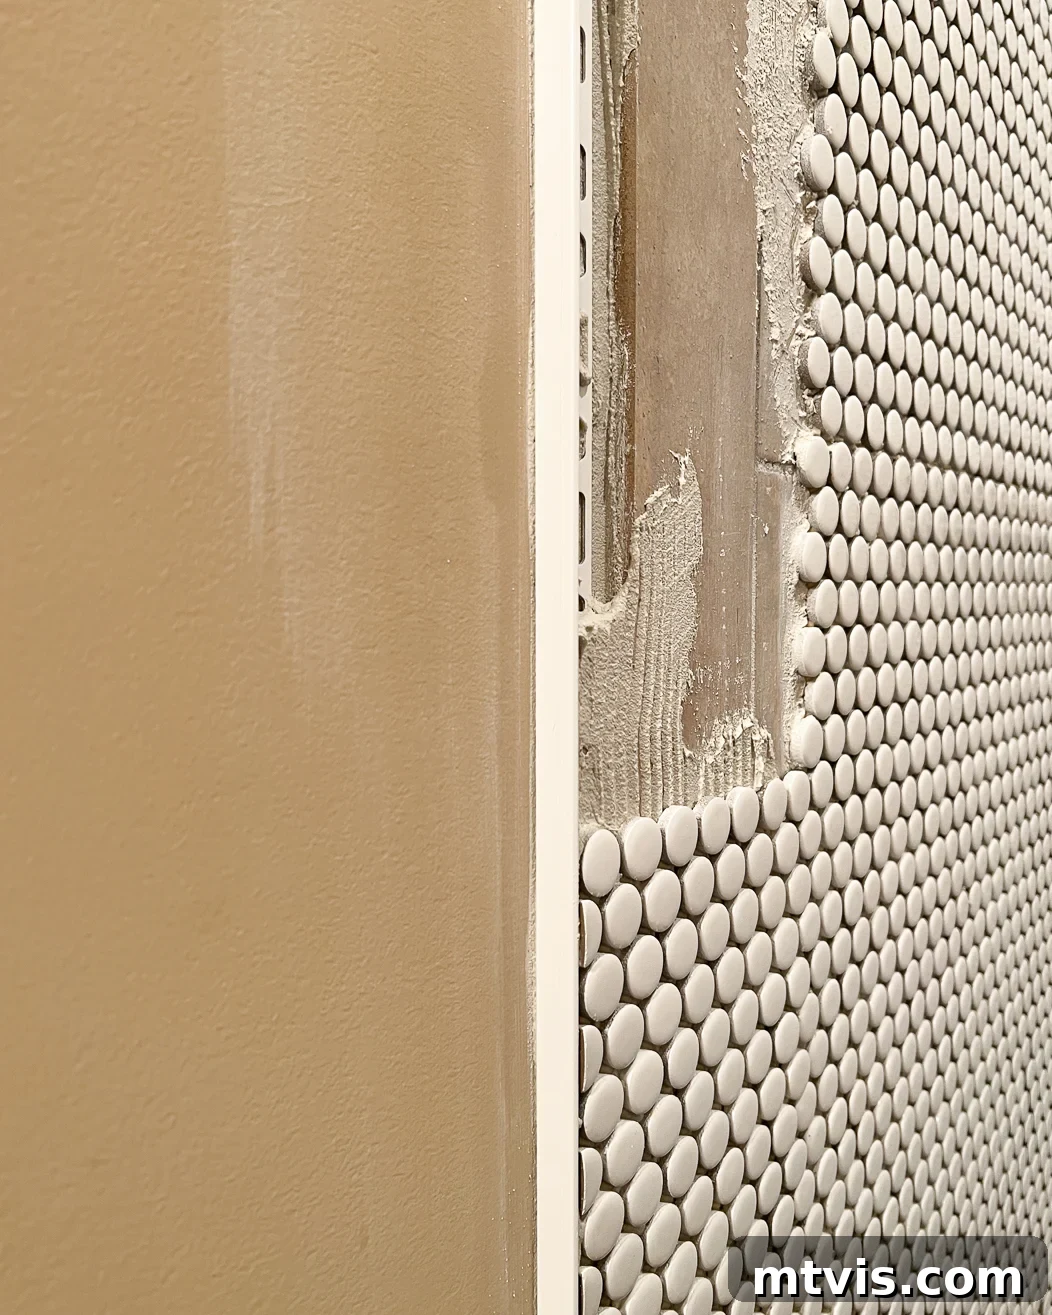
- For Wall Installations: For tiled walls, an edge trim (also known as tile trim or profile) is essential for a clean, professional, and finished appearance. You’ll need to carefully calculate the correct size to accommodate the combined thickness of your existing tile + approximately 1/8″ for the thinset mortar layer + the thickness of your new tile. For our project, a 1/2-inch size was ideal and created a perfect flush edge, but tile thickness varies widely, so always measure your specific materials carefully before purchasing.
We opted for a Schluter 1/2-inch edge trim. These are available in various colors and finishes to match your design aesthetic perfectly. We chose white for a seamless, clean blend with our new penny tiles, contributing to the overall bright and modern look.
General Tiling Tools You’ll Also Need:
Beyond the specialized bonding primer and edge trim, you’ll need standard tiling equipment to complete the job. Ensure all your tools are clean and in good working order before you begin:
- Thinset Mortar: Choose a high-quality, polymer-modified thinset mortar specifically recommended for your new tile type (e.g., porcelain, ceramic, natural stone) and for use with bond-promoting primers. This type of mortar offers superior adhesion and flexibility.
- Notched Trowel: Select the correct notch size for your new tiles. The size of the trowel’s notches (e.g., 1/4 inch square notch, 1/2 inch U-notch) depends on the size of your tiles and ensures proper mortar coverage.
- Grout: Opt for sanded grout for wider joints (1/8 inch or more) and unsanded grout for narrower joints. For wet areas like showers, consider a high-performance, stain-resistant, or epoxy grout for enhanced durability and waterproofing.
- Tile Cutter or Wet Saw: Essential for making precise, clean cuts to fit tiles around corners, fixtures, or to create custom sizes. A wet saw is highly recommended for porcelain and harder ceramic tiles for cleaner cuts and less breakage.
- Tile Spacers: Use these small plastic pieces to maintain consistent and uniform grout lines throughout your installation, ensuring a professional finish.
- Grout Float and Sponges: A rubber grout float is used to press grout into the joints, and large, clean sponges are essential for cleaning off excess grout and achieving smooth lines.
- Mixing Buckets and Drill with Paddle Mixer: For efficiently mixing thinset mortar and grout to the correct consistency, which is crucial for optimal performance.
- Measuring Tape, Pencil, Level, and Straightedge: These basic tools are indispensable for planning your tile layout, ensuring straight lines, and checking for level and plumb surfaces.
- Caulk Gun and Silicone Caulk: A high-quality, mildew-resistant silicone caulk is vital for sealing all changes of plane (corners, where tile meets tub/shower pan, around fixtures) to create a waterproof and flexible seal.
How to Tile Over Existing Tile: A Step-by-Step Tutorial
This tutorial will guide you through the precise process of tiling over existing tile on shower/tub walls, drawing from our successful personal experience. Please note: While a short video overview might typically be embedded here for visual aid, for the sake of clarity and to strictly adhere to the instruction of removing JavaScript, we will focus solely on detailed written steps. For a visual reference, you might seek out reputable contractor tutorials on platforms like YouTube, always keeping our specific primer and critical waterproofing notes in mind.
Time needed: 2 days (allowing ample drying and curing times)
This comprehensive guide focuses on tiling over existing tile on shower/tub walls. We generally followed a highly reputable contractor’s tutorial. However, a crucial divergence was our decision *not* to apply a separate waterproofing membrane, as the contractor suggests. Our research, and advice from other professionals, indicated that such a membrane might potentially interfere with the specialized bonding primer’s adhesion properties, or create an unnecessary layer if the substrate is already properly sealed. The contractor’s primary recommendation for a membrane is to provide a secondary moisture barrier from existing hidden moisture. Since we meticulously checked and confirmed absolutely no moisture behind our existing tiles using a moisture meter, we confidently omitted this step. This decision was only made after absolute certainty of a dry, stable substrate. If any moisture had been detected, we would have immediately opted for full tile removal and complete substrate repair rather than attempting to tile over, as preventing future moisture issues is paramount.
-
Step 1: Meticulously Prep the Area.
Thorough preparation is not just important; it is absolutely paramount for the long-term success and longevity of your new tile installation. Begin by deep cleaning your existing tiles. We used Trisodium Phosphate (TSP), a heavy-duty degreaser and cleaner, to strip away all traces of soap scum, grime, mildew, and grease. Ensure the entire surface is impeccably clean, completely dry, and free of any dust or debris. Once clean, meticulously mask off and protect any areas you don’t want primer, mortar, or grout to get on, such as your bathtub, shower pan, faucets, shower valves, and surrounding untiled walls. Use plastic sheeting, high-quality painter’s tape, and plastic tarps to cover these surfaces comprehensively. This step, while seemingly tedious, saves immense cleanup effort later and protects your fixtures from accidental damage or staining.
-
Step 2: Apply the Bonding Primer.
Now it’s time for the critical specialized product: the ECO Prim Grip. Shake the container well before use to ensure the aggregate is evenly distributed. Pour a reasonable amount into your painter’s tray. Using a medium-nap roller, apply a thin, even coat of the primer across the entire existing tile surface. For areas inaccessible by the roller, such as tight corners, edges near fixtures, or intricate details, use a disposable paintbrush. This product has a fairly thin consistency, so work carefully to avoid drips and protect surrounding masked areas. Allow the primer to dry completely according to the manufacturer’s instructions, which typically takes several hours (often 1-3 hours, but verify the specific product’s recommendations). You’ll notice it dries to a slightly grayish, translucent haze. Don’t be fooled by its appearance; the magic happens when you run your hand over the dried surface – it will feel distinctly gritty, much like fine sandpaper. This grit is precisely what creates the mechanical bond for your new thinset mortar and ensures strong, reliable adhesion, capable of supporting the additional weight of the new tiles. Adequate ventilation is strongly recommended during and after application to facilitate drying and dissipate any fumes.

-
Step 3: Cut and Install Your Edge Trim (if applicable).
The installation sequence for edge trim can vary slightly depending on your tile type and desired aesthetic. In most cases, especially when working with straight-edged, square, or rectangular tiles, it’s advisable to install your tile edge trim (like the Schluter trim) at this stage. You would then begin tiling by butting the edge of your first tile row directly against the trim and working outwards into the corner. This approach ensures a perfectly straight, clean, and finished edge from the outset, providing a clear starting line for your tiling. Carefully measure and cut your trim pieces to length, using a hacksaw or miter saw with a fine-tooth blade, then set them in a thin bed of mortar.
However, for our specific project with small, round penny tiles, we had a particular aesthetic in mind for how they met in the corners and how the pattern would flow. Therefore, we chose to reverse the typical order: we worked our tile installation from the corner outwards and installed the edge trim only when we were ready to tile up to it. This alternative method worked perfectly for our specific tile type and desired look, allowing for greater flexibility in pattern alignment. But for typical square or rectangular tiles, the former approach (installing trim first) is generally more straightforward for achieving crisp, professional lines.
-
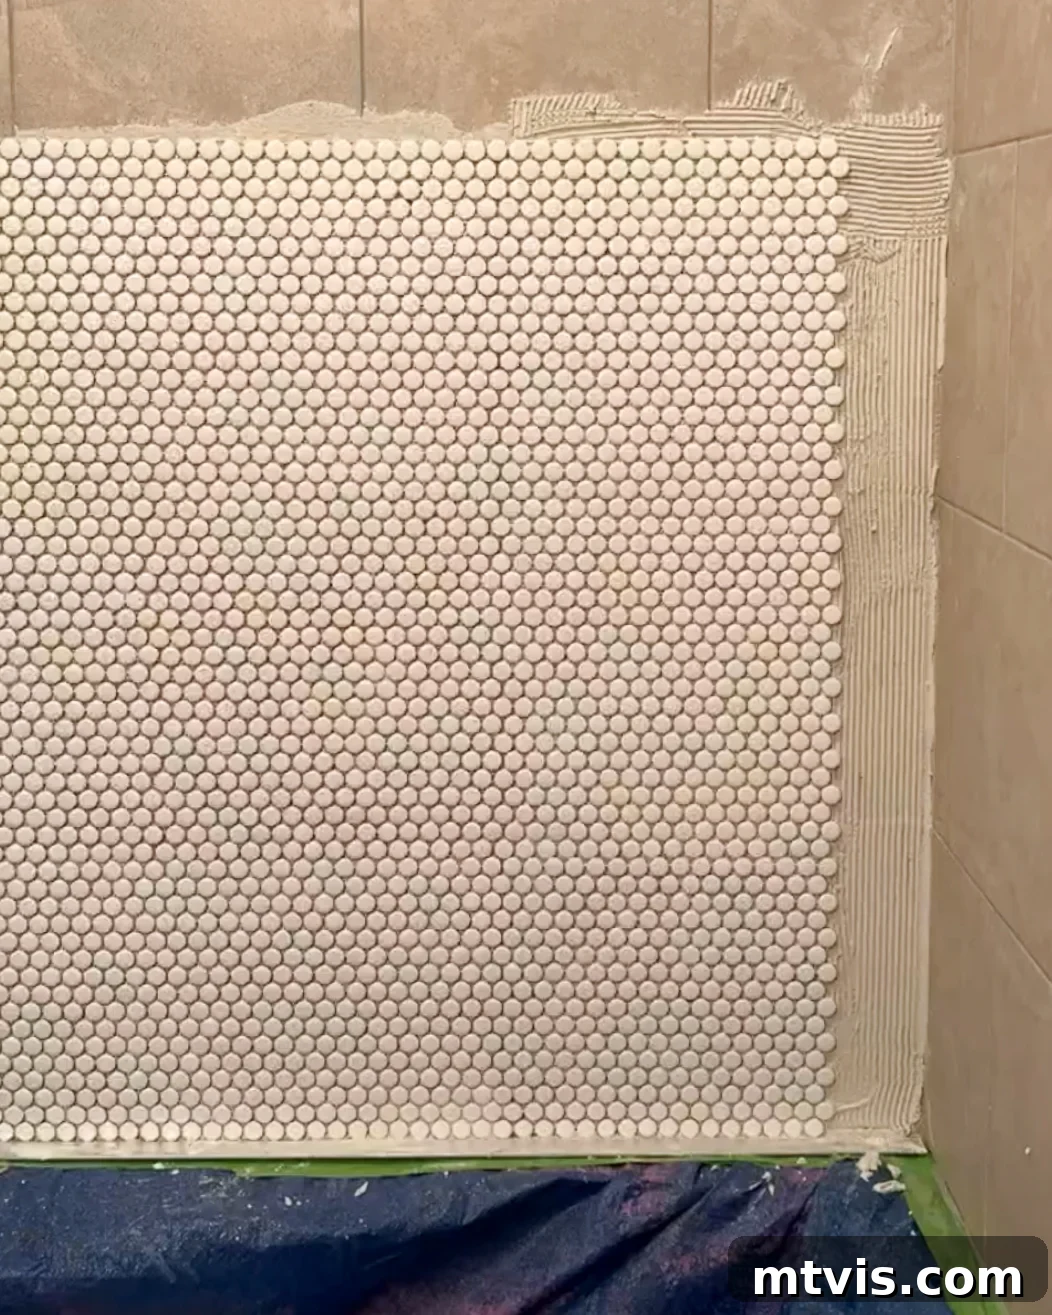
Step 4: Install Your New Tile and Grout.
With the bonding primer fully cured and edge trim either in place or planned for, you can now proceed with standard tile installation techniques. This part of the process is similar to any other tiling job, but always remember the importance of proper coverage. Mix your chosen polymer-modified thinset mortar according to the manufacturer’s instructions, ensuring a smooth, lump-free consistency. Apply the mortar to the wall using your appropriately notched trowel, spreading it evenly. For maximum adhesion and to prevent hollow spots, we highly recommend “back-buttering” each individual tile or tile sheet with a thin layer of mortar before pressing it onto the wall. Press each tile firmly into place with a slight twisting motion, using tile spacers to maintain consistent and uniform grout lines. Periodically check for levelness and plumbness with your level and make adjustments as needed before the mortar sets. Once all tiles are installed, allow the mortar to cure completely (typically 24-48 hours, depending on ambient conditions and product specifications) before moving on to grouting. Mix your chosen grout, apply it with a rubber grout float, ensuring all joints are thoroughly filled. Clean off excess grout from the tile faces with a damp sponge, working diagonally across the tiles, and buff away any remaining haze once dry to prevent stubborn grout film.
-
Step 5: Caulk All Seams and Joints.
The final, crucial step for any tile installation, particularly in wet areas like showers or around bathtubs, is proper caulking. This step ensures a waterproof and aesthetically pleasing finish. After your grout has fully cured (check manufacturer’s recommendations, usually 24-72 hours), apply a high-quality, mildew-resistant silicone caulk to all “changes of plane.” This includes where the tiled wall meets the bathtub or shower pan, in all inside corners where two tiled walls meet, and along the perimeter of your edge trim where it meets the untiled wall. Caulking provides a flexible, waterproof seal that grout alone cannot offer, preventing water infiltration, which can lead to mold growth and potential damage to the underlying structure. Use a steady hand and a caulk tool or your finger to create a smooth, clean bead. If you need a refresher on the technique, our tutorial on how to caulk a bathtub can provide detailed guidance for achieving a flawless, professional seal.
There you have it! When the conditions are meticulously assessed and proven right, tiling over existing tile offers an incredibly efficient, less disruptive, and rewarding path to a beautifully refreshed space, completely bypassing the mess and expense of traditional demolition. We hope this comprehensive guide has equipped you with the thorough knowledge to confidently assess whether this method is suitable for your specific project and provided a clear roadmap for successful execution. Enjoy your newly transformed space!
Explore More BATHROOM IDEAS
SEE ALL BATHROOM POSTS
Here are some additional resources from our blog to inspire your next bathroom project and help you navigate various renovation challenges, offering creative and budget-friendly ideas:
-
Tips for a Budget Bathroom Makeover + Attley’s Bathroom Reveal
-
Charming Bathroom Signs for Your Doors & Walls
-
25 Ingenious Powder Room Concepts
-
Tiling Over Existing Tile: What You NEED To Know
-
15+ DIY Bathroom Remodel Ideas to Save You Money
-
Everything You Need to Know About Tile Stickers
Are you looking for a structured, step-by-step approach to decorating and transforming rooms in your home, ensuring every decision is cohesive and purposeful? Discover the power of Designer in a Binder®. This simple, affordable method helps you plan and execute your design visions with confidence, ensuring a cohesive and beautifully styled result tailored to your unique taste.
For exclusive content, behind-the-scenes glimpses into our latest projects, and early access to invaluable design tips and DIY inspiration, don’t forget to subscribe to our newsletter before you leave! Join our community and never miss an update on how to make your home beautiful and functional.