
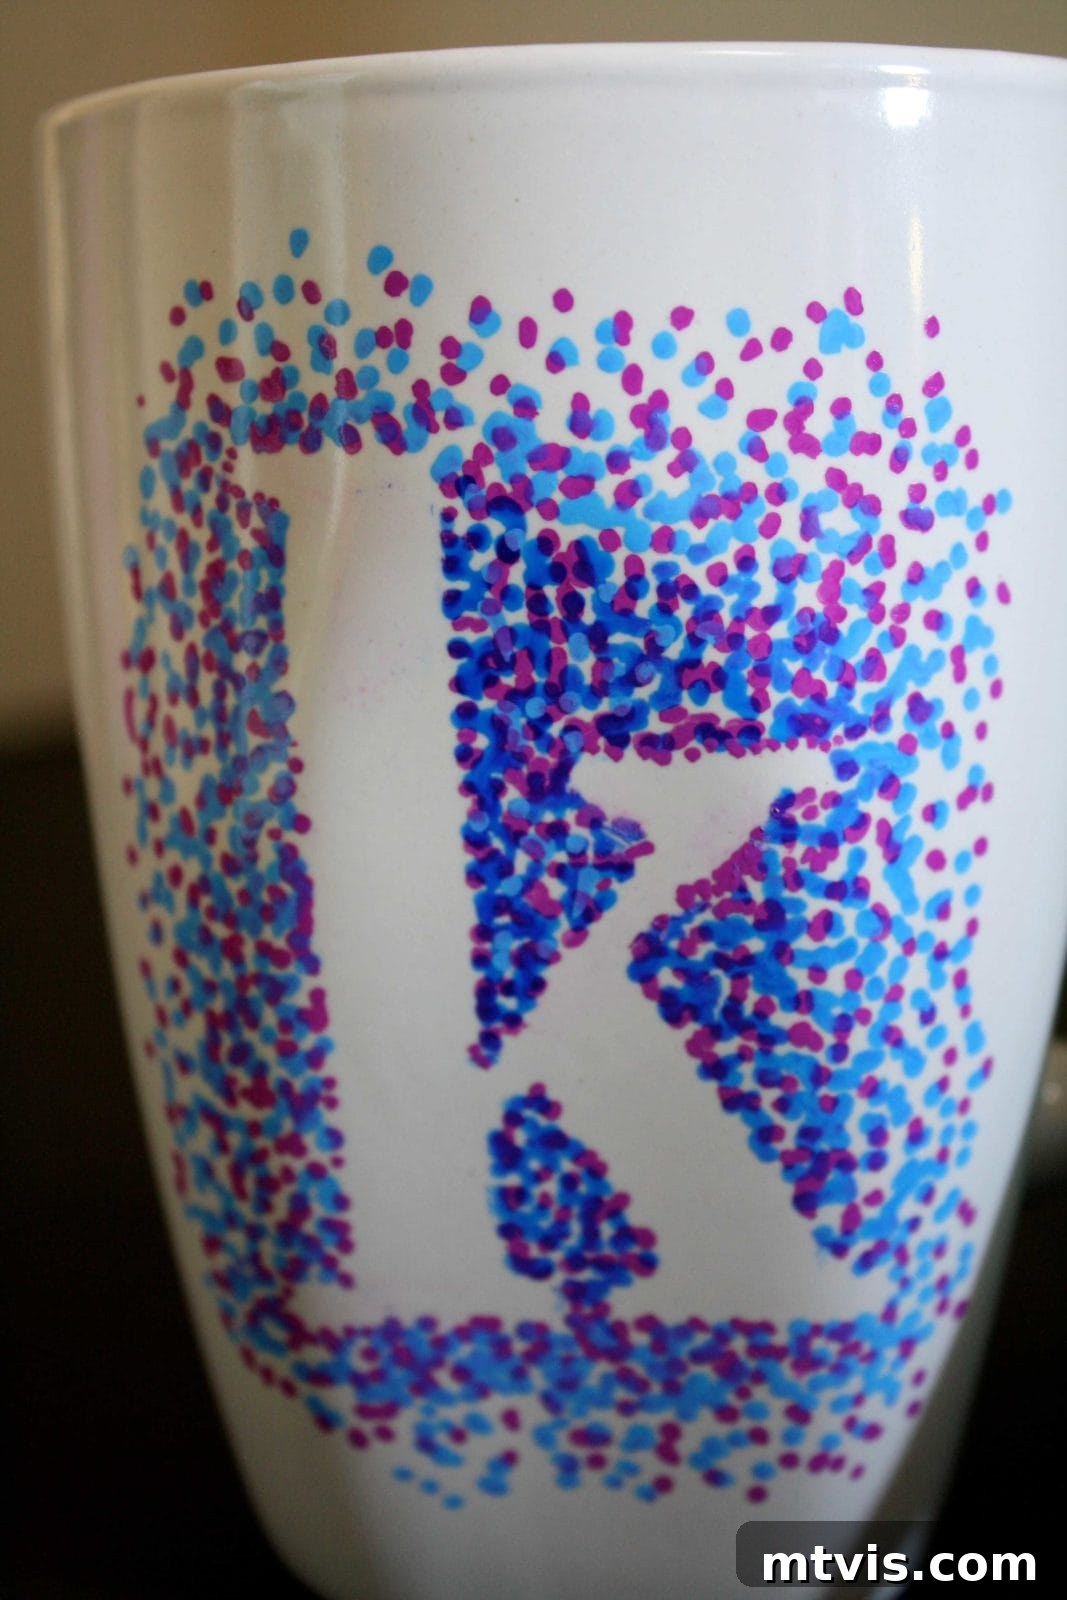

How to Make Dishwasher Safe Sharpie Mugs: A Creative Guide to Personalized Gifts
There’s something incredibly rewarding about giving a handmade gift, especially when it’s both beautiful and practical. If you’re searching for a thoughtful, unique present that truly stands out, look no further than personalized DIY Sharpie mugs. Whether it’s for Teacher Appreciation Week, holidays, birthdays, or just to show someone you care, these dotted Sharpie mugs are an absolute delight to create and receive. The best part? They are genuinely dishwasher safe, ensuring your heartfelt creation withstands daily use and washing.
This year, as Teacher Appreciation Week approached, my heart was set on crafting something truly special for my twin girls’ preschool teachers. Ms. J and Ms. K are not just educators; they are passionate mentors who have profoundly impacted my daughters’ learning and development. Their dedication to creating an engaging and fun learning environment is truly remarkable, and I wanted to express our gratitude with a gift that reflected their unique commitment.
My girls, Attley and Avery, adore their preschool days and have absorbed an incredible amount of knowledge. For instance, after a unit on penguins in February, Avery excitedly recounted a myriad of facts about these fascinating creatures during a snowy morning. She shared how penguins live in the snow, hatch babies from eggs, and ingeniously balance those eggs on their feet! I was genuinely impressed by her retention, and when I mentioned it to Ms. J, she explained they had practiced balancing eggs on their feet during the lesson. This small detail perfectly encapsulates their approach: making learning experiential and memorable. It’s a testament to their innovative teaching methods and why these teachers deserve an extra special token of appreciation.
The inspiration for these custom mugs came to me after creating some fun dotted Easter eggs, a project that was both easy and incredibly satisfying. The dotting method, which I initially saw applied to mugs, immediately sparked an idea. Knowing I wanted to make something personalized for Ms. J and Ms. K, these easy dotted Sharpie mugs were the perfect fit. After a quick chat to discover their favorite colors, I eagerly gathered my supplies and got to work! This post contains some affiliate links for your convenience. Click here to read my full disclosure policy.
Essential Materials for Your Dishwasher Safe Sharpie Mugs
Creating durable, dishwasher-safe Sharpie mugs requires a few specific items to ensure your design lasts. Here’s a breakdown of what you’ll need:
- Plain White Mugs: Opt for smooth, ceramic mugs without any ridges or textures. White provides the perfect canvas for your colorful dots, making your design pop.
- Oil-Based Sharpie Paint Pens: This is the most crucial ingredient for making your mugs dishwasher safe! Unlike regular Sharpies, oil-based paint pens contain actual paint, which cures beautifully in the oven, bonding permanently to the ceramic surface. Fine point pens offer excellent control for detailed dotting.
- Craft Stickers: These are fantastic for creating clean, defined shapes or initials. Choose vinyl stickers for easy removal without leaving residue. You can also use stencils or even masking tape to create custom designs.
- A Working Oven: Essential for baking and curing the paint, which is key to making your design permanent and dishwasher safe.
- Nail Polish Remover and Q-tips: Don’t fear mistakes! This duo is your best friend for easily wiping away any errant dots or smudges before baking.
Crafting Your Dotted Sharpie Mugs: Step-by-Step Instructions
Ready to transform a simple mug into a work of art? Follow these easy steps to create your custom dotted Sharpie mugs:
Step 1: Prepare Your Mug and Place Your Sticker
First, ensure your mug is sparkling clean and completely dry. Any dust or grease can prevent the paint from adhering properly. Wash it with soap and water, then dry thoroughly or wipe with rubbing alcohol for a pristine surface.
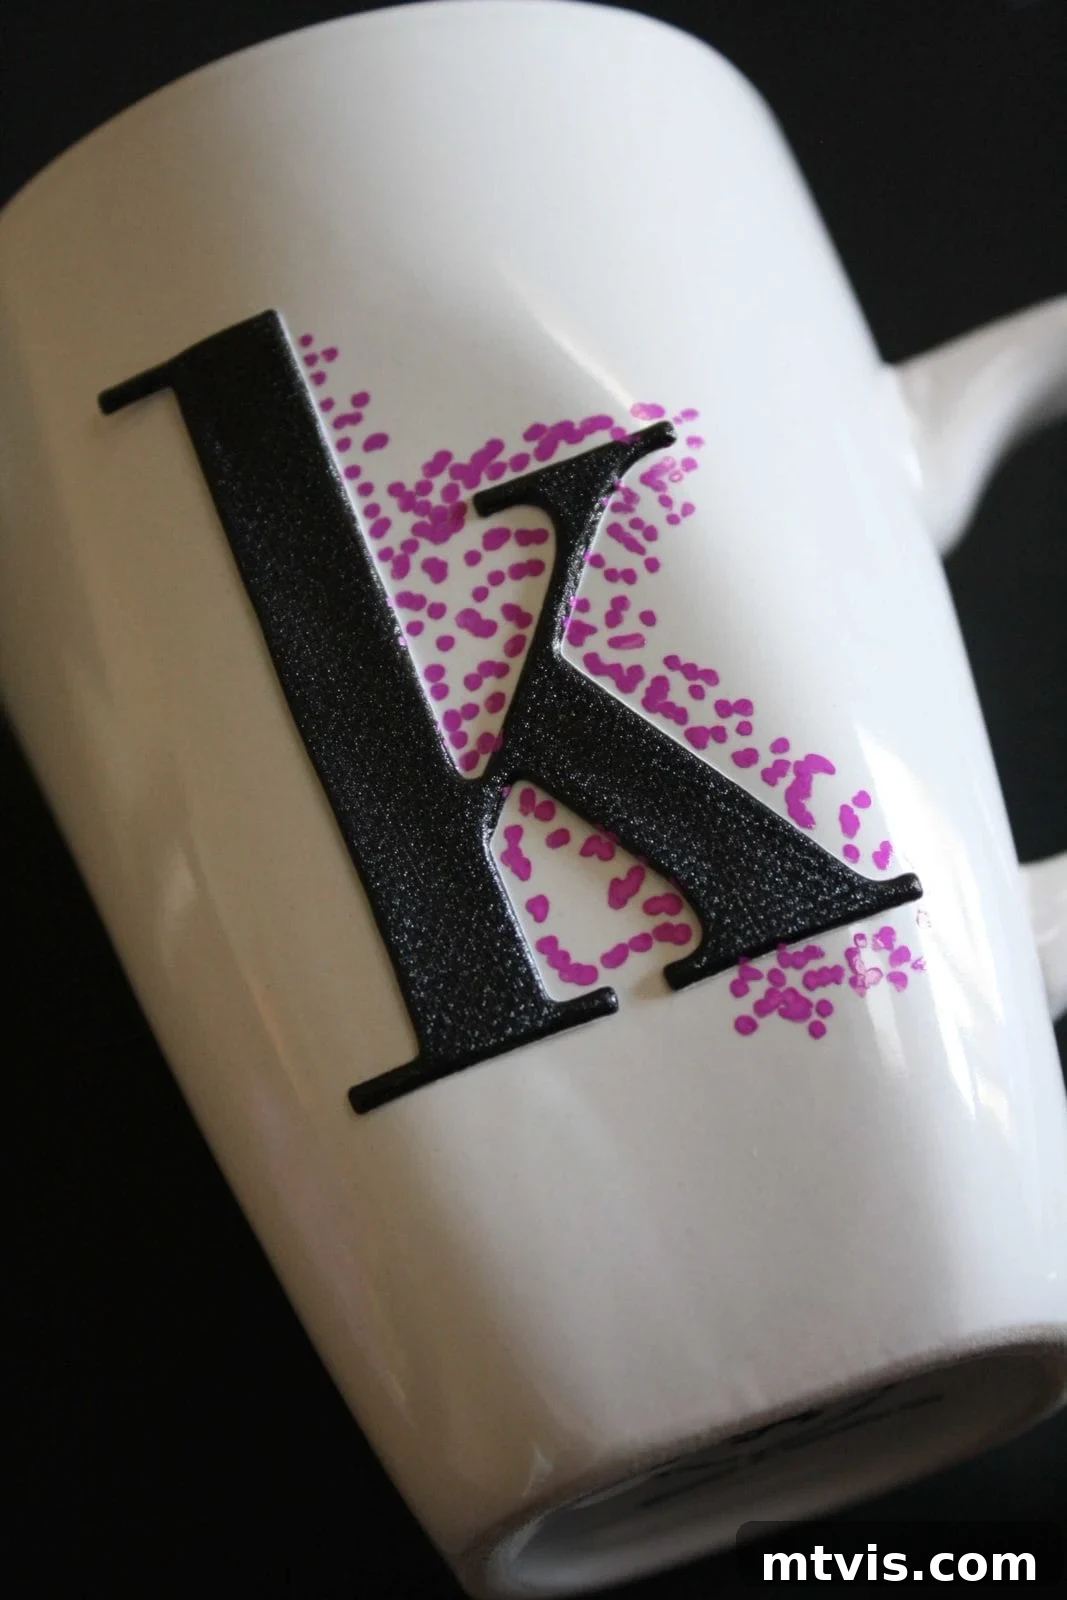
Next, carefully place your chosen craft sticker onto the mug. This sticker will act as a resist, creating a blank space for your design. Press down firmly to ensure there are no air bubbles or lifted edges, especially around the perimeter where you’ll be dotting. You can place the sticker anywhere you like – centered, off-center, or wrapped around a curve.
Step 2: Begin Dotting with Oil-Based Sharpie Pens
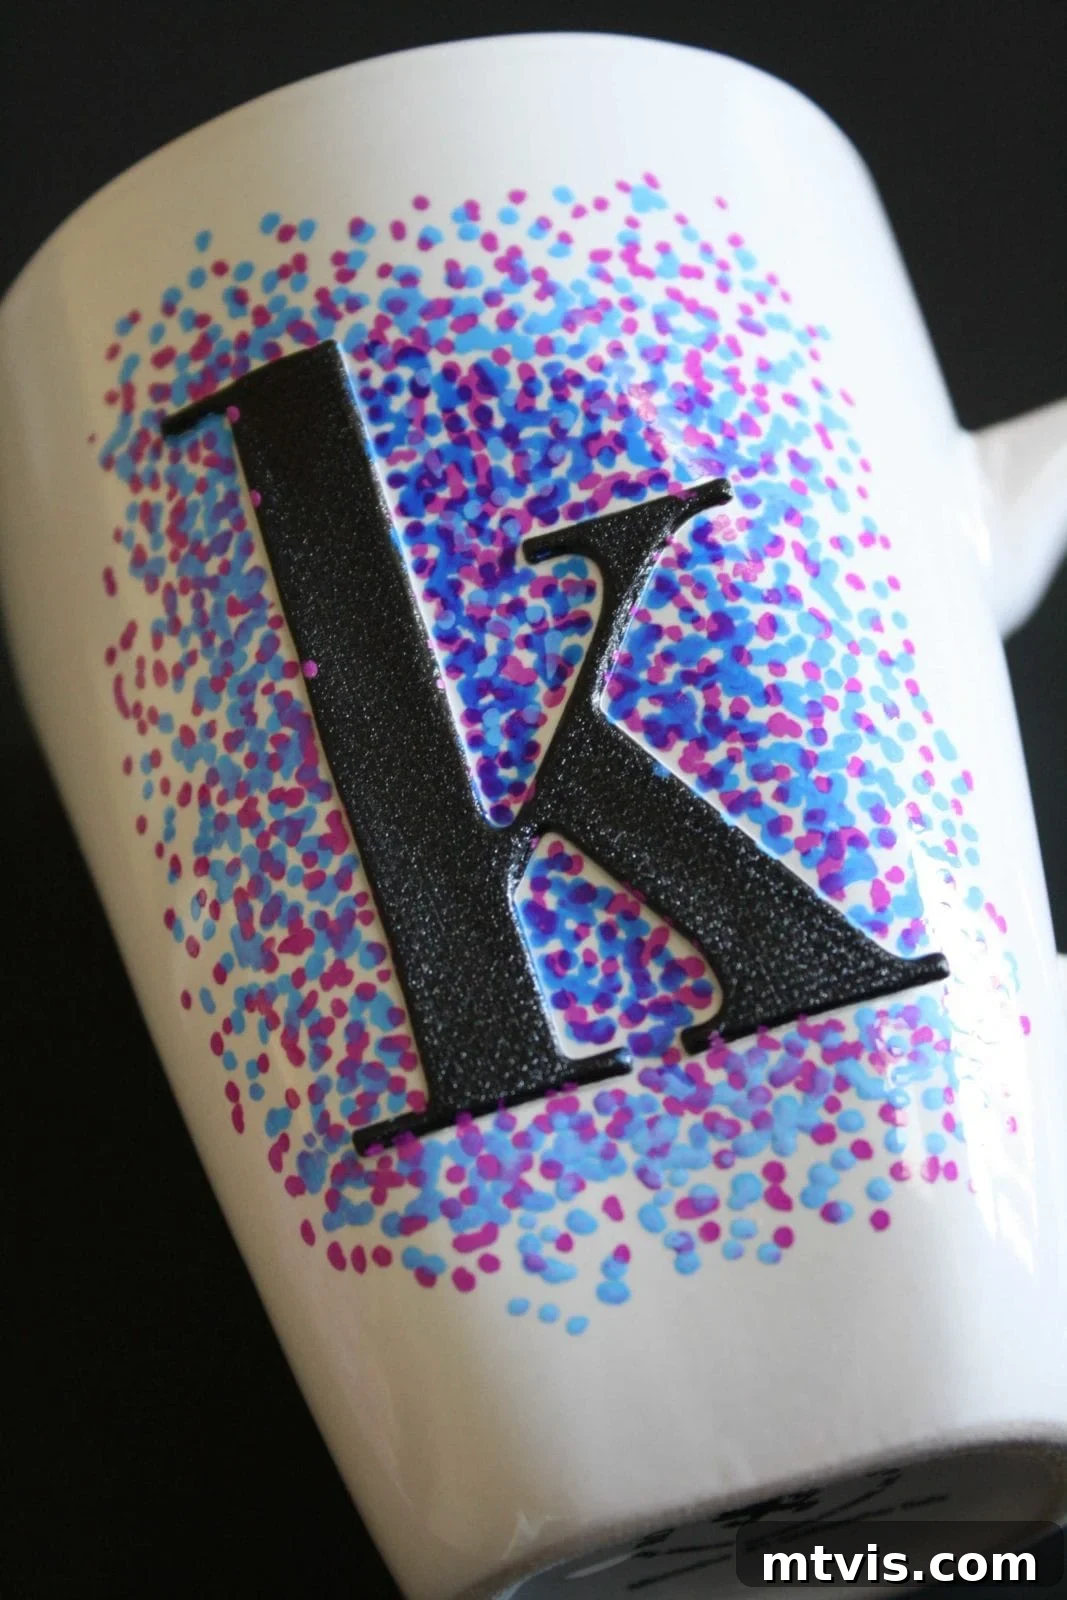
Now for the fun part! Using an oil-based Sharpie paint pen in your preferred color, begin making dots around the edge of your sticker. Start by heavily concentrating your dots directly along the sticker’s perimeter. This creates a dense, vibrant border.
As you work your way outward from the sticker, gradually lessen the concentration of your dots. This technique creates a beautiful fading effect, giving your design depth and dimension. You can use a single color for a monochromatic look or introduce multiple colors for a more playful, gradient effect. Don’t be afraid to experiment with different dot sizes by varying the pressure you apply to the pen.
Step 3: Allow Paint to Dry Thoroughly
Patience is key at this stage. Once you’ve completed your dotting, allow ample time for the oil-based paint to dry. This typically takes several hours, or even overnight, depending on the thickness of your paint application and humidity. Resist the urge to touch the dots before they are completely dry, as smudges can be difficult to fix without affecting the surrounding design.
Step 4: Peel Off the Sticker and Correct Any Mistakes
Once the paint is completely dry, carefully and slowly peel off your craft sticker. You’ll reveal a clean, unpainted shape or initial, beautifully framed by your dots. If you notice any small mistakes, such as a stray dot or a smudged edge, simply dip a Q-tip in nail polish remover and gently wipe away the unwanted paint. This method allows for precise corrections without damaging the rest of your design.
Step 5: Bake Your Mugs to Make Them Dishwasher Safe
This is the magical step that transforms your artistic creation into a durable, dishwasher-safe item. Preheat your oven to 350 degrees Fahrenheit (175 degrees Celsius).
Once the oven has reached the desired temperature, carefully place your mugs inside. Bake them for 30 minutes. The heat from the oven cures the oil-based paint, bonding it permanently to the ceramic surface of the mug.
After 30 minutes, turn off the oven but leave the mugs inside. Allow them to cool down completely with the oven. This gradual cooling process is crucial to prevent thermal shock, which could potentially crack the ceramic or affect the paint’s adhesion. Only remove the mugs when they are cool enough to handle.
THAT’S IT! Your personalized, dishwasher-safe dotted Sharpie mugs are now complete and ready to bring joy! Aren’t they absolutely adorable and fun to make?
Pro Tip: Ensuring Long-Term Durability
While these mugs are dishwasher safe, for maximum longevity, consider washing them on the top rack of your dishwasher or hand-washing them gently with a non-abrasive sponge. Avoid harsh scrubbing or soaking, especially right after baking. The oil-based paint, when properly cured, is incredibly resilient, but a little extra care will keep your handmade masterpiece looking vibrant for years to come.
Beyond Initials: Creative Design Variations
The beauty of the dotted Sharpie mug technique lies in its versatility. While initials make for fantastic personalized gifts, don’t limit your imagination! Here are a few ideas to spark your creativity:
- Shapes & Silhouettes: Use stickers of hearts, stars, animals, or even intricate mandalas.
- Quotes & Phrases: Print out a favorite quote in a bold font, carefully cut it out, and use it as a stencil or guide for dotting around the text.
- Abstract Patterns: Skip the sticker entirely and freehand abstract dot patterns, stripes, or waves. Varying dot sizes and colors can create stunning effects.
- Ombre & Gradient Effects: Start with a dark color at the bottom and gradually lighten the shade or switch to a complementary color as you move up the mug.
- Seasonal Themes: Create holiday-themed mugs with festive colors and stickers (e.g., pumpkins for fall, snowflakes for winter, flowers for spring).
Troubleshooting & FAQs
Even the simplest crafts can have questions. Here are some common queries and tips:
- Can I use regular Sharpies? No, absolutely not for dishwasher-safe results. Regular Sharpies are dye-based inks, not oil-based paints, and will wash off almost immediately. Only use oil-based paint pens.
- What if my dots smudge while drying? If the paint isn’t fully dry, you can use nail polish remover on a Q-tip to clean it up. If it’s only slightly smudged, sometimes baking will help set it, but for best results, clean and re-dot.
- Are the mugs food safe? Yes, the cured oil-based paint is food-safe. However, it’s generally recommended to keep painted designs off the lip of the mug where it will come into direct contact with food or drink.
- Can kids help with this project? Absolutely! With adult supervision, children can have a blast placing stickers and making dots. It’s a fantastic way to encourage creativity.
- How long will the design last? With proper baking and care, your Sharpie mug design can last for many years, even with regular use and washing.
Enhance Your Gift with a Heartfelt Printable
To accompany the dotted mugs, I also designed a special printable gift tag for Teacher Appreciation Week. At age three, it’s fascinating to observe how our girls are independently beginning to use deductive reasoning – in other words, “connecting the dots” in their learning journey. This phrase seemed perfectly fitting for a gift tag, acknowledging how much their teachers contribute to helping them make those crucial connections.

You can easily save this image to your computer by right-clicking on it and choosing “Save image as…”
For my mugs, I printed the tag on plain, white 8.5 x 11-inch printer paper, scaling it to print nine tags per page. This yielded a perfect small, square size to attach to the mug handles with a ribbon. I then cut out each tag with scissors and glued it to a piece of scrapbook paper. This simple addition provided extra rigidity and a pop of complementary color, making the gift even more visually appealing and polished.
I absolutely adore these handmade mugs and sincerely hope Ms. K and Ms. J will love them just as much. There’s a special joy in knowing my girls will proudly present these one-of-a-kind gifts, made with love and a sprinkle of dots!

Share Your Creations!
What are your thoughts on these charming dotted Sharpie mugs? Will you be making them for the special teachers, friends, or family members in your life? I’d love to hear about the color combinations and personalized touches you plan to use. Don’t forget, if you want to save this fun and easy project for later, go ahead and pin it to your favorite crafting or gift idea board for easy reference!
If you enjoyed this project, you might also be interested in my DIY His & Hers Mugs for another creative Sharpie mug idea!