
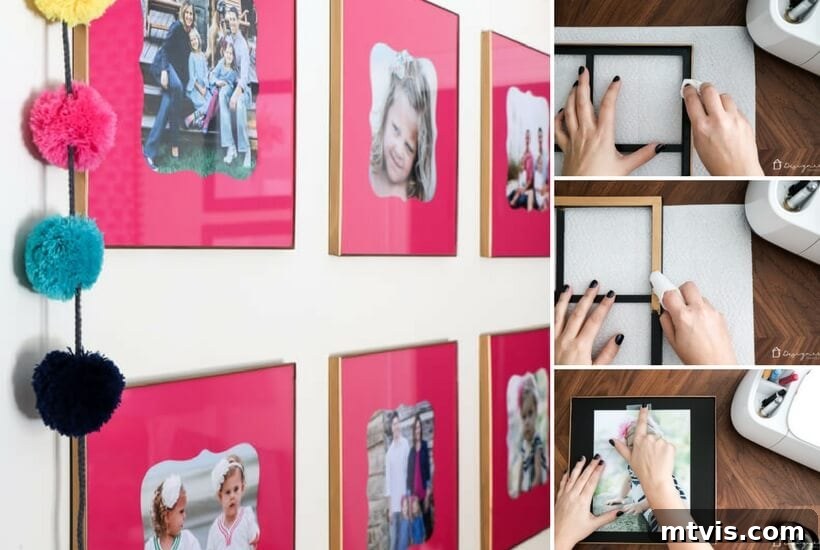
DIY Gold Frames: Achieve a High-End Look on a Budget
Gold frames are undeniably a sensation in home décor right now, gracing everything from minimalist modern spaces to richly traditional interiors. Their elegant sheen and timeless appeal can instantly elevate a room’s aesthetic. However, acquiring these coveted pieces can quickly become an expensive endeavor, with even “affordable” options often carrying a hefty price tag. But what if we told you that achieving this chic look doesn’t require breaking the bank? Get ready to unlock the secret to creating your own gorgeous, semi-DIY gold frames that are virtually indistinguishable from their pricey counterparts, all on a tiny budget.
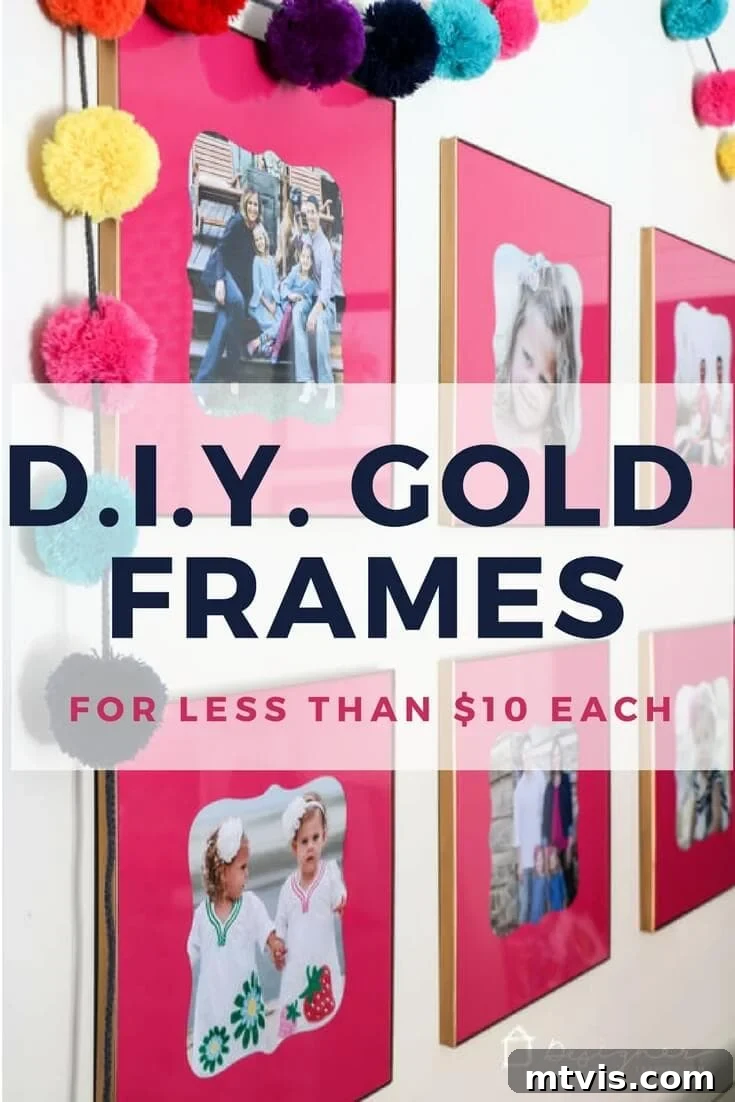
Hi friends! It’s not every day that a specific tutorial request lands in my inbox repeatedly, but after showcasing the DIY photo mats I crafted for Attley’s room, my inbox was flooded with questions. Everyone wanted to know where I sourced those stunning frames. When I revealed they were, in fact, store-bought frames given a transformative makeover, the clamor for a tutorial became undeniable. So, I prioritized getting this guide out to you as quickly as possible! Dive in to learn how you can craft these semi-DIY gold frames and infuse your space with a touch of luxury without the exorbitant cost.
This post contains some affiliate links for your convenience (which means if you make a purchase after clicking a link I will earn a small commission but it won’t cost you a penny more)! Click here to read my full disclosure policy.
Why Choose a Semi-DIY Approach for Gold Frames?
The allure of gold frames is undeniable, but their market price can be a significant barrier for many budget-conscious decorators. This semi-DIY method offers a fantastic solution, allowing you to bypass the high cost while still achieving a premium look. By opting for inexpensive plastic frames and transforming them with a simple technique, you gain several advantages:
- Significant Cost Savings: As you’ll see, the difference in price between buying pre-made gold frames and making your own is astounding.
- Customization: You’re not limited by the styles or sizes available in stores. Pick any basic frame, and give it the Midas touch!
- Durability: The chosen product, Rub ‘N Buff, is incredibly durable, offering a finish that withstands handling far better than many spray paints.
- Instant Gratification: With quick drying times, you can complete your project and display your new frames almost immediately.
- Eco-Friendly Option: Reimagining existing or inexpensive items reduces waste and gives them a new lease on life.
This project is perfect for beginners and seasoned DIY enthusiasts alike, promising stunning results with minimal effort and investment. Prepare to impress your friends and family with your crafty skills!
Semi-DIY Gold Frames Tutorial: Your Step-by-Step Guide
Materials Needed for Your Gold Frame Transformation:
Gathering your materials is the first exciting step in any DIY project. For this golden transformation, you’ll need just a few key items. The beauty of this project lies in its simplicity and the minimal specialized supplies required.
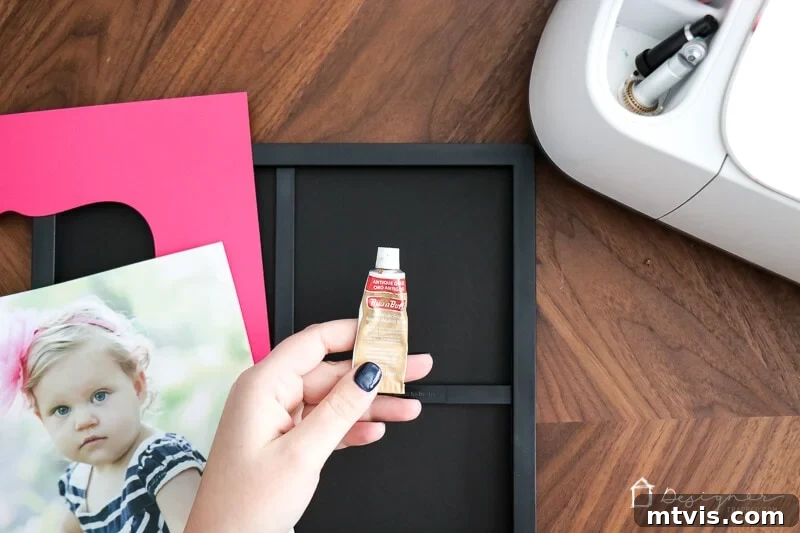
- These affordable frames (I personally opted for the 6-pack to get started and supplemented with 2 individual frames – you can purchase individual frames here). Look for basic, square plastic frames that are typically black or dark-colored, as these provide an excellent base for the gold finish. Their smooth surface makes the application process incredibly easy.
- Rub ‘N Buff in Antique Gold. This is the star of our show! Rub ‘N Buff is a unique wax metallic finish that truly works wonders. It’s incredibly concentrated, meaning a small tube goes a very long way. We used less than one tube to transform eight frames, demonstrating its impressive coverage and cost-effectiveness.
- Paper towels or a soft, lint-free cloth. These will be essential for applying and buffing the Rub ‘N Buff, ensuring an even and radiant finish.
- Gloves (optional but recommended): While Rub ‘N Buff isn’t overly messy, wearing gloves can help keep your hands clean during the application process.
- A protected work surface: Lay down some newspaper or an old sheet to protect your table or floor from any stray product.
Once you have these items assembled, you’re ready to embark on your frame transformation journey!
Detailed Steps to Create Your Luxe Gold Frames:
If you’d like a video overview of this project, check out our YouTube channel for a visual guide!
- Prepare Your Frames: The very first step is to carefully remove the glass and the back insert from your chosen plastic frames. This ensures you can access all surfaces of the frame for an even application and prevents any product from getting on the glass. Don’t be deterred by the fact that these are plastic frames; trust the process – they will indeed be transformed into beautiful, gold metal-like masterpieces! Set the glass and back inserts aside in a safe place until you’re ready for reassembly.
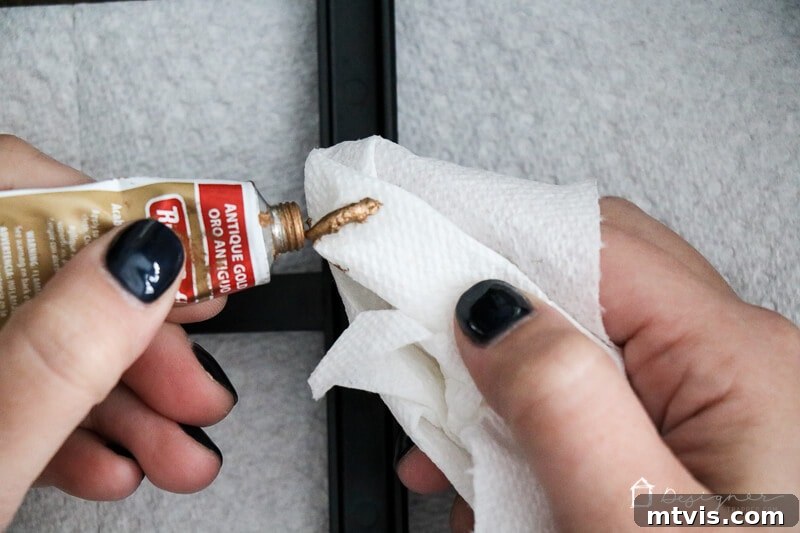
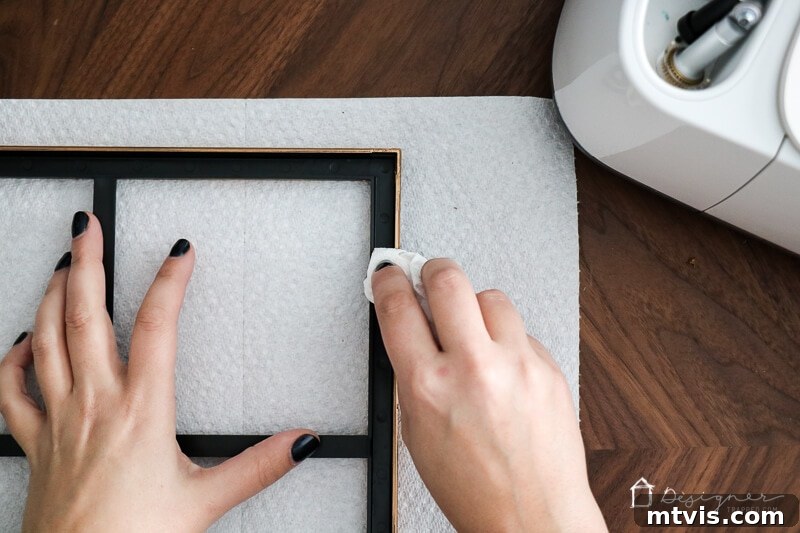
- Apply the Rub ‘N Buff: Now for the magic! Squeeze a very small amount of Rub ‘N Buff in Antique Gold onto a folded paper towel or a soft cloth. Remember, this is a wax-based product, and a little bit truly goes a long way. Start with a pea-sized amount – you can always add more if needed. Gently begin rubbing the product onto the black plastic frame. Use light, even strokes, working in small sections. You’ll immediately notice the transformation as the plastic begins to take on a rich, metallic gold sheen.
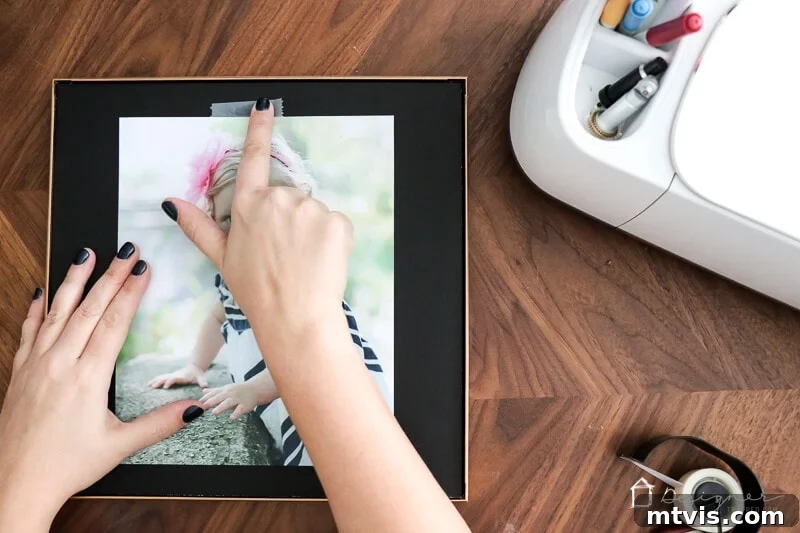
- Reassemble and Display: One of the most remarkable advantages of Rub ‘N Buff is its incredibly fast drying time. Unlike spray paint, which often requires hours of waiting and careful handling, this wax product dries almost instantly to the touch. This means you can proceed to reassembly nearly immediately. Carefully insert the backer, your chosen photo mat (if you’re using one), and your beloved photo into the frame. Then, replace the glass, which typically just pops back into place. Once everything is secured, your gorgeous new gold frame is ready to be hung and admired!
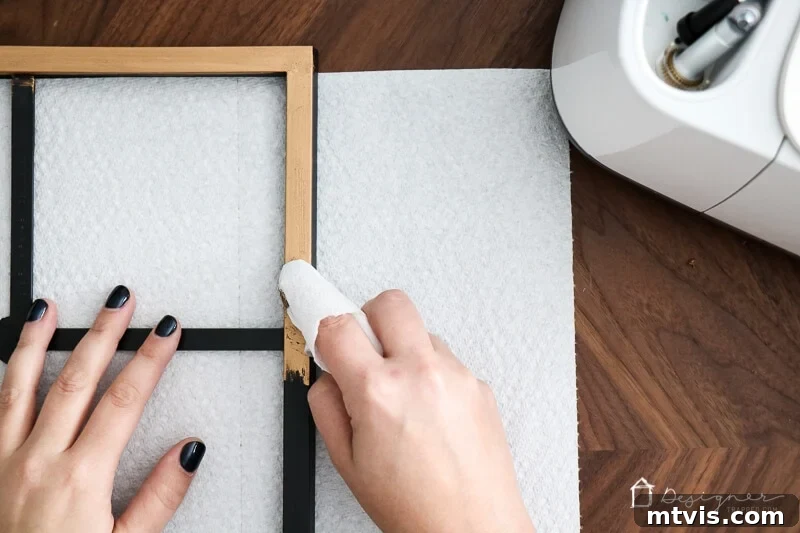
Ensure you achieve complete coverage across the entire visible surface of the frame. Pay particular attention to the thin profile or outer edge that will be visible from the front. A common mistake is to overlook these subtle areas, which can detract from the finished look. However, there’s no need to coat the inside edge of the frame that will be covered by the glass, mat, and photo. Working smarter, not harder, is key to an efficient DIY project!
Cost Analysis: Unbeatable Savings with DIY
Let’s talk numbers, because this is where the DIY advantage truly shines. For our project, we purchased 8 frames for a total of $66. The Rub ‘N Buff in Antique Gold, which costs approximately $7.00, was used in less than one tube for all eight frames. Additionally, we made custom photo mats for about $0.50 each (check out our tutorial on making your own DIY photo mats!).
Calculating the total, our cost per frame was less than $10. Compare this to purchasing pre-made gold frames, which can easily range from $20 to $50 or more per frame, especially for those with a polished metallic look. That’s a monumental saving! This project is a testament to how creative thinking can lead to huge wins in home decorating, allowing you to achieve a high-end aesthetic without the premium price tag.
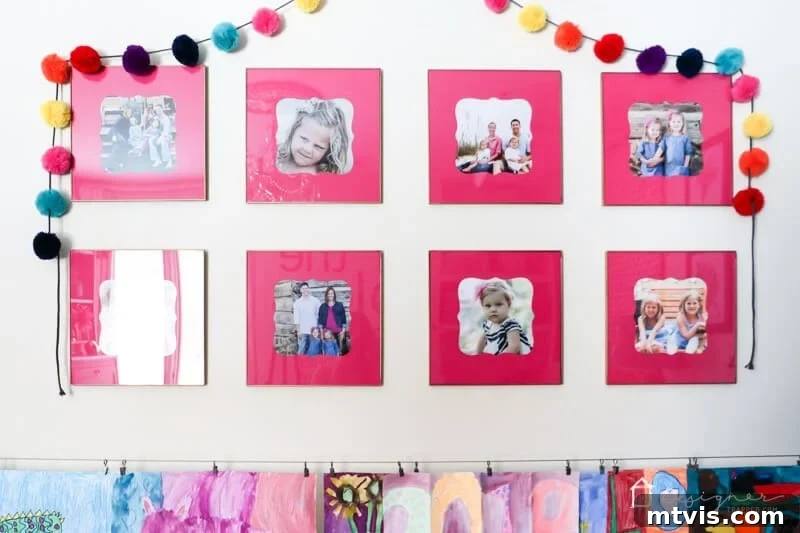
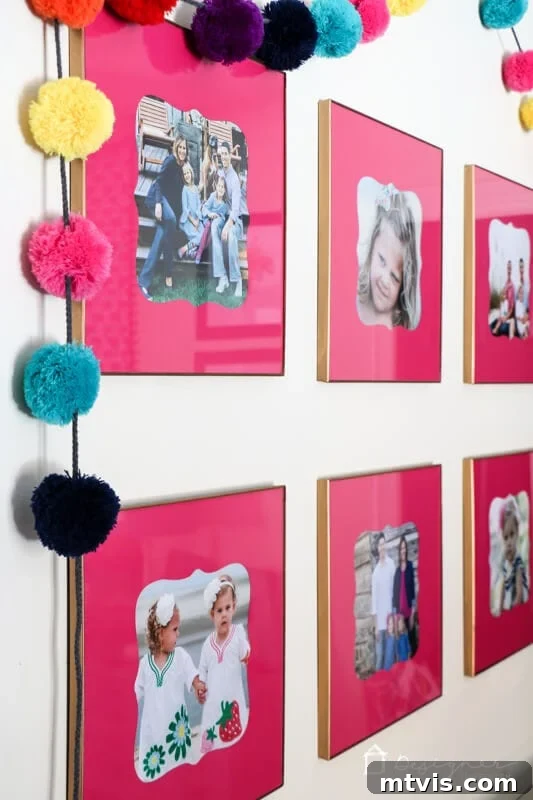
I crafted these frames with vibrant pink DIY photo mats to complement Attley’s room, but imagine them with classic white photo mats. They would be virtually indistinguishable from much more expensive, designer options. The secret truly is in the Rub ‘N Buff!
Tips for Achieving Perfect Gold Frames Every Time
To ensure your DIY gold frames turn out absolutely perfect, here are a few additional tips and tricks:
- Less is More: With Rub ‘N Buff, always start with a very small amount. It’s easier to add more product than to remove excess.
- Buff for Shine: After applying the product, gently buff the surface with a clean, dry part of your paper towel or cloth. This will enhance the metallic sheen and create a more polished, realistic finish.
- Experiment with Tones: While we used Antique Gold for a classic, warm look, Rub ‘N Buff comes in various metallic shades. Consider experimenting with different golds (like European Gold or Gold Leaf) to find the perfect tone for your space.
- Ventilation is Key: Although Rub ‘N Buff is less volatile than spray paint, it’s always good practice to work in a well-ventilated area, especially if you’re doing multiple frames.
- Practice Makes Perfect: If you’re new to using Rub ‘N Buff, consider testing it on an inconspicuous area of one frame or a spare piece of plastic first to get a feel for the application.
- Beyond Frames: Once you discover the magic of Rub ‘N Buff, you might find yourself wanting to transform other items! It works wonderfully on cabinet hardware, light fixtures, and other small decor pieces.
Displaying Your New Gold Frames: Creative Ideas
Now that you’ve created these stunning, affordable gold frames, it’s time to integrate them into your home decor! Here are some ideas for displaying them:
- Gallery Wall: A collection of gold frames featuring black and white or sepia-toned photos creates a sophisticated gallery wall. Mix and match with other metallic frames or even wooden ones for varied texture.
- Accent Piece: Let a single, beautifully framed piece be a focal point on a mantelpiece, bookshelf, or side table.
- Layering: Intersperse your gold frames with larger artwork or mirrors, creating depth and visual interest on a wall.
- Themed Rooms: Gold frames are perfect for adding a touch of glamour to a bedroom, elegance to a living room, or a spark of creativity to a home office.
- With Photo Mats: As shown with Attley’s room, adding a custom photo mat inside the frame can enhance the visual appeal and draw attention to your photographs or art prints. Whether you choose a classic white, a bold color, or a textured mat, it adds another layer of personalization.
Here’s a peek at the finished frames, proudly hanging and contributing to the charming atmosphere in Attley’s room:
Elevate Your Space with Budget-Friendly Style
This semi-DIY gold frame tutorial proves that you don’t need a lavish budget to achieve a luxurious and stylish home. With a little creativity and a few affordable materials, you can transform ordinary plastic frames into stunning pieces of art that enhance any room. The satisfaction of creating something beautiful with your own hands, combined with the significant savings, makes this project a truly rewarding endeavor.
Before you go, be sure to grab our free guide on creating a beautiful room, so you can perfectly integrate your new, super affordable gold frames into a cohesive and inviting space. Happy decorating!
