
Transform Your Kitchen on a Budget: The Ultimate Guide to Painting a Tile Backsplash
Dreaming of a kitchen makeover but worried about the cost? Revitalize your space with an incredibly quick, easy, and budget-friendly DIY project: painting your tile backsplash. Discover how a coat of paint can deliver a high-impact transformation without breaking the bank!
My Journey to a Painted Backsplash Solution
As you may know, we’ve been deeply engrossed in our kitchen makeover project. It’s been a journey of careful planning, smart choices, and, most importantly, sticking to a tight budget. One of the biggest dilemmas we faced was addressing our existing backsplash. It was, to put it mildly, not our style and significantly dated the kitchen. The big question was: how do we tackle this unfortunate eyesore without investing in a costly rip-out and replacement?
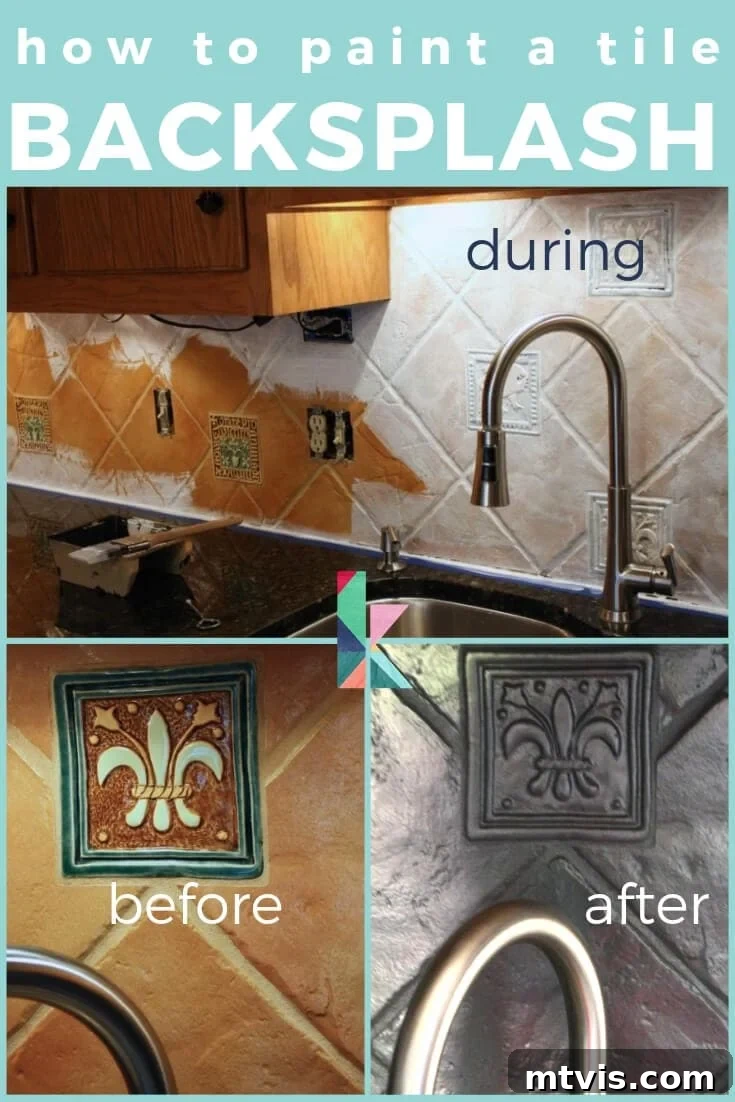
After much deliberation and creative brainstorming, the solution we landed on might surprise you: we painted it! Yes, that’s right – you absolutely can paint a tile backsplash, and the results can be astonishing. This unexpected approach not only saved us a substantial amount of money but also delivered a dramatic transformation that made our kitchen feel entirely new. Keep reading to learn the full story and discover exactly how you can achieve similar results in your own home!
An Important Update on Our Kitchen Journey!
Since this original project, our kitchen has undergone a complete metamorphosis! We’ve reconfigured and fully renovated our kitchen, meaning our painted backsplash has since been replaced with a different solution more suited to our long-term vision. However, it’s crucial to emphasize just how incredibly well our painted tile backsplash held up during its tenure.
Its durability and aesthetic appeal were so impressive that I recently had the pleasure of painting and stenciling a friend’s backsplash as a key part of her own $1,000 kitchen makeover. Her transformation is truly mind-blowing, and it stands as further proof of this technique’s effectiveness. You can click here to explore that stunning budget-friendly kitchen makeover and witness the power of painted tile. For a visual guide, be sure to watch the comprehensive video tutorial below, showcasing the step-by-step process we followed.
Now, let’s rewind to my very first experience painting a tile backsplash. Our kitchen’s existing tile was, without a doubt, the element that caused me the most concern when we embarked on our makeover. The thought of installing a brand-new tile backsplash was appealing, but it simply wasn’t within our project’s tight financial constraints. To be frank, the original backsplash was decidedly not my style – a severe understatement for what felt like a relic from another era. Its outdated design, coupled with our limited budget, instantly ruled out the possibility of a full demolition and replacement.
We explored various alternative solutions, contemplating options like covering the tiles with sleek stainless steel panels or even creating a stenciled wood overlay. However, the thickness of the existing tiles presented a significant challenge: we couldn’t devise a clean, aesthetically pleasing way to finish the visible edges if we simply covered them. This left me feeling stuck, scratching my head for a viable solution. That’s when inspiration struck!
This post contains some affiliate links for your convenience. Please click here to read my full disclosure policy.
Around the same time, we were making decisions about our kitchen cabinets, specifically whether to stain or paint them. I experimented with several shades of General Finishes Milk Paints, renowned for their high quality, acrylic base, and exceptional durability. I purchased three pint-sized cans (these handy pint sizes are readily available on Amazon and at various woodworking stores) in different shades of gray. Ultimately, two of these colors were selected for our cabinet transformation. This left me with a full pint of the darkest gray, Queenstown Grey, which I initially thought I wouldn’t use.
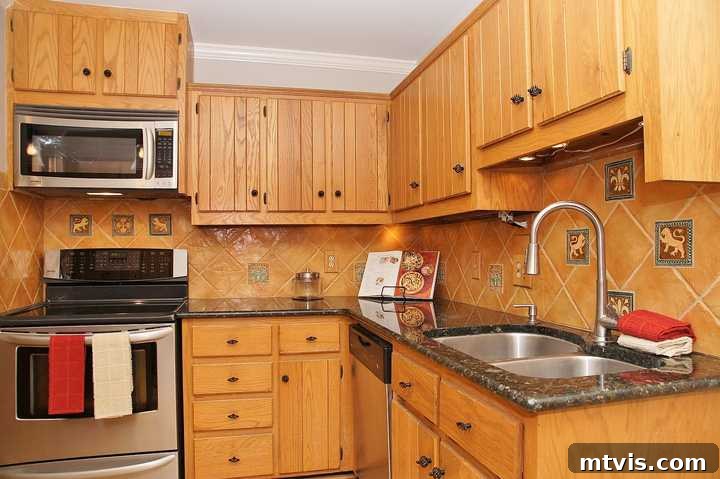
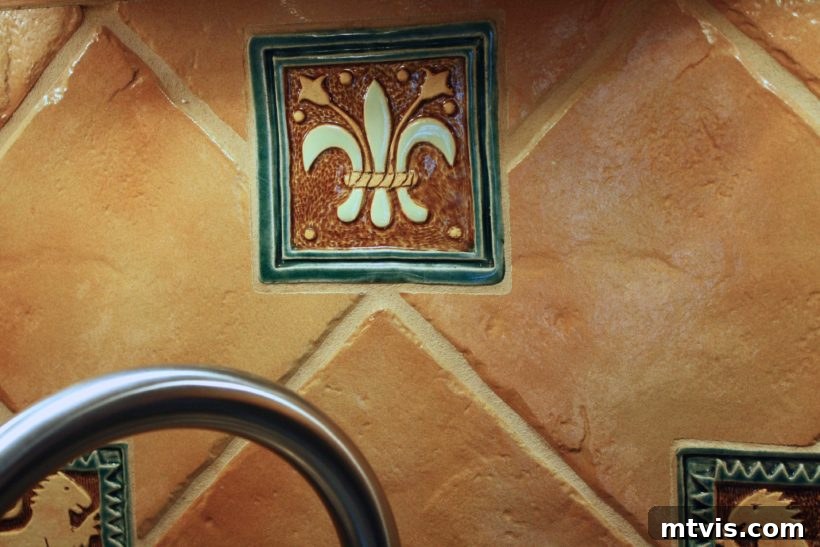
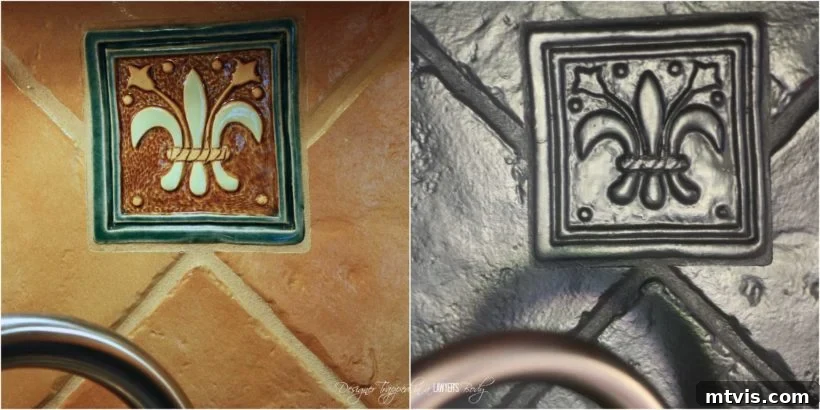
But then, a lightbulb moment! What if I could use that leftover paint to tackle the backsplash? The idea of painting the tile backsplash seemed radical at first. I mean, WHHHHHHAAAAATTT????!!!! Paint existing tiles? Absolutely! While it wasn’t an “ideal” solution in the sense that I disliked almost everything about our original backsplash – its size, shape, texture, and even the bizarre decorative accent tiles featuring prehistoric lions and Latin phrases – the prospect of a free improvement was too good to pass up. Painting it, I reasoned, would instantly elevate its appearance by at least 500% and cost me nothing!
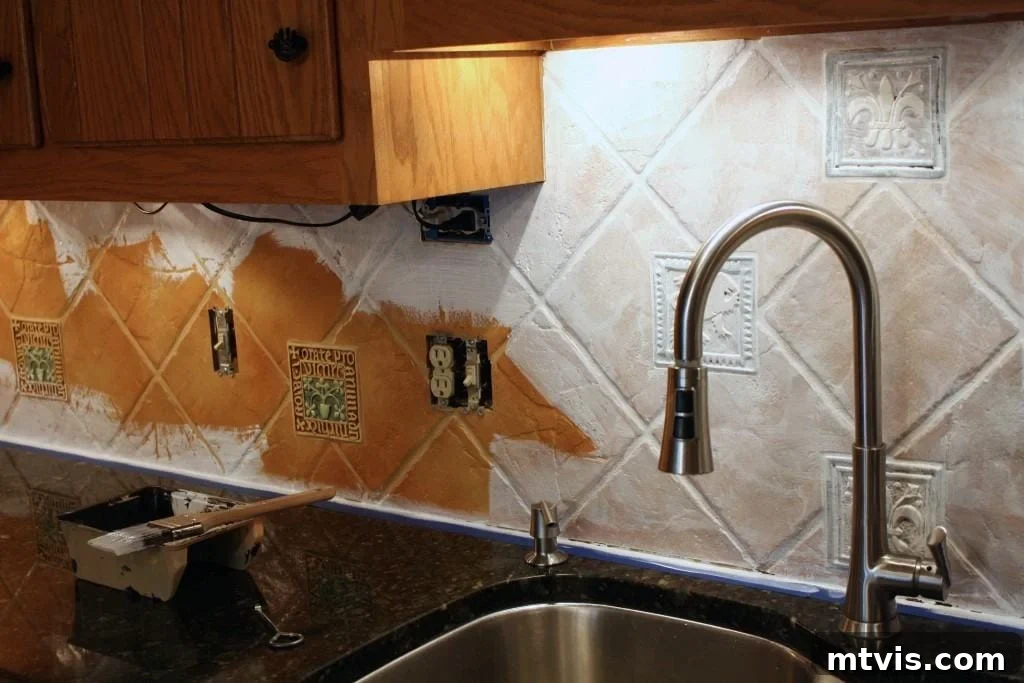
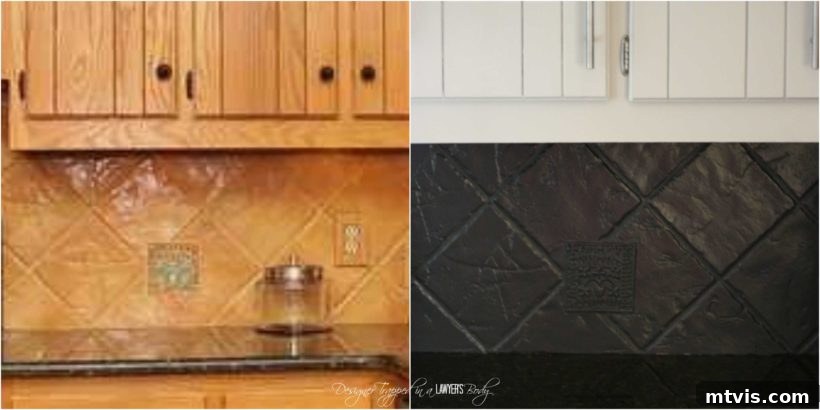
To fully appreciate the transformation, let’s take a moment to remember the original state of the tile backsplash.
And for a closer look, here’s a detailed shot highlighting its unique (and not-so-charming) features.
So, one afternoon, while my twin daughters were napping, I seized the opportunity and went for it. My rationale was simple: even if the outcome wasn’t perfect, we wouldn’t have lost any money, and it honestly couldn’t look worse than what was already there. With a newfound determination, I embarked on this simple yet impactful DIY project.
How to Paint a Tile Backsplash: A Step-by-Step Guide
Essential Materials You’ll Need
- A high-quality, water-based primer (We successfully used Kilz water-based primer, but Zinsser also offers excellent primers known for their adhesion on tricky surfaces.)
- General Finishes Milk Paint in your desired color (Remarkably, a single pint was enough to cover our entire backsplash area.)
- General Finishes High-Performance Water Based Top Coat (I opted for a flat finish to minimize sheen, but satin or semi-gloss are popular choices for added luster and protection.)
- Small foam roller (ideal for smooth, even coverage on flat surfaces)
- High-quality paint brush (for cutting in edges and reaching grout lines)
- Cleaning supplies (degreaser, sponge, clean rags)
- Painter’s tape (to protect surrounding surfaces)
Detailed Steps for a Flawless Painted Backsplash
-
Thorough Cleaning and Preparation
Before applying any primer or paint, proper preparation is key to ensuring optimal adhesion and a long-lasting finish. Begin by meticulously cleaning your backsplash tiles. Use a good degreaser or a strong all-purpose cleaner to remove any grease, grime, or food splatters that may have accumulated over time. Rinse the tiles thoroughly with clean water and allow them to dry completely. Any residual dirt or oil can compromise the paint’s ability to stick.
-
Priming for Superior Adhesion
While General Finishes Milk Paint often boasts excellent adhesion properties without a primer on many surfaces, I was a bit nervous about painting over glossy, smooth tile. To guarantee the best possible adhesion and durability, I decided to err on the side of caution and apply a coat of water-based Kilz primer. This step creates a uniform, matte surface that the paint can grip onto much more effectively. Apply the primer evenly using your small foam roller, using a brush for grout lines and corners. Allow the primer to dry completely according to the manufacturer’s instructions – patience here will pay off!

Priming the backsplash is a crucial step for ensuring excellent paint adhesion and a durable finish, especially on glossy tiles. -
Applying the First Coat of Paint
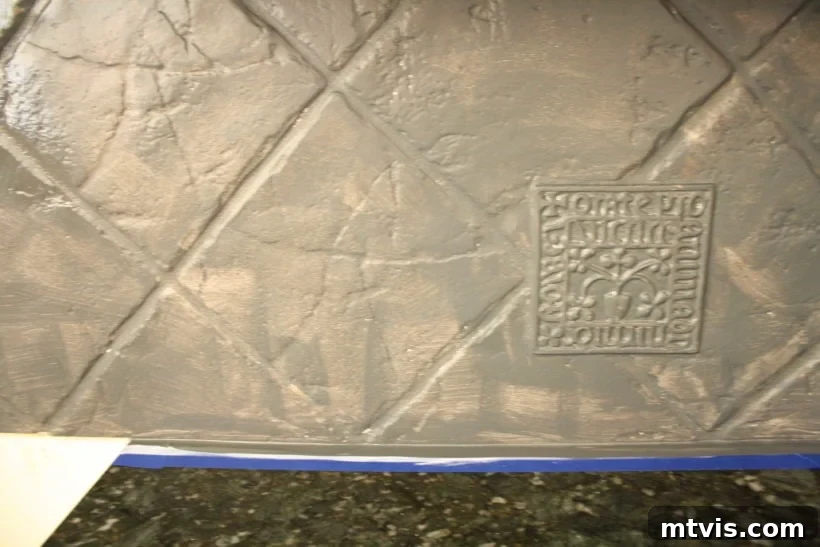
Once the primer is dry, it’s time for the exciting part: applying the paint! I used the General Finishes Milk Paintin Queenstown Grey. Begin by using a paintbrush to carefully “cut in” around the edges of your backsplash and along any countertops or cabinets you’ve taped off. Then, switch to your small foam roller for the main tile surfaces. Apply thin, even coats. Don’t be alarmed if the first coat doesn’t provide full coverage or looks a bit streaky; this is completely normal. I must admit, after my first coat, I felt a tiny pang of worry, questioning if I’d made the right decision!
The first coat of paint might look a bit uneven, but don’t worry – subsequent coats will build up the color beautifully. -
Applying Subsequent Coats for Full Coverage
Allow the first coat to dry completely before applying the second. This usually takes a few hours, but always refer to the paint manufacturer’s recommendations. Fortunately, the second coat of paint provided phenomenal coverage and immediately brought my vision to life. The color was rich and uniform, completely transforming the previously dated tiles. I was able to cover the entire backsplash area with just one tiny pint of paint – it was a close call, with me literally scraping the last drops from the can to finish!
-
Sealing with a Durable Top Coat
For long-term durability and protection against splashes, stains, and daily wear and tear, applying a top coat is absolutely essential. I applied three thin coats of the General Finishes High-Performance Water Based Top Coat. I chose a flat finish because my goal was for the backsplash to subtly blend into the background, avoiding any added sheen that might draw attention to the tile’s underlying pattern. However, many people prefer a satin or semi-gloss finish for a bit more luster and easier cleaning. Apply each coat thinly and evenly, allowing ample drying time between applications. This final step is crucial for creating a robust, washable surface that will stand up to the demands of a busy kitchen.
The Stunning Results: Before & After
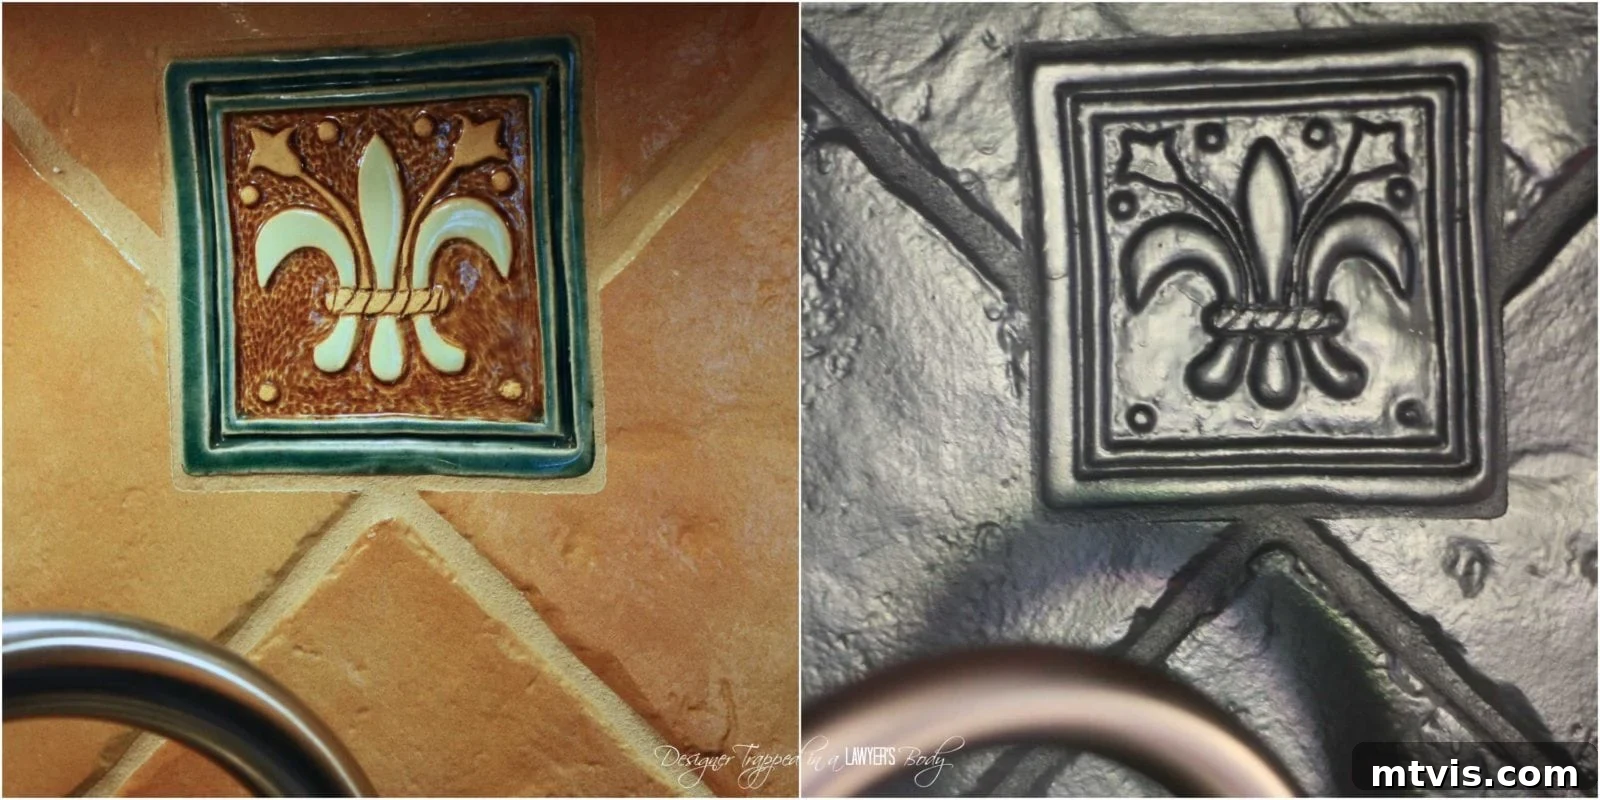
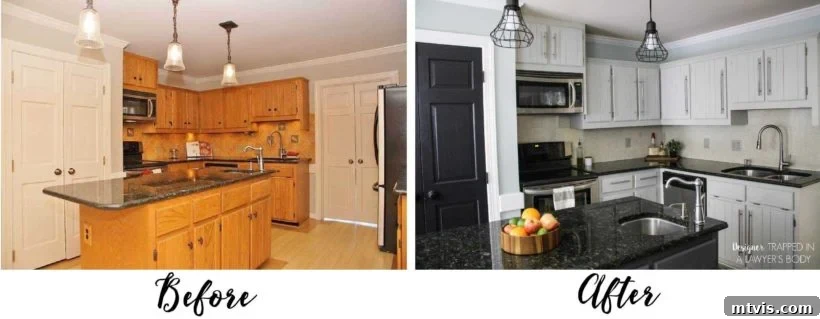
And I truly love how it turned out! The transformation was far beyond my expectations for a project that essentially cost me nothing (since I used leftover paint). While you can still discern the subtle pattern and texture of the decorative tiles beneath the paint, the overall effect is nothing short of miraculous. The backsplash now beautifully integrates into the kitchen’s aesthetic, providing a cohesive backdrop that complements our granite countertops and newly painted light grey cabinets.
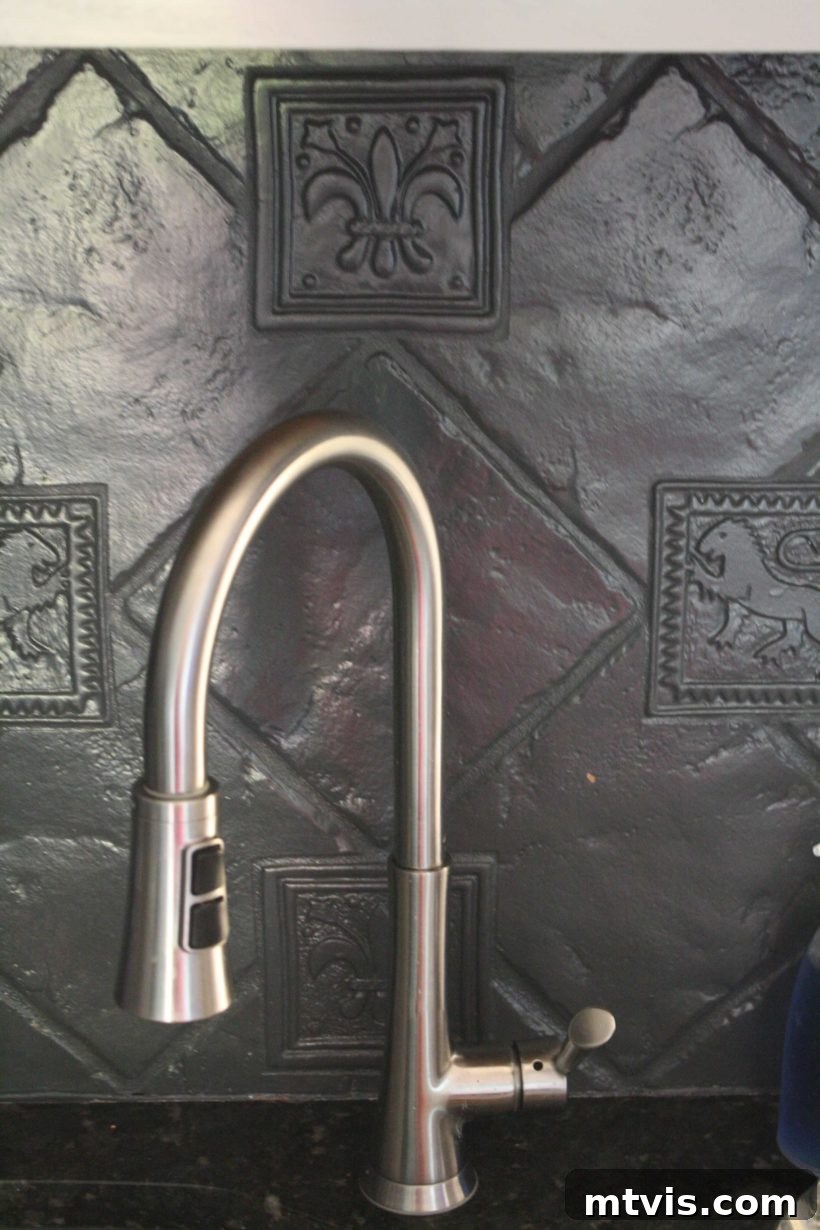
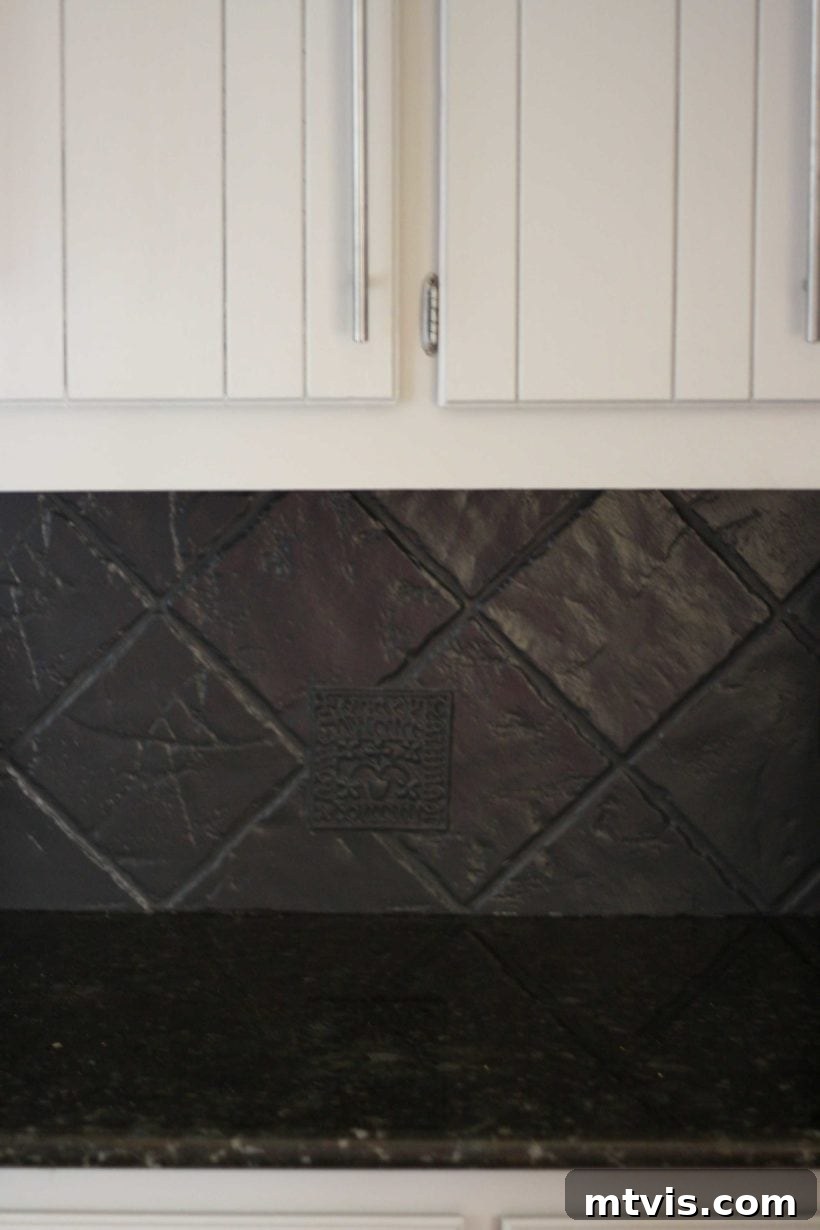
This “free” transformation has left me incredibly happy. The backsplash, once a jarring focal point, now gracefully blends into the background, enhancing the overall calm and updated feel of the kitchen. Had I purchased all the products specifically for this project, the total cost would have been an incredibly modest $30 – an unbeatable price for what feels like a brand-new backsplash!
As I always say, a good side-by-side comparison tells the whole story. Prepare to be amazed:
What are your thoughts on this thrifty, high-impact kitchen transformation? Have you ever considered painting your tile backsplash, or perhaps even tried it yourself? We’d love to hear about your experiences or any other ingenious, budget-friendly backsplash makeovers you’ve discovered!
**Important Updates and Long-Term Performance Review**
The performance of General Finishes Milk Paint extends beyond backsplashes. We also used these same products to revitalize our outdated kitchen cabinets, and I’m thrilled to report that as of January 21, 2016 (nearly two years after completing that project!), we experienced absolutely no chipping or peeling. You can delve into our detailed guide on how we painted our kitchen cabinets without needing to prime or sand here.
Regarding the painted backsplash itself, its durability was exceptional. It held up perfectly, resisting peeling, chipping, and proving incredibly easy to clean. We eventually chose to replace it after about 18 months, but this decision was purely aesthetic, not due to any failure of the paint. Even with the fresh paint, the underlying tile pattern was still visible, and while it was a fantastic temporary solution, we eventually sought a different long-term look for our dream kitchen. However, I remain incredibly glad we opted for painting it initially; it was a brilliant, low-cost solution that gave us a beautiful, updated kitchen for a significant period. For those curious about our subsequent renovation, you can read all about our new laminate backsplash here.
Beyond simple painting, the versatility of tile transformation knows no bounds! When assisting a friend with her kitchen makeover, we faced a similar challenge with her rather unappealing red tile backsplash. Instead of a costly tile replacement, we employed a creative solution: we painted and then stenciled her existing tiles. The result was absolutely stunning, giving her kitchen a custom, high-end look on a shoestring budget. Discover the full process and see the amazing transformation here.
Continue Your Kitchen Makeover Journey with More DIY Inspiration
Before you dive into your own backsplash project, explore some of our other impactful kitchen makeover posts. Learn how we completely transformed our kitchen floor with paint and a stencil, discover the clever ways we reconfigured our cabinets to create a more functional eat-in area, and get inspired by our high-impact DIY herringbone plank wall, upcycled from an old fence. These projects are testament to what can be achieved with creativity and a budget-conscious mindset.
Stay tuned for the grand reveal of our entire kitchen makeover – it’s coming very soon! UPDATE: The complete kitchen reveal is now live! Click HERE to explore all the details and see the final transformation!
Unlock Your Design Potential with Our FREE Resources
Before you head off to start your own incredible DIY projects, be sure to take advantage of my complimentary design guides. These invaluable resources are crafted to help you design spaces you absolutely adore, making the process smoother and more enjoyable. Simply subscribe now, and you’ll receive an exclusive password, granting you instant access to our comprehensive digital library, filled with inspiration and practical advice.

[mv_create key=”1″ type=”list” title=”Most Popular Projects” thumbnail=””]