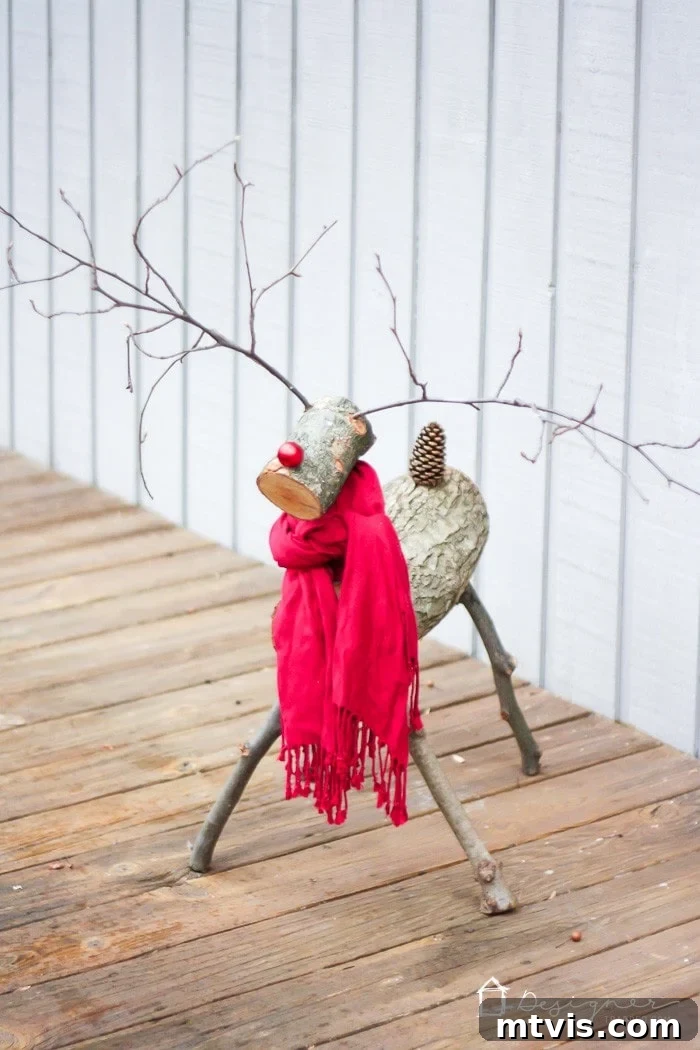
Crafting Joy: Your Guide to a Beautiful Log Reindeer for Outdoor Christmas Decor
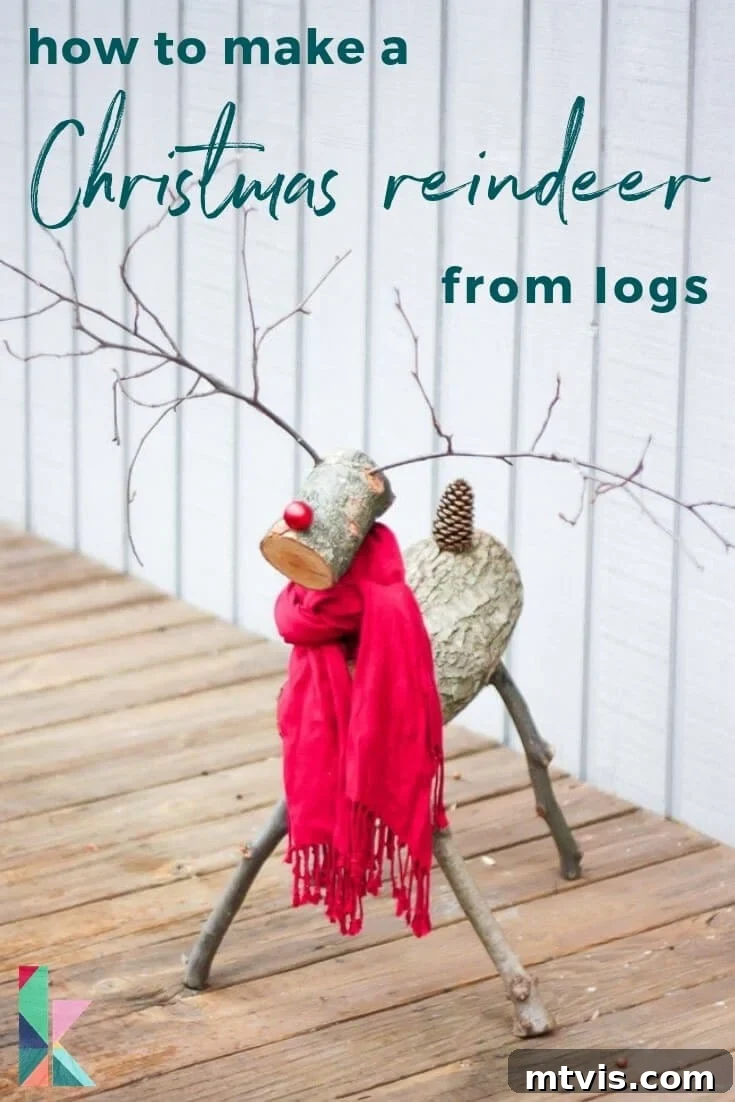
The holiday season brings with it a magical opportunity to transform our homes, both inside and out, into festive havens. While indoor Christmas decorations capture our hearts with their warmth and sparkle, extending that festive spirit to our outdoor spaces creates an inviting and whimsical atmosphere for neighbors and guests alike. This year, instead of relying solely on store-bought decorations, we embarked on a delightful journey to craft something truly special and uniquely natural for our yard: a charming Christmas reindeer made entirely from logs and branches.
There’s an unparalleled satisfaction that comes from creating your own holiday decor. It’s not just about saving money; it’s about infusing each piece with personal touch, a story, and a sense of accomplishment. Over the years, we’ve enjoyed numerous DIY projects, from crafting unique Christmas decor pieces like our innovative DIY reindeer art and adorable mini wreaths. However, this rustic log reindeer project quickly ascended to the top of our list of favorite holiday crafts. Its earthy appeal and simple elegance make it a standout addition to any outdoor Christmas display, bringing a touch of woodland magic to your festive scene.
For our inaugural log reindeer, we decided to give him the iconic red nose, transforming him into Rudolph, the most famous reindeer of all. While Rudolph’s signature feature is entirely optional, it adds a playful pop of color and instantly recognizable charm. Our long-term vision is to expand our herd, adding one or more reindeer each year until we have Santa’s full team gracing our yard. Imagine the joyful sight of Dasher, Dancer, Prancer, Vixen, Comet, Cupid, Donner, Blitzen, and of course, Rudolph, all handcrafted and proudly standing guard!
Crafting these log reindeers is a wonderfully rewarding experience. It’s surprisingly quick, incredibly easy, and the end result is undeniably adorable. Not only do these natural decorations blend beautifully with any landscape, but they also offer a sustainable and eco-friendly way to celebrate the season. Get ready to embrace your inner crafter and discover just how simple it is to build your very own festive forest friend. Follow our detailed tutorial, and you’ll be well on your way to starting your very own charming herd of Santa’s reindeer, bringing joy and a rustic elegance to your outdoor Christmas decor for years to come.
This post contains affiliate links for your convenience. Click here for my full disclosure policy.
Your Step-by-Step Guide to Crafting a Christmas Log Reindeer
Ready to bring a touch of woodland whimsy to your holiday decorations? This comprehensive guide will walk you through every step of creating your very own charming Christmas reindeer from natural materials. It’s an enjoyable project that results in a unique and durable decoration perfect for your outdoor spaces.
Gathering Your Materials: What You’ll Need
The beauty of this project lies in its simplicity and reliance on natural elements. You might even find most of these items in your own backyard or local park (just be sure to source responsibly!). Selecting good quality, dry wood is key for durability and ease of crafting.
- 1 large log (approximately 4 inches in diameter, 18-24 inches long): This will serve as the reindeer’s main body. Look for a sturdy, relatively straight piece of wood. The length can be adjusted to create a larger or smaller reindeer, but ensure it’s balanced.
- 1 medium log (approximately 3 inches in diameter, 8-12 inches long): This will be the head. It should be slightly narrower and shorter than the body log for proper proportion.
- 5 small branches (approximately 1 inch in diameter, varying lengths): Four of these will be for the legs and one for the neck. Choose branches that are fairly straight and strong enough to support the body. The leg branches should be around 12-18 inches long, and the neck branch slightly shorter to connect the head to the body.
- 2 multi-point branches: These are crucial for the antlers! Look for branches with natural forks or interesting twig formations that mimic real antlers. The more natural and irregular, the better.
- 1 pinecone: A medium-sized pinecone works perfectly for the tail, adding another organic touch.
- 1 small, red Christmas ornament: For Rudolph’s iconic nose. Opt for a shatterproof ornament if your reindeer will be exposed to the elements or playful children/pets. Consider a durable ornament here.
- Clear caulk: Essential for securing the nose and providing a weather-resistant seal. A good quality clear caulk will ensure longevity.
- Wood glue: For attaching the tail and providing extra reinforcement where needed. Choose an outdoor-grade wood glue for best results. Strong outdoor wood glue is recommended.
- Reciprocating saw or chainsaw: For cutting the logs and branches to size. Always exercise extreme caution when using power tools. A cordless reciprocating saw offers great versatility.
- Drill: Necessary for creating holes for the legs, neck, head, and antlers. A reliable cordless drill kit is a fantastic investment for DIY projects.
- Paddle drill bits: You’ll need bits that match the diameter of your leg and neck branches for a snug fit. Having a set of paddle bits will cover various branch sizes.
- A sharp pocket knife: Useful for shaving down branches to fit precisely into drilled holes.
Safety First! Important Considerations Before You Begin
Working with power tools and sharp objects requires careful attention to safety. Always wear appropriate personal protective equipment (PPE), including safety glasses and gloves. Ensure your workspace is clear and stable. If you’re unfamiliar with operating a reciprocating saw or chainsaw, consider getting help from someone experienced or opting for hand tools (which will take longer but are safer). Always secure logs and branches properly before cutting or drilling to prevent slips or kickbacks.
The Crafting Process: Step-by-Step Instructions
Step 1. Prepare the Reindeer’s Body
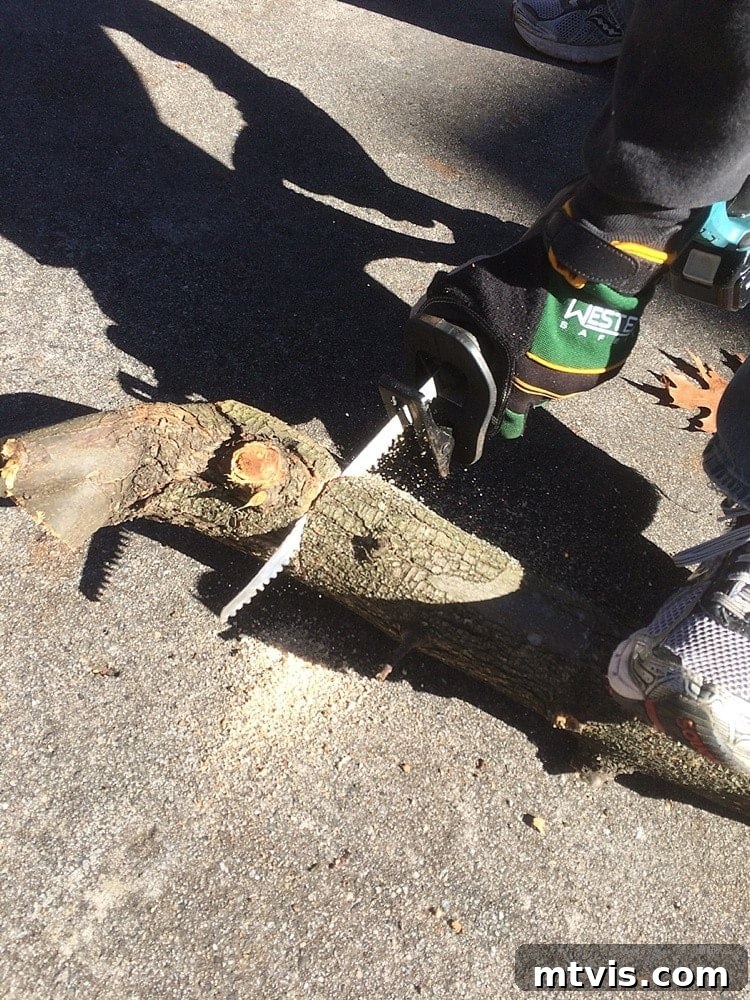
Begin by selecting your largest log for the reindeer’s body. Using your reciprocating saw or chainsaw, carefully cut it to your desired length. While there are no strict dimensions, we found a length of around 18-24 inches to be ideal for a proportionate reindeer. Visually assess what scale looks appropriate for your chosen logs. Once cut, remove any smaller twigs or uneven branches that protrude from the main body log, ensuring a clean and smooth surface. This foundational piece sets the overall size and presence of your finished reindeer.
Step 2. Cut and Ready the Legs
Next, select four of your smaller, straighter branches to serve as the legs. Cut these branches to equal lengths, ensuring they are long enough to give your reindeer a stable and natural stance. A length of 12-18 inches usually works well, depending on your body log’s size. Just like the body log, trim off any smaller twigs or irregularities from these branches to ensure they are smooth and ready for attachment. Uniform leg lengths are essential for a stable reindeer that won’t wobble.
Step 3. Precisely Drill the Connection Holes
Now it’s time to prepare the body log for assembly. Using your drill fitted with a paddle drill bit, select a bit size that is as close as possible to the diameter of your chosen leg branches. This snug fit is crucial for stability. Drill four holes into the underside of the body log, evenly spaced to represent where the reindeer’s legs would naturally be. Aim for a slight outward angle to enhance stability and give the reindeer a more natural posture. Additionally, drill one hole directly on the top center of the deer body. This hole will securely house the neck branch.
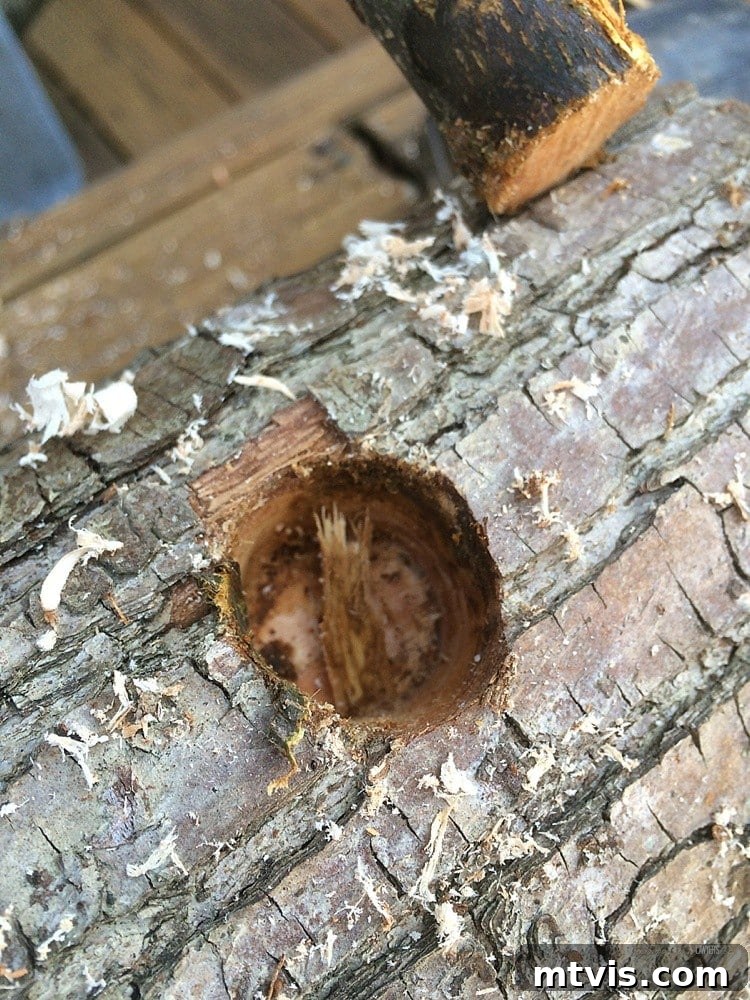
Step 4. Custom-Fit Your Branches
After drilling the holes, you may find that the leg and neck branches don’t perfectly fit. This is where your sharp pocket knife comes in handy. Carefully use the knife to shave off excess bark or wood from the top ends of the leg branches and the end of the neck branch. The goal is to create a slightly tapered end that can be snugly inserted into the drilled holes. Take your time with this step, shaving small amounts until you achieve a tight, secure fit. This ensures your reindeer’s limbs are firmly attached and stable.
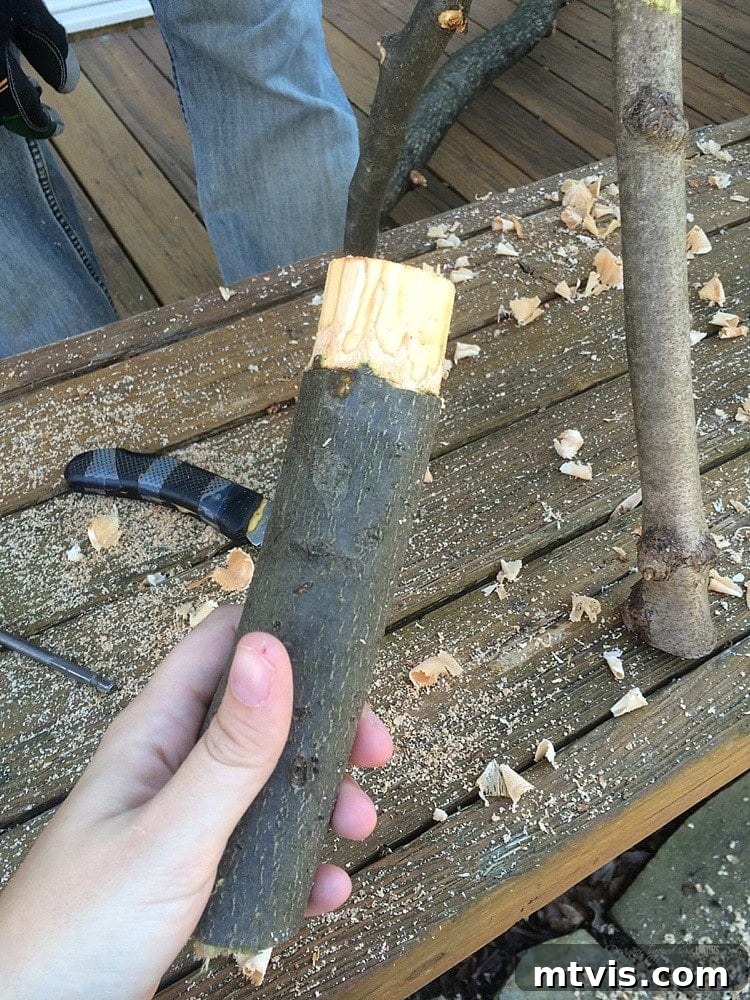
Step 5. Initial Assembly and Proportion Assessment
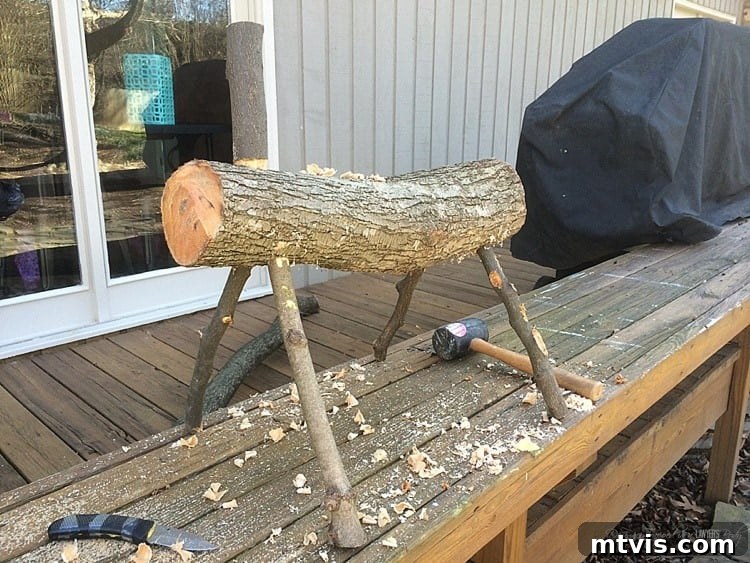
Before making any permanent attachments, perform a dry fit. Insert the prepared legs into their respective holes on the underside of the body, and fit the neck branch into its hole on top. This allows you to visually determine how long your head log should be and to ensure all components are proportionate. Stand back and “eyeball” the assembly. There’s no right or wrong exact dimension; the key is to achieve a pleasing aesthetic balance that looks good to your eye. Adjust the depth of insertion or even trim branch lengths slightly if necessary, striving for a natural and stable posture.
Step 6. Shape and Attach the Head
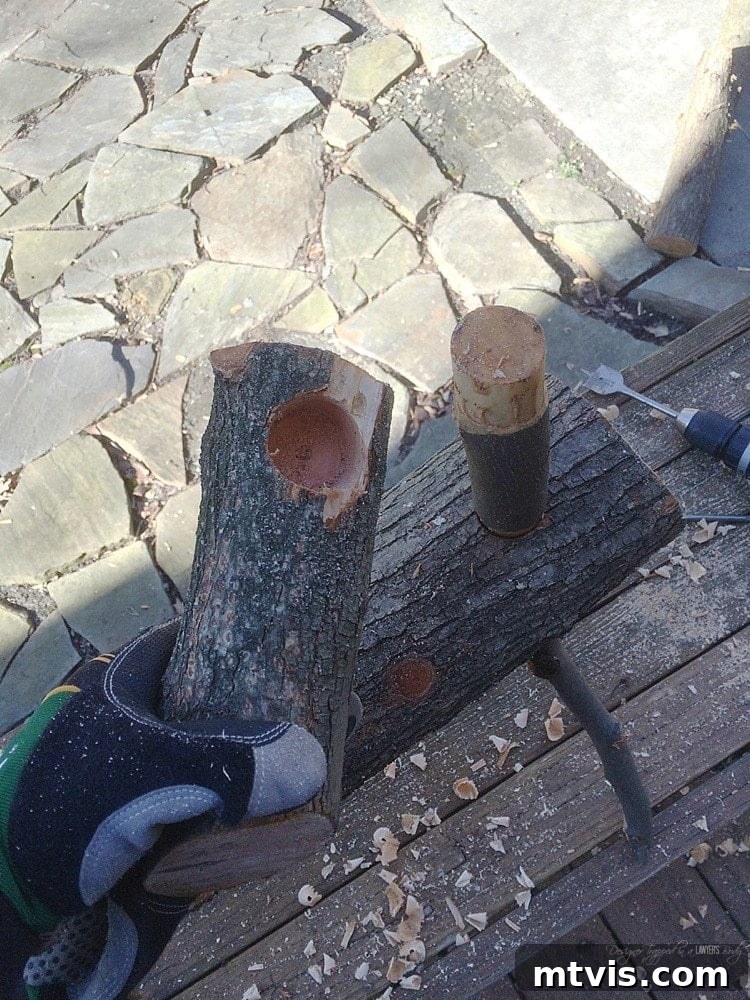
Take your medium-sized log for the head and cut it to the length you determined in the previous step. For a more realistic and charming appearance, cut the back end of the head log flat where it will connect to the neck, and then angle the front end to form the reindeer’s “face.” This simple angle adds character. Next, drill a hole into the bottom (flat) end of the head log, using a paddle bit that matches the neck branch’s diameter. Once the hole is ready, carefully fit the head onto the top of the neck branch. Apply a generous amount of wood glue into the hole before inserting the neck for a secure and lasting bond.
Step 7. Giving Your Reindeer Its Iconic Nose
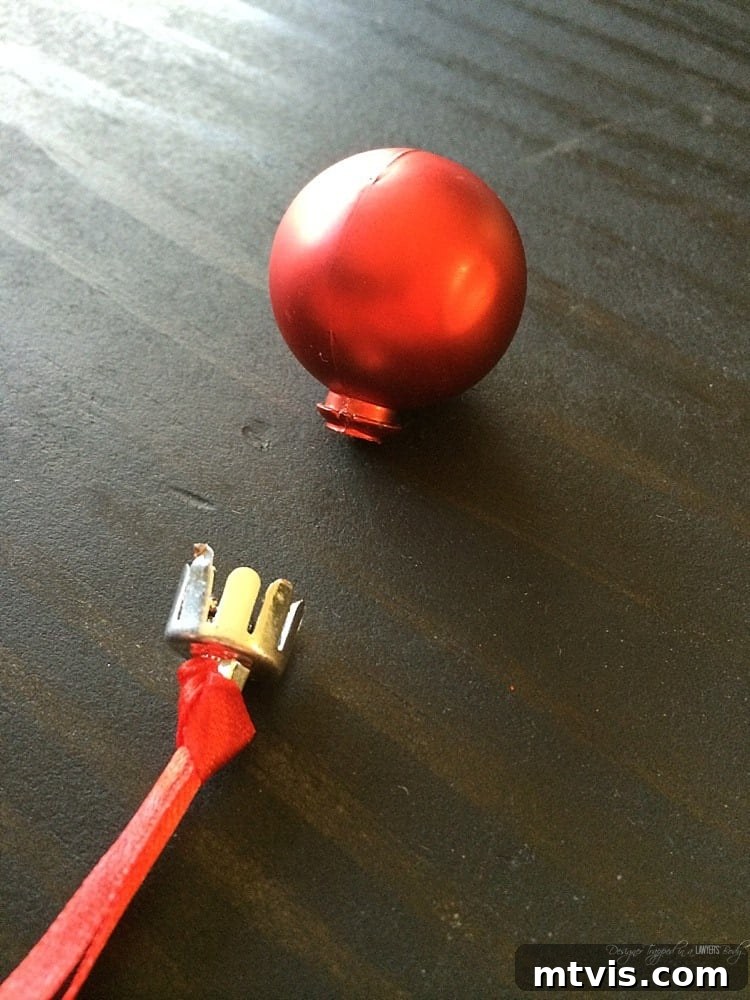
This is where Rudolph truly comes to life! Take your small, red Christmas ornament. If it has a metal hanger, gently remove it. Drill a small, shallow hole on the angled “face” of your reindeer’s head where you want the nose to sit. Apply a generous amount of clear caulk into this hole and around the base of the ornament, then carefully press the ornament into place. The caulk will create a strong, weather-resistant bond, ensuring Rudolph’s nose stays bright red through all winter conditions. Allow ample time for the caulk to cure completely before moving the reindeer.
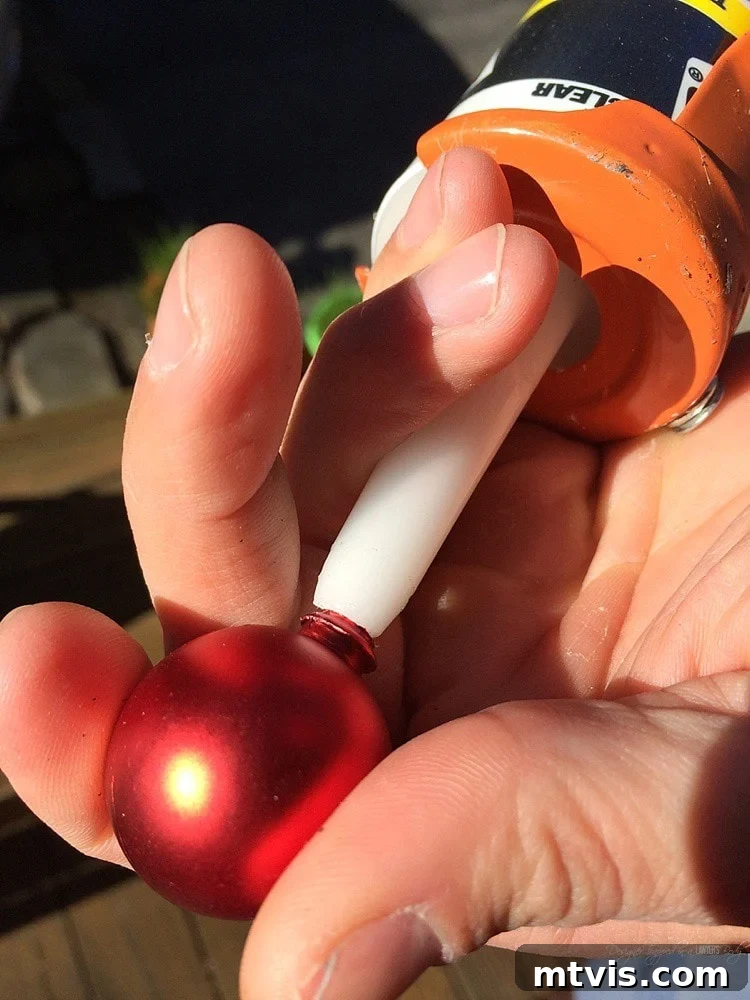
Step 8. Attaching the Majestic Antlers
Select your two multi-point branches that will serve as the antlers. Position them on either side of the reindeer’s head, just above the eyes, to find the most natural and aesthetically pleasing placement. Once you’ve determined their ideal spot, drill small holes into the head log. Apply a strong outdoor wood glue into these holes, then firmly insert the antler branches. Hold them in place for a moment to ensure they set, and consider using clamps or heavy objects to support them while the glue dries, especially if they are heavy. The antlers add significant character and complete the reindeer’s iconic silhouette.
Step 9. Completing Your Reindeer with a Tail
The final touch for your log reindeer is its tail. Choose your pinecone and position it on the rear of the body log. Drill a small, shallow pilot hole into the body log if needed to give the pinecone a better anchor. Apply a generous amount of outdoor wood glue to the base of the pinecone and firmly press it onto the body. Hold it in place until the glue begins to set. This simple addition adds charm and completes the natural look of your rustic Christmas decoration.
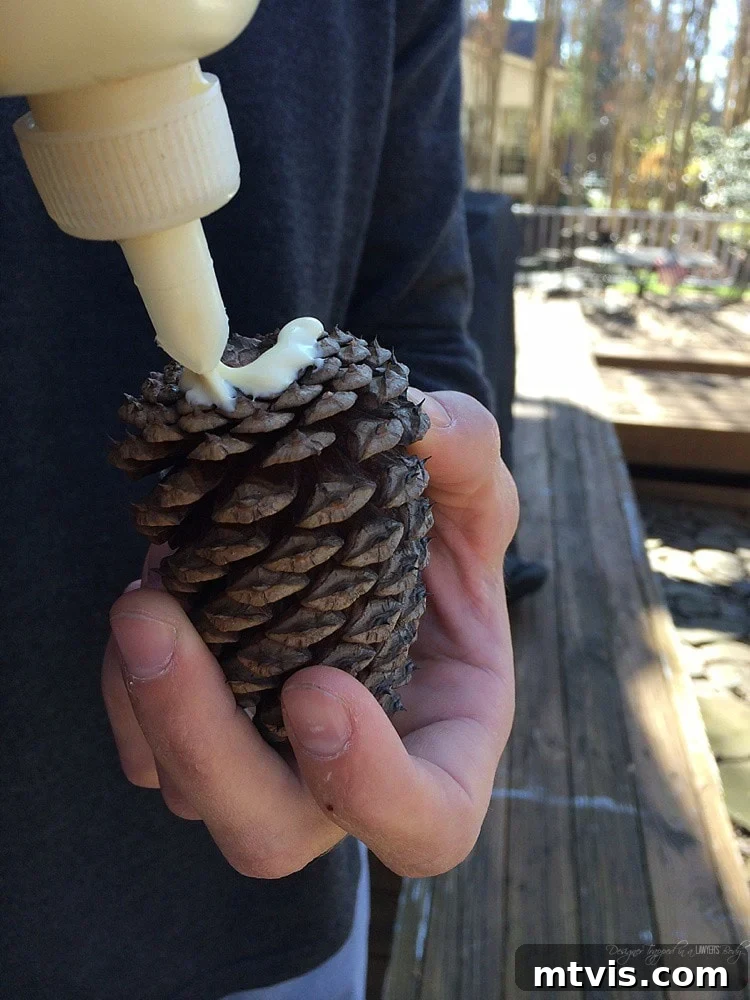
Displaying and Enjoying Your Handcrafted Log Reindeer
And just like that, you’ve created a truly unique and heartwarming outdoor Christmas reindeer! This rustic decoration is not only incredibly charming but also durable enough to bring holiday cheer year after year. We decided to accessorize our Rudolph with a cozy red scarf, adding an extra layer of festive warmth and personality. He now proudly stands guard by our driveway, greeting everyone with his festive presence.
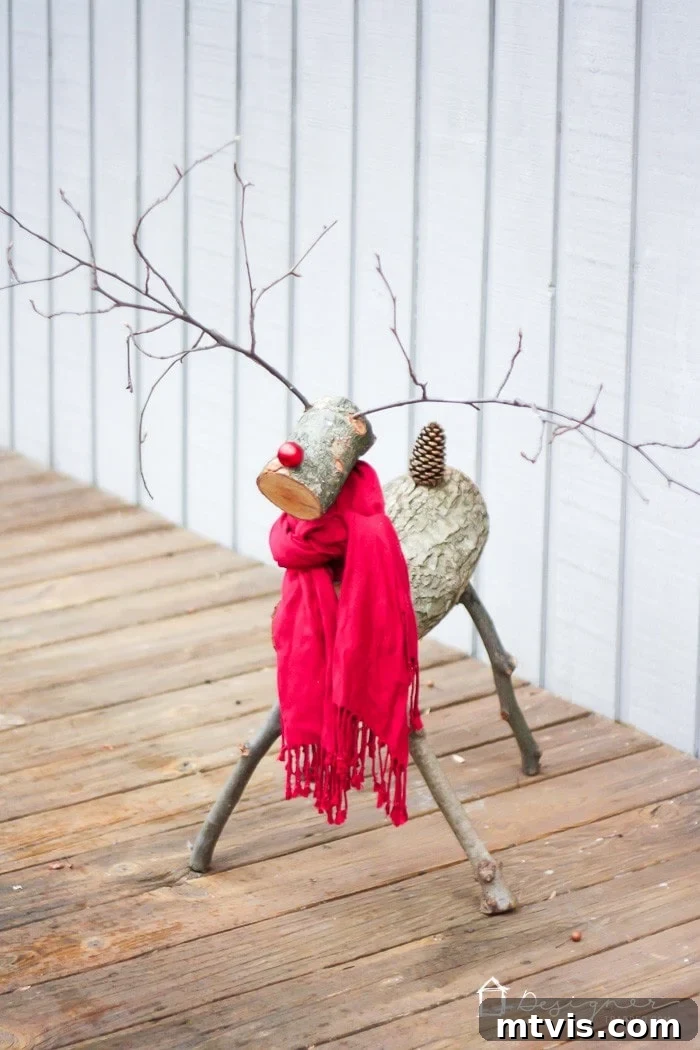
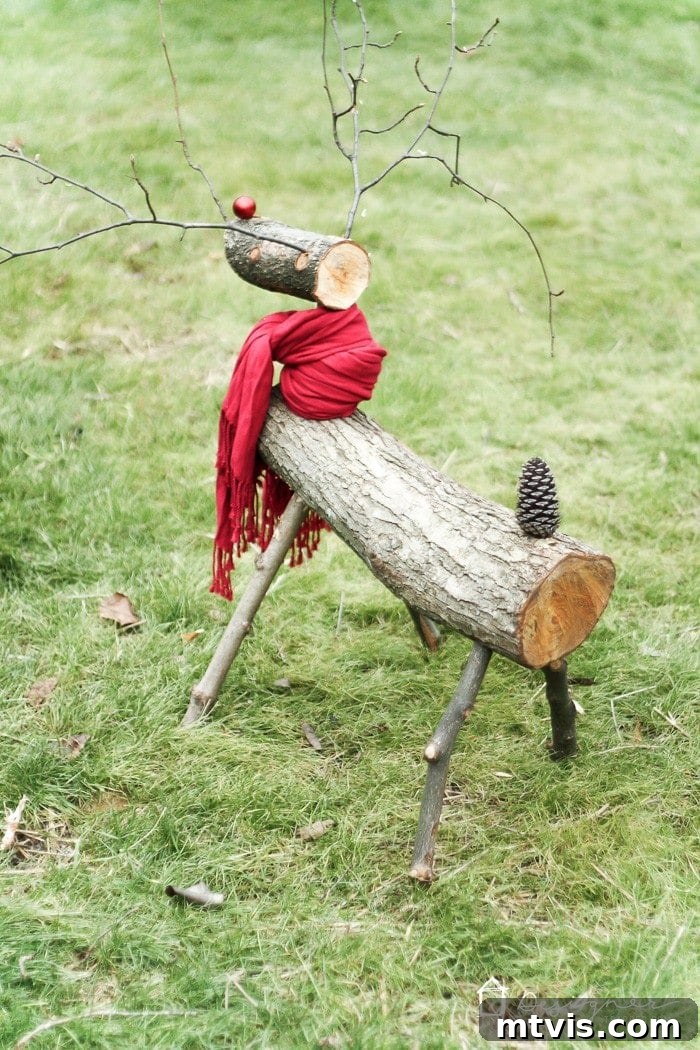
Caring for Your Outdoor Log Reindeer
To ensure your log reindeer withstands the elements and remains a festive staple for many seasons, consider these care tips:
- Weatherproofing: While logs are naturally hardy, applying a clear outdoor sealant or varnish can help protect the wood from moisture, UV rays, and rot, extending its lifespan.
- Secure Placement: Choose a stable, level spot in your yard or on your porch. If you live in a windy area, you might consider anchoring the reindeer slightly to prevent it from toppling over.
- Seasonal Storage: During the off-season, storing your reindeer in a dry, covered area like a shed or garage will further protect it from harsh weather and preserve its natural beauty.
Expand Your Herd: Customization and Future Plans
The beauty of this DIY project is its versatility. You can easily customize your reindeer to match your personal style:
- Accessories: Besides a scarf, think about adding miniature bells, a string of battery-operated LED lights, or even a small wreath around its neck.
- Color: While we loved the natural look, you could paint your reindeer with outdoor-safe paints – perhaps a classic brown or a whimsical white for a snowy effect.
- Family of Reindeer: We can’t wait to add to our reindeer family next year! Imagine creating a whole collection of varying sizes, perhaps a larger one for Santa and smaller ones for his little helpers. Each one will have its own unique character, turning your yard into a magical Christmas scene.
What do you think? Are you tempted to gather some logs and branches to make your own charming log reindeer? There’s a special magic that truly ushers in the Christmas season, and for us, it isn’t officially Christmas until our handcrafted log reindeer has made its proud appearance in the yard. It’s more than just a decoration; it’s a labor of love, a connection to nature, and a sustainable way to celebrate the most wonderful time of the year.
More Festive DIY Inspiration
If you enjoyed crafting your log reindeer, you might love these other DIY Christmas projects to further deck your halls and outdoor spaces:
- Creative DIY Christmas Stocking Ideas
- Colorful & Easy DIY Christmas Ornaments
- Cheery and Bright Christmas Mantel Ideas
- How to Make a Gift Bag Out of Wrapping Paper
- Amazing Free Christmas Printables
- Inspiring DIY Advent Calendars
- 6 Secrets to Elevate Your Christmas Aesthetic
Wondering how I approach transforming rooms and spaces in our home? Check out Designer in a Binder® – your ultimate guide to decorating with confidence.
For exclusive content, behind-the-scenes sneak peeks, and more fantastic DIY ideas delivered straight to your inbox, be sure to subscribe to our newsletter before you go!