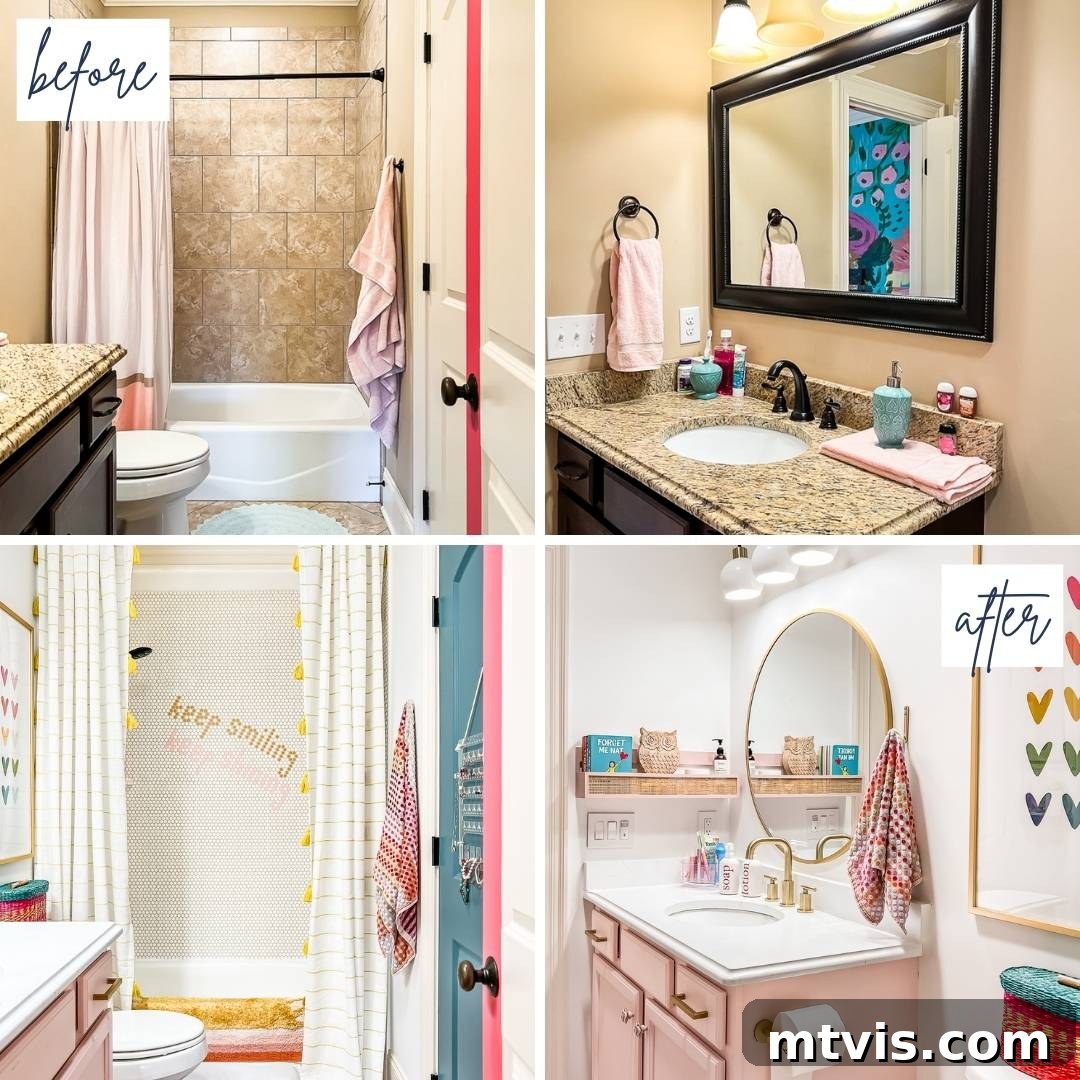
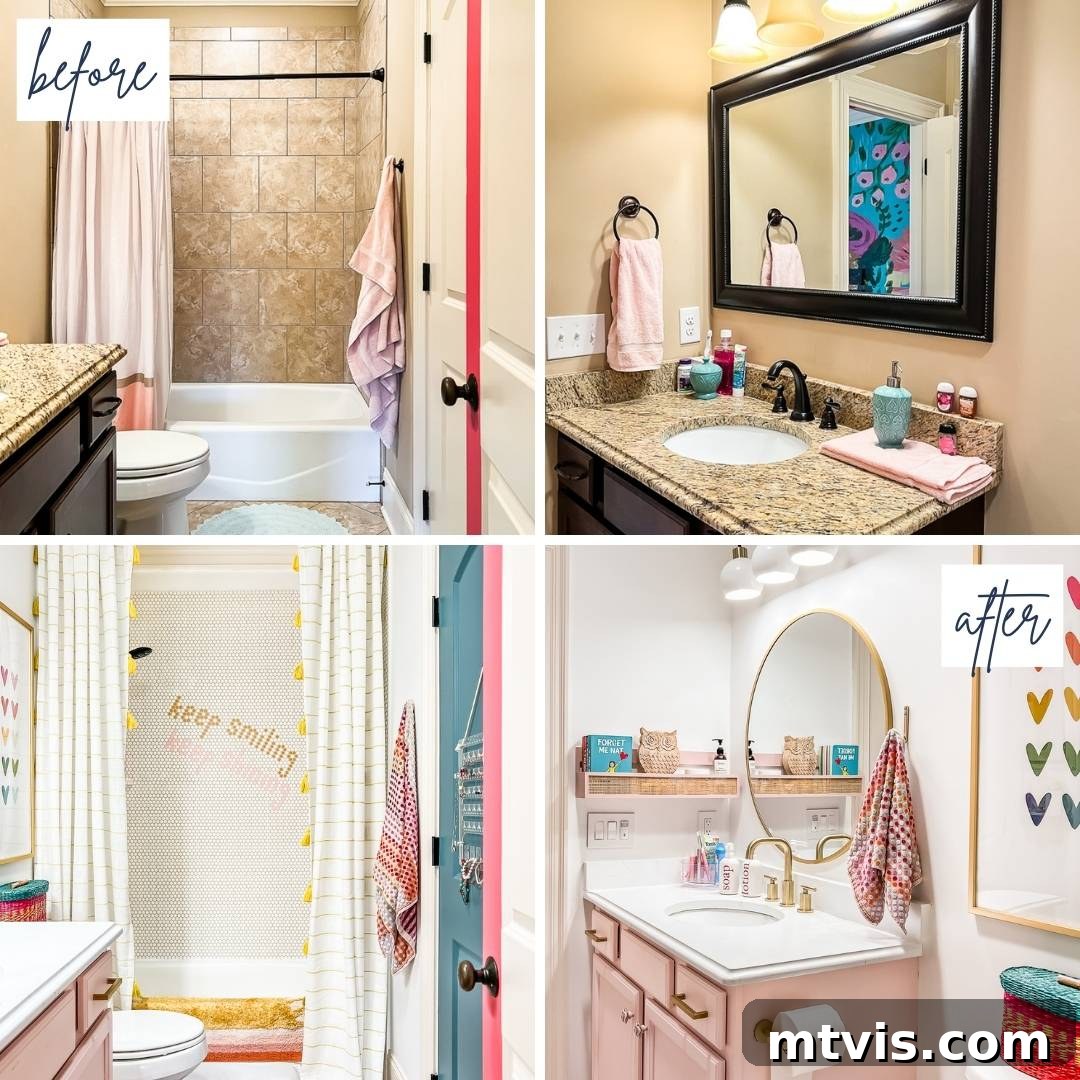
Bathroom renovations are often perceived as monumental and costly undertakings. Industry statistics, such as those from the National Kitchen and Bath Association, suggest an average bathroom remodel cost around $8,100. However, we successfully transformed our daughter’s dull and outdated bathroom into a vibrant, stylish, and highly functional space for a fraction of that cost – less than $2,000! This comprehensive guide will reveal the ingenious strategies and specific DIY techniques we employed to achieve a dramatic bathroom makeover on a strict budget, proving that with a little creativity and effort, you can breathe new life into an old bathroom without breaking the bank.
Having navigated several bathroom renovation projects, from extensive gut jobs to incredibly budget-conscious DIY transformations like this one, we’ve honed our skills in maximizing impact with minimal expenditure. This isn’t our first rodeo; we’ve updated numerous bathrooms, learning valuable lessons along the way. If you’re looking to stretch your renovation budget even further, explore our other comprehensive posts packed with DIY bathroom remodel ideas to save money. You can also find detailed accounts of our previous four bathroom makeovers at the end of this article, offering a wealth of inspiration and practical advice.
Our recent triumph involves our daughter Attley’s bathroom, which we completely overhauled for under $1,700, covering all materials and decor. This figure represents an impressive $6,400 savings compared to the national average. Read on to discover precisely how we achieved this remarkable transformation!
This post contains affiliate links for your convenience. Click here for my full disclosure policy.
Expert Tips to Tackle a Bathroom Makeover on a Budget
Embarking on a bathroom renovation doesn’t have to drain your savings. By implementing smart strategies and embracing DIY solutions, you can achieve a stunning transformation without overspending. Here are our top tips for a successful, budget-friendly bathroom makeover:
Tip 1: Start with a Comprehensive Plan
The foundation of any successful renovation or room makeover lies in meticulous planning. Before lifting a single tool or purchasing any item, dedicate ample time to outlining your vision, budget, and action steps. For this bathroom makeover, we leveraged the Designer in a Binder® system, which guided us from initial concept to final execution. A crucial part of this process involved creating a digital mood board. This visual tool allowed us to see how all design elements—colors, textures, fixtures, and decor—would come together, ensuring cohesion and preventing costly mistakes before any purchases were made. Additionally, Designer in a Binder® was instrumental in developing a realistic budget, compiling a detailed shopping list for necessary items, and crafting a clear to-do list with a project timeline.
A well-defined design and execution plan is your roadmap to a smoother, more efficient renovation. It helps you anticipate challenges, allocate resources wisely, and stay focused on your goals, thereby minimizing unnecessary spending and wasted time. We began Attley’s bathroom remodel with a crystal-clear vision, and by adhering to our plan, we successfully avoided deviations that could have inflated costs. Interestingly, for Attley’s bathroom, a specific bathmat served as the “crucial element,” anchoring all subsequent design decisions and simplifying the entire selection process. (While the exact mat is unavailable, a similar style can be found here).
(Image of Attley’s bathroom mood board would typically be here, showing the planned aesthetic.)
Tip 2: Maintain the Existing Layout
One of the most significant cost-saving measures in a bathroom renovation is to **preserve the current layout.** Any alterations to the bathroom’s footprint often necessitate moving plumbing lines and electrical wiring, which are notoriously expensive and require professional expertise. These hidden costs can quickly escalate your budget, turning a modest project into an exorbitant one. By electing to keep the existing layout, you effectively eliminate these major expenses, allowing your budget to be redirected towards aesthetic enhancements. This strategy enables you to concentrate on updating the visual appeal of your bathroom through new fixtures, a fresh coat of paint, and stylish decor, rather than spending on costly structural changes. It’s an ideal approach for those operating on a tight budget who still desire a revitalized and modern bathroom appearance. In Attley’s bathroom, the existing layout was perfectly functional, so we wisely chose to retain it, saving us a substantial amount of money and avoiding complex, time-consuming work.
Tip 3: Maximize Reuse of Existing Materials
Another powerful tactic for economizing on a bathroom renovation is to intelligently reuse existing materials whenever feasible. Instead of automatically ripping out and replacing items like your current vanity, sink, or bathtub, assess their condition. If they are structurally sound and in good working order, consider giving them a facelift. A fresh coat of paint on a vanity, new hardware for cabinets, or even a professional reglazing for an old tub can dramatically alter their appearance at a fraction of the cost of replacement. This approach is not only budget-friendly but also environmentally conscious, reducing waste. It allows you to achieve a refreshed look without the significant expense associated with purchasing and installing new bathroom cabinetry, plumbing fixtures, and other core components.
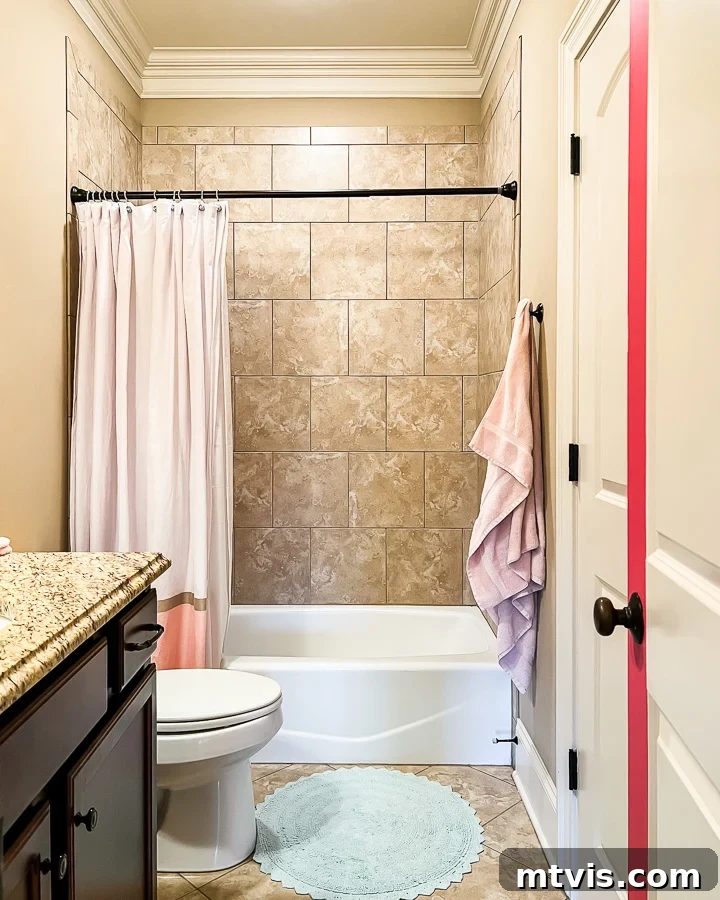
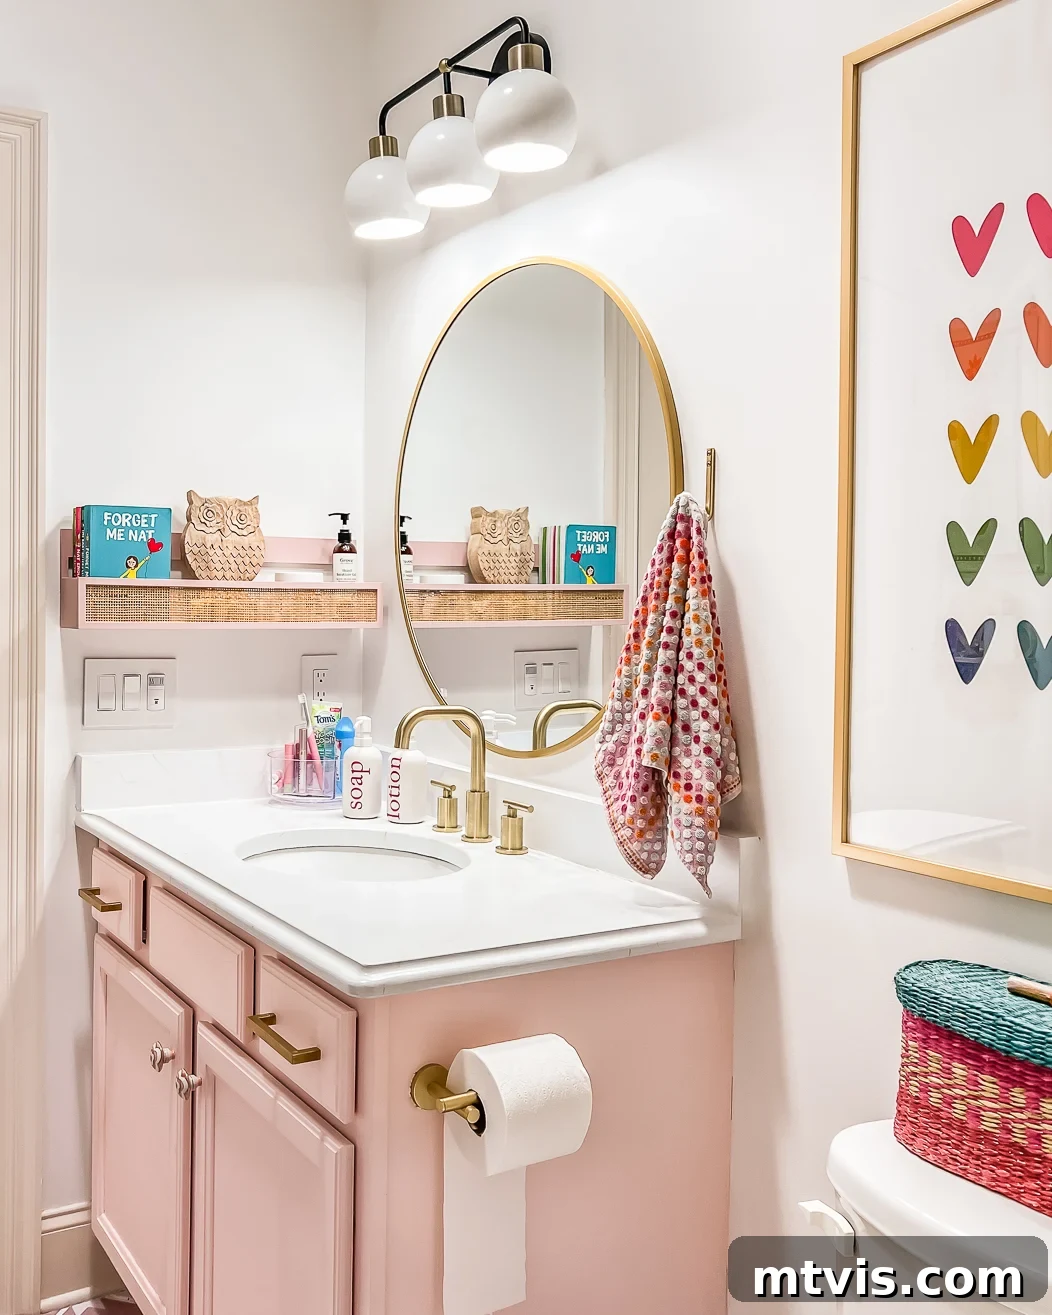
In Attley’s bathroom, her bathtub, toilet, sink, and vanity were all in excellent condition. However, their outdated aesthetics no longer aligned with our home’s evolving style. Rather than incurring the high cost of new installations, we opted for a transformative approach: updating these existing elements with paint! This leads directly to our next invaluable tip…
Tip 4: Unleash the Power of Paint for Maximum Transformation
Few tools are as effective and budget-friendly for transforming a bathroom as a fresh coat of paint. Paint has an incredible ability to instantly brighten, modernize, and enlarge a space. We started by repainting Attley’s formerly drab brown walls with Pure White by Sherwin Williams. The difference this alone made was absolutely stunning, creating a clean, airy canvas for the rest of the makeover.
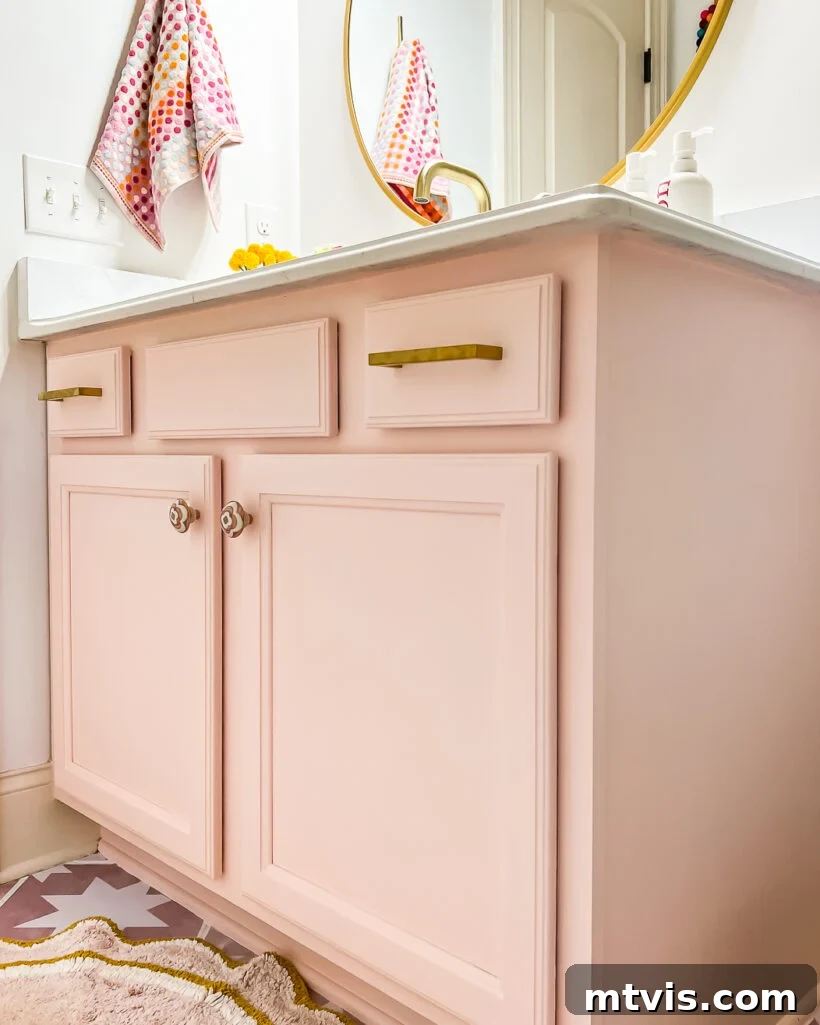
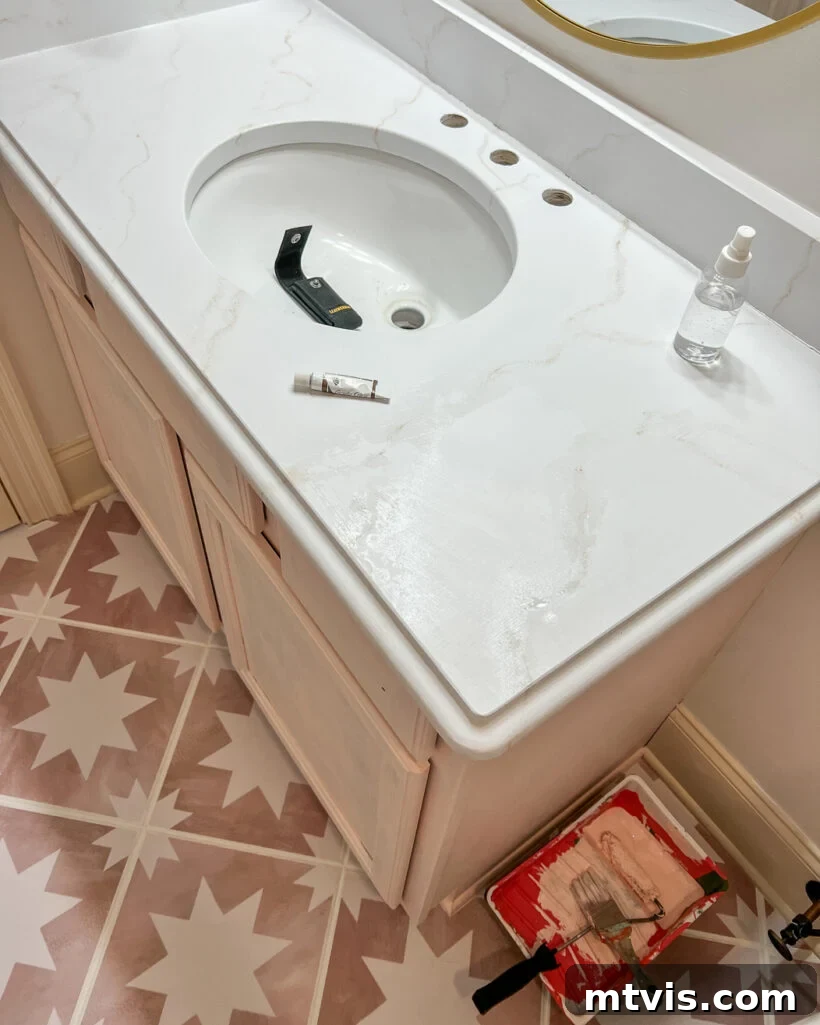
Beyond the walls, we extended the magic of paint to other significant surfaces. I skillfully painted her existing laminate countertops to mimic the luxurious look of marble. This DIY project has proven incredibly durable, holding up beautifully for nearly two years. Additionally, her outdated vanity received a complete overhaul using a quick and easy cabinet painting method, giving it a modern, cohesive feel. These three simple painting projects—walls, countertops, and vanity—collectively had a monumental impact on the bathroom’s overall aesthetic. Paint truly is the ultimate secret weapon for a budget-friendly small bathroom idea, offering an unparalleled return on investment in terms of visual transformation.
Tip 5: Revitalize Outdated Floor Tile Without Demolition
An outdated bathroom floor can significantly detract from the overall appeal of your space, but replacing it is often a messy, time-consuming, and expensive endeavor. If your existing floor tile is in good, stable condition, you have fantastic options to transform its appearance without the need for demolition! There are numerous cheap flooring ideas you can implement in a bathroom, offering a fresh look on a budget.
For Attley’s bathroom, we achieved a dramatic floor transformation by covering her old, brown floor tiles with these truly GORGEOUS tile stickers. These self-adhesive decals are a game-changer for budget-conscious renovators. They offer an incredible array of patterns and colors, allowing you to completely reinvent your floor’s aesthetic in a matter of hours, not days or weeks.
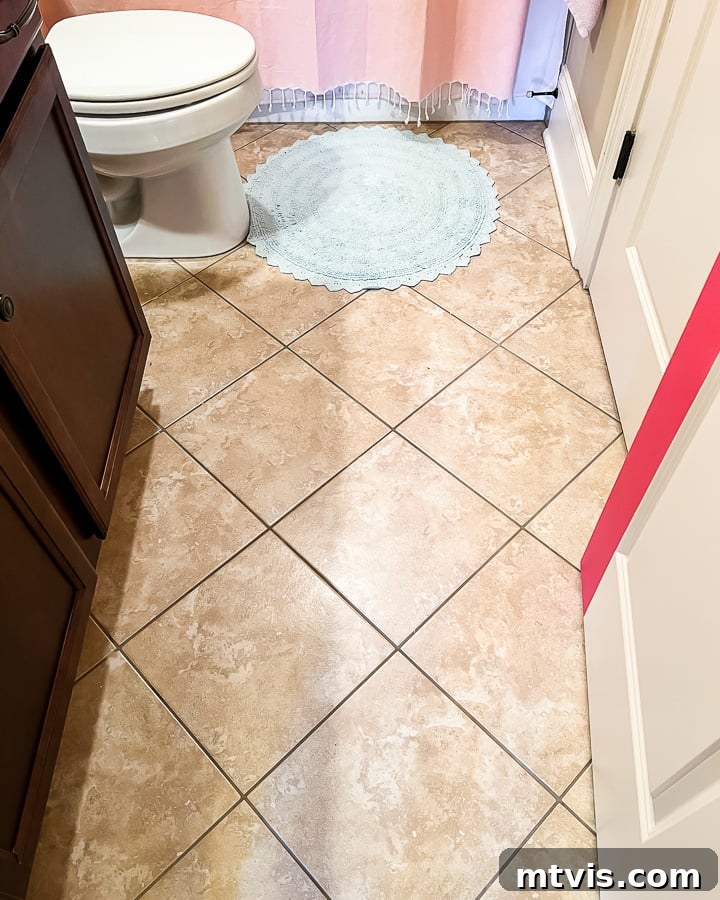
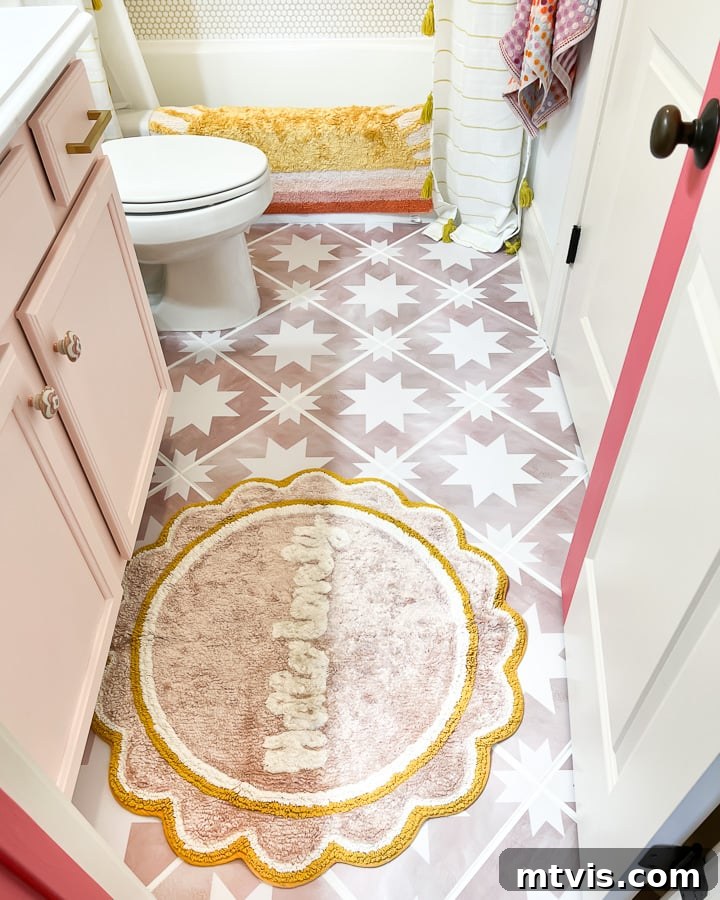
Due to common misconceptions about tile stickers, we highly recommend reading our detailed post on everything you need to know about tile stickers. The key takeaway is that when applied correctly, they are incredibly durable and waterproof, making them suitable for high-moisture environments like bathrooms. We’ve used tile stickers in both of our girls’ bathrooms, and they have held up perfectly, looking just as good as the day they were installed. If skepticism lingers, a quick video demonstration (linked in the original article) can provide a powerful visual testament to their quality and longevity.
(A video demonstration on the durability of tile stickers would typically be embedded here, showing how well they hold up.)
Tip 6: Explore Tiling Over Existing Tile (with Caution)
When faced with outdated shower tile, many assume the only options are either to paint the shower tiles (which requires a special kit) or to undertake the arduous and costly process of ripping them out and starting anew. Full tile installation, especially demolition, is undeniably a significant undertaking. However, there’s a less common, yet highly effective, alternative that can save you considerable time and money: tiling directly over existing tile. This method is viable only if the original tile is in excellent, stable condition, completely free of leaks, cracks, or any signs of grout deterioration or moisture issues. I understand this might sound unconventional, but allow me to explain.
While contemplating how to address the brown tiles in Attley’s shower, I recalled that my friend Bre from Brepurposed had successfully tiled over existing tile in one of her bathrooms. Given her father-in-law’s expertise as a tile professional, her success convinced me of the method’s potential. Although she didn’t apply it in a shower, it sparked my intensive research into the feasibility of this technique for our project.
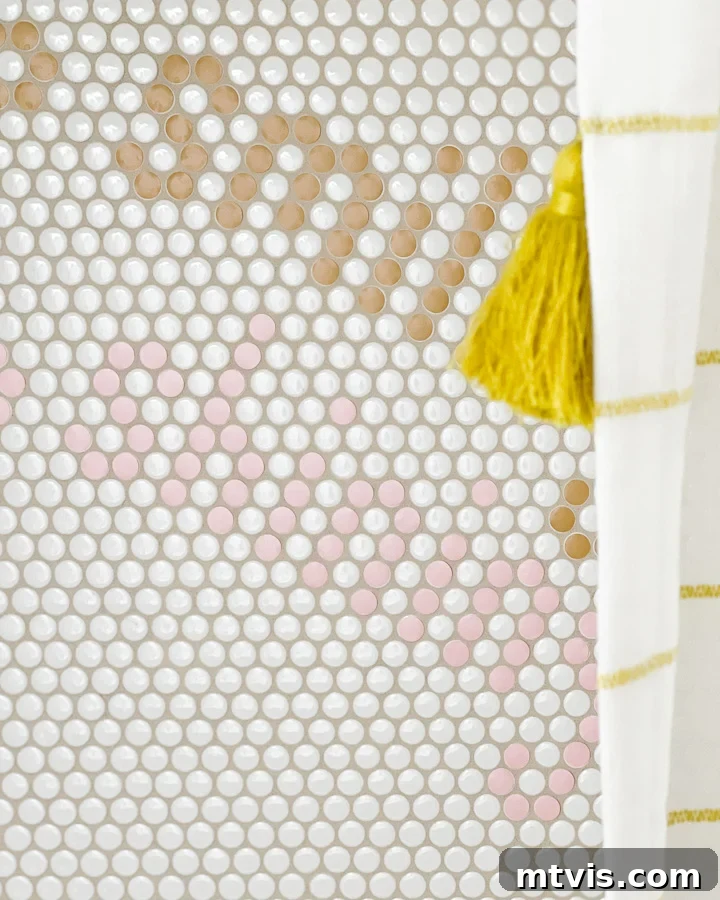
After thorough investigation, we decided to proceed with tiling over the existing shower tile. I urge you to consult my detailed post on how to tile over tile to determine if it’s a suitable option for your specific situation. This article shares our exact process and critically assesses when it’s a viable choice (spoiler alert: it can often be a BAD idea if conditions aren’t perfect!). We proceeded because our shower tile was in pristine condition, and we were absolutely certain there were no underlying leaks, grout problems, or moisture concerns. We immediately ordered the penny tile we had chosen and gathered all necessary supplies. As the photos illustrate, the result was flawless! We installed the penny tile nearly two years ago, and it has performed perfectly without any issues.
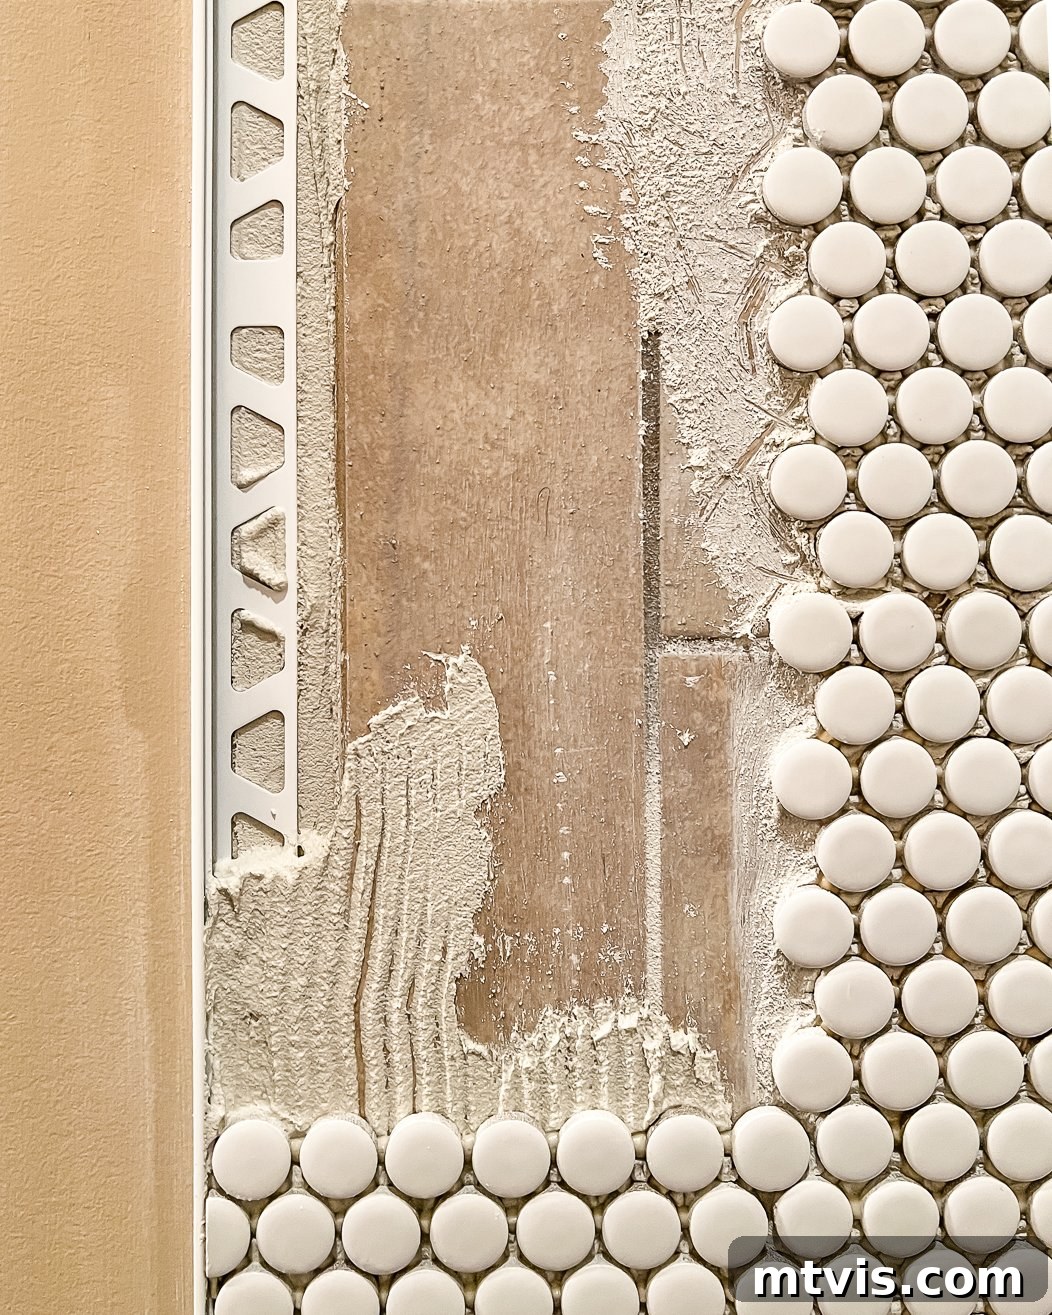
While tiling and grouting Attley’s shower was not a small task, the outcome was incredibly beautiful and well worth the effort. By choosing to tile over the old tiles instead of demoing them, we saved a significant amount of time, labor, and money, as we avoided the need to replace the cement board and other structural elements that would have been exposed during demolition.
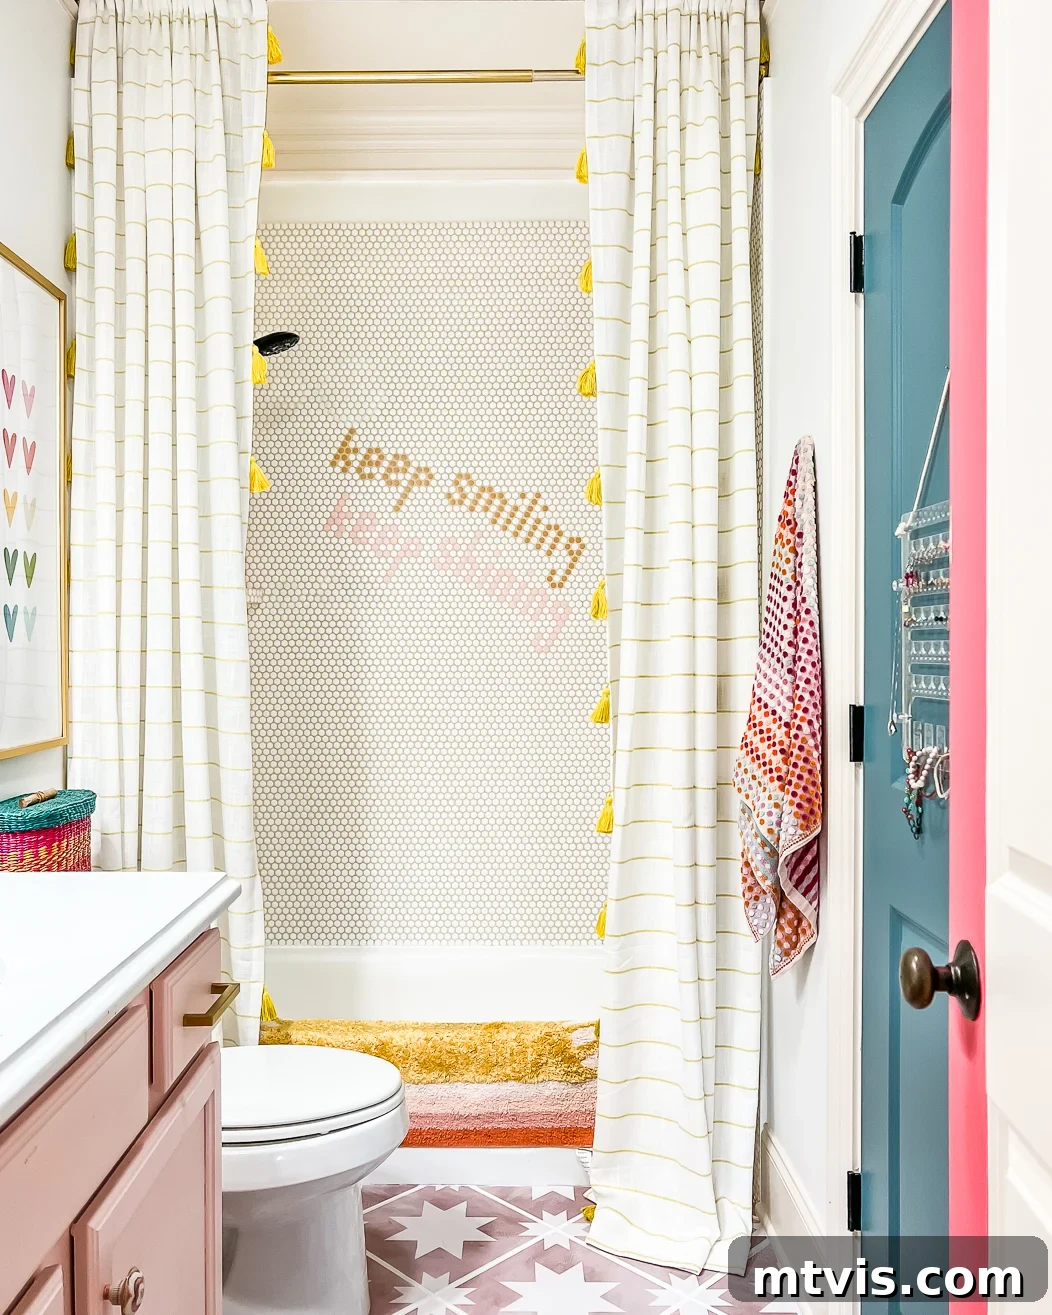
To add a unique, personalized touch, I employed a creative method similar to what I used on our DIY tile headboard. I incorporated vinyl circle cutouts onto the penny tiles, forming a custom message that adds visual interest and character to her shower (rest assured, the vinyl is completely waterproof!).
Tip 7: Thoughtfully Upgrade Lighting and Plumbing Fixtures
The impact of modern, stylish lighting and plumbing fixtures on a bathroom’s overall aesthetic is often underestimated. Fortunately, today’s market offers an abundance of high-quality options that are both visually appealing and surprisingly affordable. A modest investment in updating these elements can yield a dramatic improvement, instantly elevating your bathroom’s look from dated to contemporary. By strategically selecting new lighting and fixtures, you can infuse a fresh, updated feel into your bathroom without the expense of major structural changes.
For Attley’s bathroom, we began by replacing the old, plain mirror with a chic 32″ round wall mirror, which immediately added a touch of sophistication and opened up the space. Next, the outdated light fixture was swapped out for this beautiful and modern alternative, providing both improved illumination and a contemporary design statement. Finally, we exchanged the old bathroom faucet for this more modern option, completing the cohesive and refreshed look of the vanity area. These targeted upgrades, though seemingly small, collectively contribute significantly to a revitalized bathroom aesthetic.
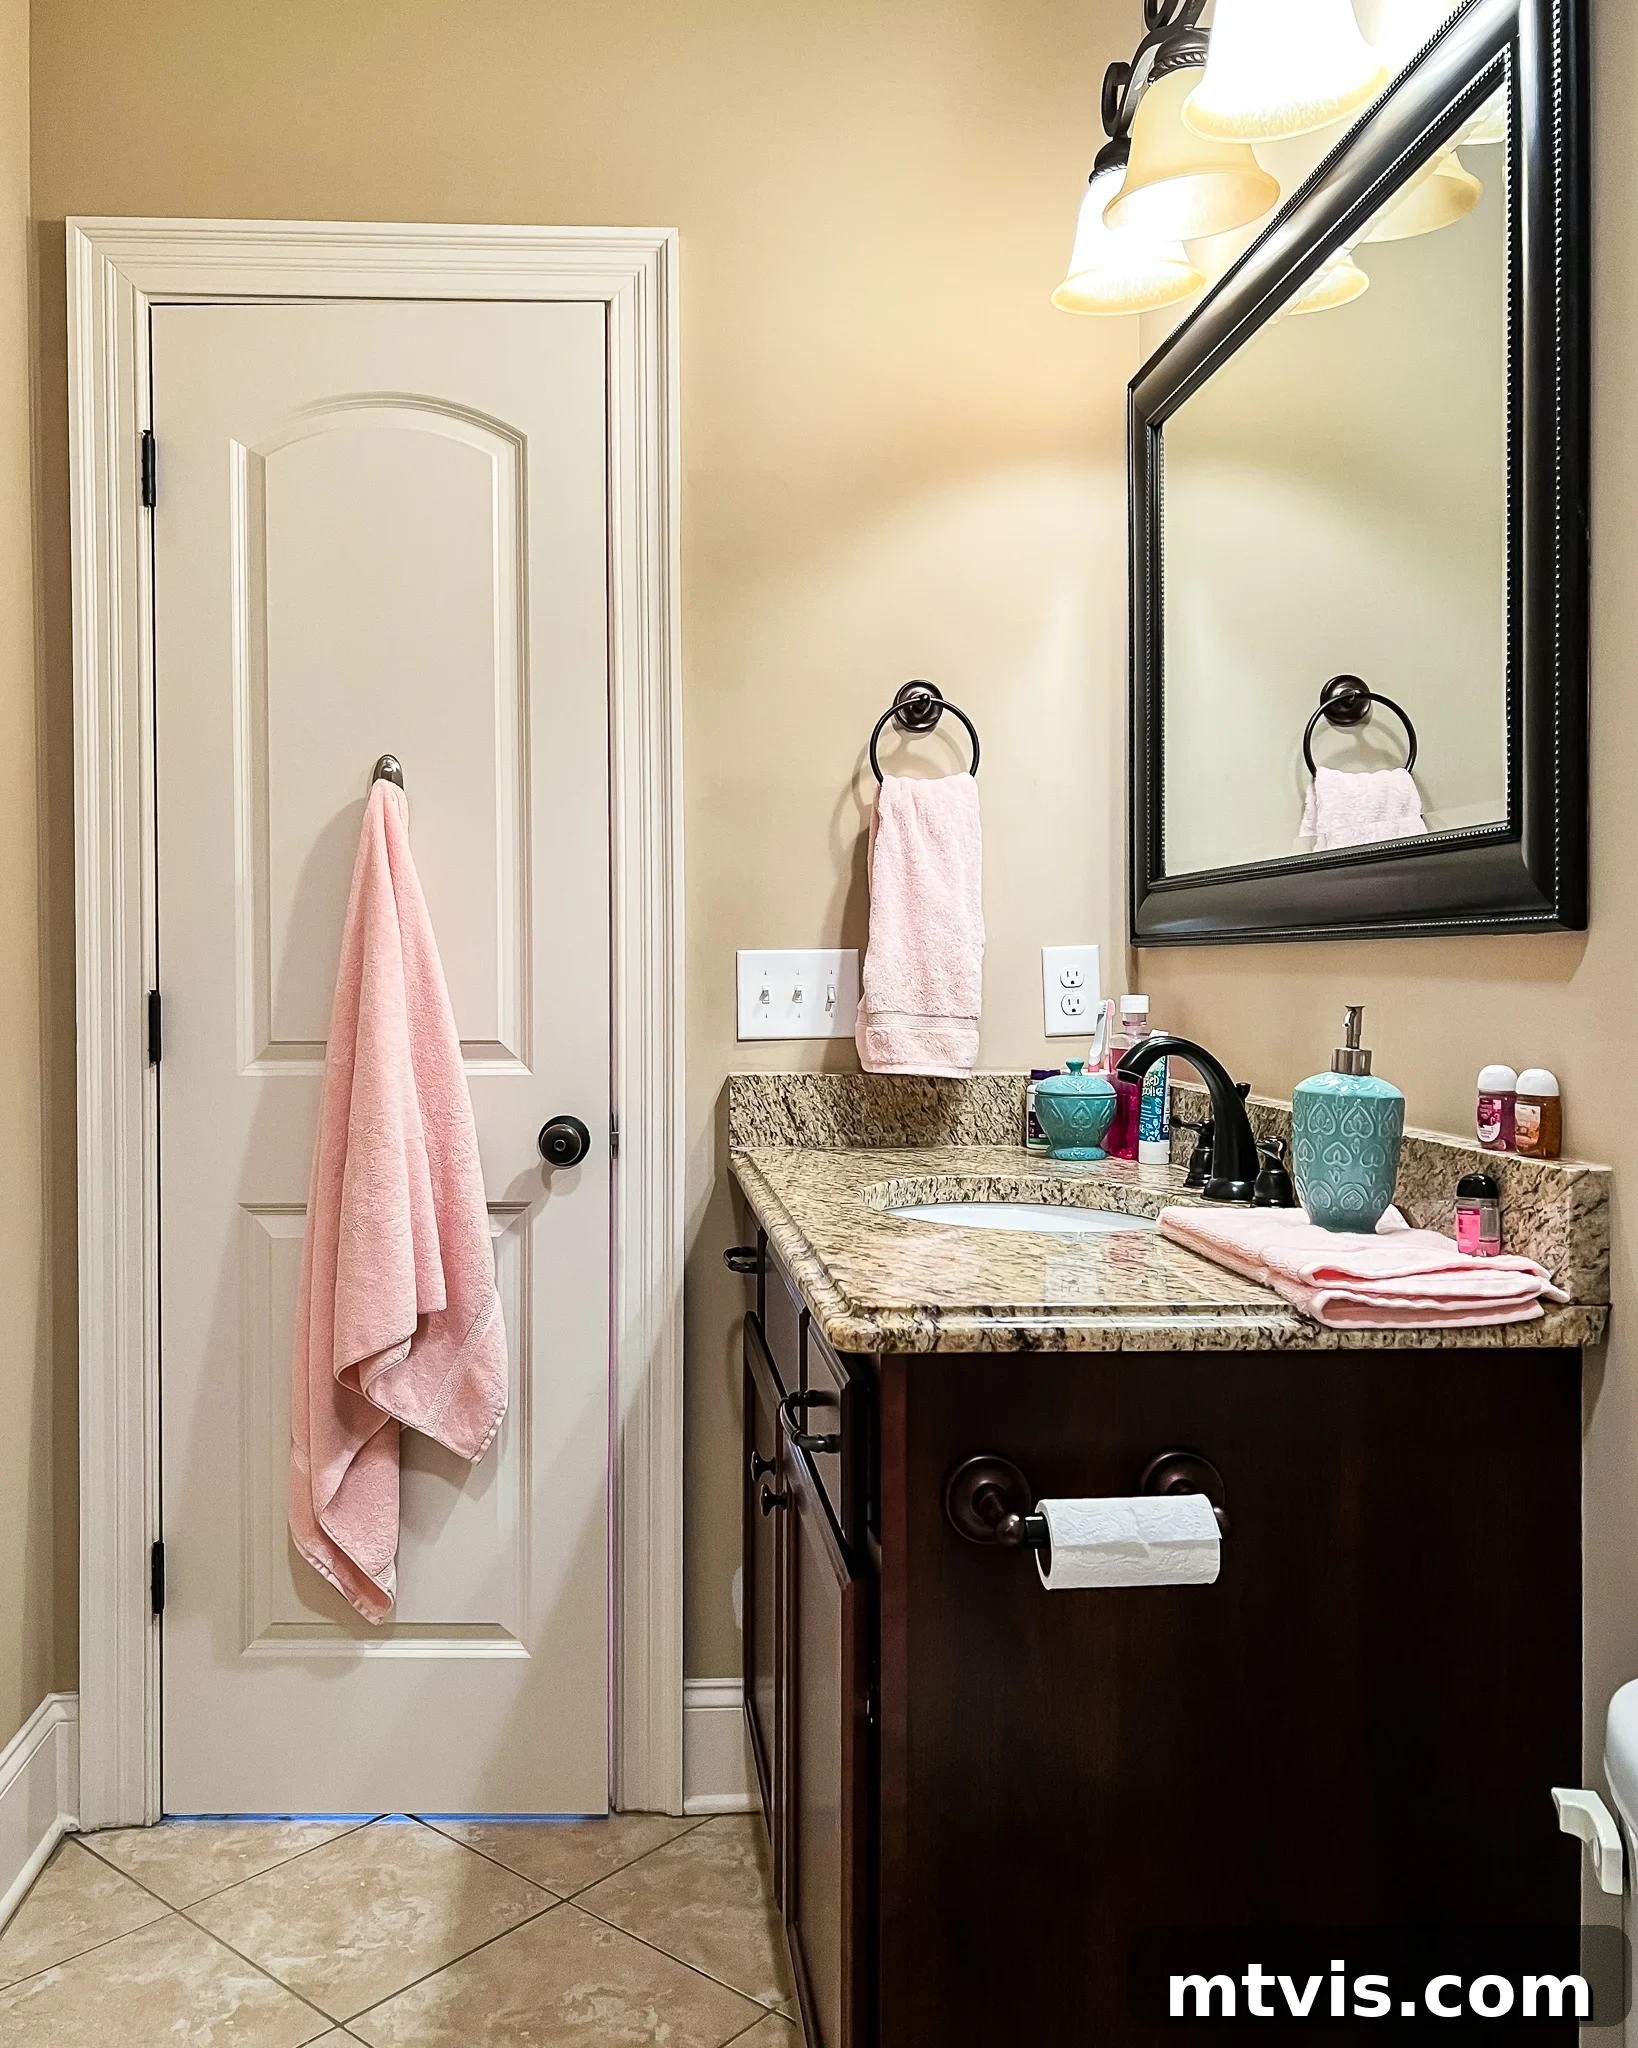
Tip 8: Achieve Maximum Impact with Thoughtful Bathroom Decor
Never underestimate the power of carefully selected bathroom decor to transform a space. Strategic decor choices can create a significant visual impact, making your bathroom feel custom-designed and luxurious, even on a budget. For instance, we dramatically enhanced the shower area by hanging 9-foot window curtains (click here for similar options) on each side of the shower, and then placing this 9-foot shower curtain on a separate rod positioned behind the decorative curtains. This layering effect beautifully frames the shower and tub. Crucially, hanging the curtains all the way to the ceiling creates an illusion of height and makes the entire bathroom feel much larger and more grand than its actual dimensions.
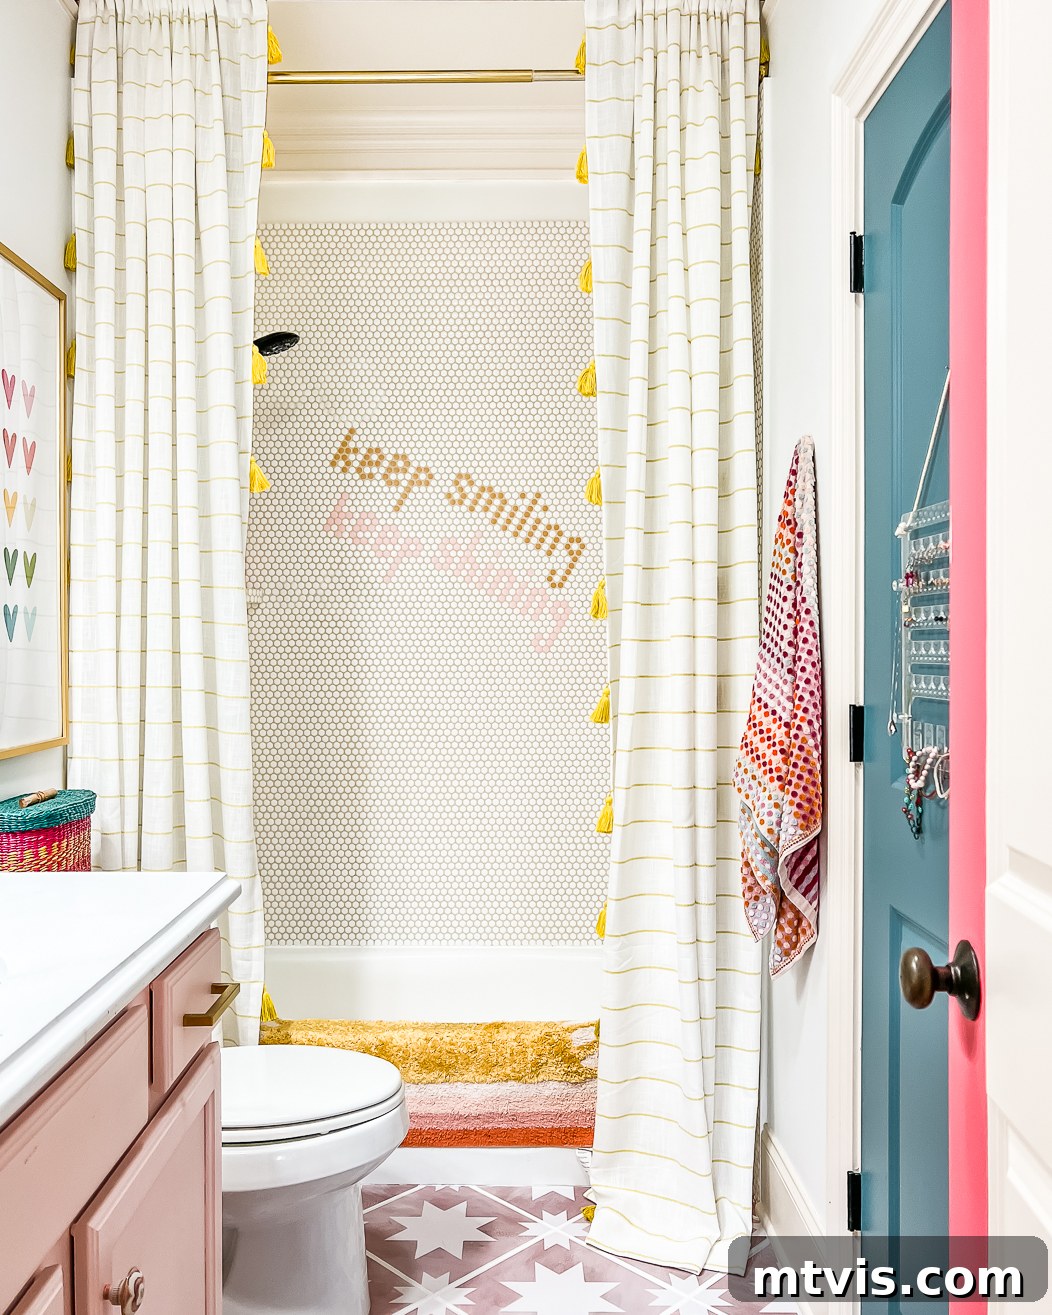
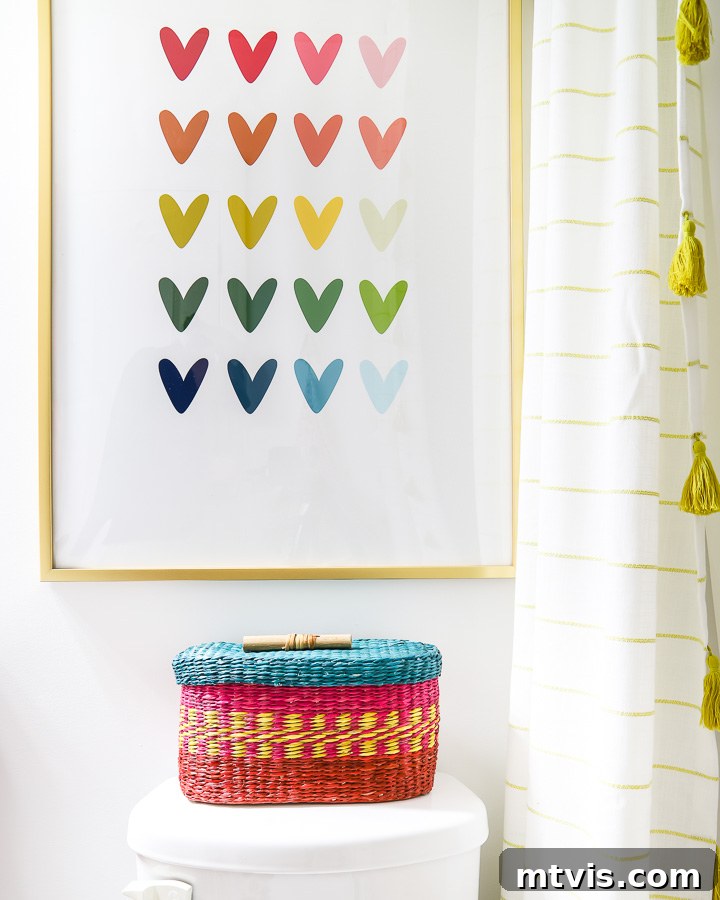
We also infused personality and vibrancy through colorful artwork and accessories, reflecting Attley’s love for bright hues. Attley specifically requested a rainbow art print for her bathroom (we chose the 24 x 36 size) and framed it with this incredibly inexpensive poster frame, a personal favorite for its affordability and sleek design. When I discovered a storage basket (similar) perfectly sized for toilet paper, it was an undeniable must-have for her space, blending functionality with whimsical charm.
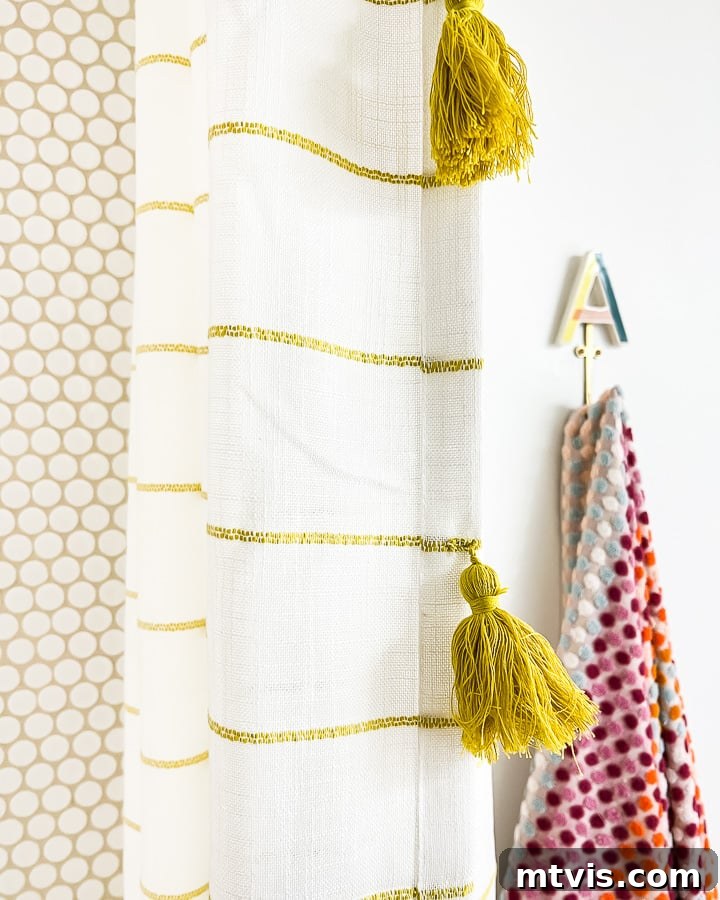
Her bathroom boasts several other delightful touches, including a charming monogrammed hook, perfect for hanging her bath towel. Incorporating ample towel hooks and convenient storage solutions is crucial for any functional bathroom.
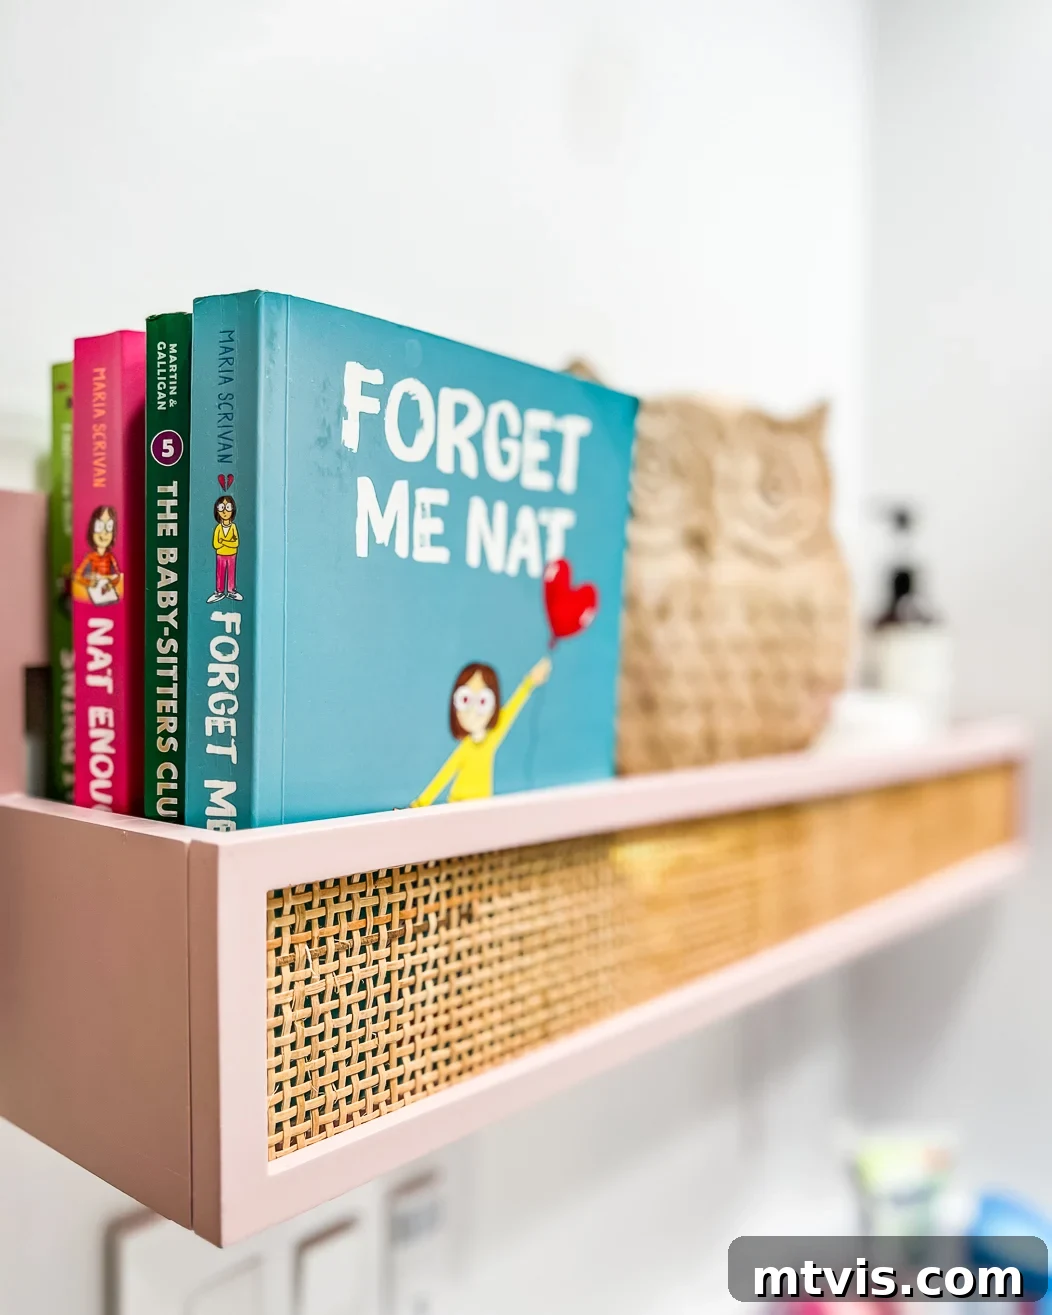
As Attley transitioned into her tween years, her need for organized storage grew, prompting us to add some cute yet functional solutions. To clear her countertop of books, lotions, and hand sanitizer, I installed this adorable wall shelf conveniently next to her sink.
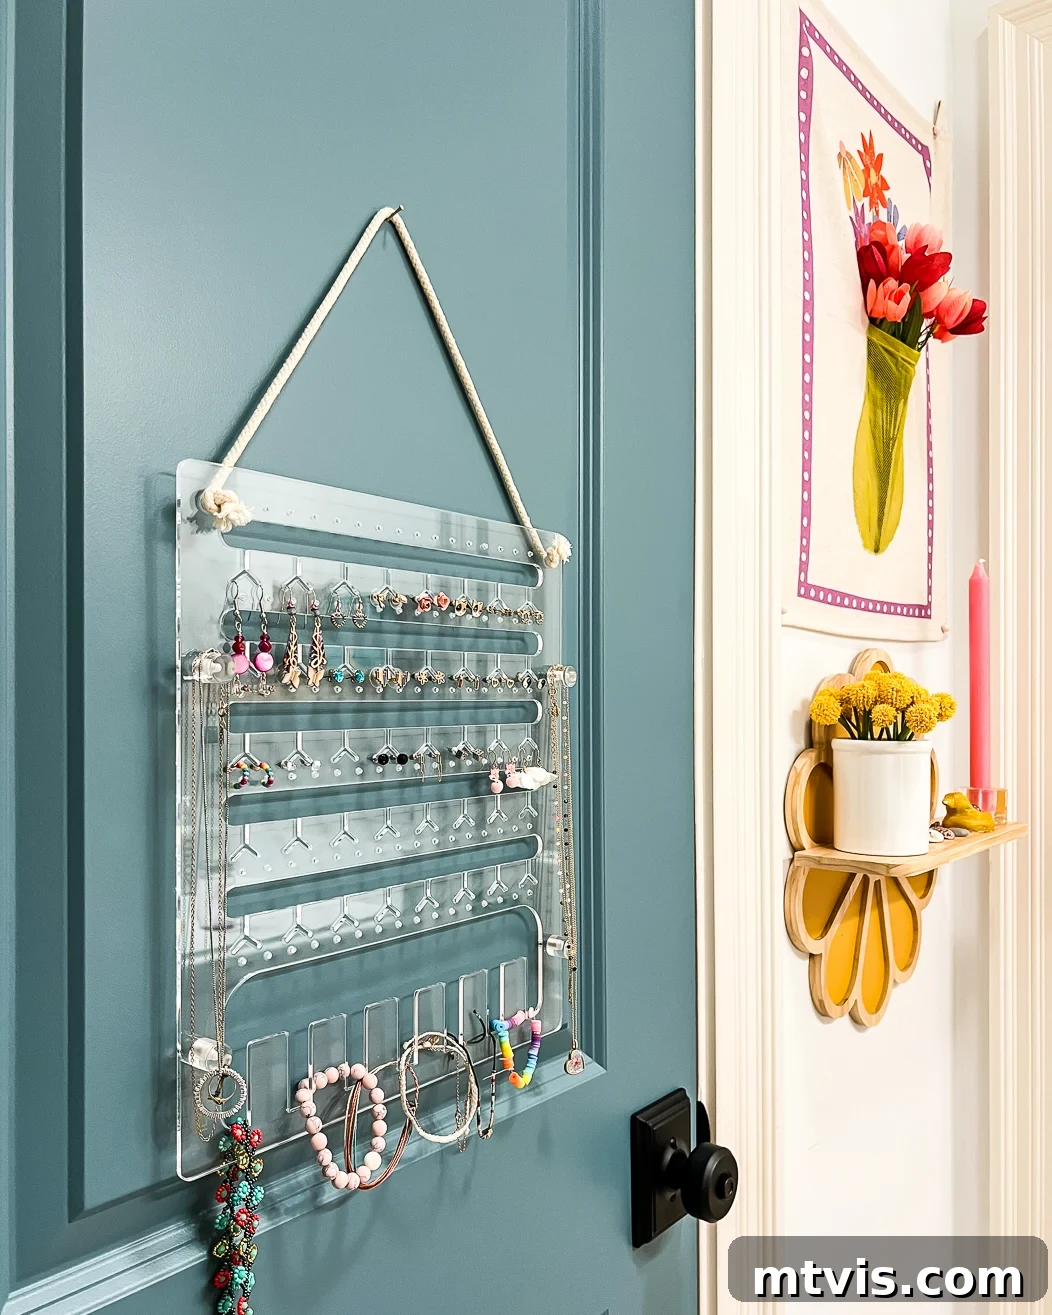
Furthermore, to keep her jewelry neatly organized and off the counter, we acquired this affordable acrylic jewelry organizer, which we hung on the back of her door, maximizing vertical storage.
Finally, to complete the playful and personalized aesthetic, I added this cute flower wall shelf and a wall tapestry I already owned to the wall behind her vanity, purely for fun and added visual interest.
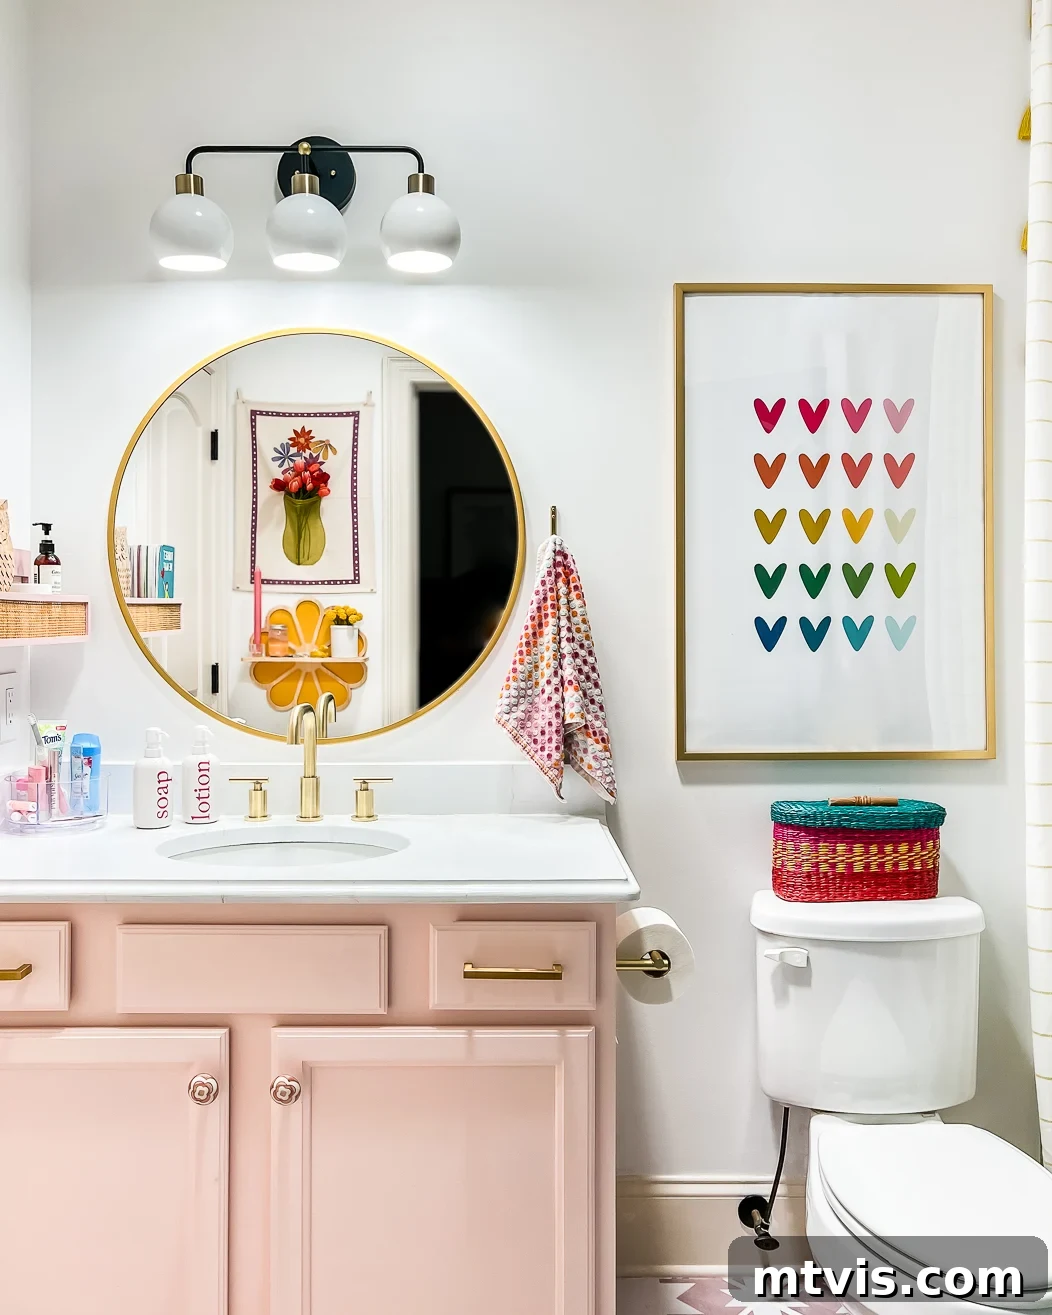
What do you think of the transformation? Attley’s sheer excitement, evidenced by her bouncing up and down upon seeing the finished space, made every bit of effort incredibly worthwhile. As a bonus, about a year after this initial budget-friendly makeover, we had a VELUX Sun Tunnel installed in her bathroom, now flooding it with beautiful natural light and enhancing the bright, inviting atmosphere even further!
Detailed Bathroom Makeover Budget Breakdown
Curious about the exact cost of this budget-friendly bathroom makeover? Here’s a transparent breakdown of our expenditures:
- Shower tile: $213
- Grout, primer, thinset, and other tiling supplies: $286
- Tile stickers (3 packs of 9): $153
- New vanity light: $259
- New mirror: $90
- New sink faucet: $85
- Pair of 9-foot curtains (click here for similar option): $50
- 9-foot shower curtain: $18
- Wall paint: We used leftover paint (approximate cost for a new gallon: $40)
- Cabinet paint: $22
- Countertop paint: We used leftovers (new cost approximately $44 – requires a white base coat and veining kit, then polyacrylic sealant)
- Polyacrylic sealant: We used leftovers (new cost approximately $10)
- New cabinet knobs: $30
- Inside curtain rod mounting brackets: $5
- Curtain rod: $32
- Decor (bath mats, art, frame, towels, shelves, hooks, etc.): $278
- Shower head: $24
- GRAND TOTAL: $1,639
This detailed breakdown, coupled with the inspiring transformation of Attley’s bathroom, serves as a powerful testament that a stunning bathroom makeover on a budget is entirely achievable. The core principles for success are simple: maintain the existing layout, creatively update and reuse the elements you already possess, and commit to doing as much of the work yourselves as possible. These strategies empower you to dramatically refresh your space without incurring exorbitant costs or extensive professional labor.
Bathroom Source List
- Wall color: Pure White by Sherwin-Williams
- Trim and ceiling color: Divine White by Sherwin-Williams
All other products for which we can find direct links are provided below for your convenience.
Scroll and click any image below for full product details.
(Product showcase for bathroom items would appear here.)
Explore Our Other Bathroom Renovations & Makeovers
If you’re eager to see more of our budget-friendly transformations, check out the details of four other bathrooms we’ve revitalized over the years:
If you’re wondering how I consistently approach transforming rooms and spaces throughout our home, be sure to check out Designer in a Binder®. It’s the system that empowers us to create beautiful, functional spaces on a budget.
For exclusive content and behind-the-scenes sneak peeks into our latest projects and design insights, make sure to subscribe before you go!
(Subscription form content would typically be embedded here.)