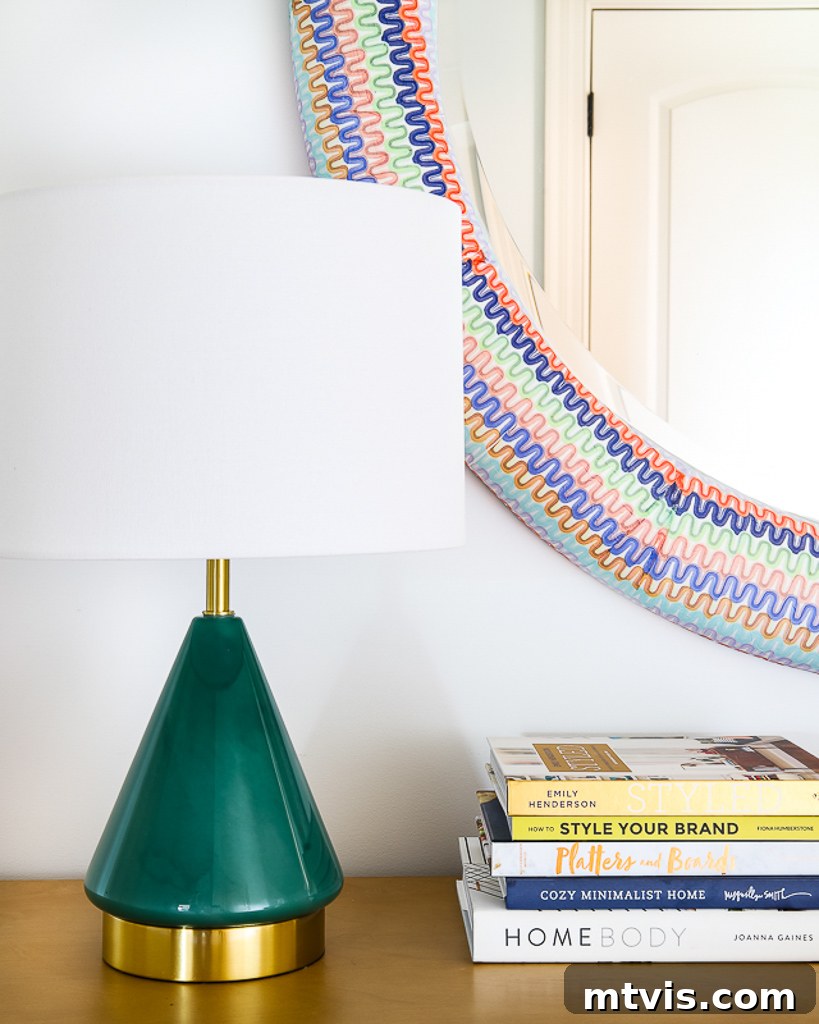
Transform Any Surface: How to Decoupage Napkins for Stunning DIY Decor
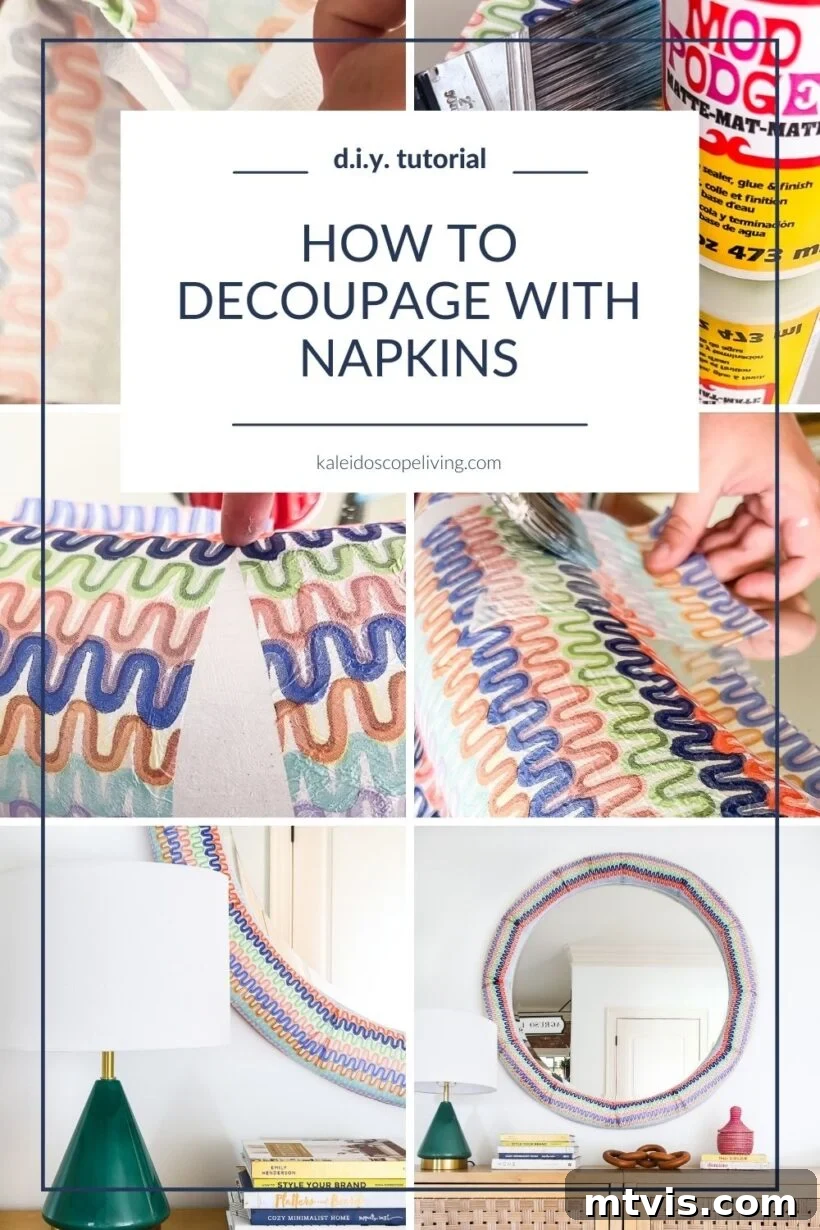
Decoupage is a wonderfully versatile art form that allows you to infuse vibrant color, intricate patterns, and personalized charm into almost any object. Over the years, I’ve used this fantastic technique to breathe new life into various items, from outdated furniture pieces to unique wall art. You might even be familiar with my popular guide on how to decoupage furniture with fabric for an elegant “upholstered” effect. My past projects also include decoupaging fabric onto chipboard to create a one-of-a-kind wall quote, and a dramatic Ikea kids’ table and chairs makeover using fabric and decoupage medium. Clearly, I’m a passionate advocate for decoupage, especially when working with fabric!
However, quality decorative fabric isn’t always the most budget-friendly option. This often leads crafters to wonder, “Can you decoupage with napkins?” The answer is a resounding YES! Napkins offer an incredibly affordable and accessible alternative for adding beautiful designs to your projects, opening up a world of creative possibilities without breaking the bank.
Inspired by this question, I embarked on a personal research and crafting journey, deciding to decoupage napkins onto an old mirror frame to give it a fresh, artistic look. The result was absolutely stunning! What made it even better was the cost: two packs of decorative napkins for this entire project set me back only $16.00, and I didn’t even use them all. This proves that you don’t need expensive materials to achieve high-end, custom decor.
I must admit, working with napkins presents its own set of challenges, and there’s definitely a learning curve involved. Their delicate nature requires a gentle touch and specific techniques to prevent tearing and achieve a smooth finish. But don’t let that deter you! With the practical tips and clever tricks I discovered throughout my own learning process, you too can master the art of decoupaging with napkins. Get ready to transform your ordinary items into extraordinary pieces of art. Let’s dive into the detailed steps and essential insights!
Table of Contents
What to Know About Decoupaging with Napkins
Decoupaging with napkins opens up a world of creative possibilities for customizing your home decor. You can apply napkins to virtually any smooth surface, including wood, paper, fabric, glass, metal, tin, terra cotta, and MDF. However, for the best results, I strongly recommend choosing a relatively smooth surface. Napkins are exceptionally delicate once separated into single plies, and a highly textured surface can make application even more challenging, increasing the risk of tearing. A smooth base provides the ideal foundation for achieving a flawless, professional finish.
- Pros of Decoupaging with Napkins
- Inexpensive: Napkins are incredibly affordable, making them a fantastic choice for budget-conscious DIYers and for practicing techniques without significant investment.
- Abundant Patterns: The market is flooded with an endless variety of fun, colorful, and unique patterns, designs, and themes. You’re sure to find something that perfectly matches your style or project vision.
- Delicate Aesthetic: Unlike heavier materials like fabric, napkins offer a more delicate and subtle look. Their translucent quality, especially when applied with decoupage medium, can create a beautifully soft, painted-on effect.
- Cons of Decoupaging with Napkins
- Fragility: Napkins are inherently delicate. Once you remove the non-printed layers, the single ply of patterned paper becomes extremely thin and prone to tearing, especially when wet with decoupage medium (I always use Mod Podge, which is my go-to for its adhesive and sealing properties).
- Wrinkling: Due to their thinness and fragility, completely avoiding wrinkles, especially on curved or irregular surfaces, can be nearly impossible. It’s often best to embrace these subtle wrinkles as part of the unique, handmade charm of your decoupage project.
- Helpful Decoupage Tips & Tricks
- The Plastic Wrap Method: Many crafters suggest placing a piece of plastic wrap over the wet napkin and then smoothing out wrinkles with your fingers or a brayer. The idea is that the plastic wrap protects the delicate napkin from tearing. While this technique didn’t yield perfect results for me on my curved mirror, it’s a popular method worth trying on flatter surfaces.
- Hairspray Pre-treatment: Some artisans lightly spray their napkins with hairspray before application. The theory is that this adds a slight stiffness to the napkin, making it a bit more durable and easier to handle when wet with Mod Podge. I didn’t try this for my mirror project but plan to experiment with it in the future.
- Sanding and Sealing: Depending on the intended use and location of your finished piece, sanding and sealing might be crucial steps. For items that will be frequently handled, exposed to moisture, or subject to wear and tear (like coasters, tabletops, or outdoor decor), a protective topcoat is essential. For my mirror, which hangs on a wall and won’t be touched often or come into contact with water, I opted to skip these steps. Remember, Mod Podge is water-resistant, not fully waterproof, and also has limited heat resistance, so choose your sealer accordingly.
This post contains affiliate links for your convenience. Click here for my full disclosure policy.
Step-by-Step Guide to Decoupage Napkins on Smooth Surfaces
Materials You’ll Need
- Paper Napkins: Choose decorative, multi-ply napkins. I found an excellent selection with unique and modern patterns at Paper Source.
- Mod Podge: This essential medium acts as both an adhesive and a sealant. Various finishes are available (matte, gloss, satin); I used Mod Podge Matte for this project.
- Paint Brush: A multi-purpose bristle brush or a foam brush works well for applying the Mod Podge smoothly and evenly.
- Disposable Cup: For pouring and holding your Mod Podge.
- Plastic Ziploc Bag or Wax Paper: Useful for protecting your work surface or for temporary storage of separated napkin layers.
- Wet Rag: Keep one handy for quick clean-ups and correcting mistakes.
I highly recommend you watch the short video below for an overview of this project! The detailed written tutorial follows 🙂
Step 1: Select Your Project Surface
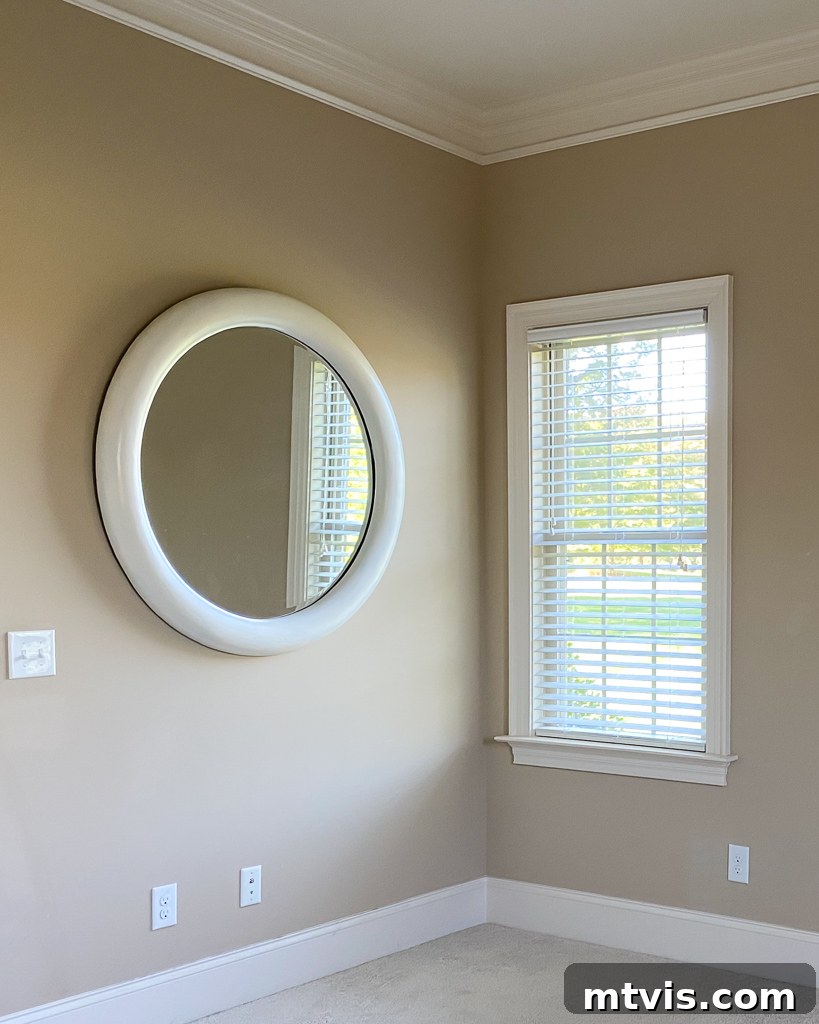
The first crucial step is to choose the item you wish to transform. Your choice of surface can greatly influence the ease and outcome of your decoupage project. For this tutorial, I selected a large, round wood mirror that was left behind by the previous owners of our current home. It was located in the guest room, and its impressive size (44 inches in diameter) and substantial scale convinced me to keep it. The mirror itself was functional, but its thick, rounded frame, though sturdy, lacked character and vibrant appeal. I recently decided it was the perfect candidate for adding some much-needed color and pattern, and napkins emerged as the ideal, cost-effective solution. This is how the mirror appeared when we first moved in – lovely, but undeniably understated and a bit dull. Consider items around your home that could benefit from a creative refresh, whether it’s a plain wooden box, an old vase, or a piece of furniture.
Step 2: Choose Your Decorative Napkins & Decoupage Medium
The beauty of decoupage truly shines through the patterns you choose. I instantly fell in love with these specific napkins from Paper Source, and I wholeheartedly recommend starting your search there for truly distinctive and beautiful designs. When I first began my hunt for appealing napkins, I quickly realized that many options tend to lean towards more traditional or old-fashioned aesthetics, which didn’t quite align with my modern style. Fortunately, Paper Source proved to be a treasure trove of colorful, contemporary, and unique patterns that offered exactly the vibrant look I was after. Take your time selecting napkins that speak to your creative vision and complement your decor style.
As I’ve mentioned, my consistent choice for all my decoupage projects is Mod Podge. For this particular project, I opted for Mod Podge Matte. The matte finish helps to minimize shine and gives the napkins a softer, almost painted-on appearance, which was perfect for the aesthetic I wanted for the mirror. Consider the finish you desire for your project – a glossy Mod Podge will give a brighter, more reflective look, while a satin finish provides a subtle sheen.
Step 3: Prepare and Clean Your Surface Thoroughly
Proper surface preparation is absolutely critical for successful decoupage, ensuring that your napkins adhere well and your finished project looks polished. I began by giving my mirror frame a comprehensive cleaning. Since it had been stored in our attic, it was quite dusty and grimy. Use a damp cloth to wipe down your surface, removing any dust, dirt, or grease. For stubborn residues, a mild soap and water solution, followed by a clean water rinse, can be effective. Ensure the surface is completely dry before proceeding.
Beyond cleaning, I also decided to prime the mirror frame with a multi-purpose primer. This step served a specific purpose: to brighten the existing white of the frame. By creating a uniformly light base, the vibrant colors and intricate details of the napkins would show up as clearly and vividly as possible, preventing any underlying color from dulling their appearance. While priming is an excellent way to ensure your napkin colors pop, it is an entirely optional step for most surfaces, especially if your object is already a light, neutral color or if you don’t mind a slightly muted effect from the underlying tone. However, for darker surfaces or if you’re using light-colored napkins, priming can make a significant difference in the final vibrancy of your design.
Step 4: Plan Your Napkin Layout
This stage is where your artistic vision truly comes to life, and it’s essential, especially for complex or large projects. I must confess, choosing a linear pattern to apply to a round AND curved surface made my project significantly more intricate than it might initially seem! However, my deep affection for the chosen napkin design motivated me to embrace the extra effort. I meticulously planned the layout, realizing that aligning the linear patterns on an angle would be the most effective approach. This strategy allowed me to strategically fill the inevitable blank triangular spaces created by placing square napkins onto a curved frame by cutting and inserting smaller napkin pieces (more on this in Step 6).
The bottom line for any decoupage project, particularly those involving large, curved, or irregularly shaped surfaces, is to finalize your layout BEFORE you begin applying any decoupage medium. This pre-planning phase saves time, reduces frustration, and ensures a cohesive and aesthetically pleasing final result. Arrange your napkins on your surface, experiment with different orientations, and even take photos to help you visualize the finished look. This foresight will be invaluable as you proceed with the delicate application process.
Step 5: Carefully Separate Napkin Layers
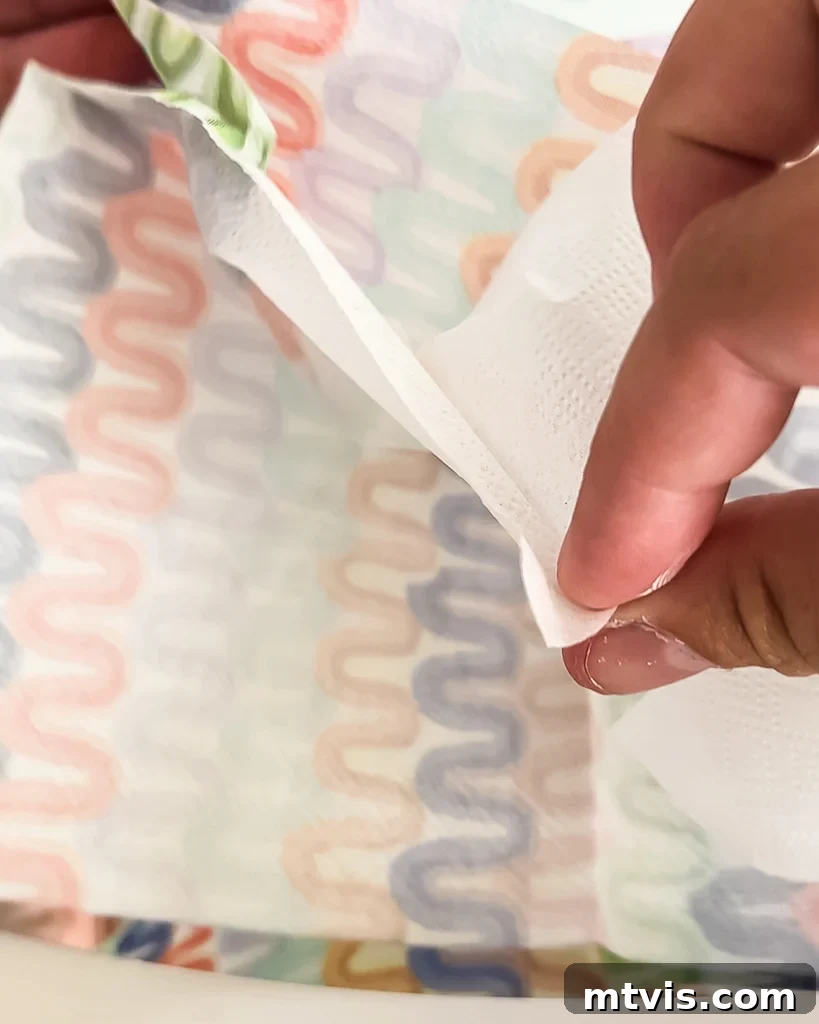
This is a critical step that requires a delicate touch. Most decorative paper napkins are multi-ply, typically having two or three layers. For decoupage, you only need the top layer – the one with the printed design. I meticulously peeled off each plain white backing layer from my napkins until I was left with just the single-ply patterned layer. This thinness is essential for achieving a smooth finish and allowing the decoupage medium to fully saturate and adhere the design seamlessly to your surface.
Separating these thin layers can sometimes be tricky. You can gently rub the corners of the napkin between your thumb and forefinger to encourage the layers to separate. If they are particularly stubborn, a small piece of Scotch tape applied to one corner of the top layer can provide enough grip to gently pull it away from the underlying plies. Work slowly and patiently to avoid tearing the delicate patterned layer, as it becomes even more fragile once separated.
Step 6: The Decoupage Application Process
Now for the main event! There are generally two methods for applying decoupage napkins. The first involves coating your surface with Mod Podge, then carefully laying the napkin on top and smoothing it, followed by a top coat. The second method, which I personally found much easier and highly recommend for delicate napkins, is to place your dry napkin directly onto your dry surface and ONLY apply Mod Podge on top of the napkin.
I prefer the latter method because it allows for much greater control. Placing the napkin on a dry surface enables you to position it precisely where you want it without the immediate stickiness of wet Mod Podge. If you place it on a wet layer, repositioning even slightly can cause immediate tearing due to the napkin’s extreme fragility. Because napkins are incredibly thin, applying Mod Podge solely to the top still ensures excellent adhesion as the medium soaks through and bonds with the surface below.
When applying the Mod Podge, pay close attention to your brush pressure. Use enough pressure to ensure the medium saturates the napkin and eliminates air bubbles, but avoid being too light, which would require multiple passes and weaken the napkin. Conversely, don’t be too rough, as this will almost certainly lead to tears. Aim for a consistent, gentle-but-firm stroke. If you make a mistake and a napkin tears or creases badly, do NOT panic. While the Mod Podge is still wet, simply use a damp cloth to gently scrub the damaged napkin piece off. It comes right off, leaving no residue, allowing you to try again. I had to do this a few times on my mirror project, and I still didn’t use all my napkins, proving that mistakes are easily fixable!
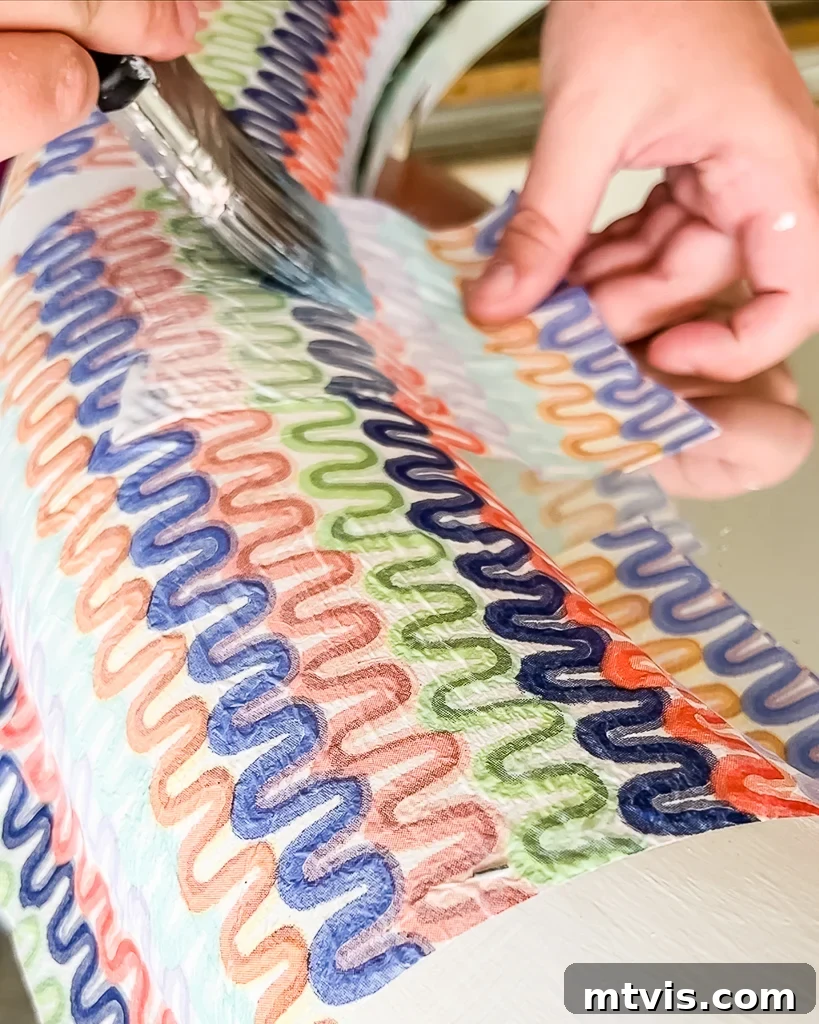
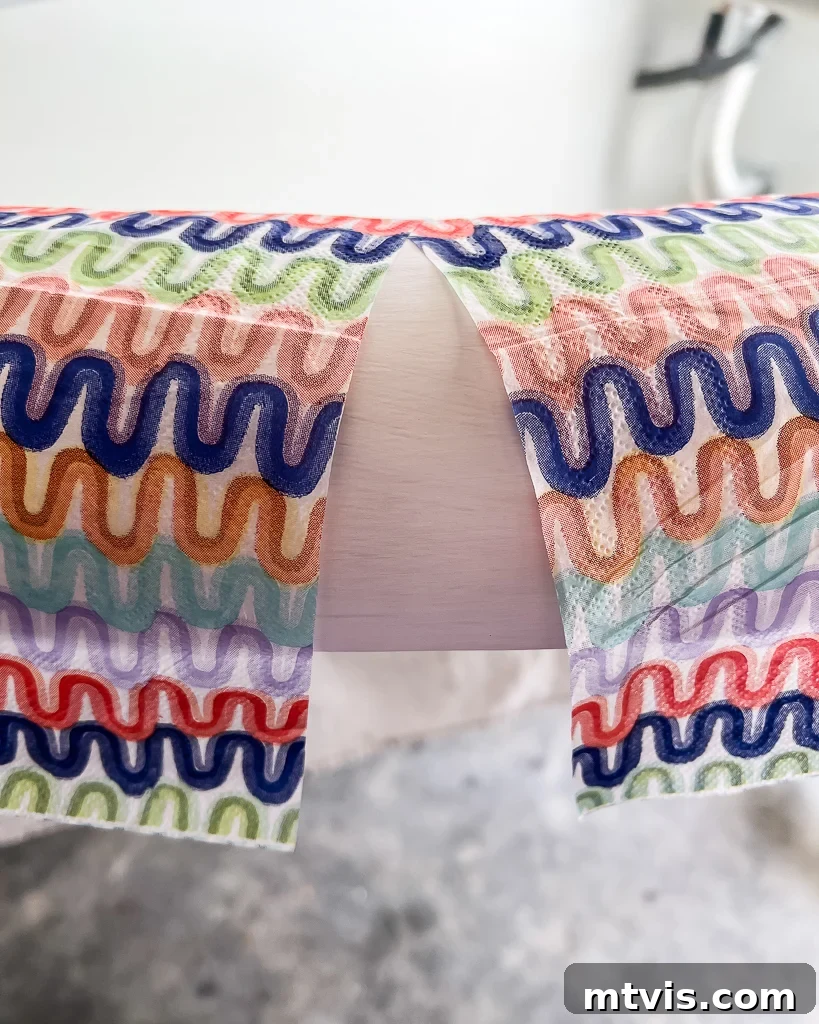
If you’re working on a curved or rounded surface like my mirror, you may find it helpful to make small, strategic relief cuts in your napkin. These cuts, made with sharp scissors before or during application, help the napkin conform more smoothly to the curves, reducing wrinkles and allowing for a more even finish. Place the napkin over the curve and observe where it bunches, then make tiny snips from the edge inwards towards the center of the bunched area. This technique allows the napkin edges to overlap slightly and lay flatter.
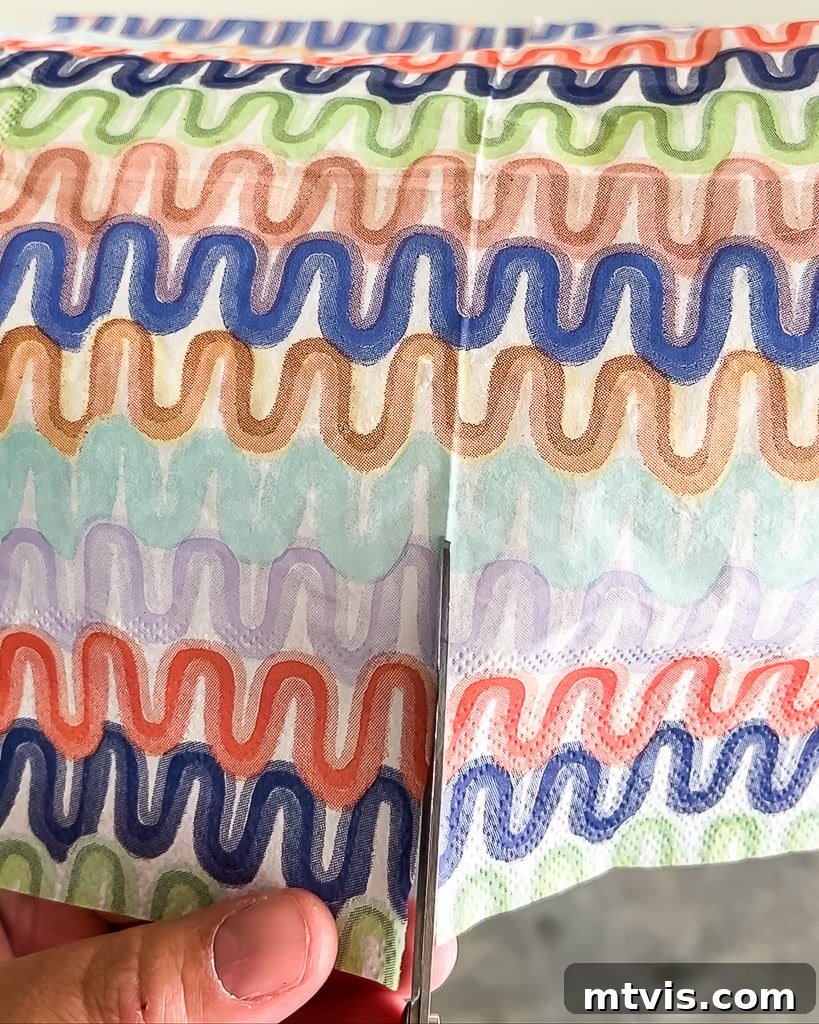
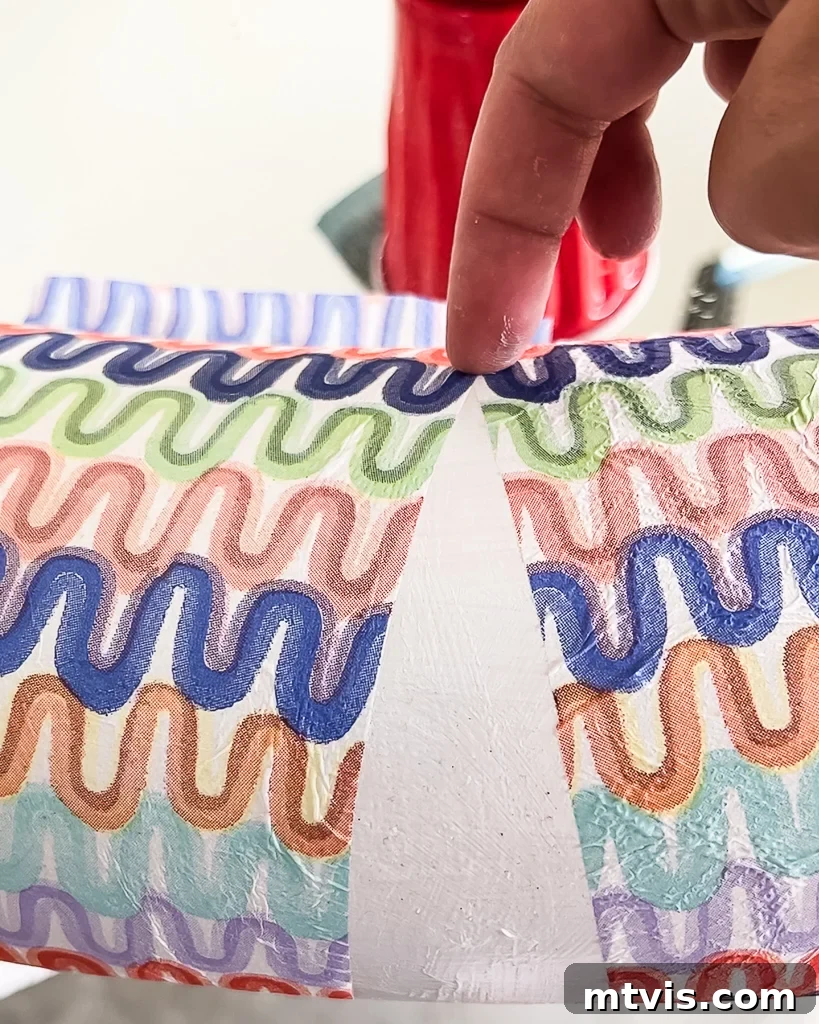
As I mentioned earlier in the planning phase, my choice of square napkins on a curved surface inevitably left some blank spots and gaps. This is a common occurrence in decoupage, especially with intricate shapes. The solution is simple and effective: I merely cut out smaller pieces of napkin, carefully matching the shape and size of these blank areas, and then decoupaged them into place using the same method. When applying these patches, try to align patterns where possible and gently blend the edges with your brush for a seamless look. The thinness of the napkin often makes these patches virtually invisible once dry, creating a continuous design across your entire surface.
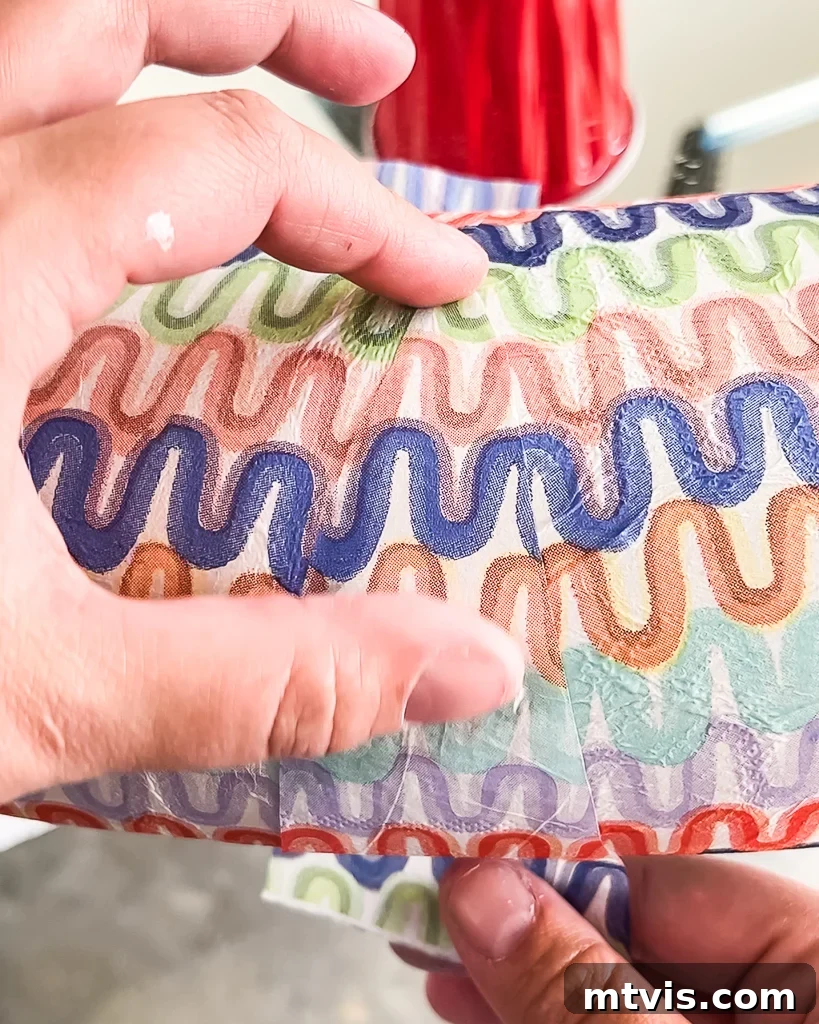
Step 7: Dry, Harden, and Trim Your Decoupage Project
Patience is key during the drying phase. After completing the application of all your napkins and Mod Podge, it’s absolutely crucial to allow your project to fully dry and harden before attempting any trimming or final finishing. I learned this the hard way: if you try to trim damp napkins, they will simply rip and tear unevenly, ruining your hard work. Allow your project to dry overnight, or for at least several hours, until the Mod Podge is completely clear and firm to the touch.
For my mirror, I strategically wrapped the outer edges of the frame with the decoupage napkins, which naturally created a neat, finished edge. However, the inner edges, where the frame met the mirror glass, presented a different challenge. Here, I had a significant amount of excess napkin material to trim off. Once the Mod Podge was fully dry, I carefully used a sharp utility knife to meticulously trim along the inner edges, achieving a crisp, clean line. For a truly professional and seamless finish, I then applied caulk to bridge the tiny gap between the newly decoupaged frame and the mirror glass. This final touch not only tidied up the edge but also provided a smooth transition, giving the project a polished, custom-made look. For other projects, you might use fine-grit sandpaper to gently smooth rough edges after trimming.
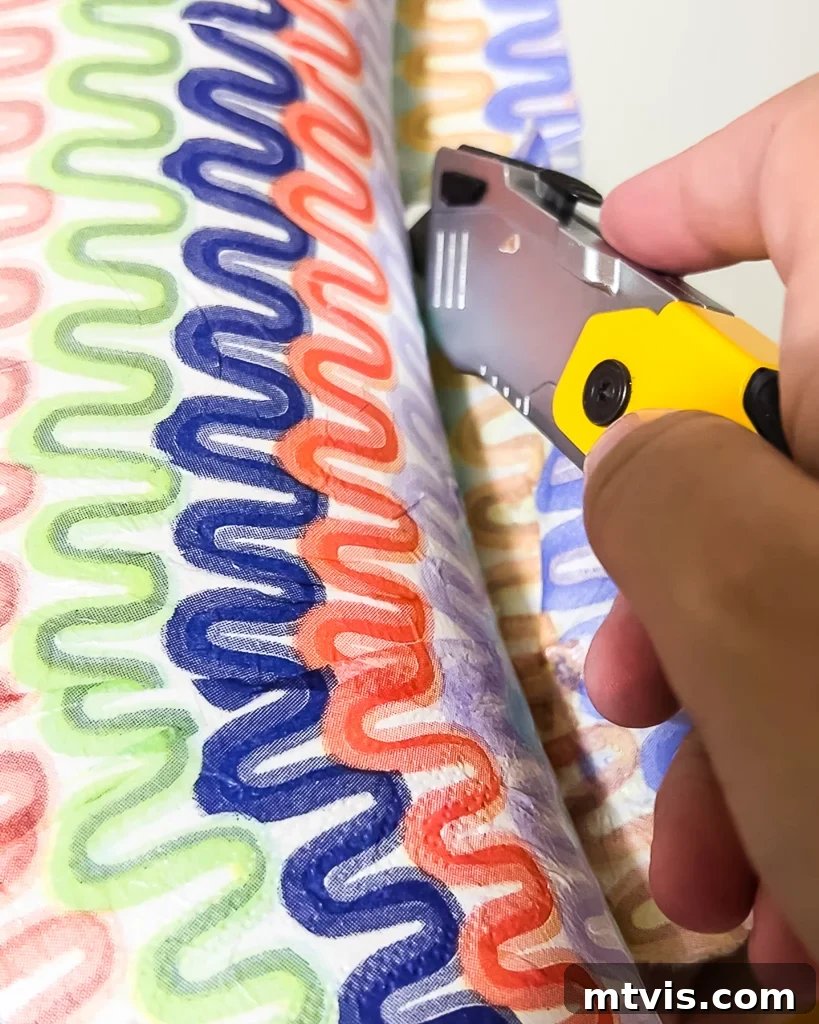
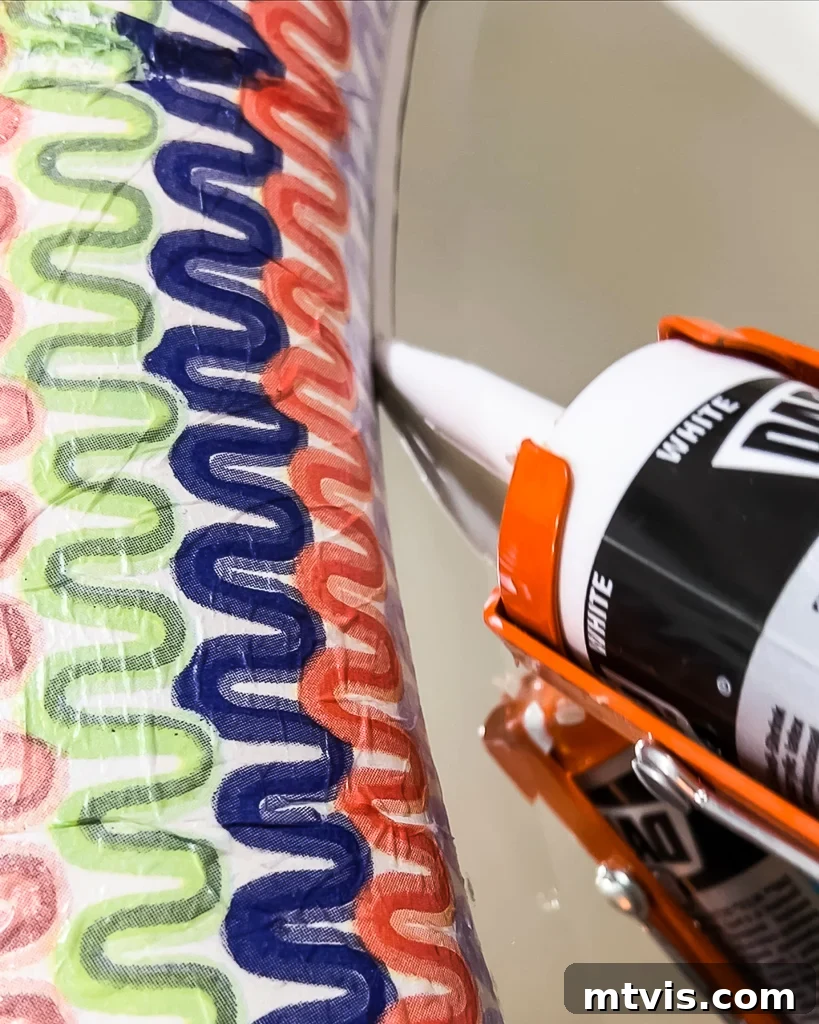
Step 8: (Optional) Sanding and Sealing for Durability
While Mod Podge acts as both an adhesive and a basic sealant, its protective qualities have limitations. For some decoupage projects, especially those that will endure frequent handling, exposure to moisture, or higher temperatures, additional sanding and sealing are highly recommended. Remember that Mod Podge is water-resistant, not fully waterproof, and it’s also not highly heat resistant.
For my mirror, which is purely decorative and hangs on a wall where it won’t be regularly touched or come into contact with water, I chose not to sand or apply an additional topcoat. Its placement means it’s safe from typical wear and tear. However, consider the following:
- Sanding: If you desire an ultra-smooth finish, particularly on surfaces where napkin edges might be slightly perceptible, a very light sanding with fine-grit sandpaper (around 400-600 grit) can create a silky texture. Always sand gently after the Mod Podge is completely dry, and wipe away any dust before sealing.
- Sealing: For projects requiring enhanced durability, such as coasters, trays, tabletops, or items for outdoor use, a more robust sealant is essential. Options include clear acrylic spray sealers, polyurethane (water-based or oil-based depending on desired finish and compatibility), or specialty decoupage sealers designed for greater resilience. Choose a sealer that aligns with the specific needs of your finished project – whether it’s waterproof, heat-resistant, or simply more durable against scuffs and scratches.
And there you have it! The transformation of my once-plain mirror into a unique, colorful statement piece is complete. I absolutely adore its vibrancy and the personalized touch it adds to our home. This project truly showcases how accessible and rewarding decoupage can be, even with delicate materials like napkins. The journey might have its tricky moments, but the end result is undeniably worth the effort.
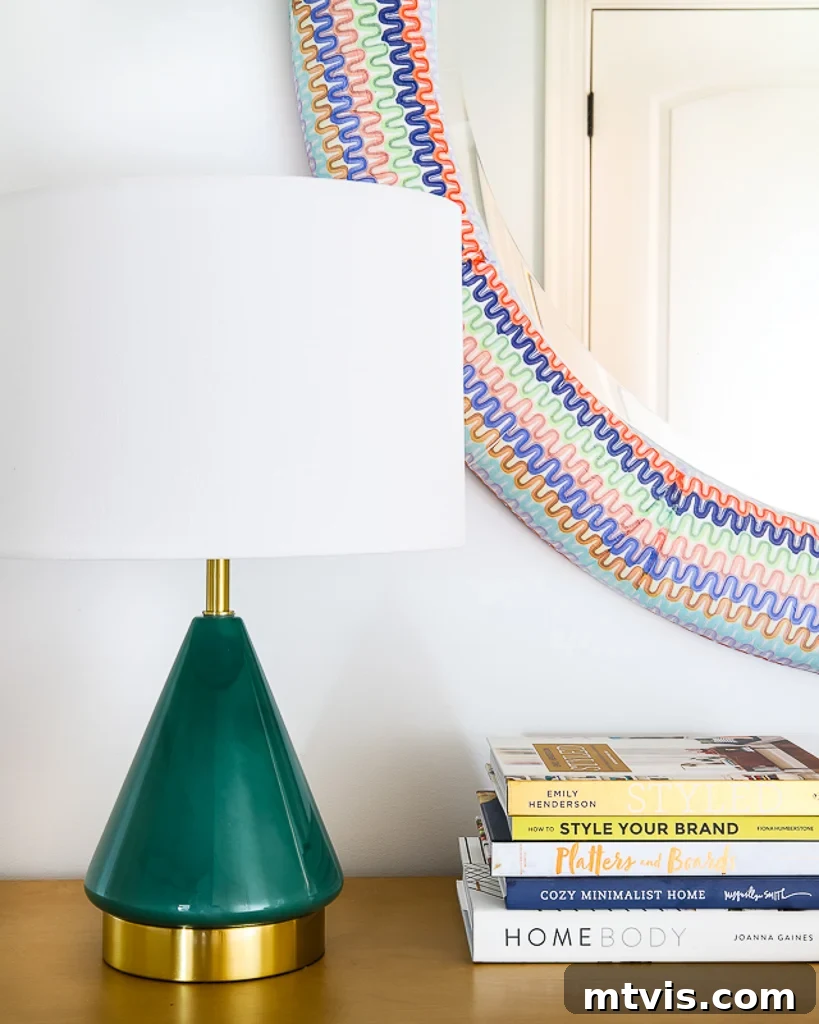
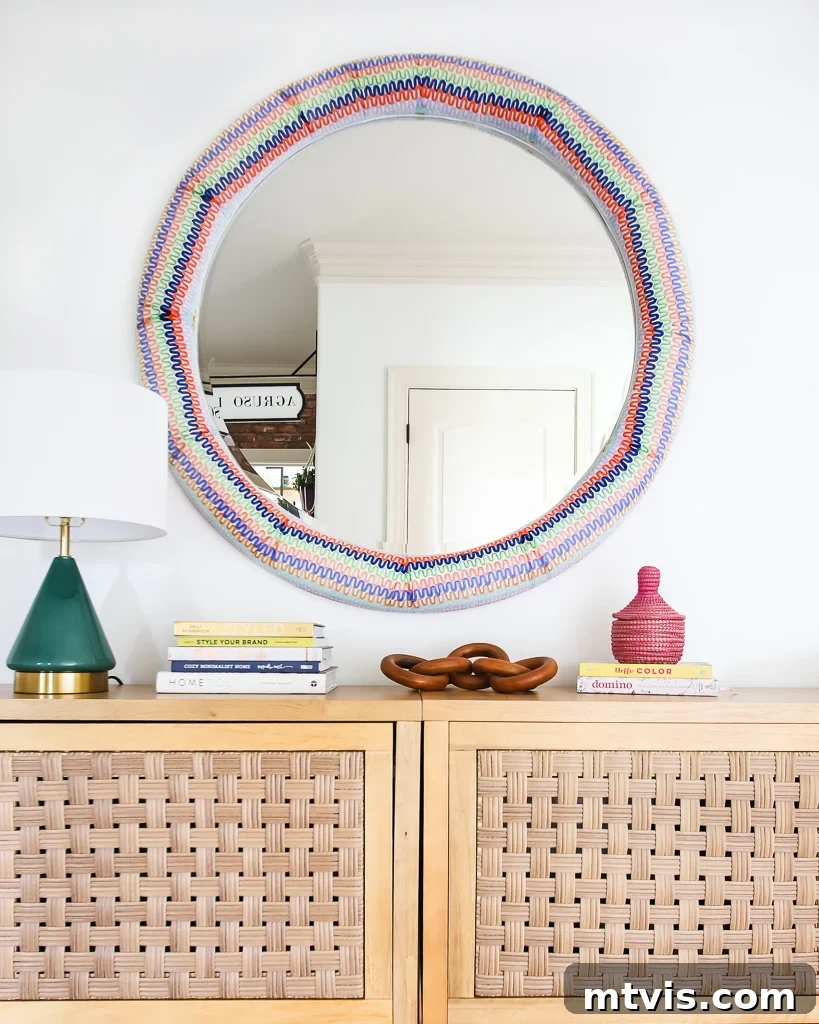
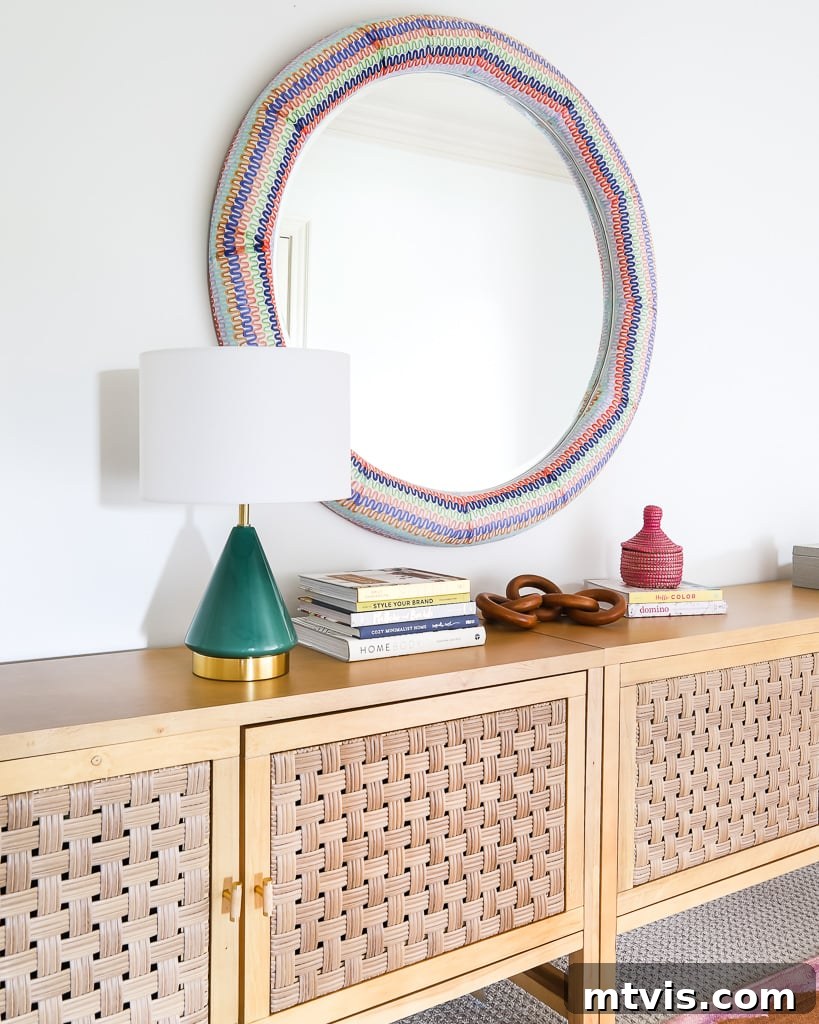
What are your thoughts on this colorful transformation? Are you feeling inspired to try decoupaging with napkins on an upcoming DIY project? If you love this idea and want to save this comprehensive tutorial for later, be sure to pin it to Pinterest so you can easily find it when you’re ready to start crafting!
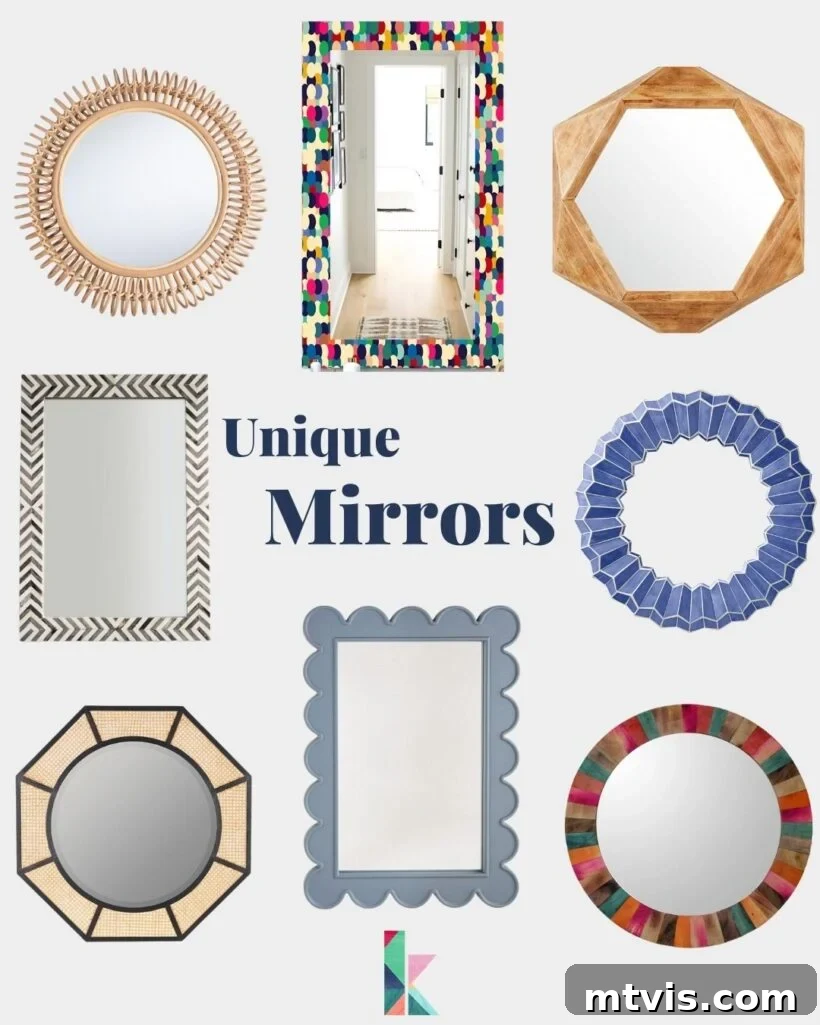
And if you’re captivated by the idea of a statement mirror but prefer to purchase one rather than make it yourself, explore my curated selection of favorite unique mirror options below. Simply scroll through and click on any product image for full details and purchasing information.
Scroll and click on any product image for full product details
Click on the image for links to everything
Other creative DIY posts you may enjoy:
- 16 Gallery Wall Ideas (and Tips) To Inspire You
- How to Decorate With Color Even When It Scares You
- Unique Family Photo Gallery Wall
- 20+ Creative Decoupage Ideas Anyone Can Do
- 5 Room Updates for Under $100 (Some are FREE!)
- DIY Photo Canvas Prints With Authentic Texture
- How to Make Any Wallpaper Removable & Renter-Friendly
Curious about my personal approach to transforming rooms and spaces within our home? Discover the strategies and insights in Designer in a Binder®, my comprehensive guide to affordable and stylish home decoration.
And for exclusive content, behind-the-scenes sneak peeks, and more DIY inspiration delivered directly to your inbox, be sure to subscribe to my newsletter before you go!