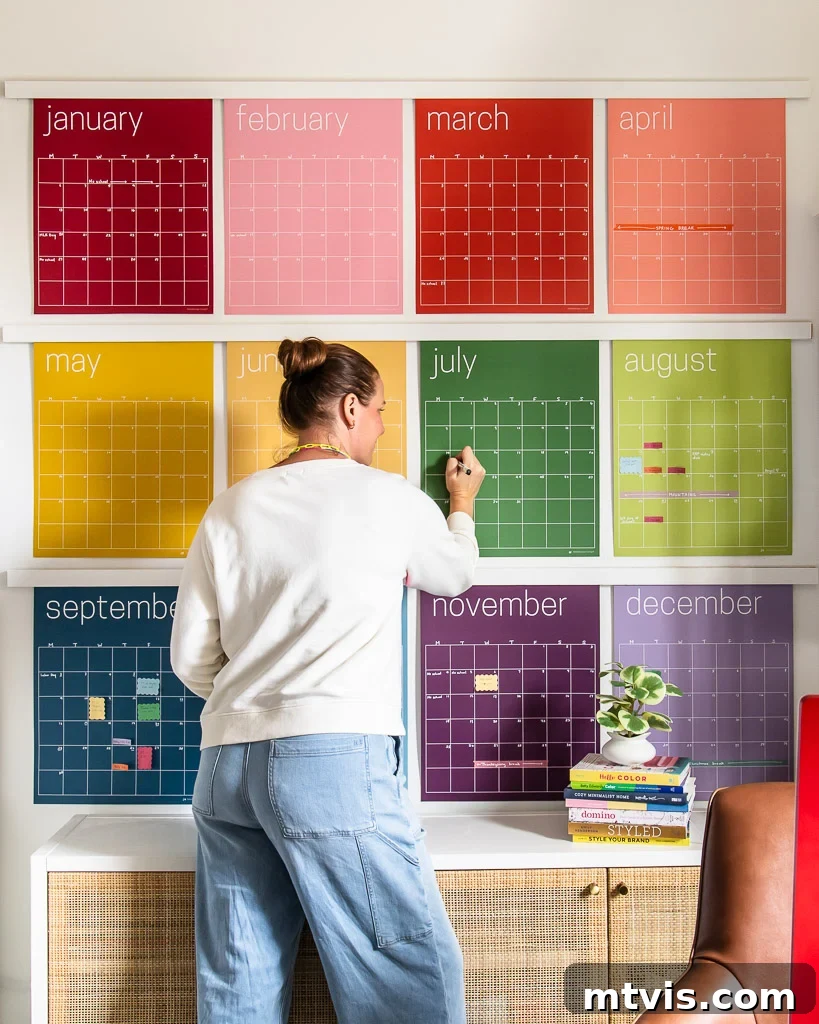
Are you looking to elevate your home decor beyond simple tape or push pins? Wood poster hangers offer a sophisticated and clean aesthetic, perfect for showcasing your favorite art prints, posters, or even large wall calendars. If you admire the sleek look of modern magnetic poster hangers but struggle to find options long enough for oversized pieces, your search ends here. This beginner-friendly DIY project provides an ingenious, affordable, and incredibly easy solution to display virtually anything. The best part? You won’t need a single power tool!
The Quest for Stylish, Large-Scale Art Display
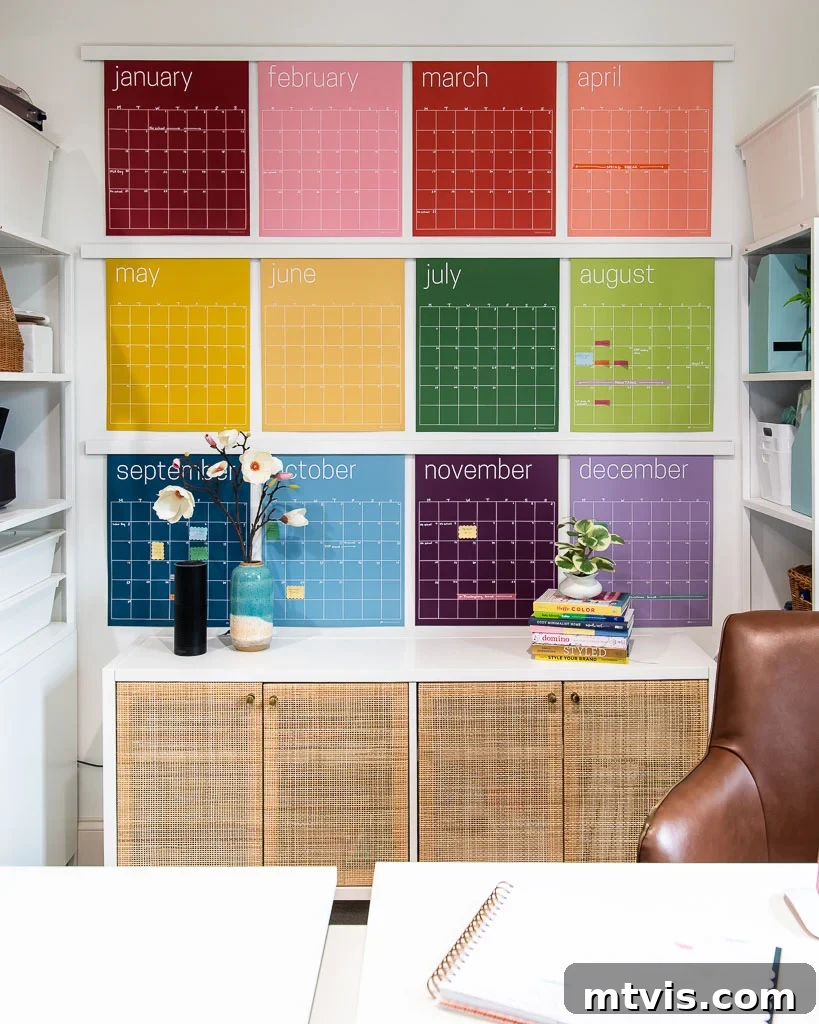
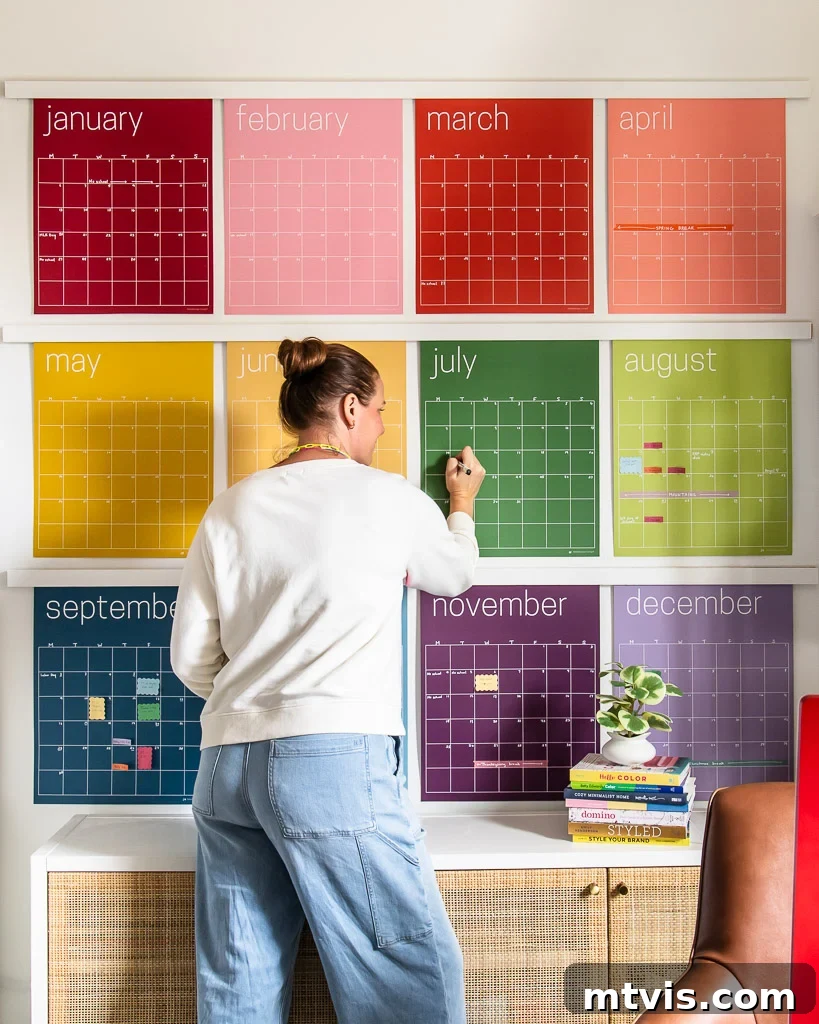
I’ve always been a fan of magnetic poster holders for their clean lines and modern appeal. They instantly upgrade the presentation of any print, making wall art feel more curated and less like dormitory decor. While perfect for standard sizes, a unique challenge arose when I needed to hang my extra-large reusable wall calendar, which measures a substantial six feet in length.
My search for a magnetic hanger of that proportion proved fruitless; most retail options maxed out at four feet. A few years ago, we tackled a more involved DIY magnetic poster hanger project, and while the results were fantastic, I knew many people would prefer a less intensive method to achieve a similar sophisticated look. This led me to brainstorm a simpler approach—a “faux” magnetic hanger that delivers the desired aesthetic with significantly less effort. I recently rehung my calendars using this innovative method, and it worked flawlessly, offering a chic, custom solution without the hassle.
Gather Your Supplies: What You’ll Need for Your Faux Poster Hangers
One of the beauties of this project is its minimal material list and affordability. Here’s everything you’ll need to create your oversized faux poster hangers:
- 1/4″ x 2″ Wood Lattice Strips: These are incredibly inexpensive and come in various lengths, typically 8-foot sections. You’ll choose the length that suits your poster or art. The slim profile of lattice strips is crucial for achieving that delicate, magnetic-hanger look.
- Hand Saw and Miter Box: An accessible alternative to power tools. A miter box helps guide your hand saw for straight, clean cuts. If you happen to have a compound miter saw, it will make quick work of this step, but it’s by no means necessary.
- Sandpaper: Essential for smoothing out any rough edges or surfaces on the lattice strips, ensuring a polished finish and better paint/stain adhesion.
- Paint or Wood Stain (Optional): This allows you to customize your hangers to match your decor. You can choose to paint them to blend with your wall color, or stain them to enhance the natural wood grain.
- Command Picture Hanging Strips: These robust adhesive strips are specifically designed to securely hold frames and heavier items, making them ideal for attaching your wooden lattice strips to the wall. Ensure you get the picture hanging variety, not just poster strips, as they offer greater holding power for the wood.
- Command Poster Hanging Strips: Lighter-duty than picture strips, these are perfect for attaching your posters, art prints, or calendars directly to the wall.
- Level: A simple tool that ensures your hangers are perfectly straight, giving your display a professional, high-end look.
A Quick Note on Command Strips: These adhesive strips are designed for damage-free removal from compatible surfaces, but proper application is key. Always read the product limitations and instructions carefully before use to ensure a clean removal and optimal adhesion.
Step-by-Step Guide: Crafting Your Faux Oversized Poster Hangers
A Quick Visual Overview (Optional Video Reference)
While the video player functionality (which contained JavaScript) has been removed, the original project included a short, helpful video. If you prefer visual learning, a quick search for “DIY faux poster hangers” might provide a similar visual guide that complements these instructions.
Detailed Tutorial
Step 1: Precision Cutting Your Wood Strips
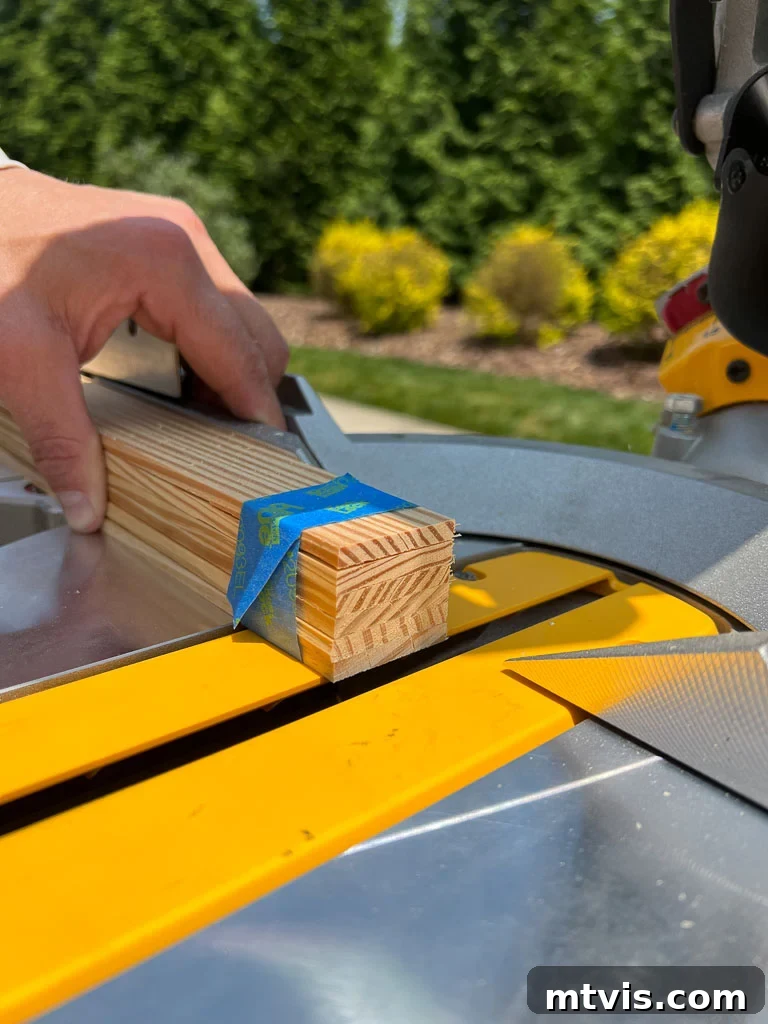
Begin by cutting your lattice strips to the desired length. The beauty of this DIY is customization – simply measure your poster or art print and add a couple of inches for overhang on each side, if you prefer, or cut them to the exact width. If you don’t own a compound miter saw, a hand saw paired with a miter box is an excellent, accessible tool for achieving straight, clean cuts. Alternatively, many hardware stores like Home Depot or Lowe’s offer cutting services for lumber, so you can have them precisely cut to length right in the store. We opted for 6-foot lengths for our calendar, making the cuts with our miter saw.
Step 2: Smooth Finish: The Importance of Sanding
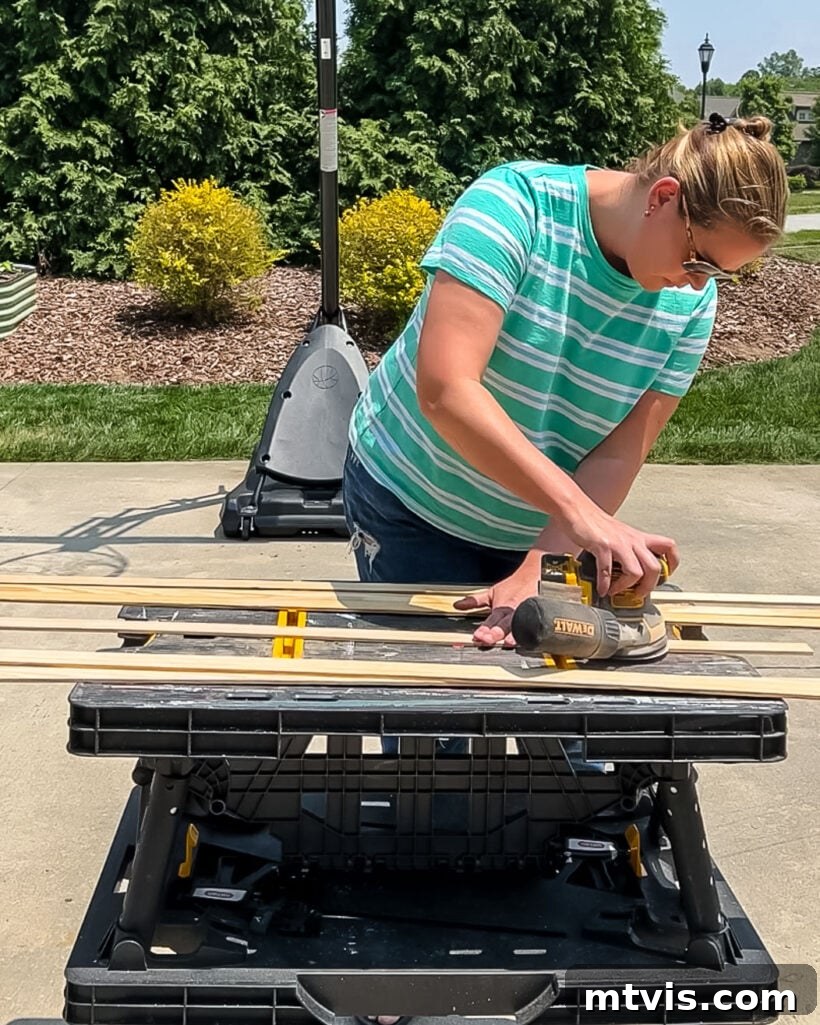
Lattice strips are incredibly affordable, but this often means they can be a bit rough or splintery in places. To achieve a high-quality, professional look, take a few minutes to sand your strips until they are smooth to the touch. Start with a medium-grit sandpaper (around 120-150 grit) to remove any major imperfections, then follow up with a finer grit (220 grit) for a silky-smooth finish. This step is optional, but it makes a significant difference in both the appearance and feel of your finished hangers, especially if you plan to paint or stain them.
Step 3: Personalize Your Hangers: Painting or Staining
Now comes the fun part: customizing your lattice strips! You can either paint them or apply a wood stain. For my office, I wanted the hangers to seamlessly blend with the wall, so I used the exact same white paint—Pure White by Sherwin-Williams. If you opt for paint, consider a primer first, especially on raw wood, for better adhesion and a more durable finish. Apply two thin coats for optimal coverage. If staining, ensure the wood is clean and free of dust. Apply the stain evenly, allow it to penetrate, and then wipe off any excess according to the product instructions. Whether you choose a bold accent color, a classic wood tone, or a subtle wall-matching hue, this step allows for full creative expression.
Step 4: Securely Hanging Your Art or Posters
This crucial step involves attaching your poster, art print, or calendar directly to the wall using Command poster hanging strips. Before applying, always ensure your wall surface is clean, dry, and compatible with the strips. Smooth walls that haven’t been freshly painted (typically at least 7 days dry) work best. Apply the strips to the back of your poster, usually one at each corner and perhaps one or two more along longer edges for larger pieces, then press firmly onto the wall. Remember to read and follow the specific instructions on the Command strip packaging for optimal performance and damage-free removal.
I can attest to their effectiveness: I accidentally hung April in the wrong spot on my calendar and had to remove it. By carefully following the instructions—pulling the tab downwards slowly—the poster strips came off without damaging my wall or my thick calendar paper. Just be gentle when peeling the calendar from the wall to avoid creases. My experience, along with countless others, proves that Command products are reliable *when their instructions are followed precisely*. Don’t risk wall damage by skipping this vital step!
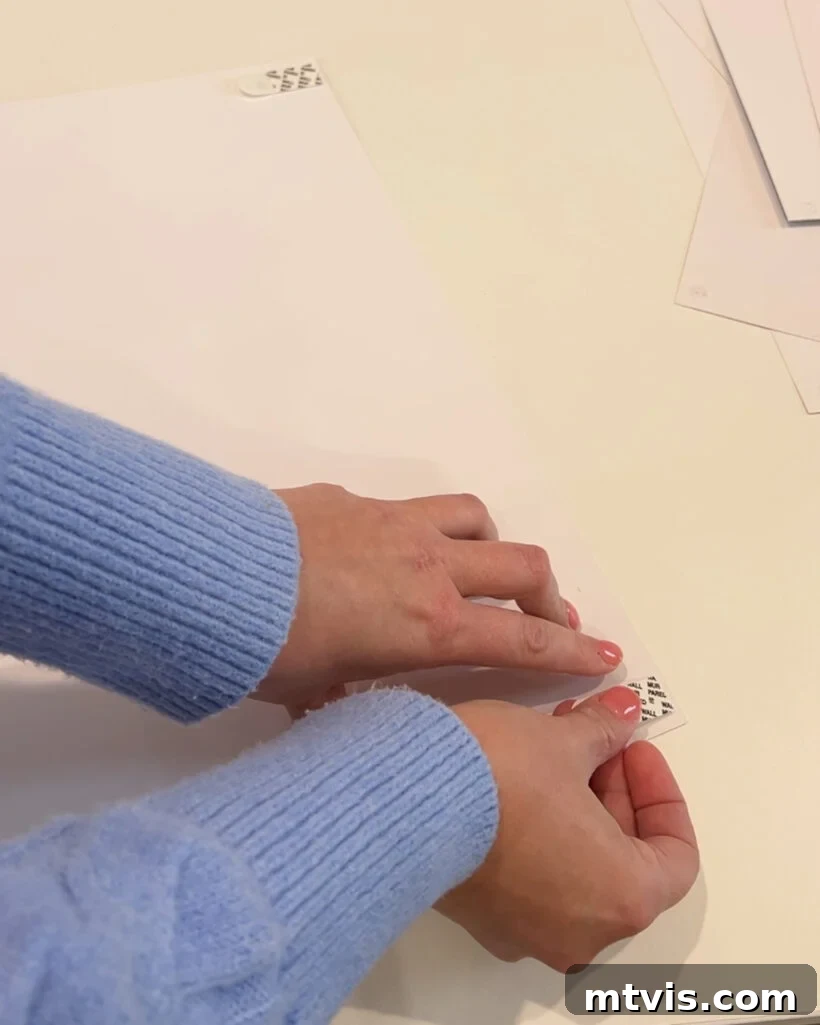
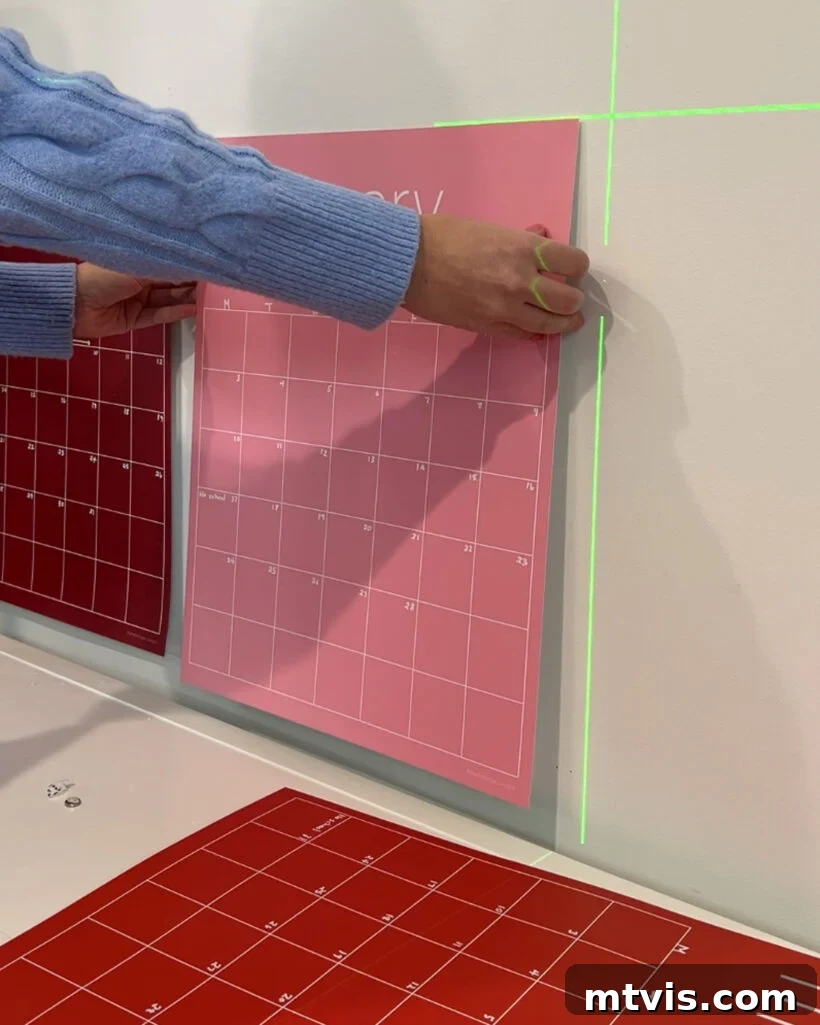
Step 5: Attaching the Faux Hangers with Command Picture Strips
This is where the magic happens! To create the illusion of a magnetic hanger, you’ll attach two Command picture hanging strips to each lattice strip—one at each end. These are different from the poster strips; they are designed for heavier items and create a strong, interlocking bond. Ensure the long edge of each picture strip is flush with the top edge of your lattice strip. This precise placement is crucial because you want the wood strip to sit directly on the wall, just above and slightly overlapping your poster or art, without adhering to the art itself. The wood strip simply “rests” over the top edge of your art, creating the faux magnetic effect.
Once the strips are firmly on the lattice, carefully align the wood strip on the wall, ensuring it’s perfectly level using your level tool. Press firmly along the entire length of the strip where the Command strips are located. This creates a secure attachment to the wall, completing the elegant illusion. Remember, the wood strip should be attached to the wall, *not* to your poster or calendar!
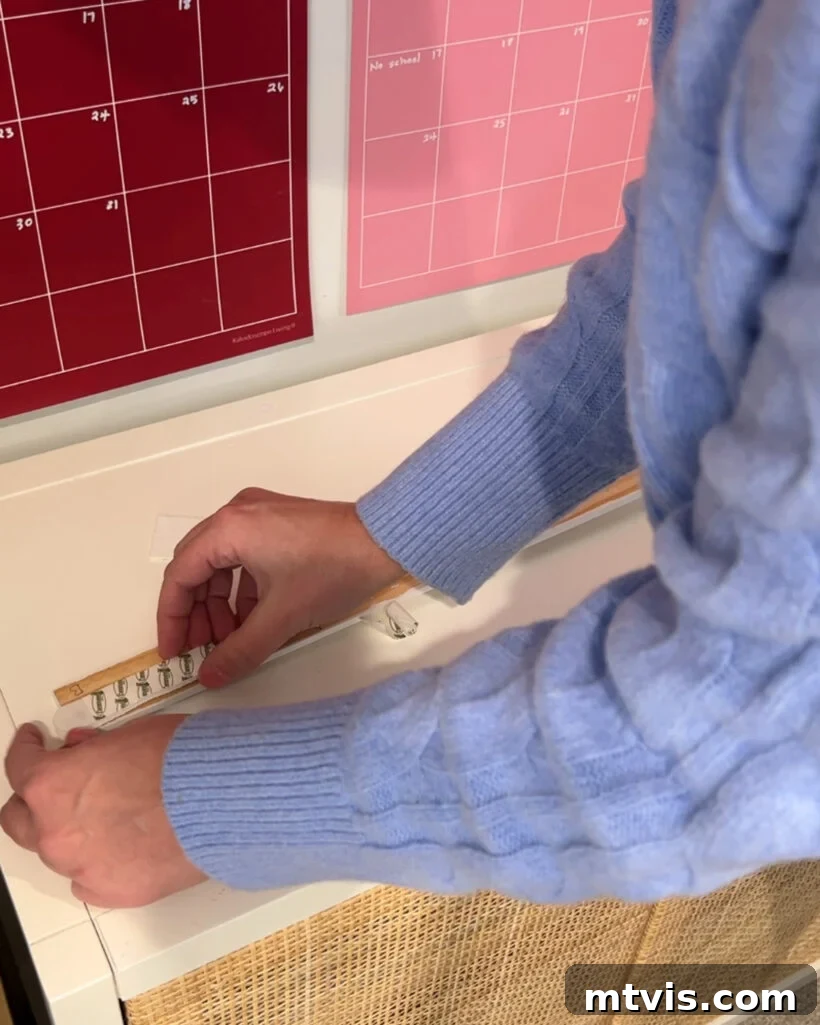
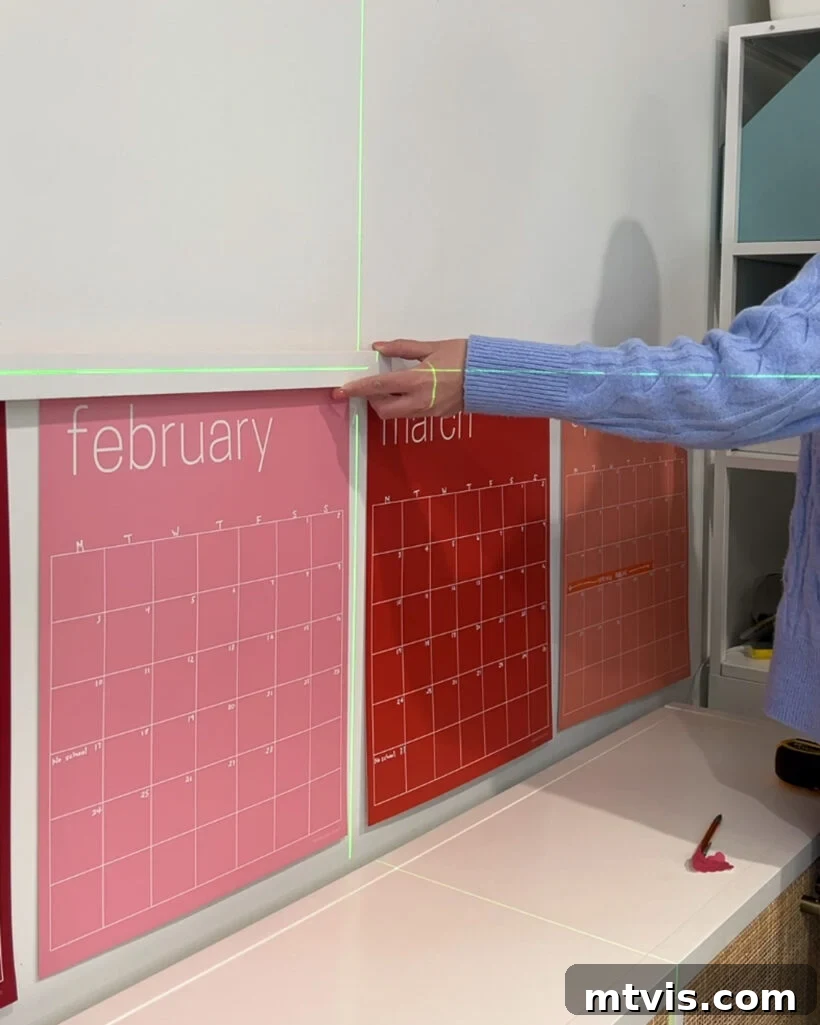
The Illusion of Elegance: Why This Faux Method Works
And just like that, you have a stunning, custom-looking poster hanger! This method brilliantly replicates the sophisticated appearance of a magnetic hanger without the complexities. You completely bypass the need for precise counter-sinking of magnets into wood strips, a task that often demands specialized tools and perfect alignment. Instead, the wood lattice simply acts as a decorative element, creating the illusion of a robust frame holding your art in place. It’s a testament to clever design and simple materials combining for an impressive effect.
Considerations for Your Faux Poster Hangers: Pros and Cons
While this DIY offers many advantages, it’s helpful to weigh its benefits against any potential drawbacks to decide if it’s the right solution for your specific needs.
Pros:
- Affordable: Wood lattice strips are very inexpensive, and Command strips offer great value, making this an extremely budget-friendly decor upgrade.
- Easy & Beginner-Friendly: No complex carpentry skills, intricate measurements for magnets, or power tools are required. Most steps are straightforward and achievable for anyone.
- Customizable: You can cut the lattice to any length, and paint or stain it to perfectly match your interior design or create a striking contrast.
- Damage-Free Hanging: When Command strip instructions are followed, this method allows you to hang and remove art without leaving holes or sticky residue on your walls.
- Versatile: Ideal for oversized posters, prints, maps, calendars, fabric art, and even kids’ masterpieces.
Cons:
- Less Flexible for Frequent Rearrangement: Unlike true magnetic hangers where you can swap prints in seconds, rearranging art with this faux method requires removing the poster/art from the wall and using new Command poster hanging strips each time. This is the primary downside if you like to change your display very frequently.
I personally find myself rearranging my wall calendars a few times a year, typically to bring upcoming months to the bottom. While it does mean using new strips, the ease of the initial setup and the stunning result make it well worth the minimal extra effort for me. If you anticipate changing your displayed items constantly, you might find that investing in or building magnetic poster hangers, despite their increased complexity, might be a better long-term option for ultimate flexibility.
Elevate Your Walls with DIY Style
What do you think? This DIY faux oversized poster hanger project offers a fantastic blend of style, affordability, and ease. It’s a testament to how simple materials and a clever approach can yield professional-looking results. Give it a try and transform your wall decor today!
Explore More Art & Wall Decor Ideas
More ART & Wall Decor IDEAS
SEE ALL art POSTS
-
How to Display Art On Almost Any Smart TV
-
How to Make Faux Oversized Poster Hangers
-
DIY Light Up Wall Art
-
Make Large DIY Picture Frames For Less than $20 Each
-
DIY Magnetic Poster Hangers
-
27 Gallery Wall Ideas + Practical Tips to Inspire You
Transform Your Home Decor with Confidence
Curious about my approach to redesigning rooms and spaces? Discover the secrets with Designer in a Binder®, your go-to guide for affordable and simple home decorating.
For exclusive content, behind-the-scenes glimpses, and the latest design tips, be sure to subscribe before you go!