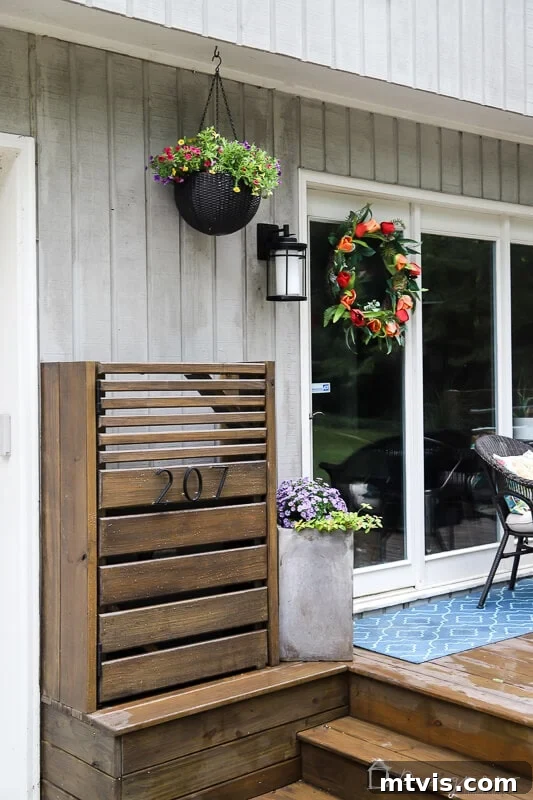
Have you ever looked at the exterior of your beautiful home and noticed an unsightly electrical meter or a cluster of utility boxes detracting from its curb appeal? You’re not alone! Many homeowners grapple with the challenge of blending these essential but often unattractive fixtures into their outdoor aesthetics. If you’re searching for an elegant, functional, and DIY-friendly solution, you’ve found the right guide. We’ll walk you through creating a custom outdoor electrical box cover that not only conceals those utility eyesores but also adds a touch of design to your home’s exterior, all while ensuring crucial access for maintenance or meter readings.
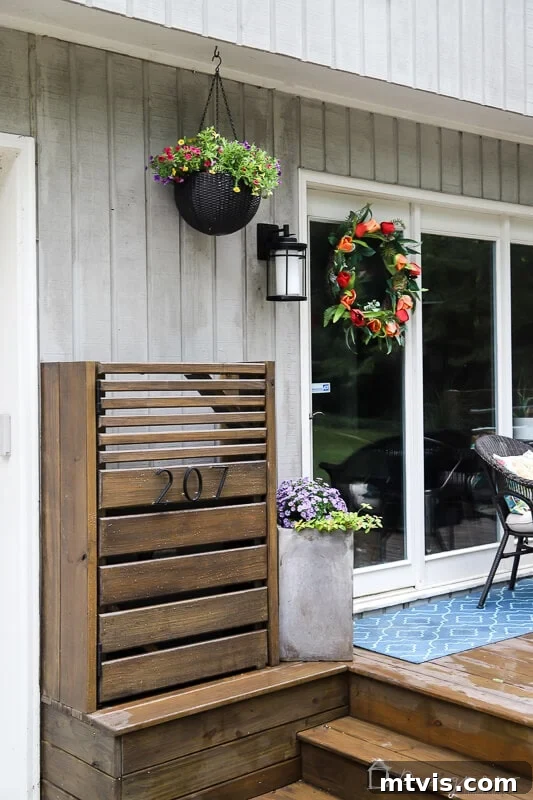
Every home has them – those indispensable yet undeniably visible electrical and utility boxes that serve vital functions but clash with your carefully curated outdoor decor. Whether it’s a prominent electrical meter, a cable box, or an outdated phone line fixture, these elements can be a major design challenge. In our own home, we faced this exact dilemma. Our main utility cluster was situated right beside our back door, the entrance we use most frequently. This meant every trip in or out brought us face-to-face with a stark reminder of these necessary evils. It was a constant visual disruption, impacting the overall feel of our outdoor living space.
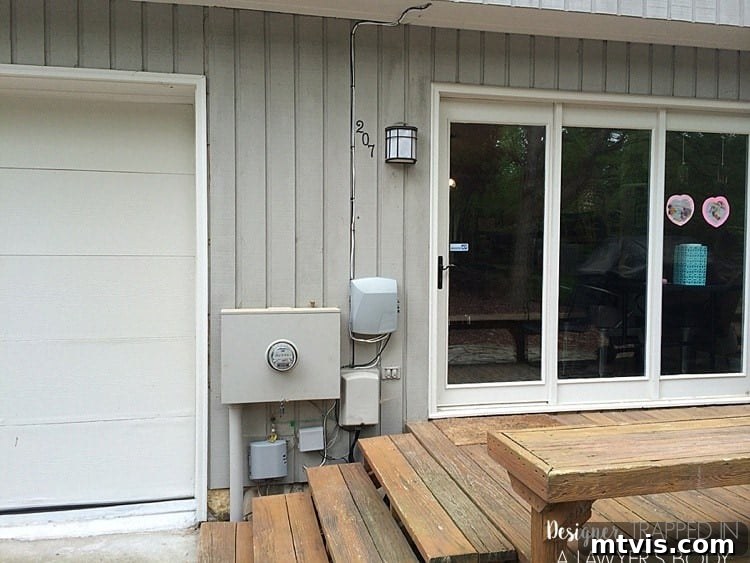
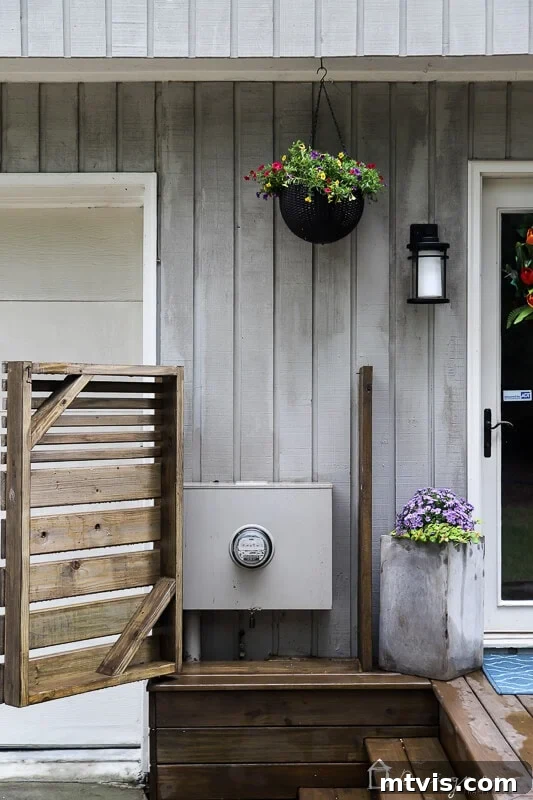
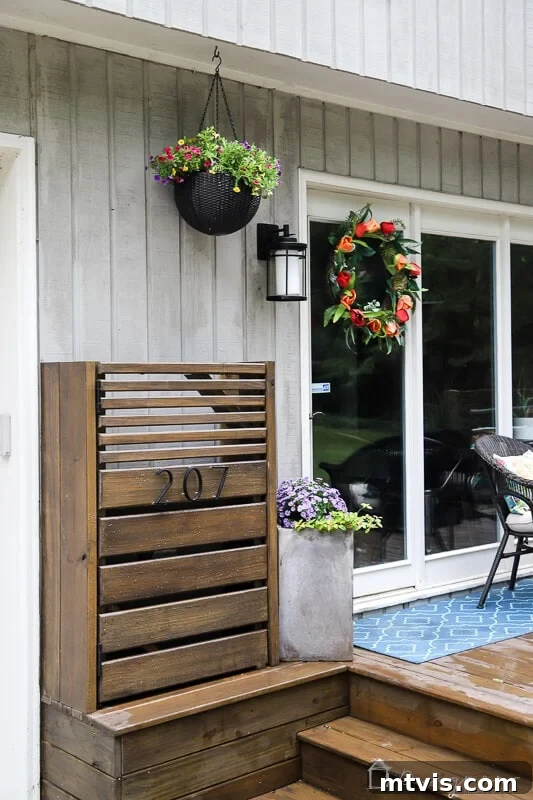
Our journey to a more aesthetically pleasing exterior began with removing inactive phone and cable boxes, which instantly improved the situation. However, the large electrical box remained a significant visual obstruction. It was clear a more comprehensive solution was needed. This motivated us to integrate a clever hiding mechanism during a larger home renovation project: rebuilding our deck. The result? A custom-designed outdoor electrical box cover that masterfully conceals the utility boxes without compromising functionality. Its hinged design allows for effortless opening, ensuring power company personnel can access the meter or wiring whenever necessary, making it both homeowner-friendly and utility-approved.
Thank you to DAP Products for sponsoring this post. This post contains some affiliate links for your convenience. Click here to read my full disclosure policy.
DIY Outdoor Electrical Box Cover: Step-by-Step Tutorial
Follow along for our detailed, step-by-step instructions to create your own bespoke utility box cover.
Materials Needed for Your Outdoor Utility Box Screen
The precise quantities and dimensions of lumber required for your outdoor utility box cover will naturally vary based on the specific size of your electrical or utility box and the surrounding area you wish to enclose. Before purchasing materials, always take careful measurements of your space. Below is a comprehensive list of the tools and materials we utilized for our project, providing a solid foundation for your own planning:
- Pine Deck Boards: We used 5/4″ pressure-treated pine, repurposing leftovers from our deck construction. Pressure-treated wood is crucial for outdoor projects as it resists rot, decay, and insect infestation, ensuring longevity.
- 2″ x 8″ Pressure-Treated Pine Boards (8 feet long): These will form the main structural components of your frame, providing necessary depth.
- 2″ x 6″ Pressure-Treated Pine Boards (8 feet long): Used in conjunction with the 2x8s to achieve the desired clearance around the utility box.
- (2) 2″ x 4″ Pressure-Treated Pine Boards (8 feet long): Essential for constructing the robust frame of your hinged gate door.
- (2) Heavy-Duty Hinges: Crucial for the gate’s functionality, allowing it to swing open easily. Opt for exterior-grade, rust-resistant hinges for durability.
- (1) Hook and Eye Latch: Provides a simple yet secure closure mechanism for the gate. Choose a weather-resistant finish.
- Nail Gun (Our preferred model): Significantly speeds up the slat attachment process, ensuring strong, consistent fastening.
- Kreg Jig: An invaluable tool for creating strong, concealed pocket-hole joints, essential for a clean and professional finish on your frame and door.
- 3-inch Exterior Screws: Use screws specifically designed for outdoor applications to prevent rust and ensure a strong, lasting hold in pressure-treated lumber.
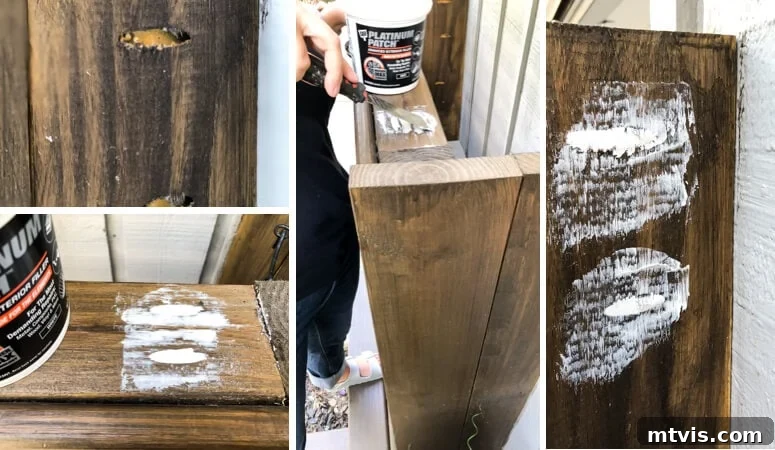
- DAP Platinum Patch Advanced Exterior Filler: An exterior-grade wood filler for concealing pocket holes and imperfections, crucial for a smooth, finished appearance.
- Putty Knife: For smooth and even application of the wood filler.
- Stain of Your Choice: Protects the wood from elements and allows you to customize the look to match your home.
- Level: Absolutely essential for ensuring all structural components are perfectly straight and plumb, preventing a crooked or ill-fitting cover.
- Speed Square: Helps ensure accurate 90-degree cuts and angles, vital for a professional-looking project.
- Router (Optional): For replicating rounded edges on ripped deck boards, if desired. A sander can achieve a similar effect.
Construction Steps for Your DIY Electrical Box Cover
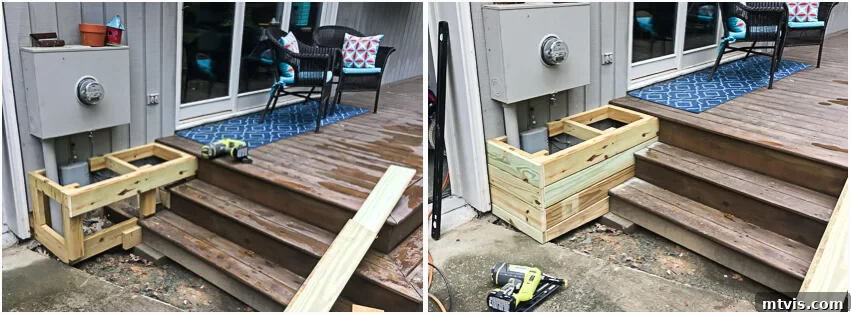
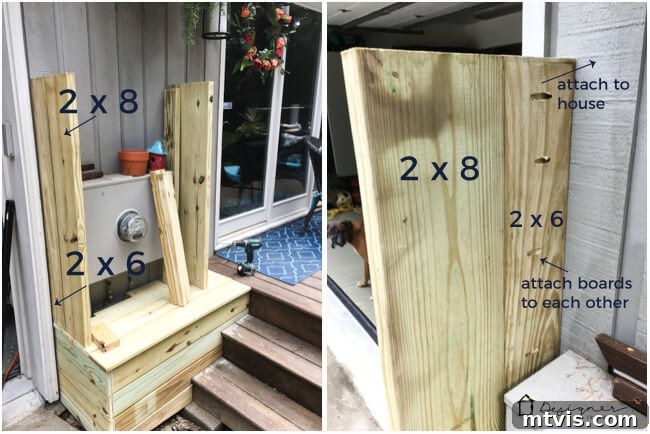
Our specific installation presented a unique challenge: the utility box was positioned directly next to the stairs leading up to our deck. This necessitated an initial step of constructing a small base box to elevate the ground level, ensuring our cover’s door could swing freely and align seamlessly with the deck. While this particular foundational work might not be necessary for every home, as most utility boxes are on a flat wall, we’ve included a couple of images for context. If your situation is similar, consider how to create a level, stable surface for your cover’s frame.
1) Accurate Measurement is Key: Begin by precisely measuring the height, width, and depth of the area you intend to enclose. This isn’t just about the utility box itself, but also ensuring adequate clearance around it for safety, ventilation, and ease of access. Measure from the ground (or your prepared base) up to the desired top of the cover, and across the entire width needed. For depth, consider the deepest part of your utility box plus a comfortable margin for air circulation and the door’s swing. Double-check all measurements to prevent costly mistakes.
2) Constructing the Stationary Frame: With your measurements in hand, it’s time to build the stationary frame that will attach to your house. We utilized a combination of 2″ x 8″ and 2″ x 6″ pressure-treated boards. This blend provided the necessary depth to comfortably clear our utility box while offering a sturdy foundation. We assembled these boards using our Kreg Jig, creating strong pocket-hole joints. Before securing the frame to your home’s exterior, it is absolutely critical to use a level and speed square to ensure the frame is perfectly level and plumb (vertically straight). An uneven frame will lead to a door that doesn’t hang properly. Use appropriate exterior screws to securely attach the frame to the side of your house, ensuring it is anchored into studs or solid blocking.
3) Building the Hinged Gate Door: Now, focus on the mobile component – your gate door. Using 2″ x 4″ pressure-treated lumber, construct a simple outer frame that matches the height and width you previously measured for the opening. Again, the Kreg Jig is invaluable here for robust, concealed connections. For enhanced stability and to prevent sagging over time, incorporate corner braces. Position these diagonally in opposite corners of the gate frame; they act as powerful reinforcements, making the door much more durable and resistant to racking.
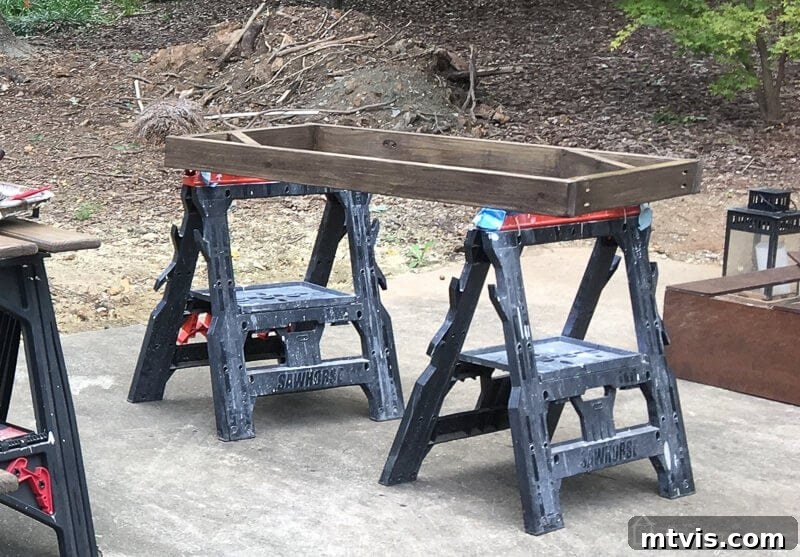
4) Attaching Decorative Slats & Customizing Design: With the gate door frame complete, it’s time to add the decorative slats that will define its aesthetic. The beauty of a DIY project is the freedom to choose your preferred pattern. We opted for a two-tiered design: the bottom half used our existing 5/4″ deck boards for a substantial look, while the top half featured thinner, ripped-down pieces (1 3/4″ wide) from the same deck boards for a lighter, more open feel. Note that standard deck boards have rounded edges; if you rip them, you’ll lose this. To maintain a consistent finish, we replicated the rounded edges using a router. If you don’t have a router, a sander can be used to soften the sharp edges of the ripped boards. Consider different slat widths, horizontal or vertical orientation, or even a lattice pattern to match your home’s style.
5) Pre-Staining for Optimal Coverage: Before final assembly, we highly recommend staining all your cut lumber. This includes the frame already attached to your house and all components of your gate door (both the frame and the individual slats). Pre-staining ensures comprehensive coverage, particularly in tight corners and crevices that would be difficult to reach after the slats are attached. Choose a high-quality exterior stain that offers UV protection and waterproofing to maximize the lifespan of your cover and protect it from the elements. Apply thin, even coats according to the manufacturer’s instructions.
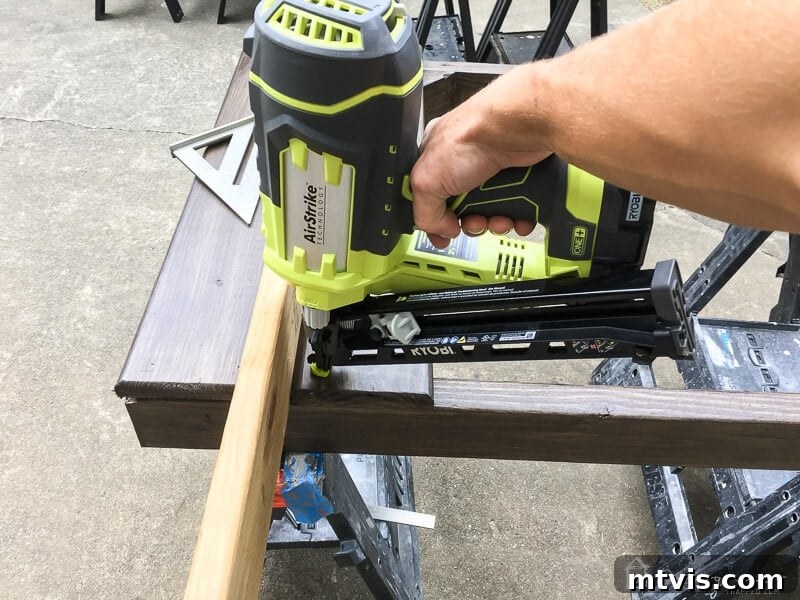
6) Securing the Slats to the Gate Frame: Once your stained lumber is dry, begin attaching the decorative slats to the gate door frame. A nail gun is ideal for this step, providing quick and secure fastening. To ensure uniform spacing between slats, which is crucial for a professional appearance, use a spare piece of lumber (like another deck board) as a spacer. This trick guarantees consistent gaps, enhancing the visual appeal of your finished cover. Work systematically, attaching each slat firmly to the frame.
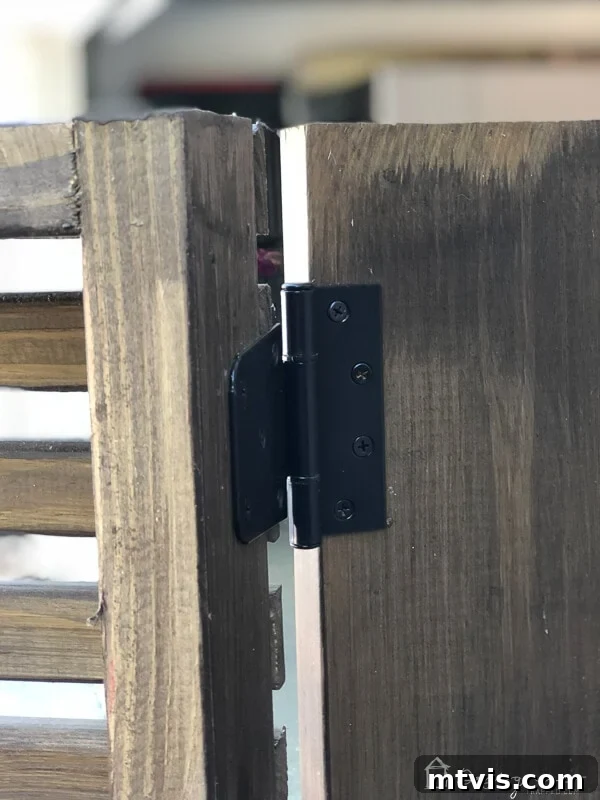
7) Installing Hinges and Hanging the Gate Door: This step requires careful alignment. Attach your chosen heavy-duty hinges to the gate door first, then position the door within the stationary frame attached to your house. Use shims if necessary to achieve perfect alignment and ensure the door swings freely without binding. Mark and drill pilot holes for the hinge screws to prevent wood splitting, then secure the hinges to the stationary frame. Test the door’s movement several times to confirm smooth operation before proceeding.
8) Adding the Latch for Security and Functionality: Once your gate door is hung and you are satisfied with its alignment and smooth swing, install the hook and eye latch. Choose a position that is convenient for you to operate but still provides a secure closure. The latch not only keeps the door neatly closed but also prevents it from swinging open in windy conditions. Consider placement that allows easy one-handed operation while securely holding the door shut. The aim is to strike a balance between ease of access and secure containment.
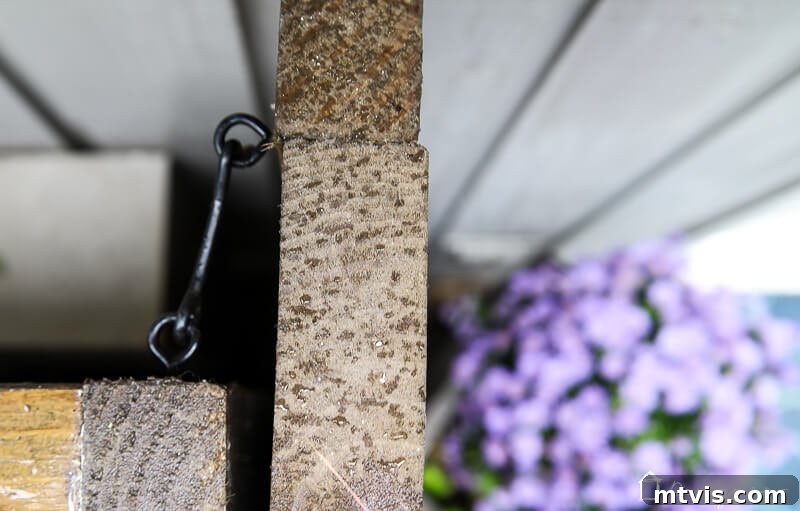
9) Finishing Touches: Filling Pocket Holes and Final Staining: The last crucial step for a professional finish is concealing all those visible pocket holes created by the Kreg Jig. Our go-to product for exterior projects is DAP Platinum Patch Advanced Exterior Filler, known for its durability and weather resistance. Apply the filler smoothly with a putty knife, ensuring it’s flush with the wood surface. Once the filler has completely dried (follow manufacturer’s drying times), lightly sand the patched areas until smooth. Finally, apply a touch-up coat of your chosen stain to the filled and sanded spots, blending them seamlessly with the rest of your beautiful new utility box cover.
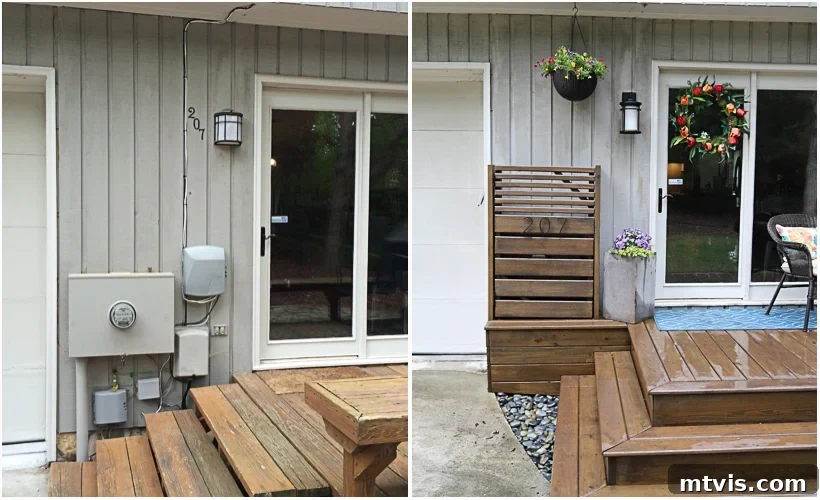
And there you have it! Step back and admire the transformation. This DIY electrical box cover isn’t just an attractive addition to your home’s exterior; it’s a testament to thoughtful design and practical functionality. The hinged door ensures that while your utility boxes are beautifully concealed, access for maintenance and readings remains utterly hassle-free. Our own project turned out wonderfully, blending seamlessly with our deck and home, and we’re confident yours will too!
Here’s a dramatic look at the incredible before and after transformation:
And for a closer look at its operational design, here’s how elegantly it appears when opened:
The improvement is undeniable, isn’t it? If you’ve been living with visible utility boxes that detract from your home’s exterior, we wholeheartedly encourage you to take on this rewarding DIY project. With a few basic tools, some high-quality materials, and a bit of free time, you can significantly enhance your home’s curb appeal. This utility box cover is a surprisingly manageable DIY endeavor, making it a perfect weekend project to boost your home’s aesthetic and value. Say goodbye to eyesores and hello to a more polished, beautiful outdoor space!
Before you embark on your next home improvement project, explore some more inspiring DIY outdoor ideas:
More OUTDOOR IDEAS
SEE ALL outdoor POSTS
-
Fire Pit Ideas for Every Outdoor Space
-
How to Make a DIY Outdoor Chandelier
-
Modern DIY Garden Trellis
-
DIY Outdoor Electrical Box Cover
-
DIY Diamond Wire Trellis for a Vine
-
A Complete Review of Vego Garden Beds: Pros, Cons, and Everything In-between
Curious about my approach to transforming spaces in our home? Dive into the details with Designer in a Binder® – your comprehensive guide to affordable and stylish home decoration.
For exclusive content, behind-the-scenes glimpses, and the latest DIY tips delivered directly to your inbox, be sure to subscribe before you leave!