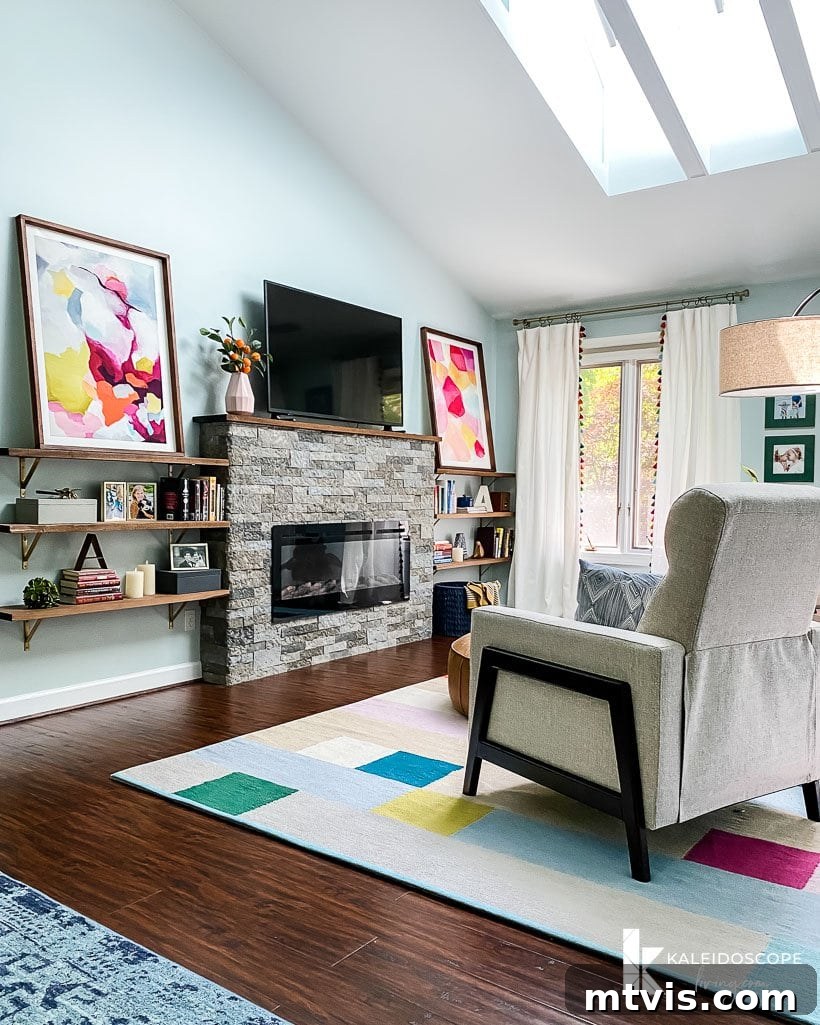
Imagine cozy evenings, the comforting glow of dancing flames, and a radiating warmth transforming your living space into a sanctuary. For many homeowners, the dream of adding a fireplace seems out of reach, especially if their home lacks a traditional chimney. But what if we told you that achieving this dream is not only possible but also surprisingly simple and budget-friendly? Welcome to the world of electric fireplaces – a revolutionary solution that brings the warmth, ambiance, and aesthetic appeal of a fireplace to any room in your home, without the need for complex construction or a hefty price tag.
Electric fireplaces are rapidly gaining popularity among homeowners and DIY enthusiasts for their ease of installation, minimal maintenance requirements, and incredible versatility. Whether you’re looking to enhance a sprawling primary bedroom, create a focal point in your living room, or add a touch of charm to a home office, an electric fireplace offers an elegant and practical solution. If you’ve been contemplating this inviting home upgrade, you’ve come to the right place. This comprehensive, step-by-step tutorial will guide you through the entire process of installing an electric fireplace, empowering you to transform your space with confidence and creativity.
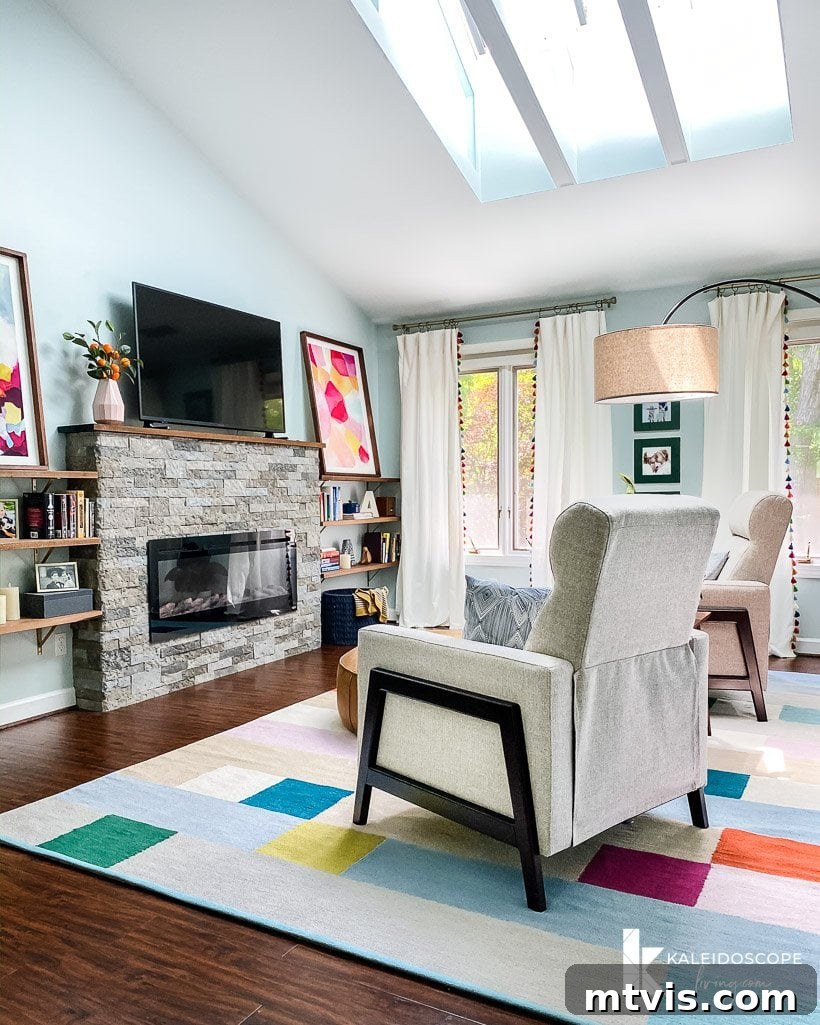
Table of Contents
Toggle
This project was completed in 2018. This tutorial was fully updated in December 2023.
Modern home construction often prioritizes open-plan living and energy efficiency, frequently leaving out traditional fireplaces. While historic homes were once built with multiple fireplaces for heating, many contemporary residences feature none, or perhaps just one in a central gathering space like a family room. This leaves many homeowners longing for the distinct charm and warmth that only a fireplace can provide in other areas of their home.
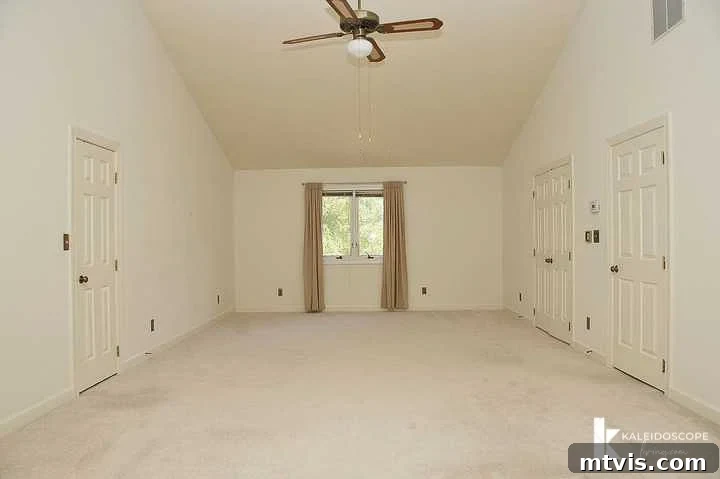
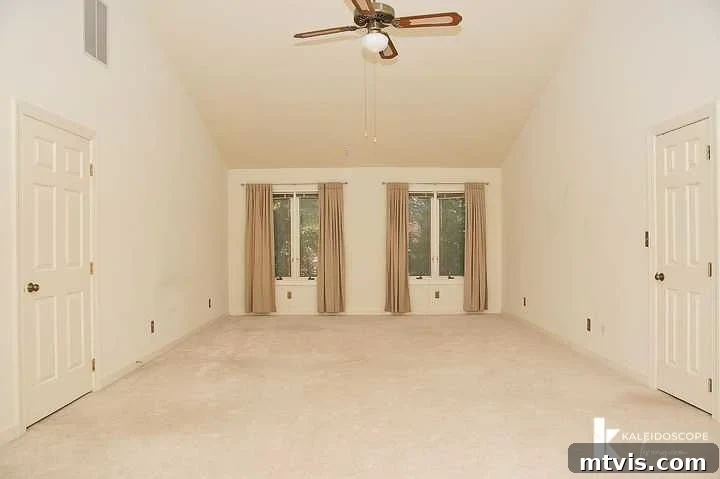
In our former home, for instance, the primary bedroom was exceptionally large – almost too large, bordering on cavernous. It lacked the intimate, cozy feel we desired and offered zero architectural interest. The sheer size, essentially two large bedrooms combined, meant one half became a sleeping zone while the other served as a sitting area. Despite installing skylights to introduce more natural light and visual appeal, the room still felt cold and impersonal. After much deliberation, we realized a fireplace in the sitting area would be the perfect solution to infuse warmth and character. The only catch? No chimney. This led us on a quest to explore viable options for adding a fireplace to an existing home without traditional venting. Here’s what we discovered during our research.
Options for Having a Fireplace Installed in an Existing Home
If you’re dreaming of a fireplace but your home wasn’t built with one, or you want to add one in a new location, understanding your options is the first crucial step. The feasibility and cost can vary dramatically depending on the type of fireplace you choose. Let’s explore the primary alternatives for introducing a fireplace into an existing home.
Option 1: Fireplace and Chimney
Opting for a traditional wood-burning fireplace, complete with a new chimney installation, is undoubtedly the most authentic way to enjoy a roaring fire. However, it’s also the most complex and expensive route. Based on extensive research, the cost for installing a fireplace and chimney can range anywhere from $2,500 to a staggering $11,000, with an average hovering around $6,750. This estimate doesn’t even account for potential structural modifications to your home, which might be necessary and could significantly inflate the price. Beyond the initial installation, wood-burning fireplaces demand ongoing maintenance. Regular inspections, cap and liner replacements, and cleaning services are essential for safety and efficiency, often costing up to $1,000 per year, according to HomeAdvisor. This option is often only feasible if your home’s structure allows for it and your budget is substantial.
Option 2: Gas Fireplace
Gas fireplaces present a more convenient alternative to wood-burning units, offering instant flames at the flick of a switch. There are two main types: ventless and vented. Ventless gas fireplaces don’t require a chimney or a venting system to the outside, making them seem like an attractive option. However, they are only recommended for well-ventilated rooms, typically those with high ceilings and multiple large windows, due to concerns about indoor air quality and the release of combustion byproducts. In fact, some regions have regulations that prohibit ventless gas fireplaces altogether because of health and safety considerations. Vented gas fireplaces, on the other hand, do require a venting system to be installed, which, while not as extensive as a full chimney, can still be complex and costly. Installing a built-in gas fireplace can average around $6,700, making it a significant investment.
When we were looking to add a fireplace to our primary bedroom, both the traditional wood-burning and gas options were simply out of our budget. We were committed to a tight financial plan for our home upgrades, rendering these choices unviable. Fortunately, there was a third, much more accessible option that perfectly aligned with our needs and financial constraints…
Option 3: Electric Fireplace
This is where electric fireplaces truly shine as a game-changer for home decor and comfort. The biggest advantage? You can install an electric fireplace in virtually any room without needing external venting or a chimney. While it’s always wise to briefly confirm with your local building code, most jurisdictions permit electric fireplaces to be placed wherever you have a standard electrical outlet and sufficient space. This unparalleled flexibility means you can add a captivating focal point to your living room, bring warmth to a chilly bedroom, or create a cozy reading nook in a previously underutilized corner. Beyond their positional freedom, electric fireplaces boast a crucial benefit for the DIY enthusiast: they are incredibly friendly to self-installation. Without the complexities of gas lines, masonry work, or elaborate venting systems, the installation process is straightforward enough for most homeowners to tackle themselves. This DIY potential translates directly into significant cost savings, making electric fireplaces an incredibly affordable option for adding both style and warmth to your home. Ready to learn how to bring this inviting feature into your own space? Keep reading for a detailed, step-by-step guide!
This post contains affiliate links for your convenience. Click here for my full disclosure policy.
DIY TUTORIAL: How to Install an Electric Fireplace in Any Room
Video Overview
Before diving into the detailed written instructions, we highly recommend watching the short video below. It provides an excellent visual overview of the entire DIY electric fireplace installation process, giving you a clear understanding of what to expect and how each step connects.
Step-by-Step Instructions
Time needed: 2 days
This entire DIY electric fireplace project was completed over a single weekend. The actual time it takes may vary depending on your chosen materials and your prior DIY experience.
- Choose your materials.
Before you even pick up a tool, the most important first step is selecting the right electric fireplace for your vision and space. Electric fireplaces come in several main types: wall-mounted units that hang directly on a wall; mantel fireplaces, which are freestanding units that include a complete mantel; and insert fireplaces, designed to fit into an existing opening or a custom-built enclosure. Each type offers different aesthetic and installation benefits. Wall-mounted units are great for minimalist designs or small spaces, offering a contemporary look. Mantel fireplaces provide a classic, furniture-like feel and require minimal assembly. Insert fireplaces, which we chose for our project, offer the most customization, allowing you to build a unique surround to match your home’s decor.
Since we opted for an electric fireplace insert, the remainder of this tutorial will focus on building a custom surround. This also means you’ll need to choose finishing materials for the fireplace façade. The possibilities are endless: you could use classic ceramic tiles for a sleek look, traditional brick (either real or lightweight faux versions), or even experiment with a modern concrete fireplace finish. For our project, we decided on AirStone for the facing. We loved the authentic stone appearance it offered but wanted to avoid the high cost and labor-intensive nature of natural stone, which can be incredibly heavy, messy to cut, and challenging to work with due to variations in size and shape. AirStone provided the perfect balance of aesthetics and DIY-friendliness.
- Sketch out your design.
Once you have a general idea of your materials, it’s time to bring your vision to paper. Thorough planning is paramount for a successful DIY project. We knew from the outset that we wanted to install custom shelves to elegantly flank our DIY fireplace, creating a cohesive and functional focal point. Therefore, our design considerations extended beyond just the fireplace itself, incorporating these integrated shelving units into the overall aesthetic. Take the time to sketch out various plans and layouts, considering the scale of the room, existing furniture, and how the new fireplace will integrate into the space. Don’t be afraid to experiment with different dimensions and configurations. This mockup design was our starting point, helping us visualize the final outcome and refine our ideas before any physical work began. This phase is crucial for avoiding costly mistakes and ensuring your finished fireplace perfectly complements your home’s style.

- Choose your electric fireplace insert and plan the layout.
With a general design concept in hand, the next critical step is to select your specific electric fireplace insert. For our project, we chose this 50-inch fireplace insert, which became the cornerstone of our design. It is absolutely essential to choose your insert before finalizing any exact measurements for the surround or framing. Every electric fireplace insert comes with very precise specifications and dimensional requirements for its opening, clearance from combustibles, and electrical hookups. Ignoring these specifications can lead to an ill-fitting frame or, worse, safety hazards. Pay meticulous attention to these details to ensure that the custom frame you build will perfectly accommodate your chosen insert.
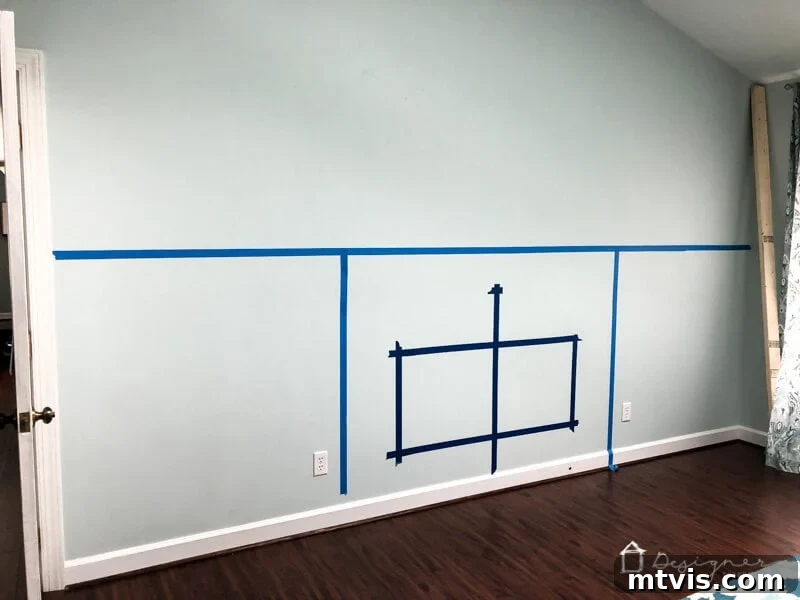
Once you have your insert’s exact dimensions, a highly recommended tip for visual planning is to use painter’s tape to mark out the full footprint of your planned fireplace on the wall and floor where it will be installed. This tangible representation allows you to truly visualize the scale, placement, and how it will interact with other elements in the room. This step helps confirm that your chosen dimensions and design aesthetic are harmonious with your space before you commit to cutting any lumber.
- Build a wood frame.
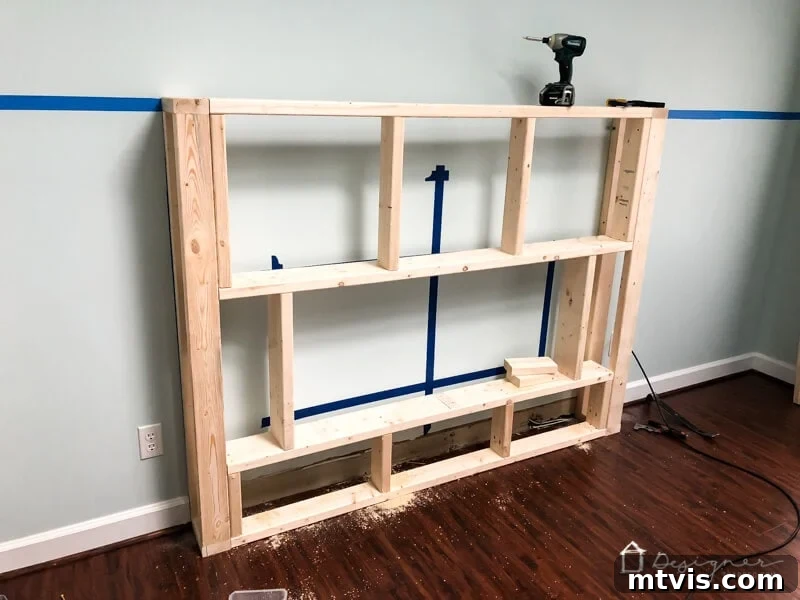
With your design finalized and precise measurements from your fireplace insert, it’s time to begin constructing the structural framework. Using durable 2×4 lumber, cut each piece according to the exact dimensions you determined in your planning phase. This frame will not only define the overall shape and size of your fireplace surround but also create the secure cavity for your electric insert. Ensure you build a robust box for the fireplace opening, carefully adhering to the insert’s specified clearance requirements for ventilation and safety. Additionally, incorporate vertical supports within your frame; these will serve as crucial attachment points for any decorative moldings or cladding materials you plan to add later, ensuring a clean and professional finish.
As previously emphasized, the specific measurements and cuts for your frame are entirely dependent on your unique design and the particular electric fireplace insert you’ve selected. We meticulously framed out our fireplace box, ensuring it met both our desired aesthetic dimensions and the manufacturer’s essential clearance specifications. A crucial and often overlooked step after constructing your frame is to perform a “dry-fit.” Carefully place your electric fireplace insert into the newly built frame to confirm it fits perfectly, without any gaps or undue pressure. This simple check can save you significant time and effort down the line.
Note: You will very likely need to address any existing baseboard molding where your new fireplace frame will sit. To ensure the fireplace lays perfectly flat against the wall, carefully remove the section of baseboard that will be covered by the frame. We found that a utility knife was ideal for scoring and removing caulk, followed by a multi-tool for precisely cutting and extracting the relevant portion of the baseboard.
- Install your frame and enclose it.
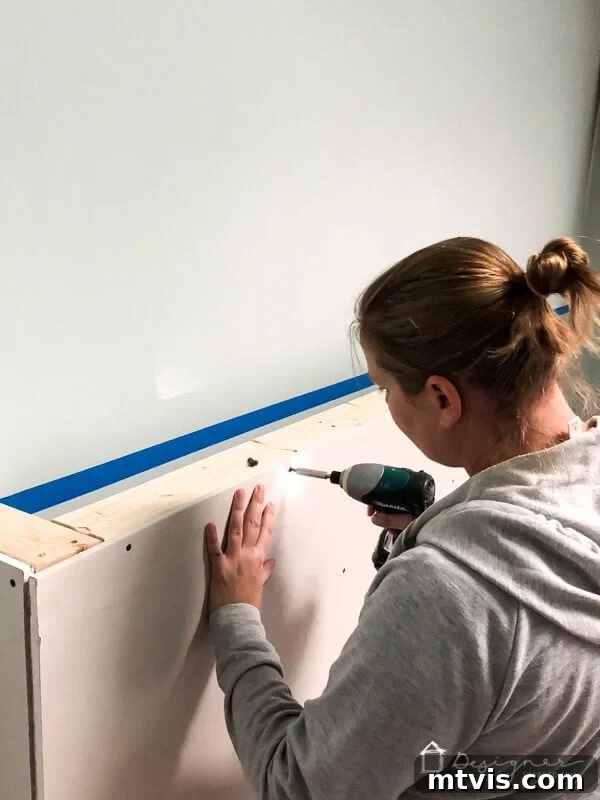
Once you’ve successfully dry-fitted your electric fireplace insert and confirmed its perfect fit within the frame, it’s time to permanently secure the structure. Carefully position the wood frame against the wall, ensuring it is level and plumb. Then, firmly attach it to both the wall studs (for stability) and the floor (to prevent any shifting). Use appropriate fasteners, such as long wood screws, to create a rock-solid foundation. With the frame securely in place, the next step is to enclose it. Since we planned to clad our fireplace with AirStone, which can be applied directly to drywall, we covered the entire external surface of our newly constructed wood frame with drywall panels. This creates a smooth, stable, and fire-resistant surface ready for your chosen decorative finish. If you were using a different cladding material, you would ensure the substrate is compatible with your chosen finish.
- Clad your fireplace.
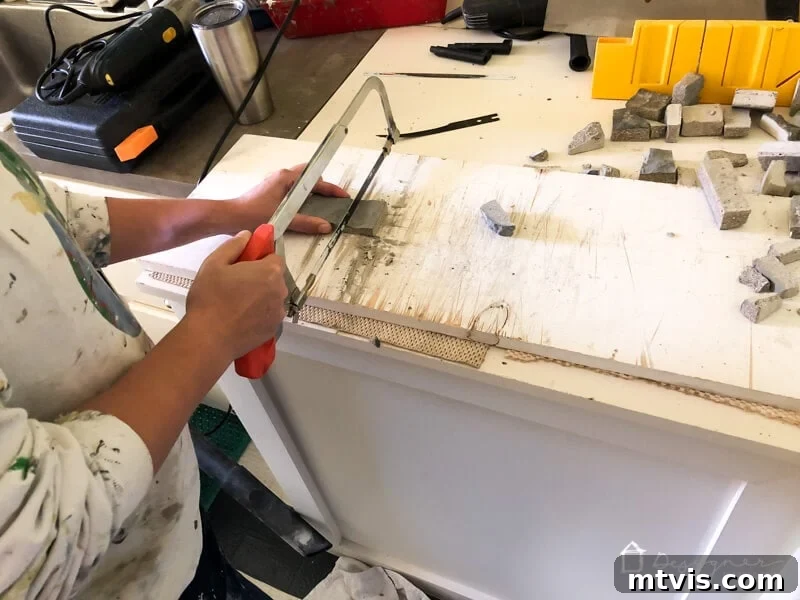
Now for the exciting part: bringing your fireplace to life with its chosen finish! As mentioned, we opted to clad the exterior of our fireplace with AirStone. This innovative faux stone product is designed for ease of installation, even for novice DIYers. To apply AirStone, you’ll primarily need a tub of the manufacturer’s recommended pre-mixed adhesive, a sturdy putty knife for applying the adhesive, and a hacksaw for making any necessary cuts. The installation process involves simply “buttering” the adhesive onto the back of each AirStone piece and pressing it firmly onto the drywall surface, ensuring a strong bond. While it can be a time-consuming process, requiring patience and attention to detail, the actual technique is remarkably straightforward. One of the greatest benefits of AirStone is its ingenious system of specialized corner pieces, which eliminates the need for tricky miter cuts. These pre-formed corners seamlessly interlock, creating a professional and authentic stone look without the headaches often associated with traditional masonry or tiling. The lightweight nature of AirStone also makes it far easier to handle and manipulate compared to real stone, reducing fatigue and simplifying the overall project.
- Install the fireplace insert.
With your fireplace surround beautifully clad and the adhesive fully cured, it’s time for the grand finale: installing the electric fireplace insert itself. Carefully read and follow the specific instructions provided by the manufacturer of your particular electric fireplace model. While some guides might suggest installing the insert before all the exterior finishing is complete, we successfully installed our electric fireplace insert after the AirStone was fully adhered and dried. This allowed us to ensure a perfect fit and protect the insert during the cladding process.
When positioning your insert, consider how you will manage its power cord. We strategically left a small, discreet opening on the right side of our fireplace frame. This allowed the cord to feed cleanly out to a nearby wall outlet, keeping the setup tidy and safe. Once your insert is securely in place and plugged in, it’s time for the moment of truth. Fire it up (pun absolutely intended!) and verify that all functions, including the flame effects and heating elements, are working correctly. This final check ensures your new electric fireplace is ready to bring warmth and ambiance to your room.
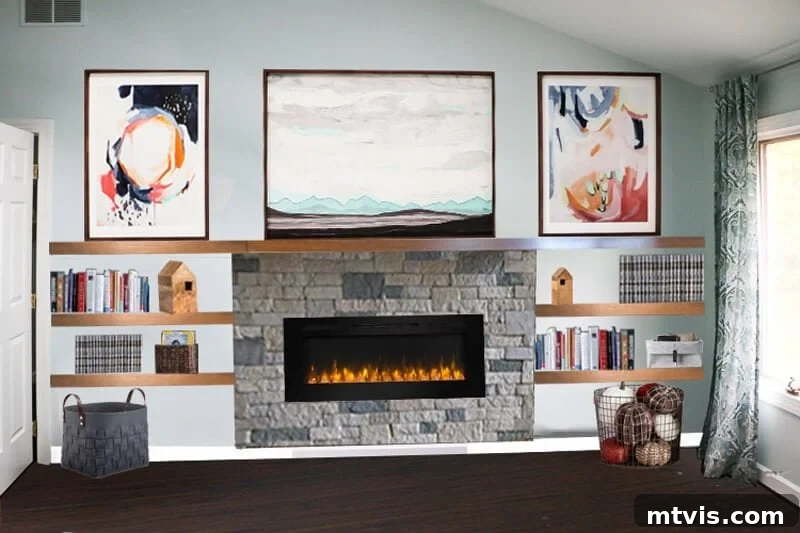
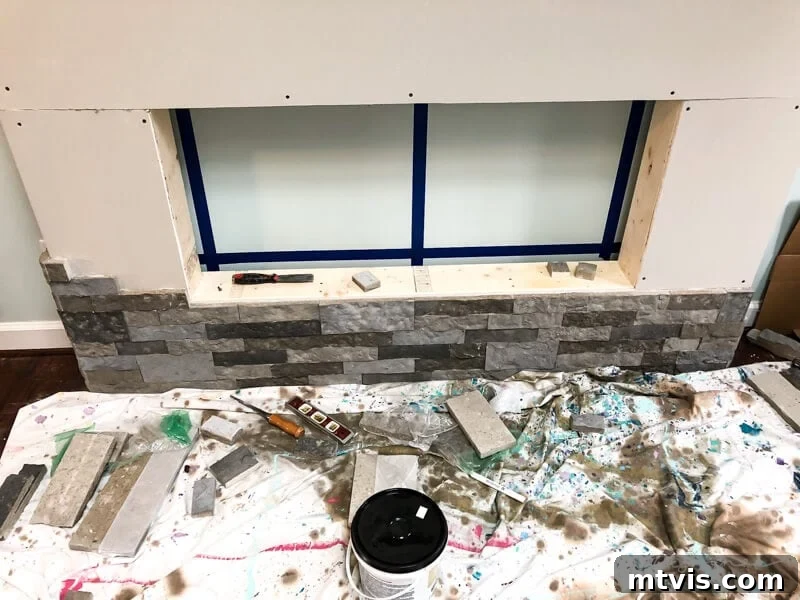
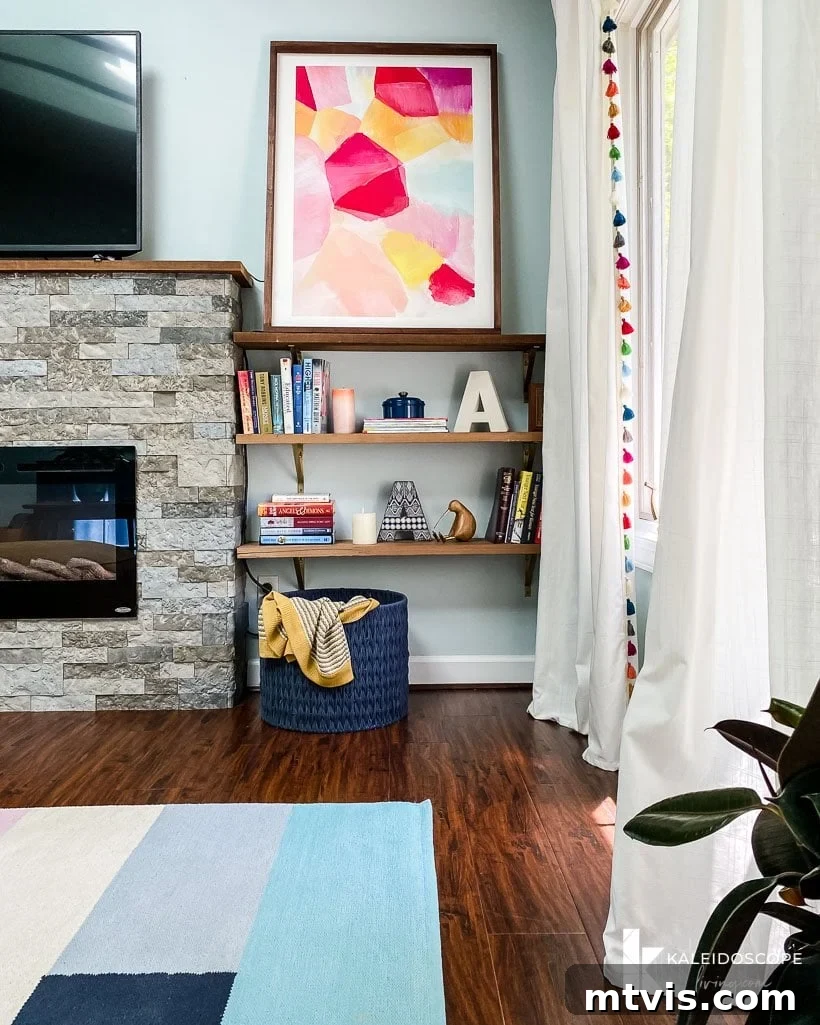
To complete the sophisticated look, we added a simple yet elegant wood mantel above the fireplace. Additionally, to enhance functionality and visual balance, we meticulously crafted DIY shelves to flank the fireplace on both sides, transforming the entire wall into a cohesive and inviting display area. Looking back, this project stands out as one of the most rewarding and impactful DIY endeavors we’ve ever undertaken, especially when considering the relatively easy process versus the monumental aesthetic and comfort transformation it brought to the room. We are absolutely thrilled with the outcome; the fireplace has undeniably warmed up the entire space, making it feel incredibly cozy and welcoming.
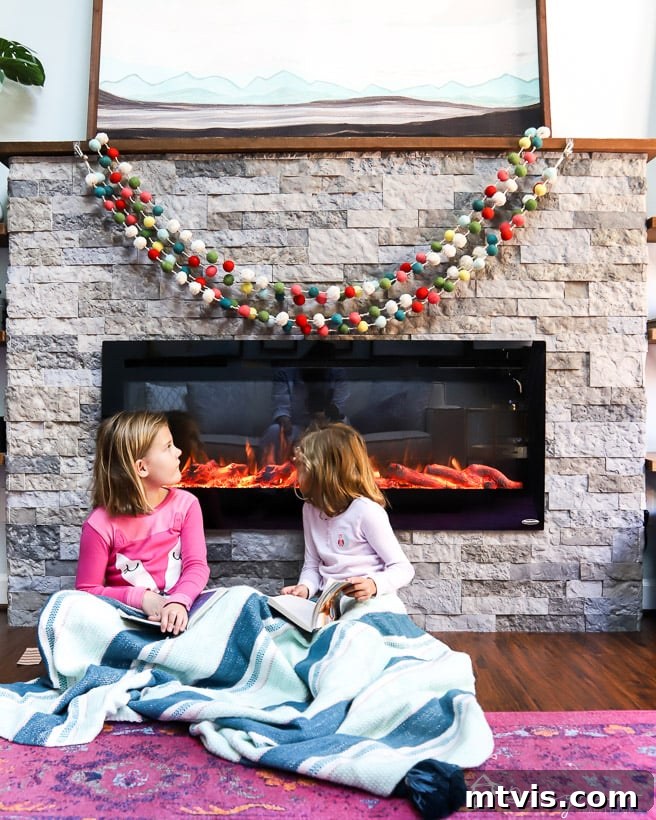
The photo below was taken shortly after the initial installation, before we made a few other subtle changes to the room’s decor, such as updating the rug. One of the features we absolutely adore is the versatility of electric fireplaces: you can activate the mesmerizing flame effects with or without the heating function, allowing for year-round ambiance. The convenience of a remote control makes adjusting settings effortless, adding another layer of modern comfort to this beautiful addition.
Frequently Asked Questions
Our selection process for the fireplace insert began with a clear idea of the finished fireplace’s approximate size. We aimed for an insert around 50 inches wide to match our design vision. The market offers a vast array of electric fireplace inserts, presenting numerous choices. As we weren’t tied to any particular brand or manufacturer, we focused on inserts that offered a favorable balance of price point and strong customer ratings. After careful consideration, this specific 50-inch electric fireplace insert was our final choice. We can confidently say, with several years of use, that we have absolutely no regrets about our decision.
AirStone is a remarkably innovative and patented ultra-light stone wall covering. It’s designed to transform the often complicated and laborious process of installing stone finishes into a simple, accessible do-it-yourself project. Unlike traditional heavy stone, AirStone is approximately 75% lighter, making it much easier to handle, cut, and install without specialized tools or professional help. It’s suitable for both indoor and outdoor applications, providing the authentic look, tactile feel, and impressive durability of real stone. AirStone is widely available at most major home improvement stores, and you can also find it conveniently on Amazon, making it an accessible choice for many DIY projects.
AirStone offers a selection of beautiful color blends to suit various design aesthetics: Autumn Mountain, Spring Creek, and the newer Birch Bluff. When making our decision, we were particularly drawn to both Birch Bluff and Spring Creek, finding them equally appealing. Ultimately, we chose the Spring Creek blend for our fireplace. We are extremely pleased with our color choice, as it perfectly complements the overall decor of the room and provides the natural, subtle stone look we desired. For more visual inspiration and to see how different AirStone blends look in various settings, you can explore loads of AirStone Inspiration here.
Absolutely, yes! When we first considered AirStone, we admit to a healthy dose of skepticism regarding the manufacturer’s claim that anyone could install it using only pre-mixed adhesive, a putty knife, and a hacksaw. However, we are delighted to report that it genuinely is that simple. We didn’t require any specialized mixing tools or expensive equipment; even our old, trusty hacksaw proved perfectly adequate for making all the necessary cuts. Applying the adhesive was straightforward, much like icing a cupcake – an analogy that truly speaks to its ease of use. If you can handle a putty knife, you can certainly apply AirStone adhesive with confidence.
While the process is indeed easy, it can be somewhat time-consuming due to the individual application of each stone piece. That said, we managed to complete the entire AirStone fireplace installation, including the framing, over a single weekend. Compared to many DIY home improvement projects, it’s remarkably fast! Furthermore, if you’ve ever tackled a tiling project yourself, you’ll find installing AirStone to be significantly less demanding. Having personally laid every single tile in our twin girls’ bathroom (which was a miserable experience!), I can confidently say that applying AirStone to our fireplace felt like a leisurely walk in the park by comparison.
The design of AirStone pieces ensures they fit together perfectly. As long as you establish a level starting line, you’re set for a smooth installation. The pre-formed corner pieces are an absolute godsend, simplifying what would otherwise be a very challenging aspect of working with natural stone or even some tile systems. The thoughtful design of AirStone truly makes achieving a beautiful, professional-looking stone finish accessible to every DIYer.
Electric fireplaces are generally very energy efficient, especially when compared to traditional wood-burning or even gas fireplaces. They operate on a ‘zone heating’ principle, allowing you to heat only the room you are in, rather than warming the entire house. Most units use standard household electricity and typically consume about 1,500 watts of power when the heater is on, which is comparable to a space heater. When only the flame effect is engaged (without heat), the energy consumption is significantly lower, often just a few cents per hour. This allows you to enjoy the ambiance year-round without a major impact on your electricity bill.
One of the greatest advantages of electric fireplaces is their minimal maintenance requirements. Unlike wood or gas fireplaces, there’s no ash to clean, no chimney to sweep, and no gas lines to inspect. The primary maintenance involves occasionally wiping down the exterior surfaces to remove dust. If your unit has a fan to distribute heat, it’s a good idea to periodically clean any air filters or vents to ensure optimal performance and airflow. Always consult your specific model’s manual for any particular cleaning or care instructions, but generally, electric fireplaces are remarkably hassle-free.
As you can see, installing an electric fireplace is an incredibly accessible and rewarding DIY project. It’s a fairly simple process that can infuse any room in your home with comfort, warmth, and undeniable style, all without necessitating a chimney or requiring a significant financial outlay. This project truly embodies the spirit of DIY-friendliness, empowering anyone to tackle it with just a few basic tools and a bit of determination. The transformative impact on your living space, creating a cozy and inviting atmosphere, is well worth the effort!
More Fireplace Posts
SEE ALL home improvement POSTS
-
How to Add a Fireplace to Any Room: A Step-by-Step Tutorial
-
DIY Concrete Fireplace For Less than $100!
-
The Fireplace Makeover Reveal
-
17 DIY Fireplace Ideas to Inspire You
-
DIY Fireplace Mantel With a Driftwood Finish
-
How to Make a Barn Door Style Fireplace Screen
Curious about how to approach transforming rooms and spaces in your own home with a designer’s eye? Be sure to explore Designer in a Binder® – your go-to resource for affordable and simple home decorating strategies.
And if you’re eager for exclusive content, behind-the-scenes sneak peeks, and fresh DIY inspiration delivered directly to your inbox, don’t forget to subscribe before you go!