
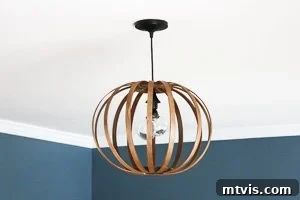
Craft Your Own Bentwood Pendant Light: The Ultimate West Elm Knockoff Guide
Transform your living space with a designer-inspired bentwood pendant light, without the hefty price tag! This comprehensive DIY tutorial will guide you through every step to create a beautiful, modern lighting fixture that rivals high-end versions.
Hello fellow DIY enthusiasts and home decor lovers! Have you ever fallen head over heels for a beautiful designer piece, only to have your heart sink at the sight of its price tag? That was exactly my experience with West Elm’s exquisite Bentwood Pendant Lights. For months, I admired their sleek design and warm ambiance, dreaming of how one would elevate our family room. But spending nearly $200 on a single light fixture just wasn’t in the budget.
Determined to have that sophisticated look without breaking the bank, I embarked on a creative journey to design my own version. After considerable thought, experimentation, and a good deal of “head scratching,” I finally cracked the code! And let me tell you, the results are absolutely worth it. Today, I’m thrilled to share my secret with you, so you can craft your very own stunning West Elm knockoff bentwood pendant light.
Why DIY Your Bentwood Pendant? The Smart Choice
Before we dive into the creation process, let’s talk about why making your own bentwood pendant is such a fantastic idea. Beyond the obvious cost savings, there are several compelling reasons to embrace this DIY project:
- Unbeatable Savings: The most immediate benefit is the dramatic reduction in cost. While designer versions can run upwards of $189-$199, you can build a comparable, if not identical, light for under $40. That’s a saving of over $150!
- Customization to Your Style: When you DIY, you’re not limited to pre-selected finishes. You get to choose the exact wood stain, paint color, and even the type of light bulbs that best complement your home decor. Want a lighter, airier look? Go for a natural stain. Prefer a dramatic, sophisticated vibe? A darker stain is perfect.
- Sense of Accomplishment: There’s an unparalleled satisfaction that comes from creating something beautiful and functional with your own hands. Every time you switch on your new pendant, you’ll feel a surge of pride knowing you crafted it yourself.
- Unique Home Accent: While inspired by a designer piece, your DIY bentwood pendant will have its own unique character, making it a true conversation starter and a personal statement in your home.
This post contains some affiliate links for your convenience. Click here to read my full disclosure policy.
Materials You’ll Need for Your West Elm Knockoff Bentwood Pendant
Gathering your materials is the first step to bringing your dream light fixture to life. Most of these items are readily available at craft stores, hardware stores, or online. We found many great deals by shopping in person, utilizing coupons and sales. However, if convenience is key, Amazon offers almost everything you’ll need, delivered right to your doorstep.
- 1 Pendant Light Kit: This forms the electrical core of your fixture. This is the exact kit we used, featuring a stylish oil-rubbed bronze finish. Choose a finish that complements your chosen wood stain or paint.
- 4 Wooden Quilting Hoops: These are the stars of our bentwood design. We recommend 14-inch hoops for a substantial look. Darice Quilting Hoops, 14-Inch worked perfectly for us.
- 1 Y Light Socket Adapter (Optional): If you desire more light output and plan to use two bulbs, this adapter is essential. We opted for two bulbs to adequately illuminate our spacious family room. This is the exact adapter we used.
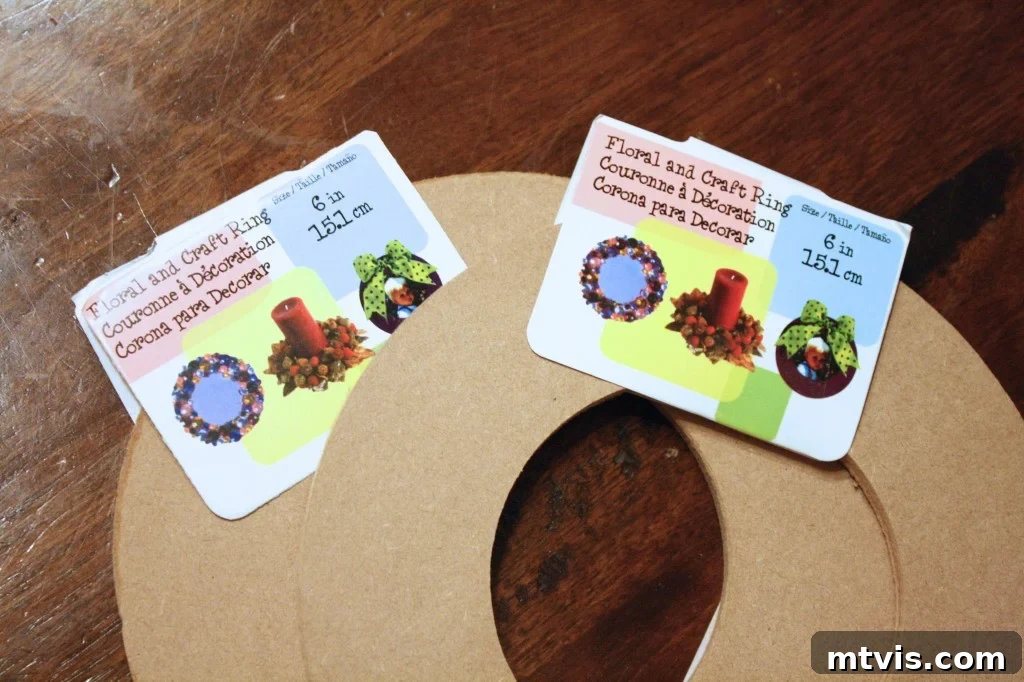
- 6 Floral Rings: These rings will form the top and bottom structural elements of your pendant. These are the rings we used.
- Wood Glue: Essential for strong, lasting bonds between wooden components.
- Twine: Used for securing the light kit within the bentwood frame. Natural jute or hemp twine works well.
- Wood Stain: Select a color that aligns with your desired aesthetic. Consider whether you want to match or contrast with existing wood tones in your room.
- A Hand Saw: For precisely cutting the quilting hoops. A small hacksaw or even a fine-toothed coping saw can work. Always prioritize safety when using cutting tools.
- A Pneumatic Nail Gun with 5/8 inch Nails (Recommended): This tool significantly speeds up and strengthens the assembly process. If you don’t have one, wood glue combined with clamps and ample drying time can serve as an alternative, though it requires more patience.
- Spray Paint (Matching your light kit finish, if using Y-adapter): For a seamless, professional look if you choose to use a Y-adapter.
Step-by-Step Guide to Crafting Your DIY Bentwood Pendant
Now, let’s get into the exciting part – building your beautiful light fixture! Follow these detailed steps for a smooth and successful DIY experience.
1. Prepare Your Floral Rings
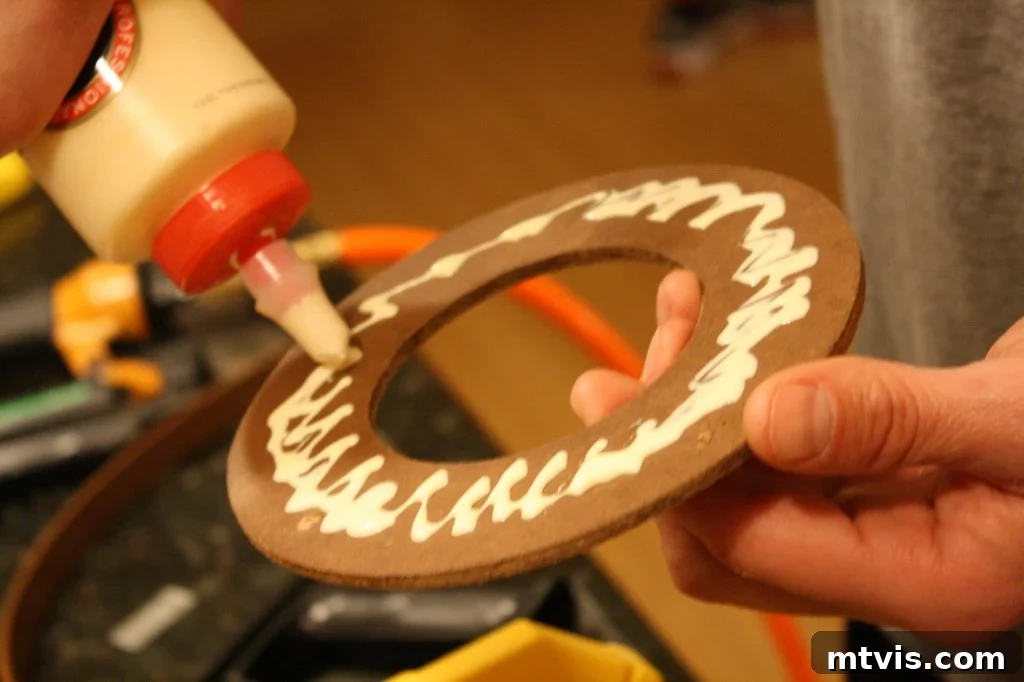
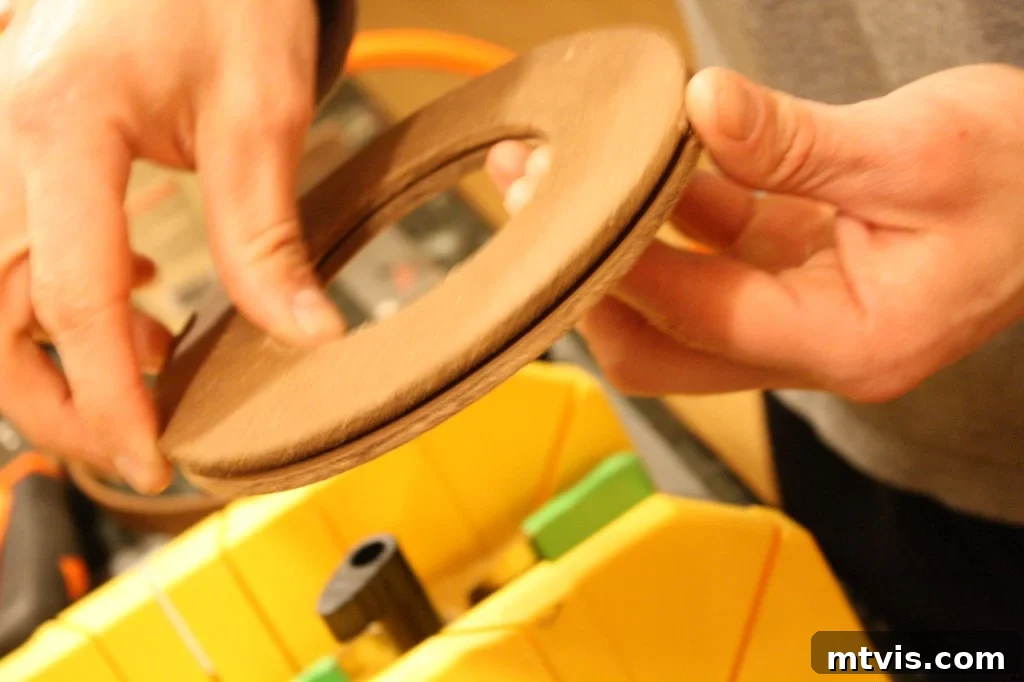
Begin by taking your six floral rings and gluing them together to form two sturdy sets of three. Apply a generous amount of wood glue between each ring and press them firmly together. Allow the glue to dry completely according to the manufacturer’s instructions – this ensures a strong foundation. Once dry, apply your chosen wood stain to both sets of rings. We opted for a darker stain to achieve a rich, warm tone, which was a personal preference. However, you are welcome to choose a lighter stain or even a different color entirely to more closely mimic the West Elm version or suit your unique style. Ensure even coverage and allow the stain to dry thoroughly before proceeding.
2. Disassemble Quilting Hoops
Each of your four wooden quilting hoops consists of an inner and an outer hoop. Carefully separate these components. You will be utilizing both the inner and outer hoops, which means you’ll have a total of eight individual hoops to work with.
3. Cut the Hoops in Half
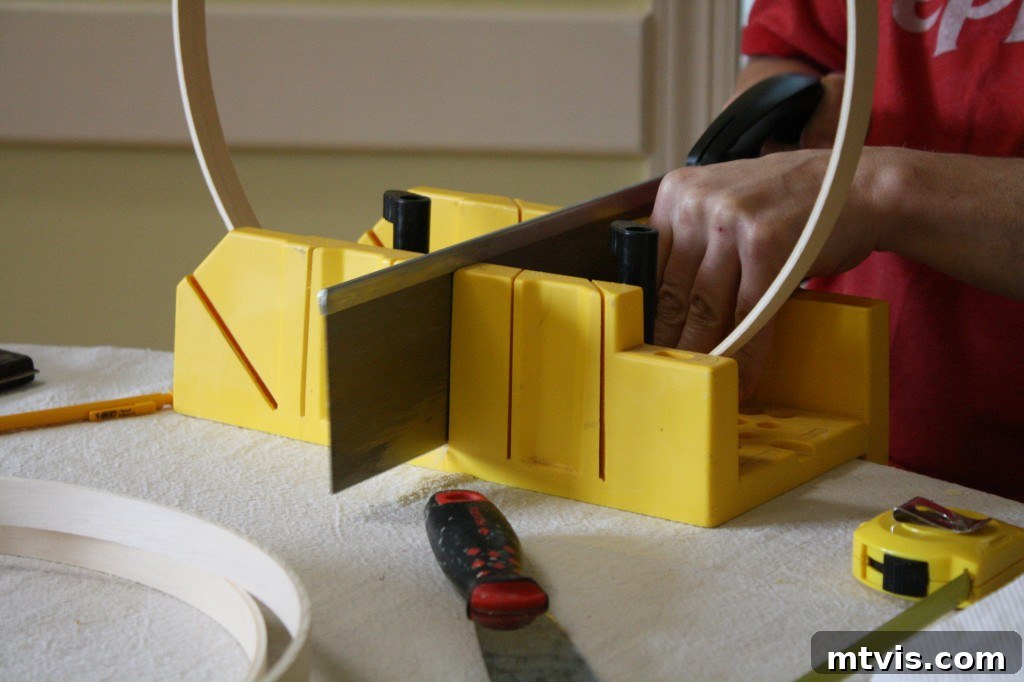
Using your hand saw, carefully cut each of the eight hoops precisely in half. This will yield a total of sixteen curved wooden pieces. Take your time to make clean cuts. Safety is paramount here; always use caution when operating a saw and consider wearing protective eyewear.
4. Remove Wood Blocks from Outer Hoops
The outer hoops typically have small wooden blocks with screws that allow for adjustment. You will need to remove these blocks. I found that a butter knife or a flathead screwdriver could gently pry them off. Work carefully to avoid damaging the wood. If any minor damage occurs during this process, don’t fret! Simply ensure that any compromised areas are positioned towards the top of your light fixture where they will be concealed once assembled and hung.
5. Stain All Wood Pieces
Now, apply your chosen wood stain to all sixteen of your cut hoop pieces. Just like with the floral rings, ensure even coverage. Allow them to dry completely according to the stain manufacturer’s recommendations. Proper drying time is crucial for both appearance and durability.
6. Assemble the Lower Section of the Pendant
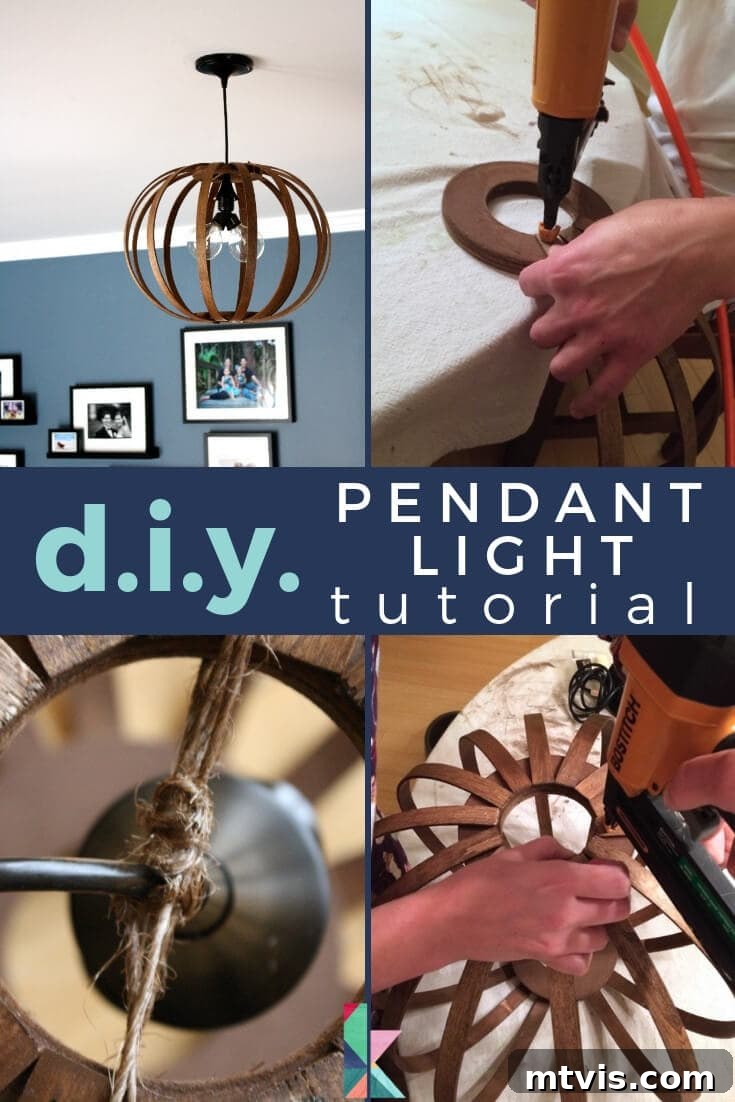
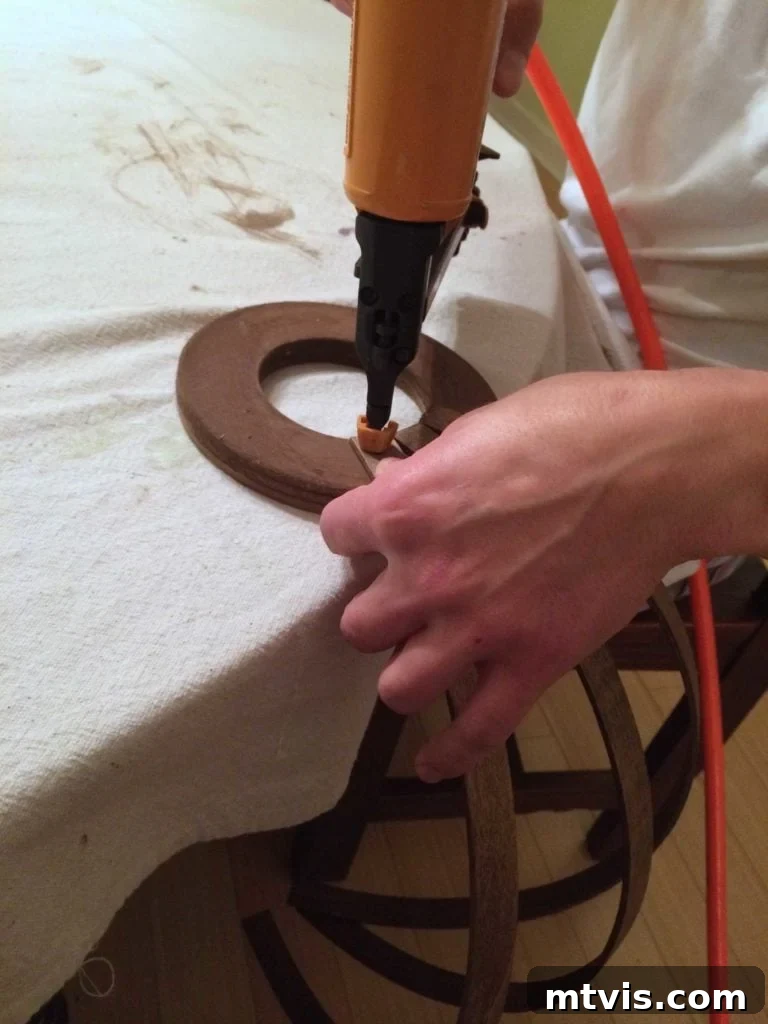
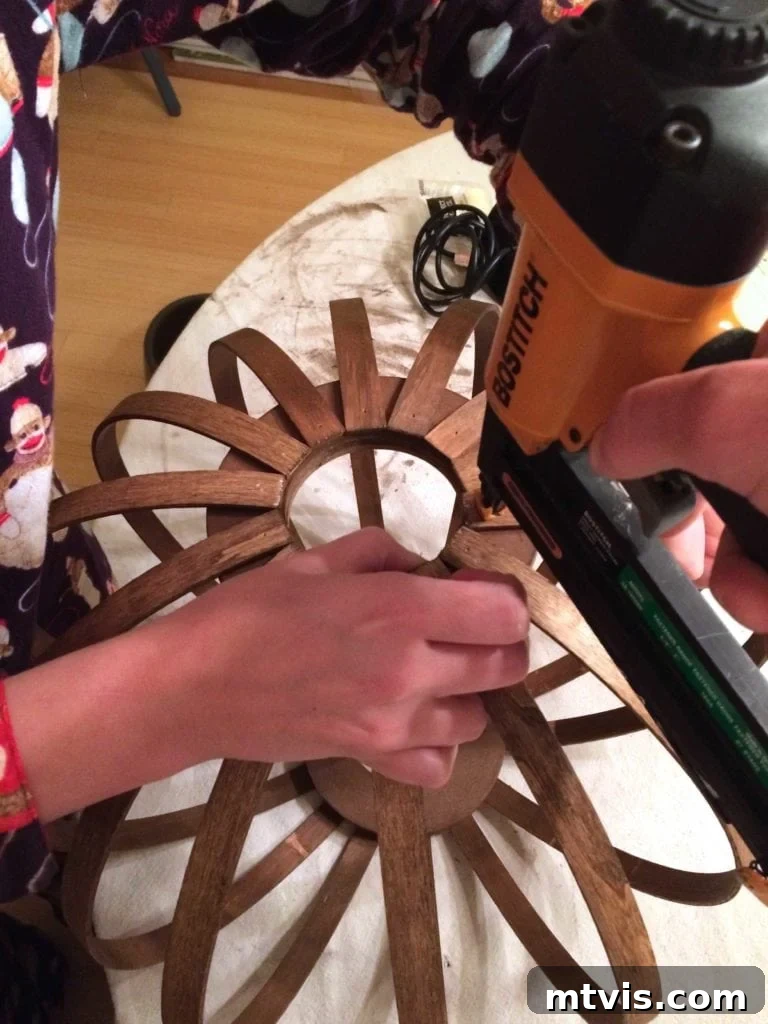
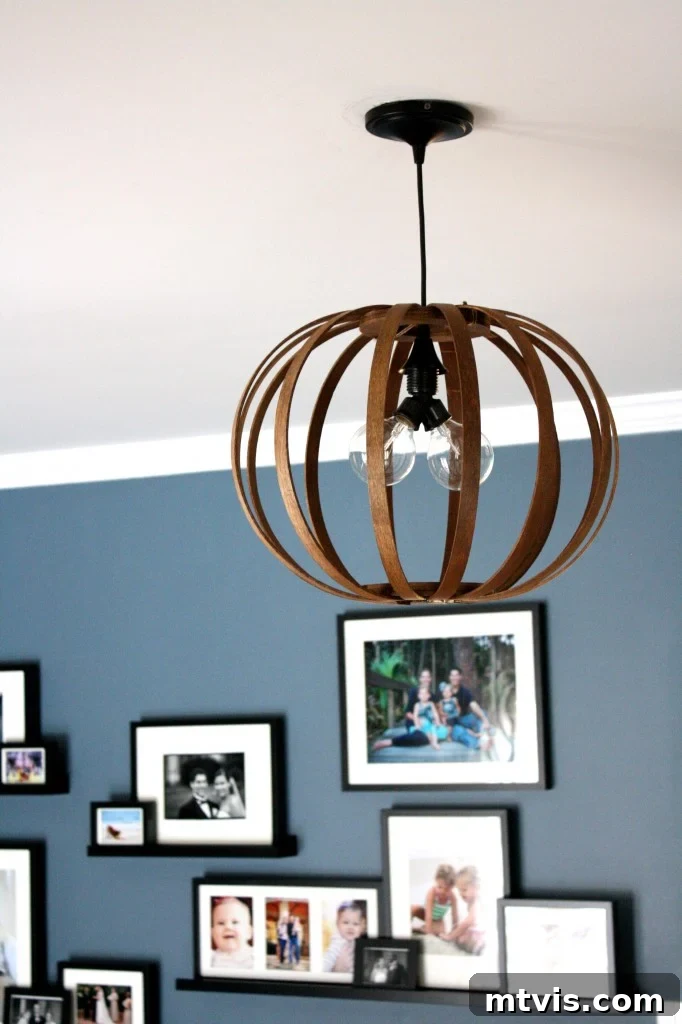
Take one set of your stacked, stained floral rings. Starting with one of your stained wood pieces (the cut hoop halves), position it against the outside edge of the floral ring stack. Using your pneumatic nail gun with 5/8 inch nails, carefully secure the end of the wood piece to the floral rings. For extra durability, you may also apply a thin bead of wood glue before nailing. Work your way around the entire circumference of the floral rings, attaching the wood pieces one at a time. Maintain consistent spacing between each piece for a visually appealing and symmetrical result. We used a total of 14 pieces of wood for our design, creating a beautiful, rounded form.
7. Complete the Bentwood Frame
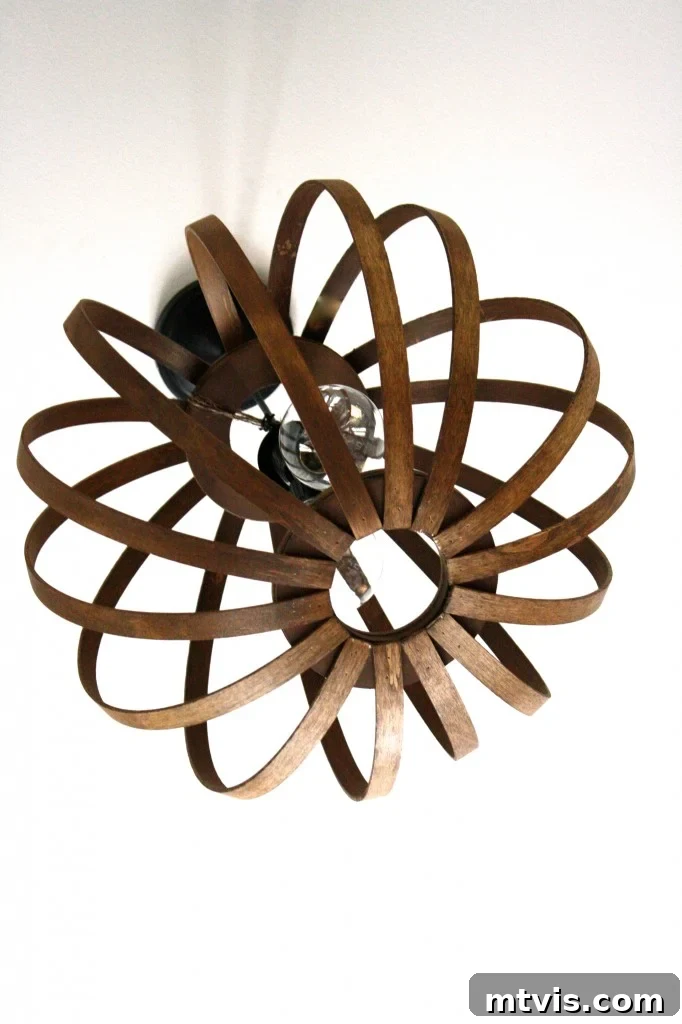
Once you’ve attached all 14 (or your chosen number) wood pieces to the first floral ring stack, take the second set of stacked floral rings. Now, carefully bend and attach the opposite ends of the wood pieces to the outside of this second floral ring stack. This step will create the signature curved, bentwood shape of your pendant. Again, use your nail gun (and glue, if desired) to secure each piece firmly. Ensure that the top and bottom rings are parallel and that the bentwood strips create a graceful, uniform curve. This is where the overall aesthetic of your pendant truly comes to life.
8. Prepare Your Electrical Components (Optional Y-Adapter)
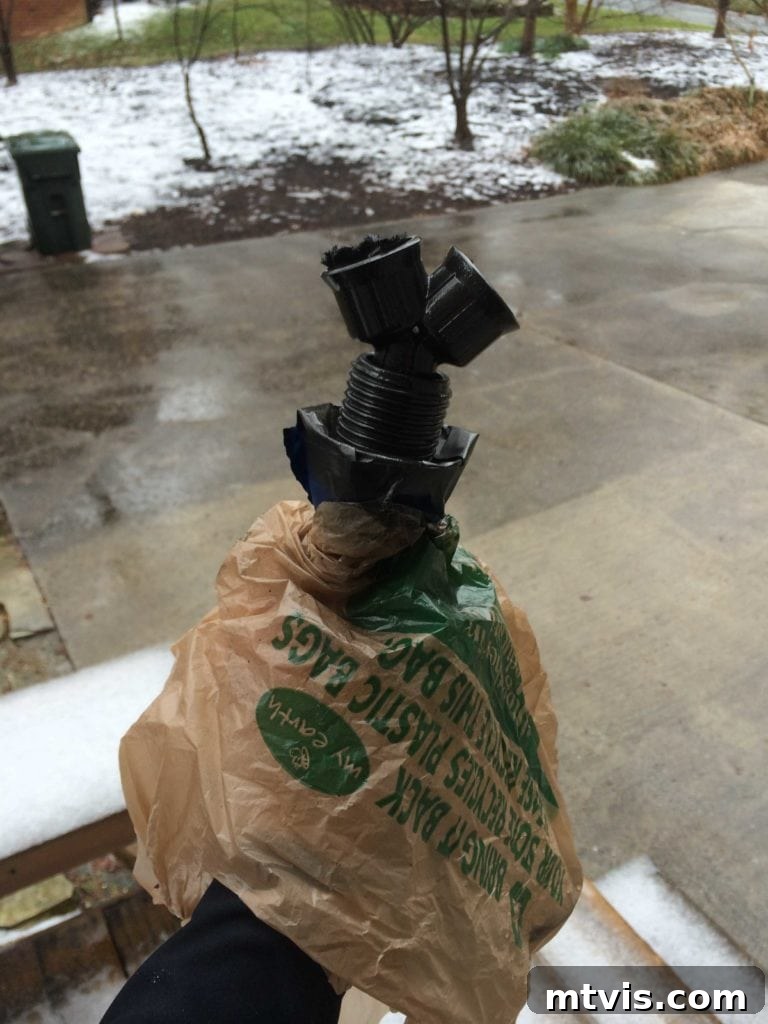
If you’ve chosen to use a Y light socket adapter for two bulbs, now is the time to prepare it. To ensure a cohesive look, spray paint the adapter to match the finish of your pendant light kit. For example, if your kit is oil-rubbed bronze, use an oil-rubbed bronze spray paint on the adapter. Apply thin, even coats of spray paint in a well-ventilated area, allowing adequate drying time between coats. We opted for two bulbs in our fixture because our family room is quite large, and we wanted to maximize the light output. Always handle electrical components with care and consult a professional if you are unsure about any wiring aspects.
9. Integrate the Pendant Light Kit
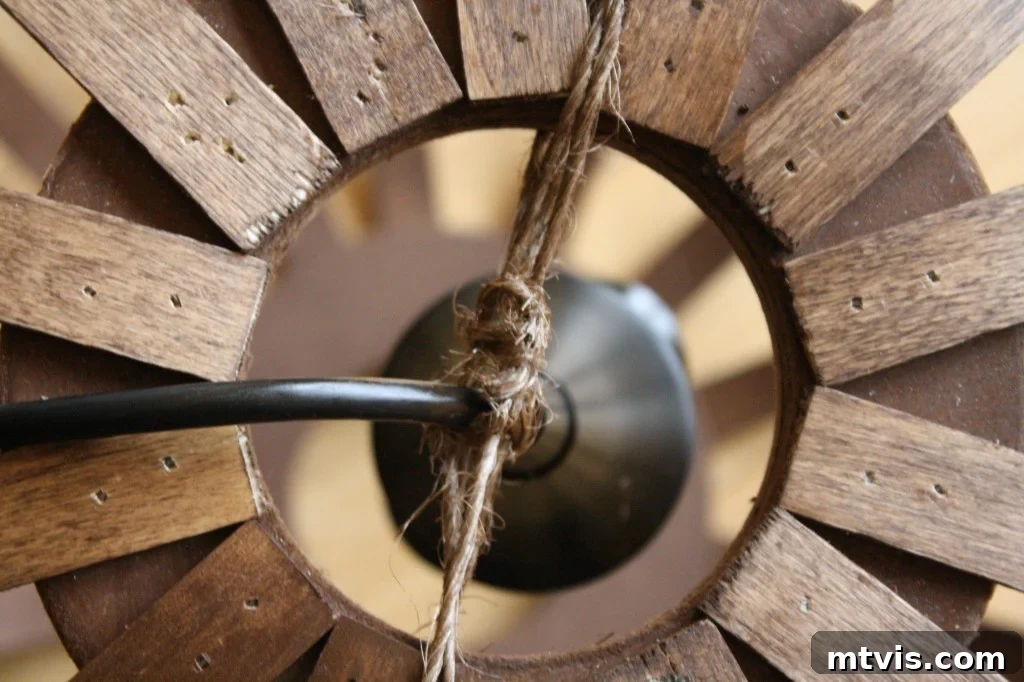
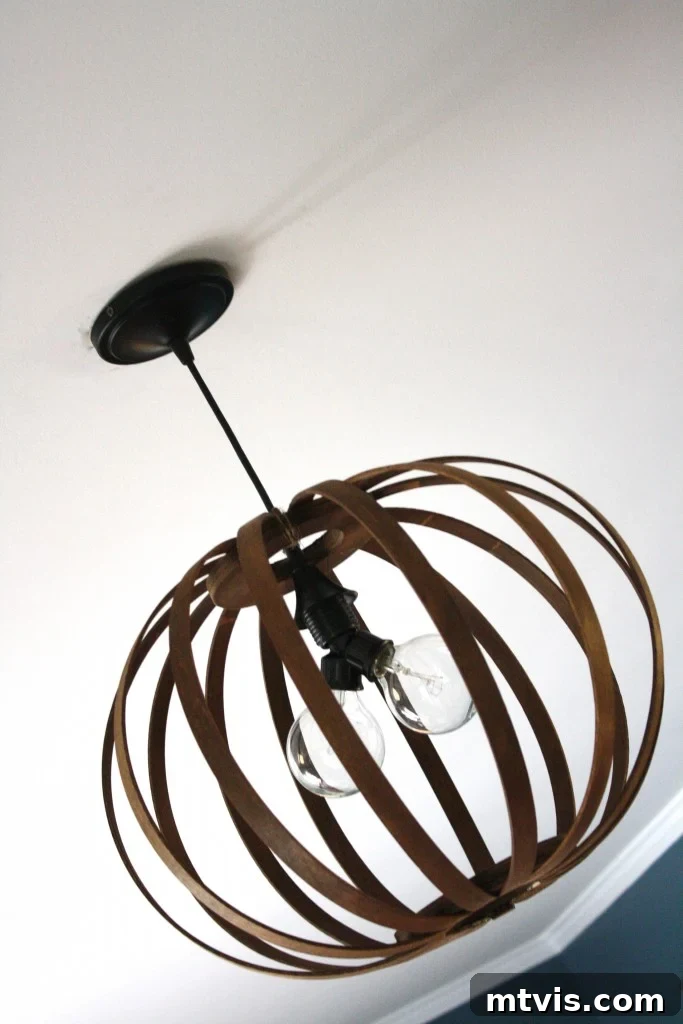
The next step is to securely attach your pendant light kit to the newly constructed bentwood frame. Because the diameter of our pendant light kit was significantly smaller than the floral rings at the top of the frame, we used twine to create a stable anchor. Carefully tie strands of twine across the top opening of the bentwood fixture, creating a crisscross pattern that forms a central support. Then, gently nestle the pendant light kit into this twine “sling,” ensuring it hangs level and centered. For an even more integrated look, you can stain the twine to match the wood, making it blend seamlessly with the rest of the fixture.
10. Hang and Admire Your Masterpiece!
With the electrical components in place and the frame complete, your magnificent DIY bentwood pendant light is ready to be hung! Follow the instructions provided with your pendant light kit for safe and proper installation into your ceiling electrical box. If you are not comfortable with basic electrical wiring, please consult a qualified electrician. Once installed, step back and bask in the glow of your incredible craftsmanship. You’ve created a stunning, designer-quality light fixture that will be the envy of all your guests!
Cost Breakdown: The Proof is in the Savings
Here’s a quick look at the approximate costs for our DIY bentwood pendant:
- Quilting Hoops: $5 each x 4 = $20.00
- Pendant Light Kit: $10.00
- Y Bulb Socket Adapter: $2.00
- Floral Rings: $0.99 each x 6 = $5.94
- Wood Stain and Spray Paint: $0 (We had these on hand from previous projects, but expect to spend about $10-$20 if buying new.)
Total Estimated Cost: Approximately $38.00
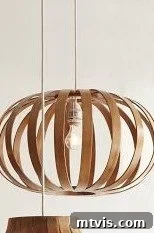
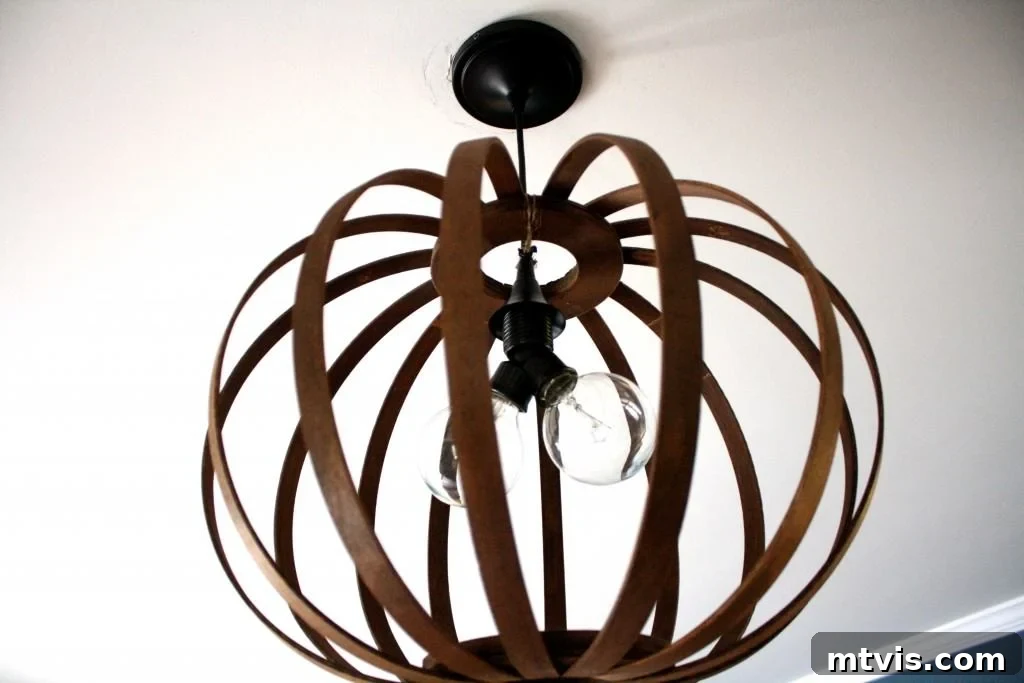
Our beautiful light fixture was modeled after the oblong Bentwood Pendant Light by West Elm, which typically retails for $189. By choosing the DIY route, we saved a remarkable $150! The satisfaction of creating something so beautiful and saving so much money is truly priceless. I absolutely LOVE, LOVE, LOVE the finished product hanging in our family room. (You can check out our family room renovation here to see how it fits in!)
Personalize Your Pendant: Ideas for Customization
One of the greatest advantages of DIY is the freedom to customize. Consider these ideas to make your bentwood pendant uniquely yours:
- Vary the Stain Color: Experiment with different wood stains. A light oak or natural finish can create a Scandinavian, minimalist look, while a rich mahogany or walnut stain adds traditional elegance. You could even paint the wood a solid color for a bold, contemporary statement.
- Different Sizes: While we used 14-inch hoops, you could experiment with larger or smaller hoops, or even combine different sizes to create a multi-tiered or cluster pendant.
- Bulb Choices: Beyond the Y-adapter for two bulbs, consider the type of bulbs. Edison-style bulbs with visible filaments add a vintage charm, while energy-efficient LED bulbs provide long-lasting, bright light. Warm white bulbs create a cozy atmosphere, while cooler tones offer a more modern feel.
- Additional Embellishments: For a touch of bohemian flair, consider adding macrame details or small decorative beads to the twine holding the light kit.
So, are you feeling inspired to tackle this rewarding project and create one of these beauties for your own home? What room will you envision it in? Will you opt for a darker, dramatic stain or a lighter, airier finish? Will one bulb suffice, or will you go for the added brilliance of two? I can tell you firsthand, it was a genuinely fun and relatively straightforward project that yields incredible results. I truly believe you should go for it!
Be sure to pin this tutorial to your favorite DIY or home decor boards on Pinterest so you can easily find it when you’re ready to start building!
And before you go, don’t forget to explore our other popular DIY projects and grab our free guide on how to design a room you love. That way, you can ensure the rest of your space is just as enchanting as your stunning new bentwood pendant light! Happy crafting!
