
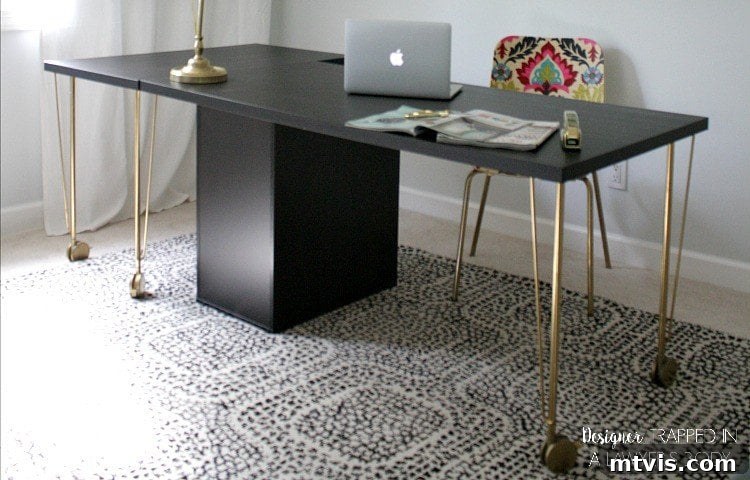
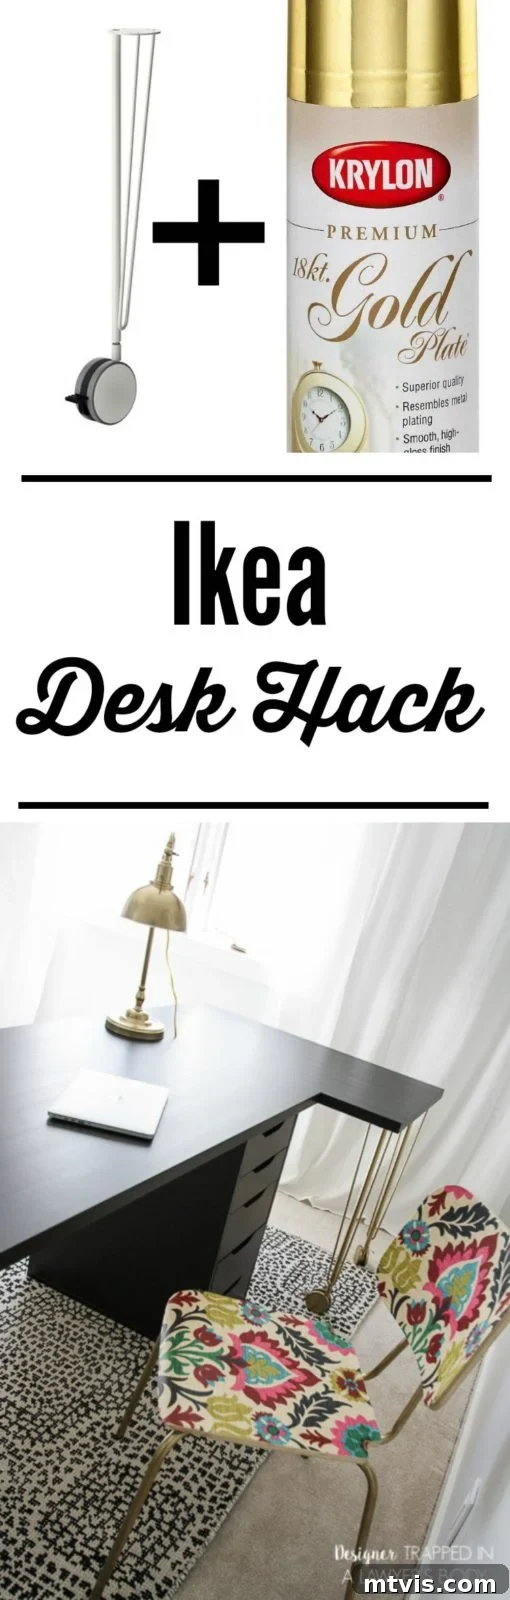
Welcome, fellow DIY enthusiasts and budget-conscious decorators! The quest for stylish, high-quality furniture often leads to a challenging dilemma: how to achieve a sophisticated look without breaking the bank. For many, including myself, spending a fortune on furniture simply isn’t an option, nor is it necessary. I firmly believe that with a bit of creativity and strategic planning, you can furnish your home with pieces that look expensive but come with a surprisingly affordable price tag. This philosophy was put to the test recently when I found myself in dire need of a spacious, functional desk for my combined craft room and home office space. You can catch a glimpse of the full craft room transformation here.
My search for an ideal desk was exhaustive. I scoured countless furniture stores, both online and physical, seeking a desk that offered ample workspace, robust quality, and a price that wouldn’t make my wallet weep. The options were either too small, too flimsy, or ridiculously overpriced for what they offered. That’s when inspiration struck: why buy when you can build (or rather, hack)? IKEA, with its modular and affordable furniture components, has long been a haven for creative DIYers. It became clear that an IKEA desk hack was the perfect solution to my design and budget conundrum. The result? The easiest and most rewarding DIY desk project I’ve ever undertaken, delivering a truly custom, high-end look for a fraction of the cost. Read on to discover how you can replicate this simple yet stunning transformation and craft your very own dream workspace. Please note that this post includes some affiliate links. For a detailed understanding of my disclosure policy, click here.
Unlocking the Potential: Why Choose an IKEA Desk Hack?
IKEA hacks have revolutionized how many of us approach home furnishing. They offer an incredible blend of affordability, customization, and accessibility. Instead of settling for mass-produced furniture that might not perfectly fit your style or space requirements, IKEA components provide a blank canvas. You can mix and match, add personal touches, and create something truly unique that reflects your taste and meets your specific functional needs. This particular desk hack is a prime example of how combining standard, inexpensive IKEA parts with a touch of DIY magic can yield a sophisticated and custom piece that looks far more expensive than it actually is. It’s about smart design choices and leveraging readily available resources to achieve a premium aesthetic on a shoestring budget.
Gather Your Supplies: Materials for Your High-End IKEA Desk Hack
One of the beauties of this project lies in its simplicity and the readily available nature of its components. You won’t need specialized tools or hard-to-find materials. Everything you need for the base structure comes directly from IKEA, making this an accessible project for anyone, regardless of their DIY experience level. Here’s a detailed breakdown of what you’ll need to create your designer-inspired workspace:
- IKEA Desk Components: All core furniture pieces for this hack are sourced from IKEA, renowned for their functional and budget-friendly designs.
- Linnmon Table Top: This is the primary surface for your desk. The Linnmon series offers various sizes, but for a spacious craft room or office, a larger dimension is recommended. Its lightweight yet sturdy construction makes it an excellent base, and its clean, minimalist aesthetic provides a perfect foundation for customization. Choose a size that best suits your space and workflow.
- Krille Legs with Casters: These adjustable legs are a game-changer for versatility and mobility. The integrated casters mean your desk isn’t fixed in one place; you can easily reconfigure your workspace as your needs evolve. We chose these not just for their practicality but also for the opportunity to elevate their look with a metallic finish, instantly transforming them from basic to bespoke.
- Alex Drawer Unit: The Alex drawer unit is an IKEA classic, beloved by many for its sleek design and ample storage capacity. It serves as both a support for your desk and an essential organizational tool, keeping your supplies tidy and within reach. Its sturdy build complements the Linnmon top perfectly, creating a cohesive and functional workspace.
- Gold Metallic Spray Paint: This is where the magic happens! A high-quality metallic spray paint will transform the ordinary Krille legs into sophisticated, eye-catching accents. Gold instantly adds a touch of glamour and luxury, giving your desk that coveted designer feel.
- Exact Paint Used: For those seeking the precise shade and finish, this is the exact brand and color I opted for, delivering a flawless, rich gold sheen.
- Drop Cloth or Cardboard Box: Essential for protecting your workspace from overspray during the painting process. A large piece of cardboard or an old sheet will do the trick.
Step-by-Step Guide: Crafting Your Custom IKEA Desk
This project is designed to be straightforward, even for those new to DIY. With a little patience and attention to detail, you’ll have a stunning custom desk ready to elevate your home office or craft room in no time. Follow these simple steps:
Step 1: Elevate with Gold – Spray Painting the Krille Legs
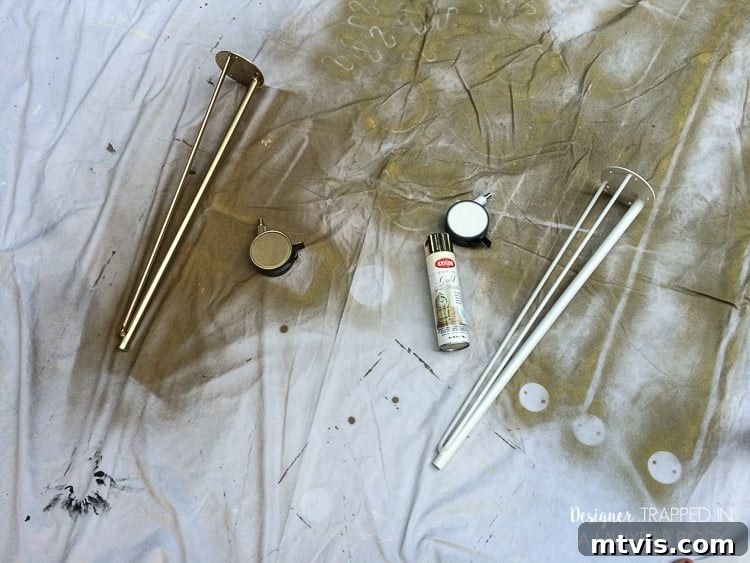
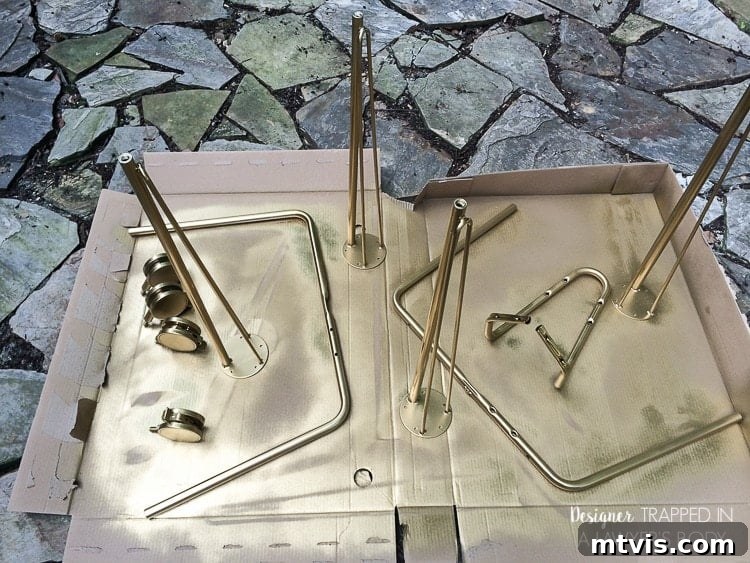
The first step in transforming your budget-friendly components into a designer-worthy piece is to add that touch of metallic elegance. Take all components of your Krille legs, including the casters (wheels), and arrange them on your protective drop cloth or inside a cardboard box in a well-ventilated area. Apply several light, even coats of your chosen gold metallic spray paint. It’s crucial to apply thin coats rather than one thick one to prevent drips and achieve a smooth, professional finish. Allow each coat to dry according to the manufacturer’s instructions before applying the next. Don’t forget to spray the wheels too for a fully integrated, polished look. This seemingly small detail makes a significant difference in the overall aesthetic, instantly upgrading the legs from utilitarian to chic.
Step 2: Efficient Assembly – Building Your Alex Drawer Unit
If you’re familiar with IKEA furniture, you know that self-assembly is part of the experience. While your beautifully painted Krille legs are drying (which can take a few hours depending on humidity and the number of coats), it’s the perfect time to assemble your Alex drawer unit. Follow the detailed instructions provided by IKEA carefully. Pay attention to the orientation of panels and drawer slides to ensure smooth operation. The Alex unit, once assembled, provides not only sturdy support for your desk but also invaluable storage for all your office supplies, craft materials, or personal items. This parallel workflow ensures efficient use of your time, getting you closer to your finished desk sooner.
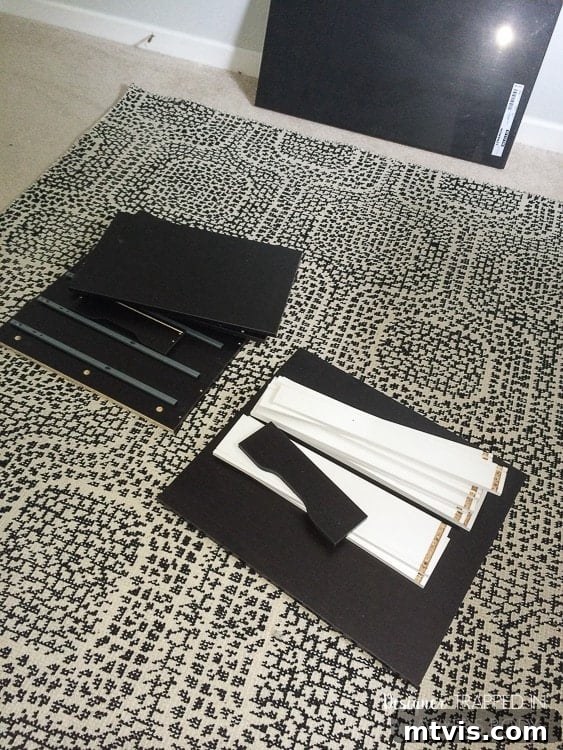
Step 3: Final Integration and Setup – Bringing Your Desk to Life
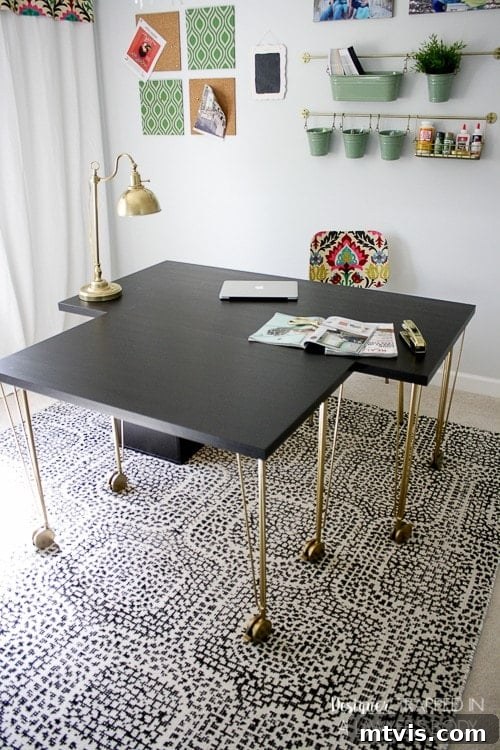
Once your gold spray paint is completely dry and the Alex drawer unit is assembled, it’s time for the final integration. Carefully attach the now-glamorous Krille legs to the Linnmon tabletop. IKEA provides straightforward fittings for this step, ensuring a secure connection. After securing the legs, position the assembled Alex drawer unit to support the other side of your Linnmon tabletop. The beauty of this setup is its inherent flexibility. In my initial configuration, I placed the smaller desk component (the Linnmon top with Krille legs) to the right of the main desk (the Linnmon top supported by Krille legs on one side and the Alex unit on the other), creating an expansive L-shaped workspace. However, the true genius lies in its modularity – you can easily move and reconfigure these elements as your needs dictate. This adaptability is a significant advantage, allowing you to optimize your workspace for various tasks.
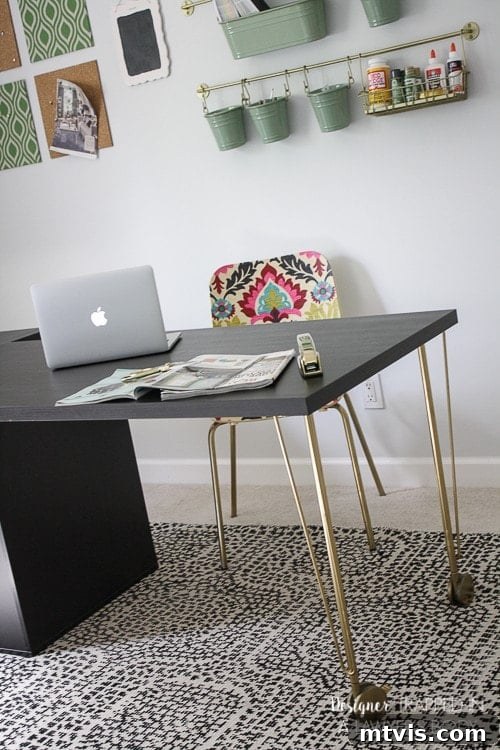
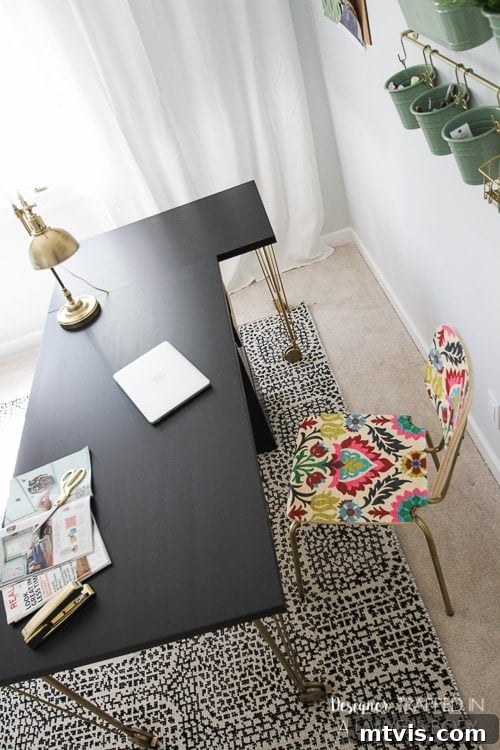
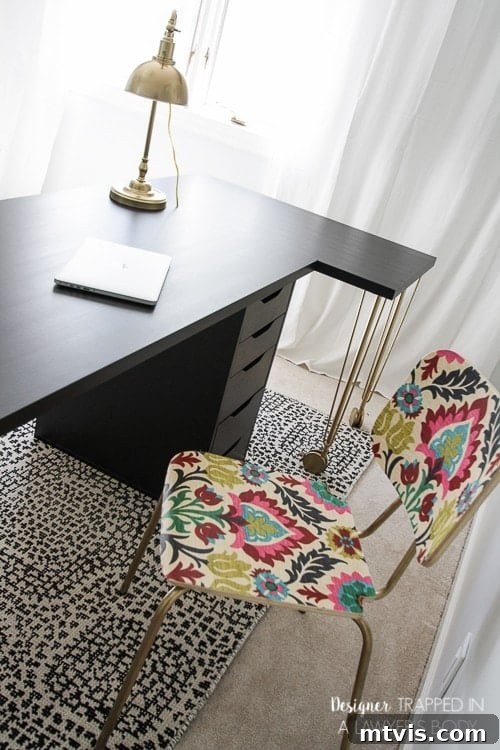
The Unbeatable Benefits of Your New Custom Desk
And there you have it! Could a desk project be any simpler or more impactful? What truly sets this IKEA desk hack apart is not just its ease of execution, but the multitude of benefits it brings to your workspace. From its stunning appearance to its incredible functionality, this DIY project delivers on all fronts.
Designer Look on a Budget
The most immediate and striking benefit is undoubtedly the aesthetic transformation. By simply adding a coat of metallic spray paint to the Krille legs, you elevate standard IKEA components into a piece that exudes sophistication and high-end design. The gold accents create a luxurious contrast against the clean lines of the Linnmon top and Alex unit, making the entire setup look far more expensive than its actual cost. It’s a testament to how small, thoughtful details can make a monumental difference in achieving a curated, designer-inspired look without the designer price tag. My large desk and the accompanying smaller desk collectively cost around $220 – an astonishingly low price for two such versatile and stylish pieces!
Unparalleled Versatility and Flexibility
One of the most practical advantages of this particular hack is the inherent versatility offered by the two separate desk components. While they work seamlessly together to form an expansive main workstation, their ability to be separated and reconfigured is truly invaluable. This modularity allows you to adapt your workspace to a variety of tasks and needs:
- Expansive Workspace: When you need maximum surface area, such as for large crafting projects, pattern cutting, or spreading out multiple documents, you can push the smaller desk component flush against the main desk. This creates a colossal working surface that’s perfect for sprawling out and tackling big tasks without feeling cramped. Imagine having a continuous table that extends across your room, giving you ample room for creativity or intense work sessions.
- Dynamic Layouts: On days when you might need distinct zones for different activities – perhaps a computer workstation and a separate area for sketching or writing – the two desks can function independently. Their mobility, thanks to the Krille legs’ casters, means you can easily move them around your room, adjusting their positions to suit your current workflow or even relocating one to another area of your home if needed. This dynamic adaptability ensures your workspace remains optimized for productivity and comfort.
- Dedicated Task Zones: You can designate one desk for digital work with your computer, monitor, and peripherals, while the other serves as a clean space for analog tasks like drawing, journaling, or organizing. This separation helps maintain focus and prevents clutter build-up in your primary work area.
This level of flexibility ensures that your desk setup is not just a static piece of furniture, but a dynamic tool that evolves with your daily demands. When I’m engrossed in sewing projects, the ability to position the small desk directly in front of the large desk creates a truly monumental working space, transforming a standard office into a dedicated creative hub (as seen below).
Simplicity and Accessibility
Finally, the sheer simplicity of this hack makes it accessible to almost anyone. You don’t need advanced woodworking skills or a workshop full of specialized tools. The instructions are clear, the materials are affordable and easy to source, and the process is forgiving. It’s a rewarding project that demonstrates how you can achieve significant impact with minimal effort, boosting your confidence in DIY endeavors.
Your Turn: Transform Your Workspace!
So, what are your thoughts? Are you ready to tackle this incredibly easy and rewarding IKEA desk hack? I genuinely believe this project can be the perfect solution for anyone struggling with desk dilemmas, offering a blend of style, function, and affordability that is hard to beat. Say goodbye to cluttered, uninspiring workspaces and hello to a custom-designed area that fosters creativity and productivity. Give it a try, and prepare to be amazed by the transformation!
