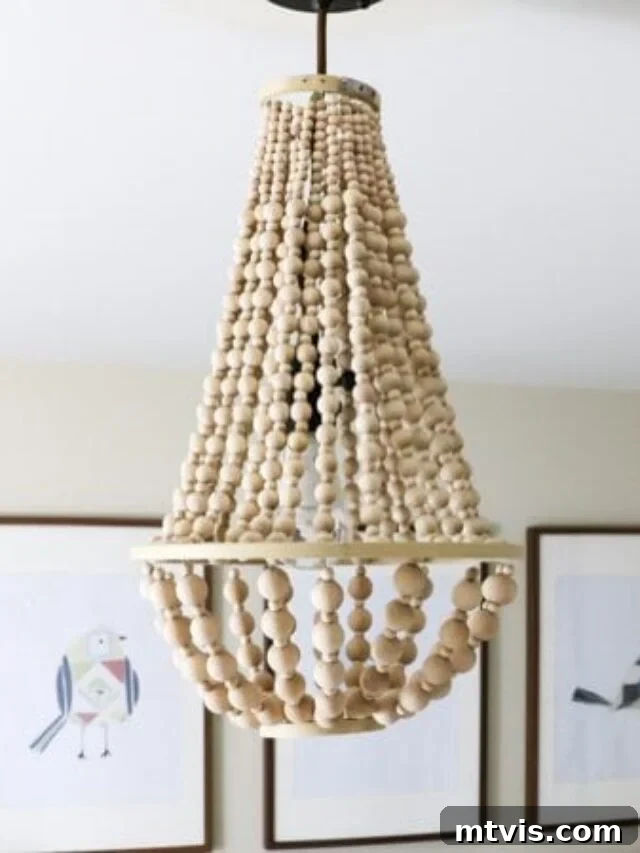
Are you dreaming of a stunning wood bead chandelier to elevate your home décor? These versatile fixtures effortlessly complement a wide range of interior styles, from modern farmhouse and bohemian chic to coastal and even traditional aesthetics. While their elegant appeal often comes with a hefty price tag in retail stores, the good news is that you can craft your very own beautiful wood bead chandelier for a mere fraction of the cost. The result is not just a light fixture, but a unique piece of art that reflects your personal style and craftsmanship. Imagine the satisfaction of looking up at a dazzling chandelier, knowing you brought it to life with your own hands! It’s an achievable DIY project that promises both significant savings and a truly custom look.
In this comprehensive guide, we’ll walk you through every step of creating a magnificent wood bead chandelier from scratch. Get ready to embark on a rewarding journey that culminates in a truly bespoke lighting solution for your home.
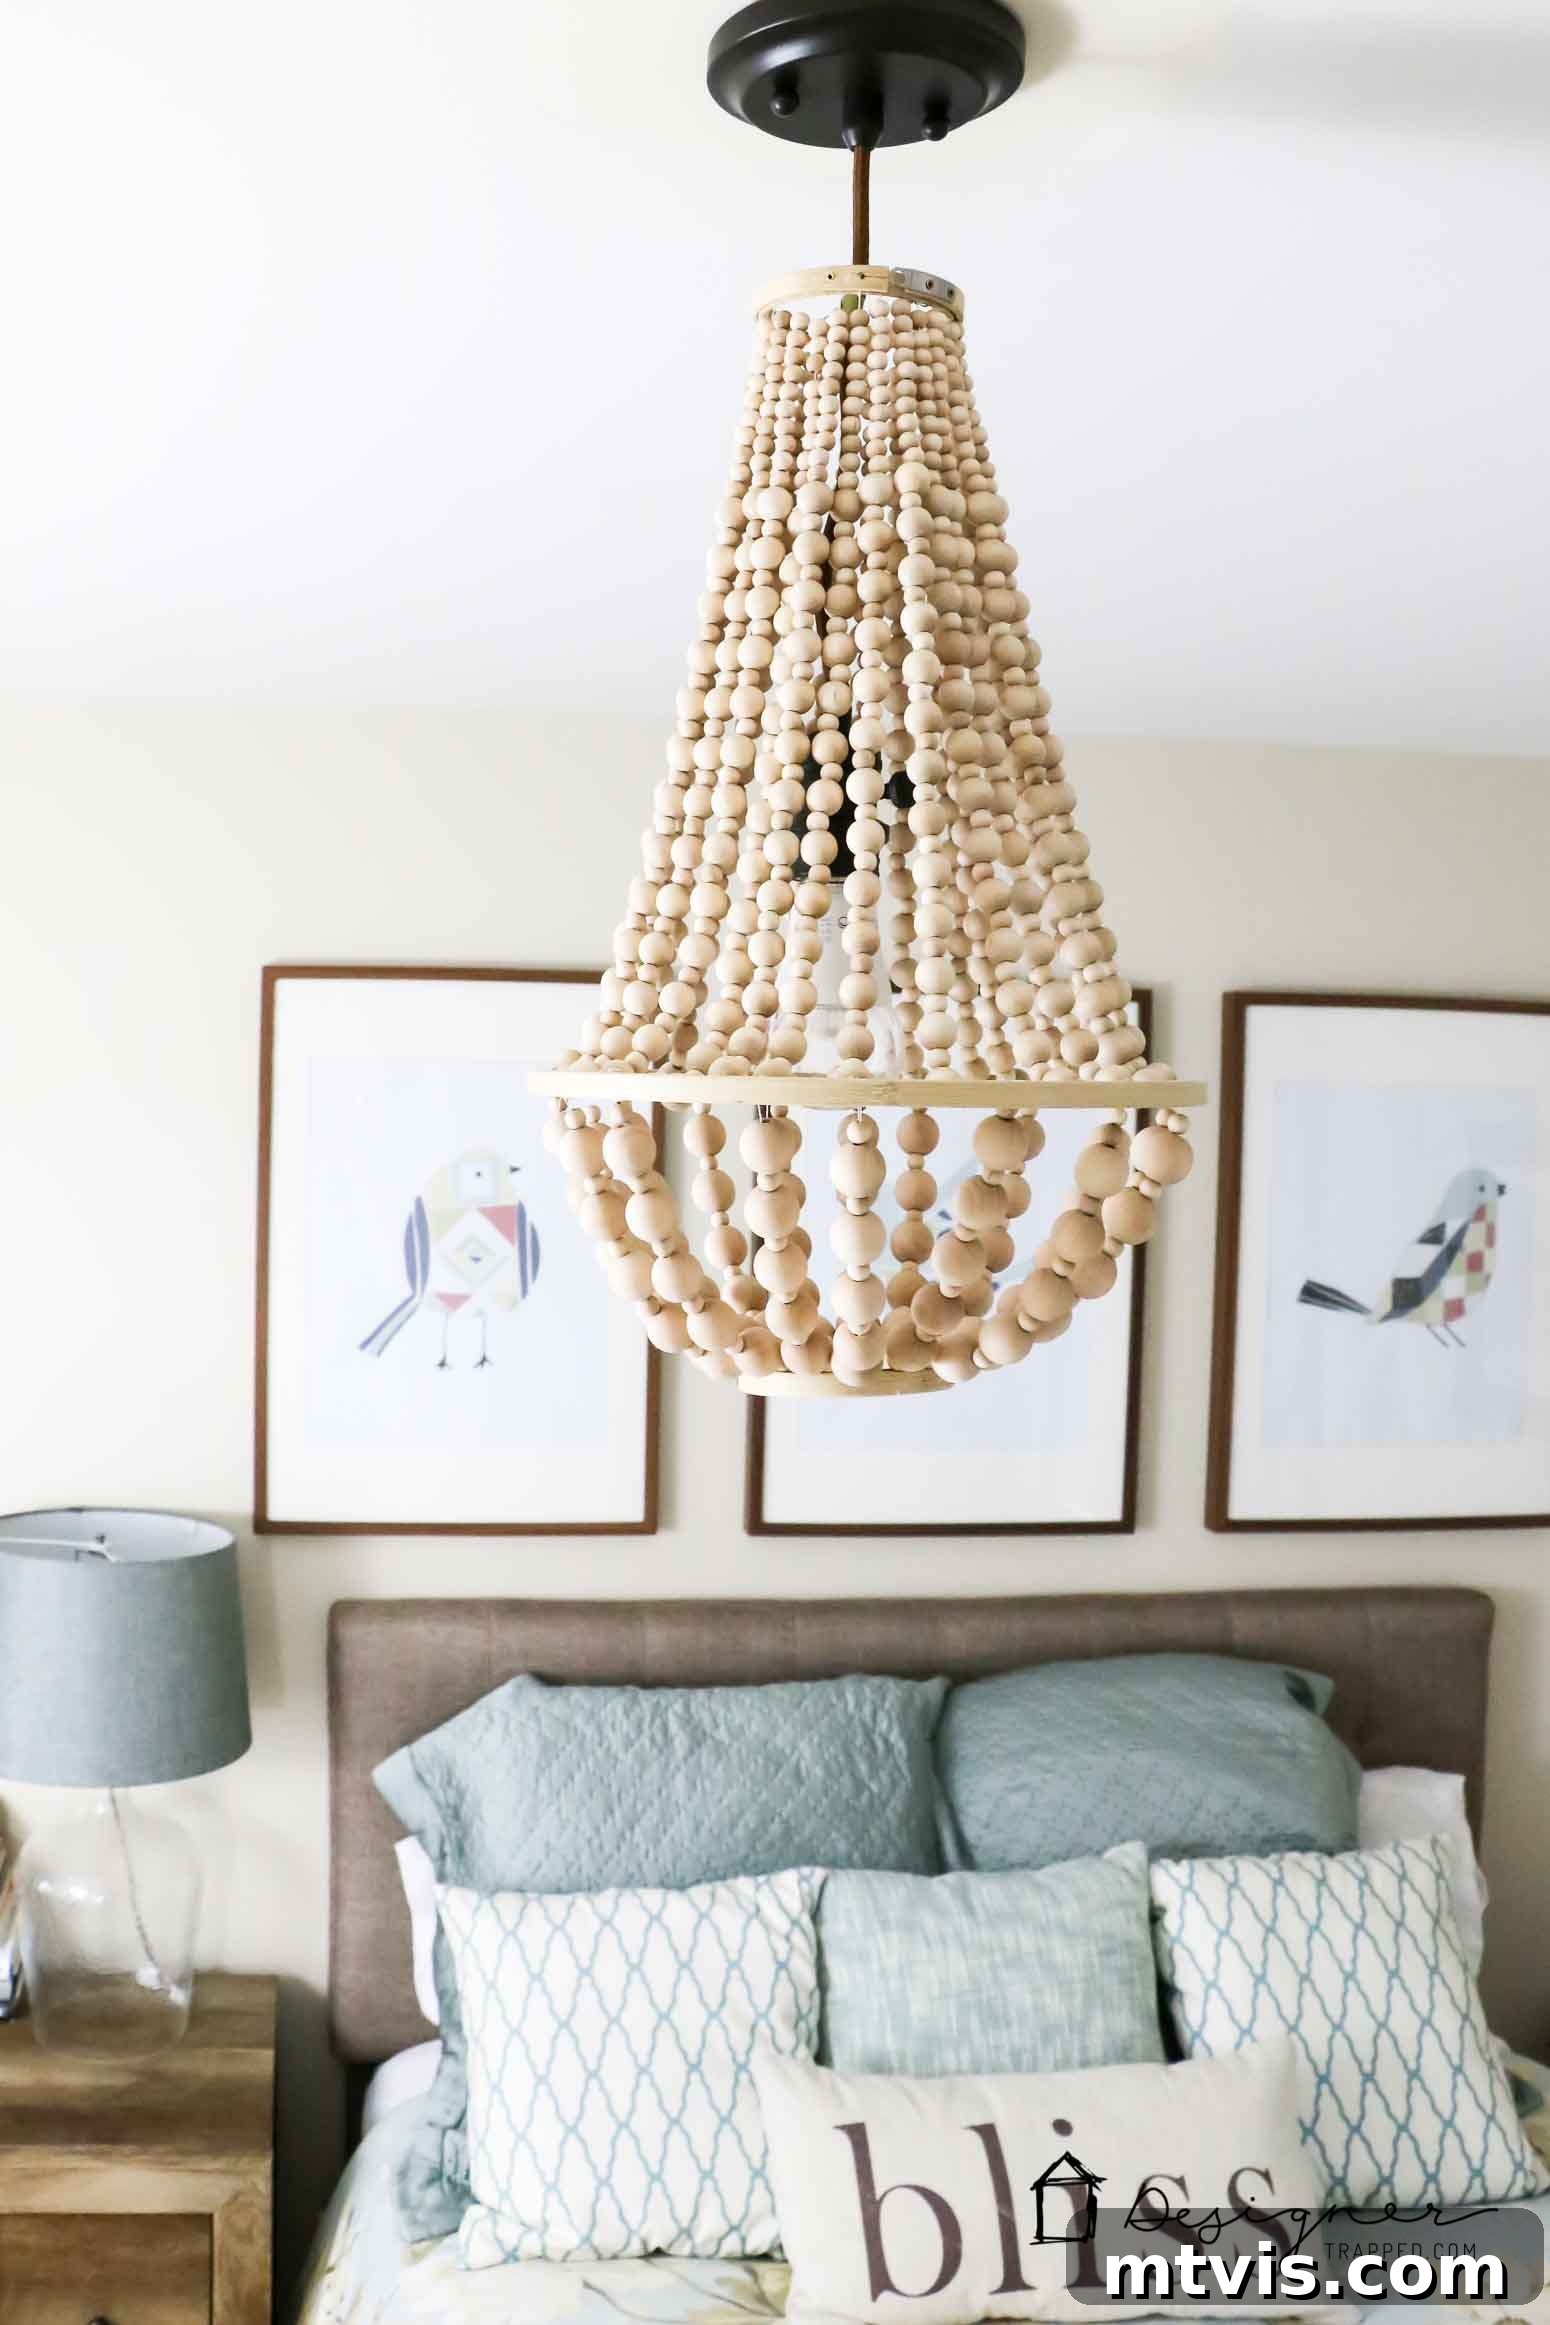
Table of Contents
The Timeless Appeal of Wood Bead Chandeliers
Wood bead chandeliers have surged in popularity, becoming a staple in contemporary home design. Their unique texture and organic feel bring warmth and character to any space. The natural wood tones offer a calming, earthy element, while the beaded structure adds an intricate, sculptural quality that catches the eye without overwhelming the room. Whether you’re aiming for the rustic charm of a farmhouse, the laid-back elegance of bohemian style, the minimalist warmth of modern design, or even a subtle touch in a traditional setting, a wood bead chandelier can effortlessly anchor the room’s aesthetic. They diffuse light beautifully, creating a soft, inviting ambiance that makes any room feel more welcoming and sophisticated. From dining rooms and living areas to bedrooms and entryways, these chandeliers are more than just light sources; they are focal points that enhance the overall atmosphere and design narrative of your home.
Why DIY Your Next Lighting Masterpiece?
One of the most satisfying aspects of home improvement is creating high-end looks on a budget, and DIY lighting fixtures are a prime example. Early in my DIY journey, I quickly realized how incredibly expensive designer lighting can be. However, I also discovered that crafting your own is far simpler and more rewarding than it initially appears. This realization led me to create several unique light fixtures, including a DIY bentwood chandelier, a stacked wood lamp, and even a DIY outdoor chandelier. Each project reinforced my belief in the power of handmade décor. When I recently needed to replace an outdated flush mount fixture in our guest room, a wood bead chandelier was the perfect choice to complete the envisioned look. While I found many absolutely stunning ready-made options, I simply wasn’t willing to spend hundreds of dollars. That’s when the decision to DIY became clear, offering the perfect blend of cost savings, personalization, and creative expression. The sense of accomplishment that comes with illuminating your home with a fixture you built yourself is truly unparalleled.
This post contains some affiliate links for your convenience. Click here to read my full disclosure policy.
How to Make a Wood Bead Chandelier
Materials Needed
Gathering the right materials is the first step towards creating your beautiful wood bead chandelier. Most of these items are readily available at craft stores or online, making it easy to get started. The key to a successful project is choosing quality components that will ensure both durability and a professional finish. Pay particular attention to your bead selection, as this will largely dictate the overall aesthetic of your chandelier.
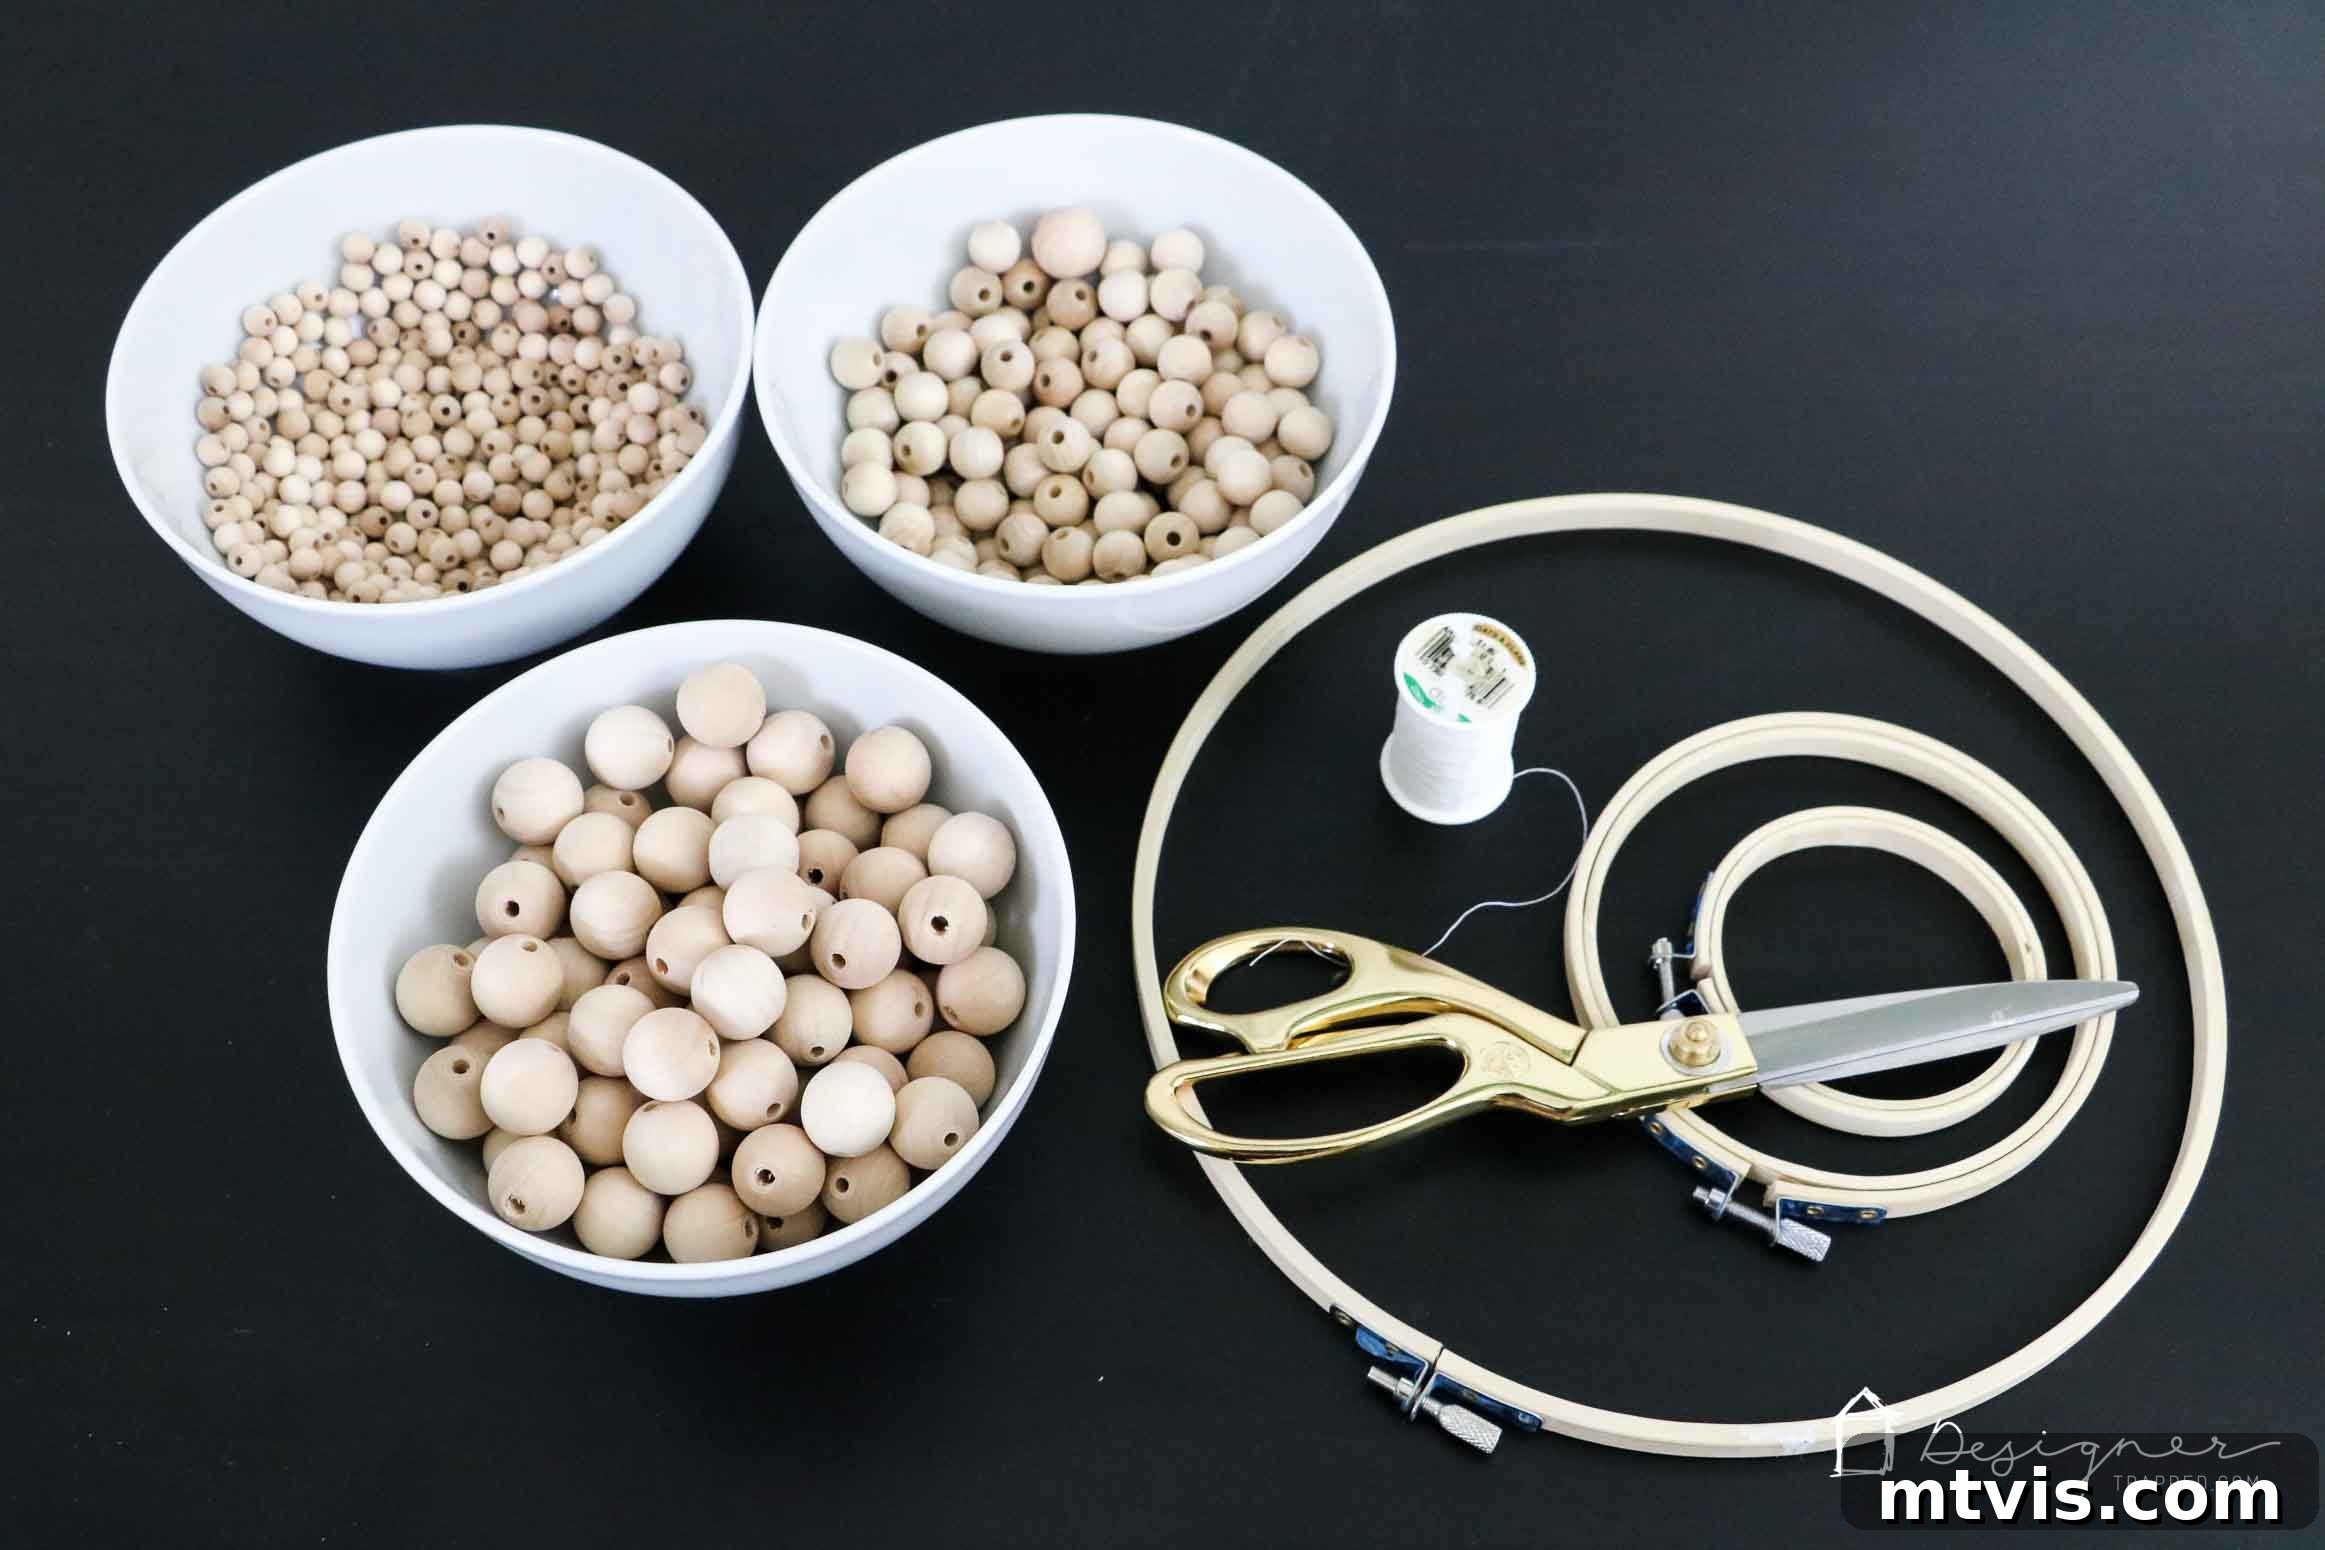
- (1) 10-inch quilting hoop: This will form the main, wider ring of your chandelier’s structure.
- (2) 3-inch quilting hoops: These smaller hoops will create the top and bottom tiers, giving your chandelier its distinct shape.
- Thin gauge wire: Essential for securely attaching the chandelier to the pendant light kit and for reinforcing certain connections.
- Wood glue: Used to permanently secure the quilting hoops in place after the beads are strung.
- Super glue: My favorite brand is DAP Rapid Fuse All Purpose Adhesive. This is crucial for locking your knots and ensuring the bead strands don’t unravel over time.
- Electrical tape: For insulating and securing electrical connections, ensuring safety.
- Scissors: For cutting thread and wire.
- Quilting thread: Choose a strong, durable thread that can withstand the weight of the beads. Double-knotting is key for extra security.
- Quilting needle: A long, sturdy needle is indispensable for stringing multiple beads quickly and efficiently.
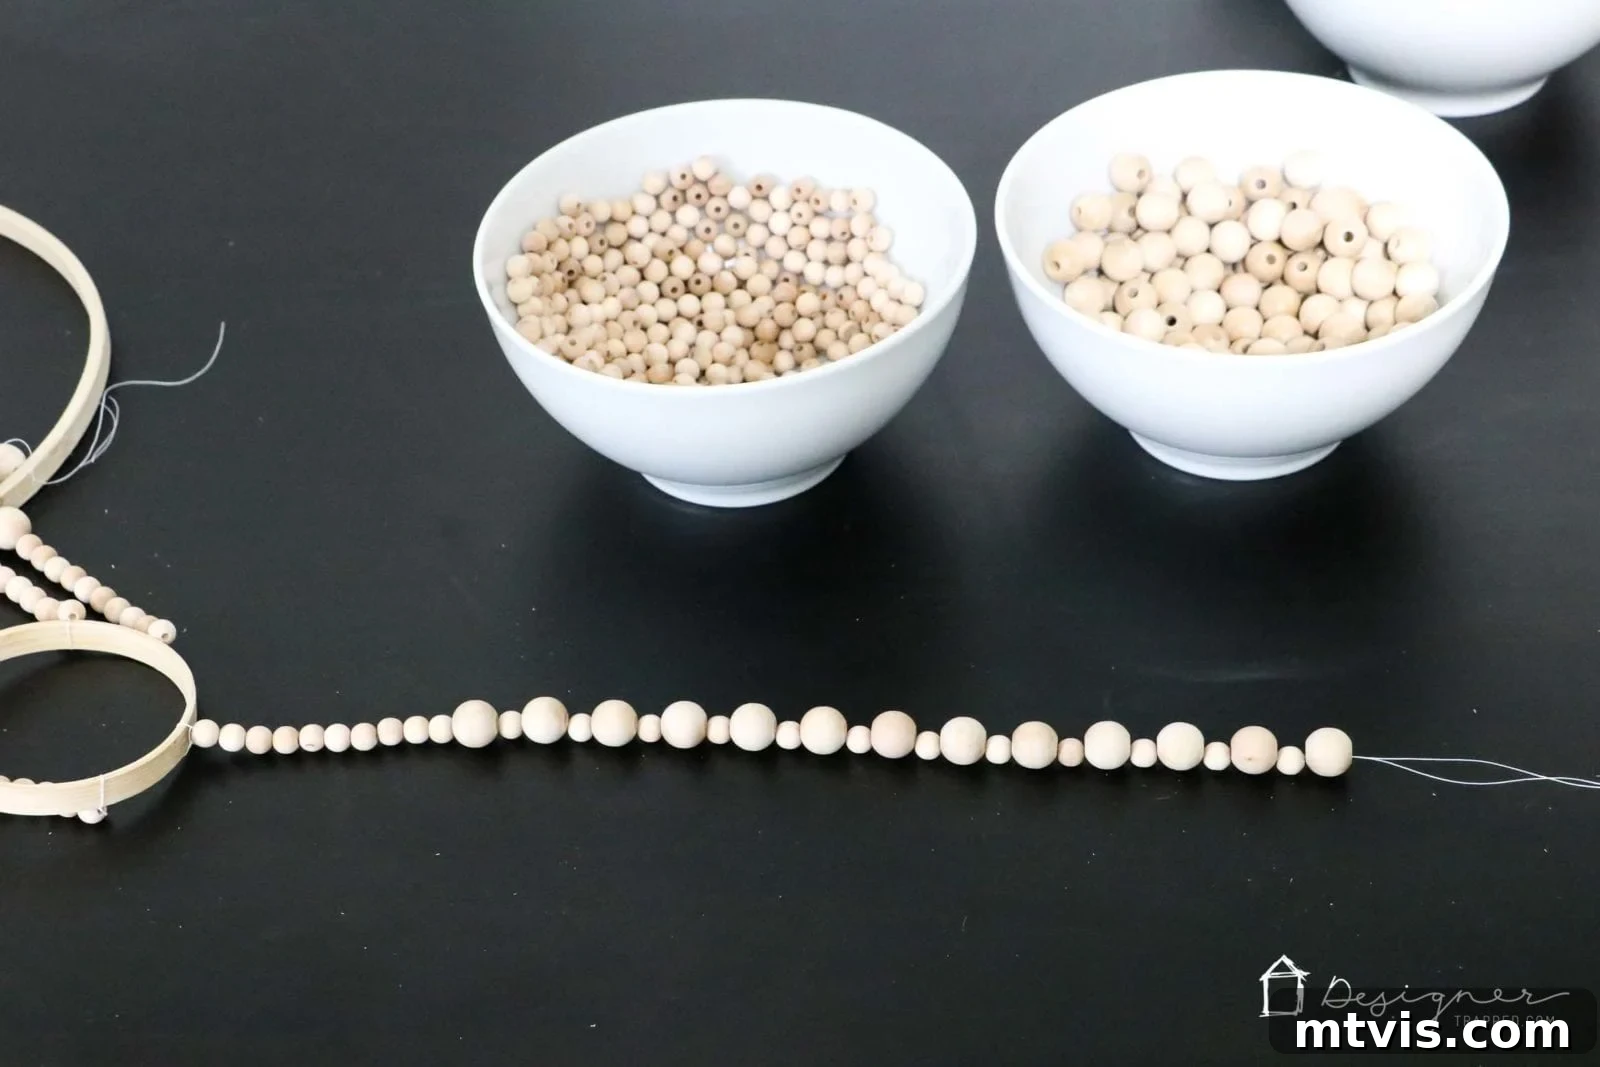
- Wood beads: The quantity and size of beads will significantly impact the final look and feel of your chandelier. I sourced mine online from this site, spending around $40 for a generous supply. While I opted for natural wood beads for a classic look, feel free to explore darker stains or even vibrant colored beads (like these – they’re fabulous!) to match your décor. Here’s a breakdown of what I used:
- Small beads: 8mm, approximately 600 pieces.
- Medium beads: 14mm, approximately 400 pieces.
- Large beads: 19mm, approximately 75 pieces.
- Mini pendant light kit: I chose an oil-rubbed bronze finish for a sophisticated touch, but various finishes are available to match your hardware. This kit will provide the electrical components necessary to illuminate your chandelier.
Step-by-Step Tutorial
Time needed: 4 hours
Crafting your wood bead chandelier typically takes about 4 hours. However, this timeframe can vary depending on your speed and the number of bead strands you decide to incorporate. Don’t rush the process; enjoy each step as your masterpiece comes to life!
- Prepare Your Quilting Hoops.
Begin by taking your 3-inch and 10-inch quilting hoops. Carefully separate the inner and outer rings of each hoop. For now, you will only be working with the inner hoops. Set the outer hoops aside, as you’ll need them later to secure the structure.
- Prepare Your Thread.
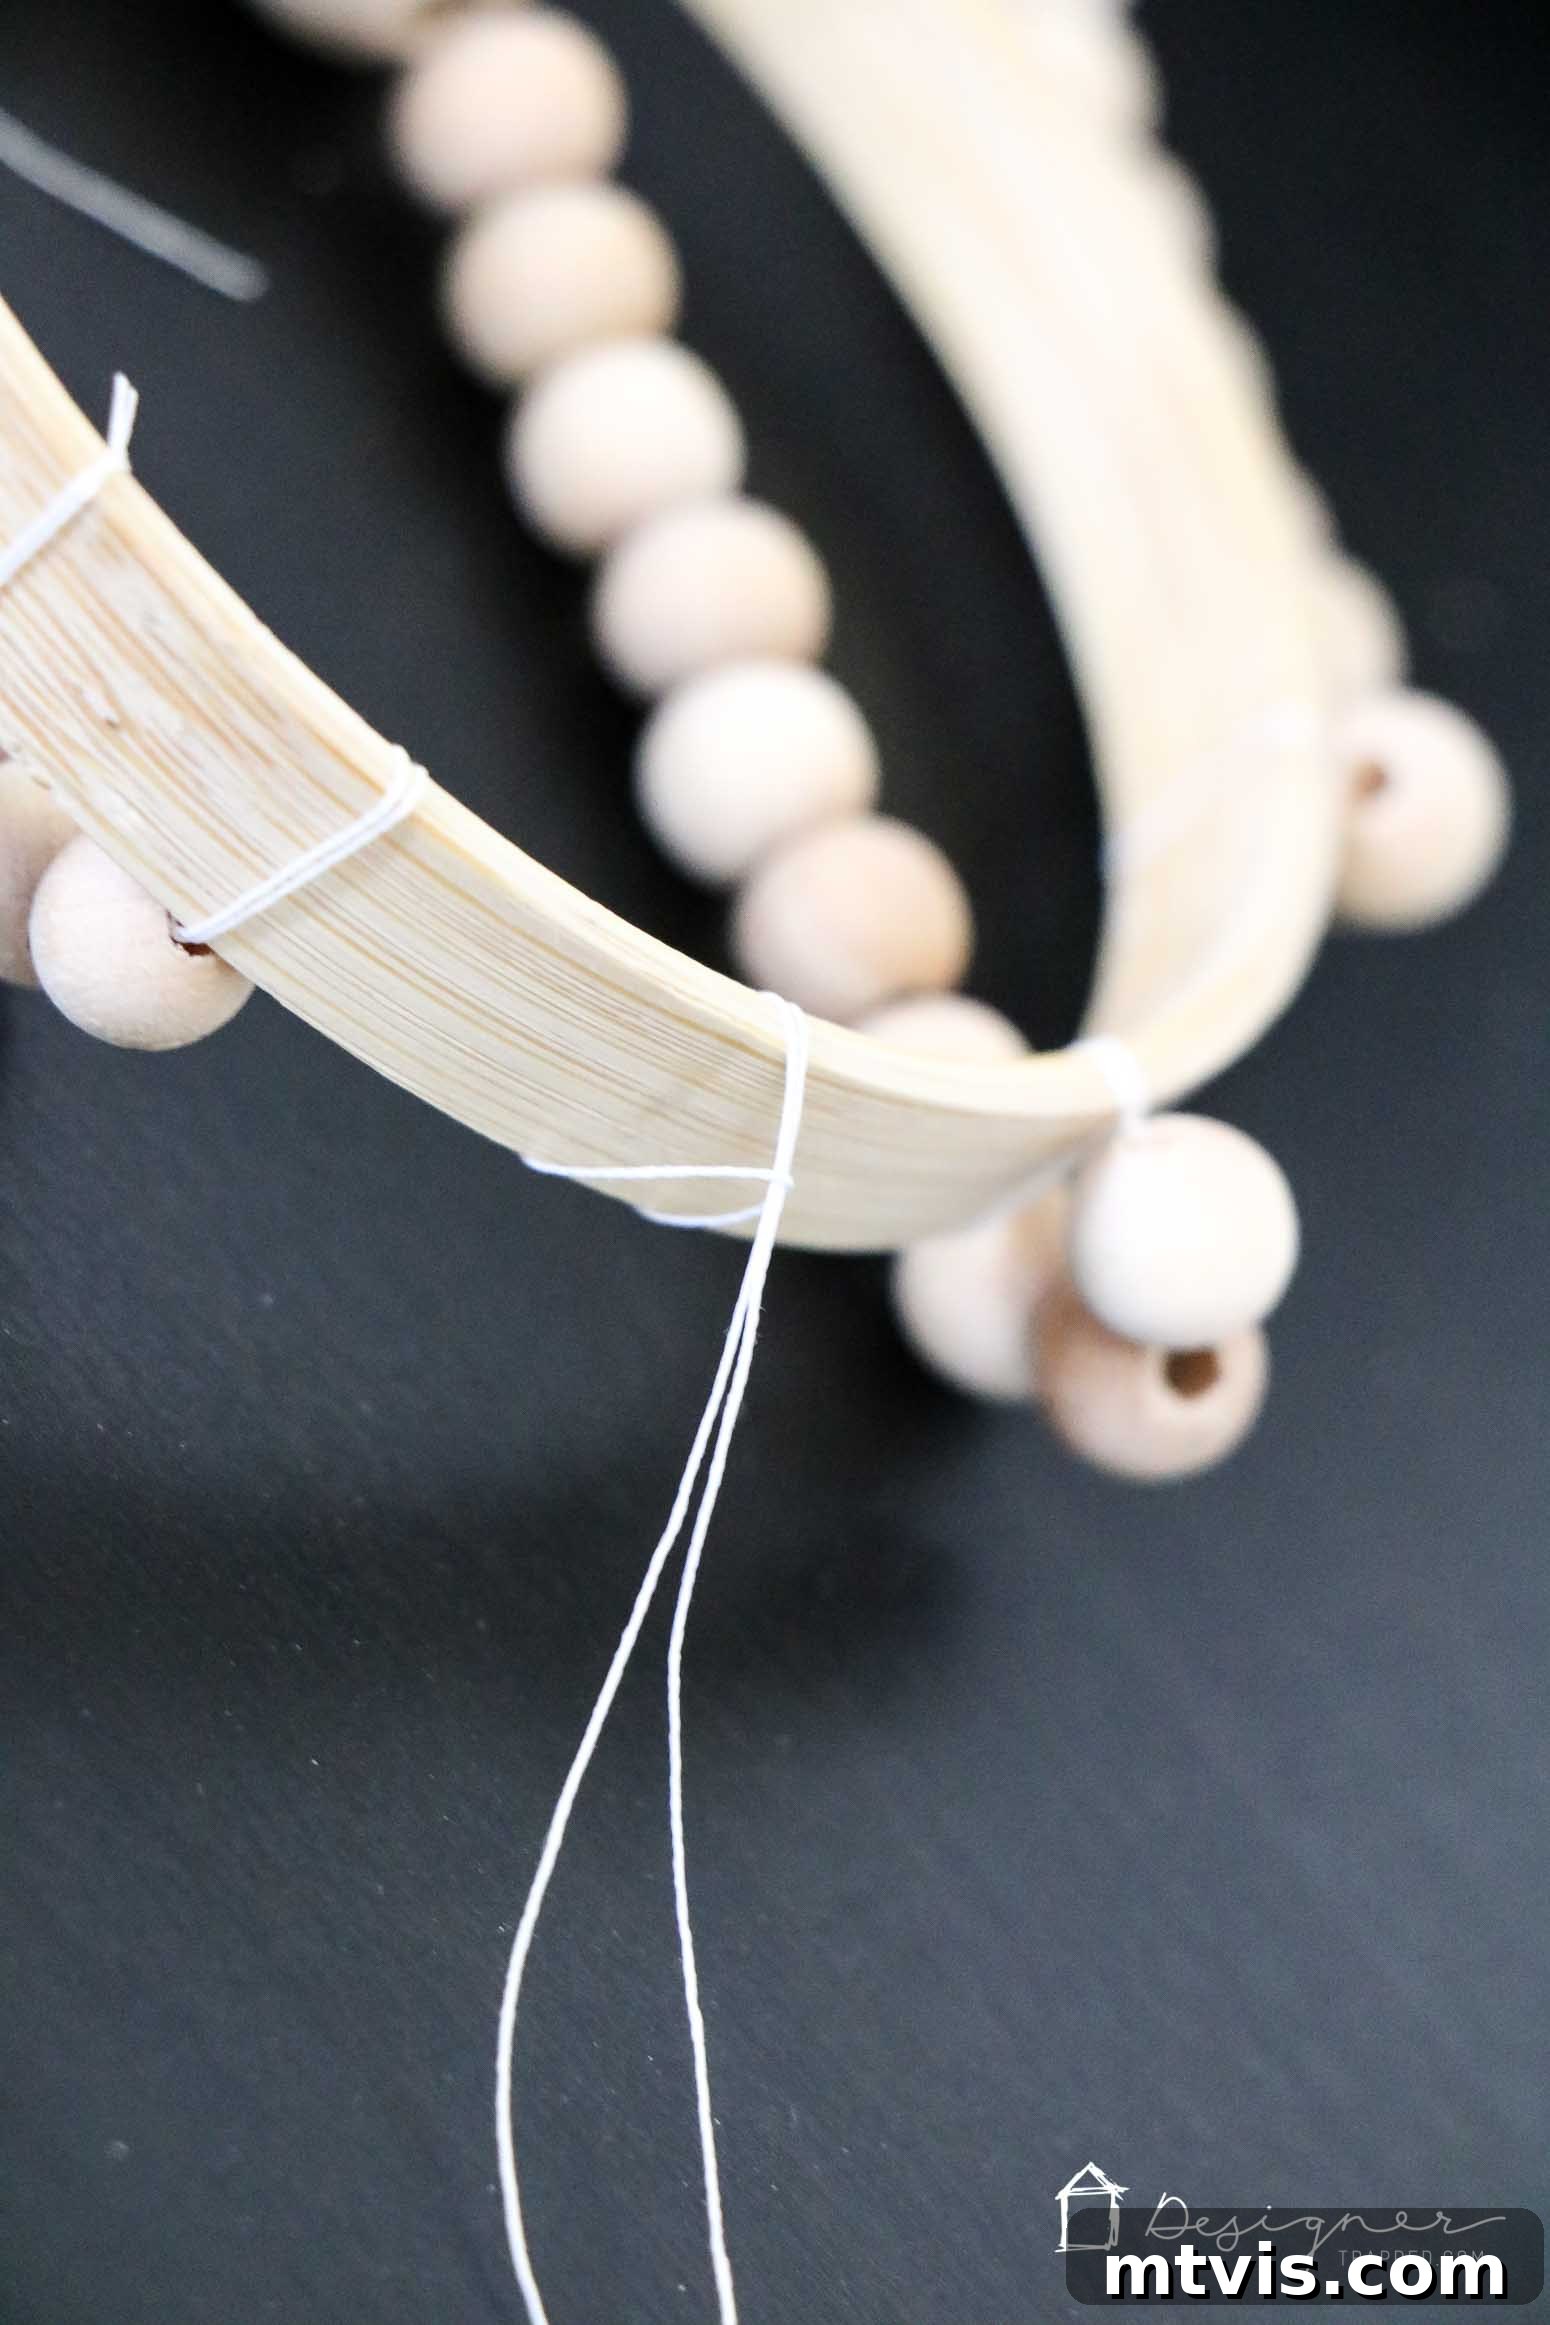
Thread your quilting needle with a generous length of quilting thread. For added strength and durability, double up the thread and tie a secure knot at the end. Loop the knotted end of the thread over one of the 3-inch quilting hoops. This will be the starting point for your first set of bead strands.

- String Your Top Layer Beads.
Now it’s time to bring your design to life! String your beads onto the prepared thread following this pattern: 10 small beads, then 1 medium bead, followed by 1 small bead, and repeat this (1 medium/1 small) sequence 12 times. Finish each strand with a medium bead, resulting in a total of 13 medium beads per strand. This pattern creates a lovely cascading effect for the top section of your chandelier.
- Attach Strands to the 10-inch Hoop.
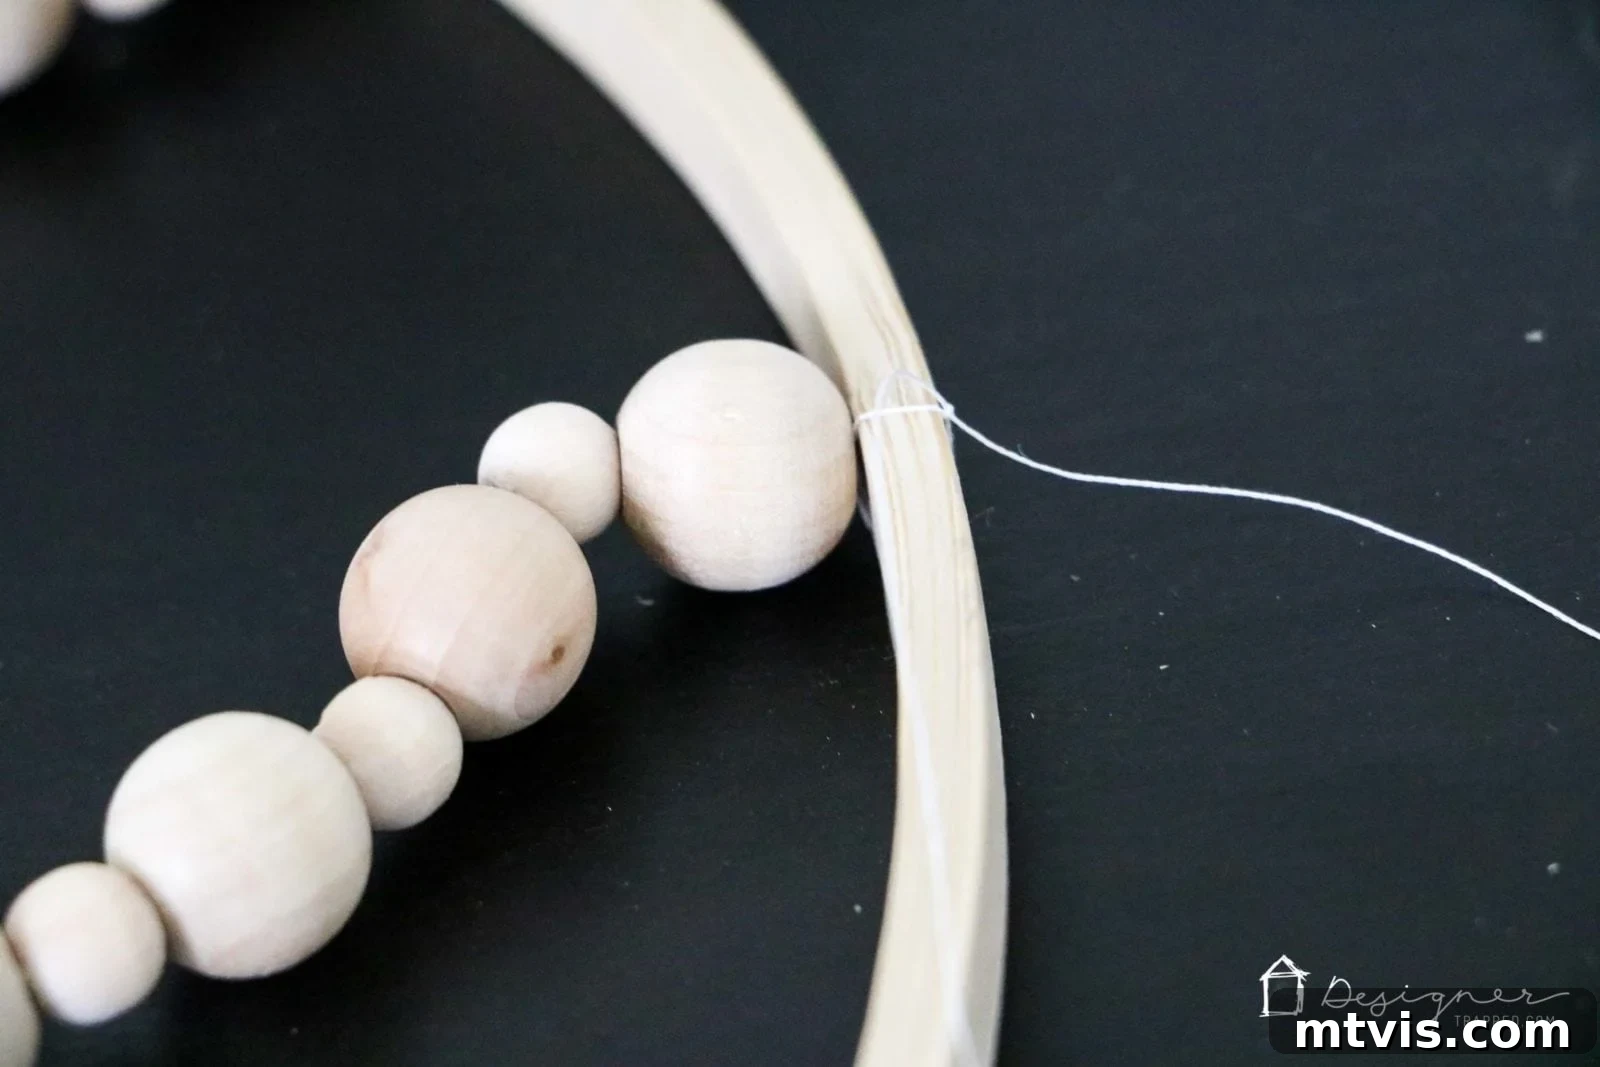
Once you’ve completed stringing a bead strand, carefully tie the end of the strand to the 10-inch quilting hoop using a double or triple knot. This larger hoop will form the main circumference of your chandelier. A crucial tip: ensure that your strands of beads do not cross over each other as you tie them. Learning this the hard way can lead to tangles and an uneven look!
- Continue Adding Top Strands.
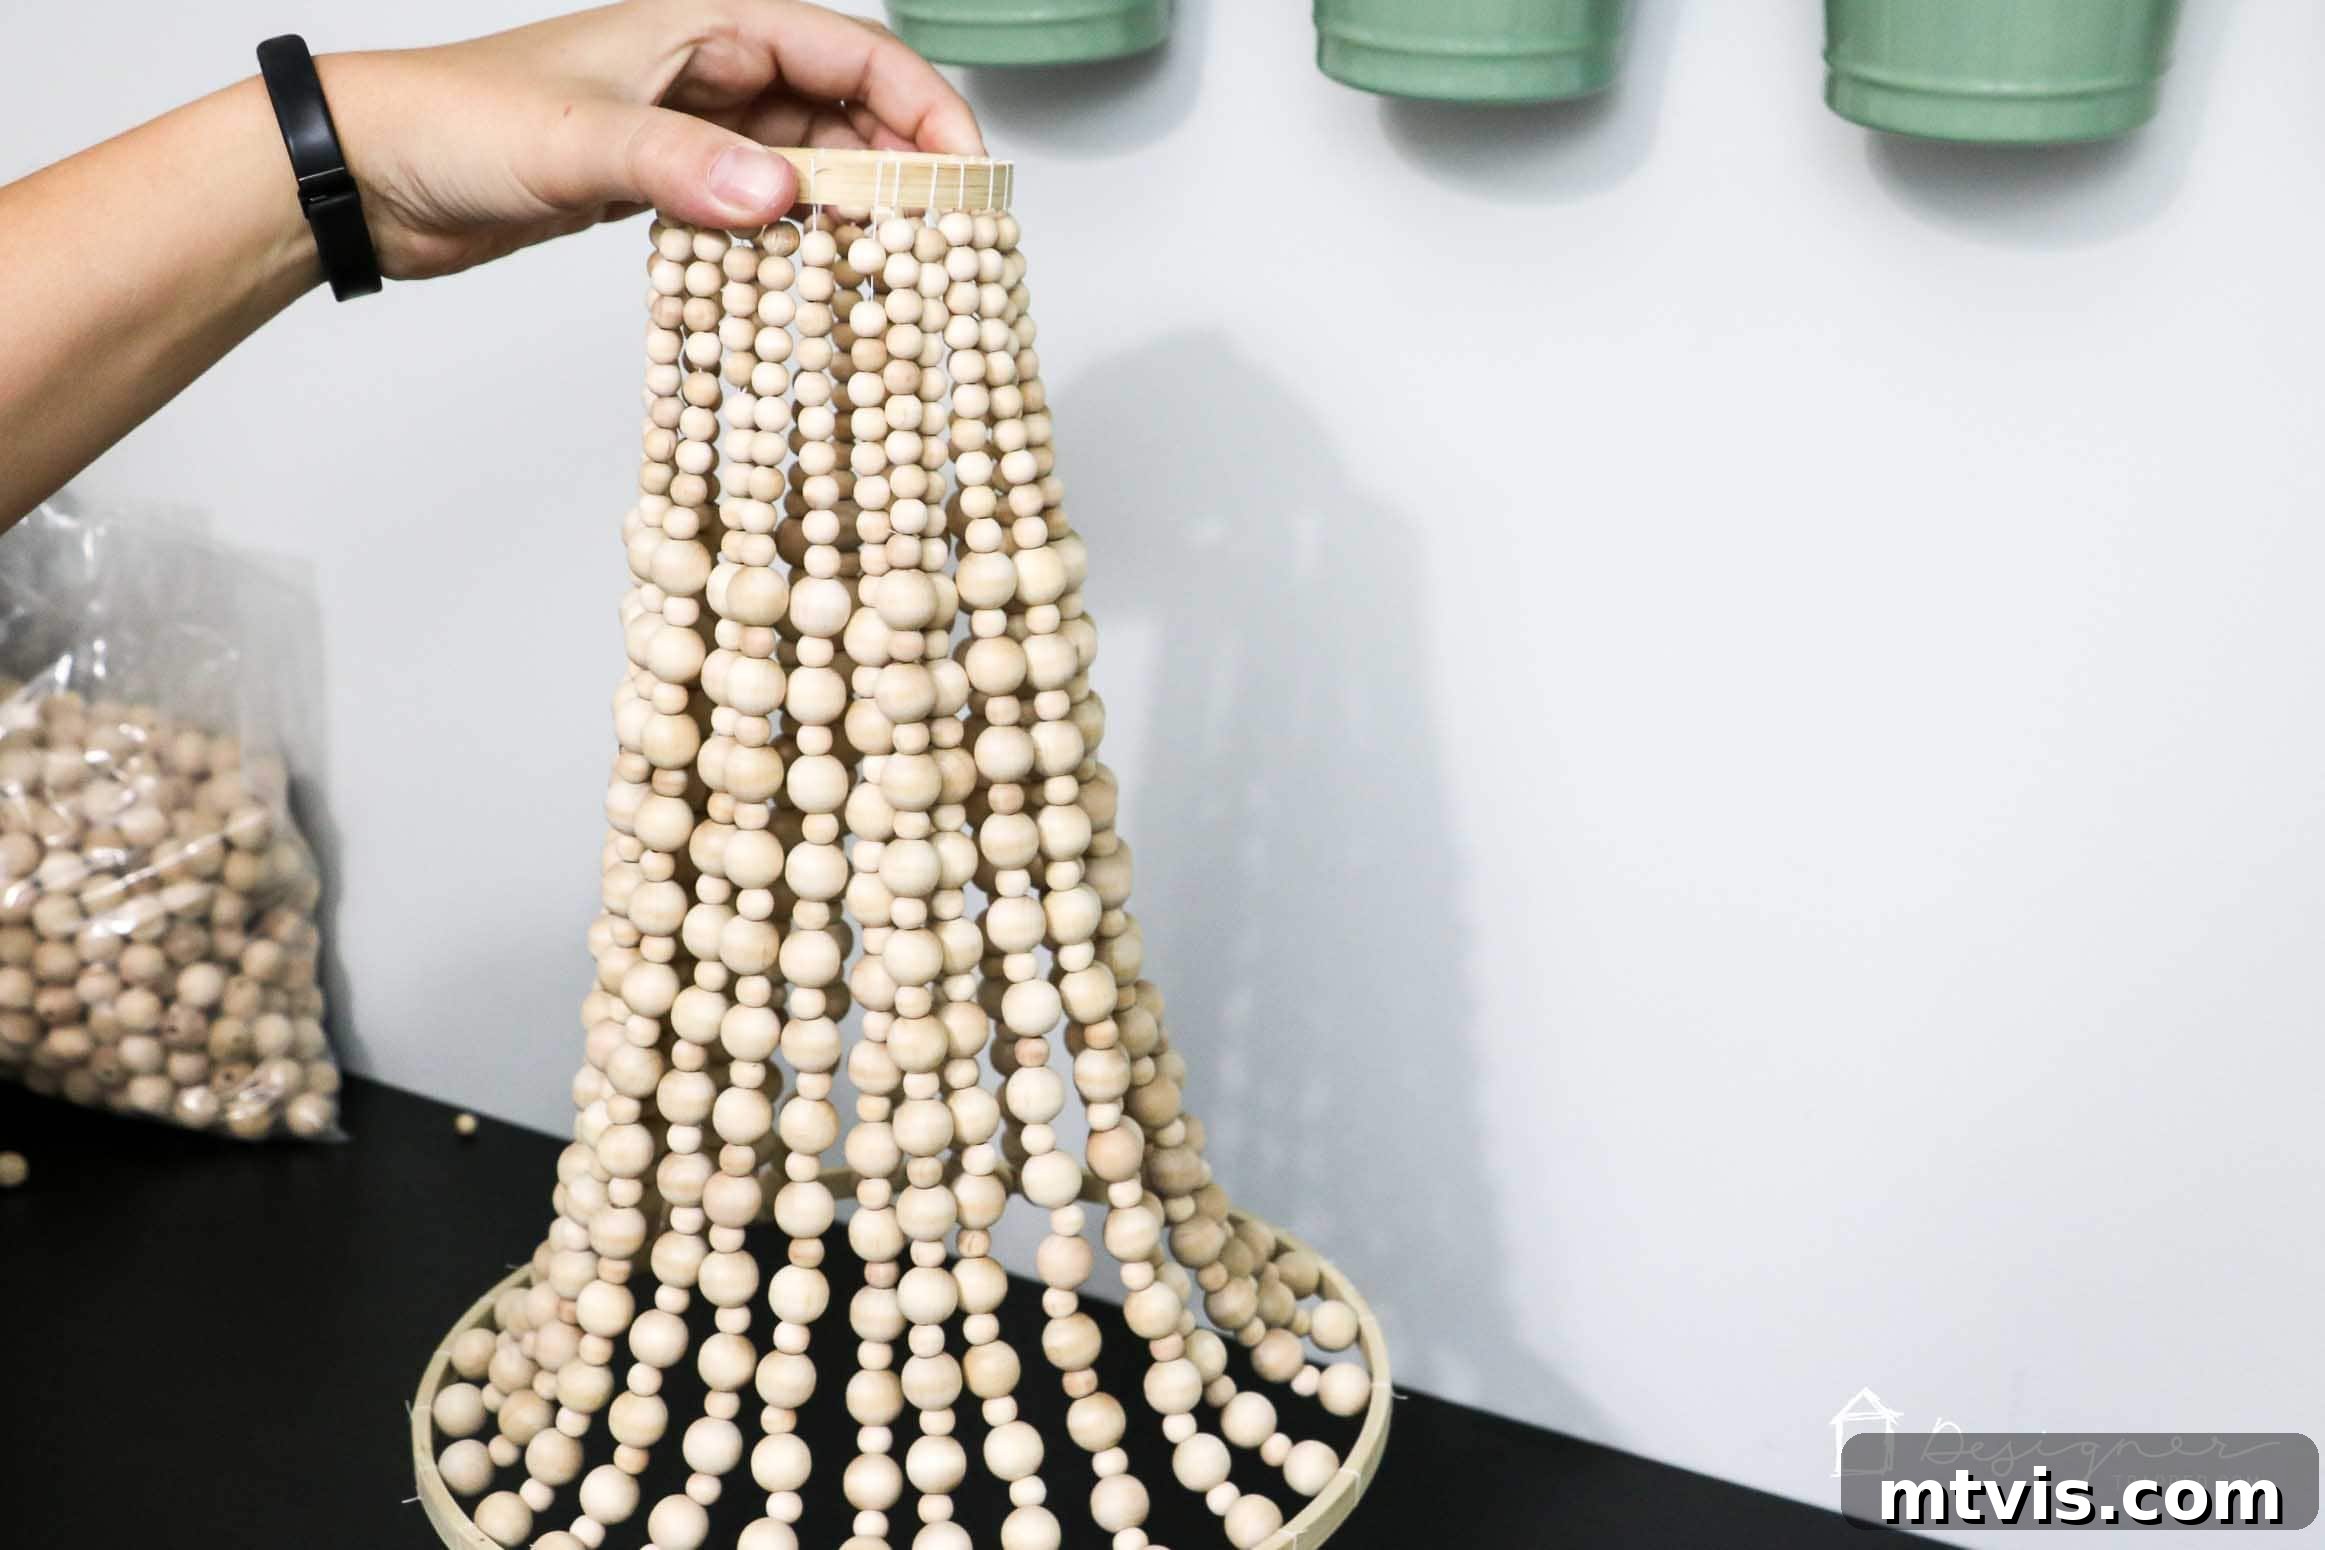
Repeat the process of stringing beads and tying them to the 10-inch hoop until the top section of your DIY chandelier achieves your desired fullness. The density of the bead strands is entirely up to your personal preference. After adding all the strands, trim any excess thread close to the knots. At this stage, your DIY chandelier will begin to take its distinctive shape, ready for the next layer.
- Prepare the Bottom Hoop.
Now, retrieve your second 3-inch hoop and remove its outer ring, leaving only the inner hoop. Just as before, thread your quilting needle with doubled quilting thread and knot the end securely. Loop this thread over the 3-inch quilting hoop. This hoop will form the base of your chandelier, providing structure for the bottom tier of beads.
- String Your Bottom Layer Beads.
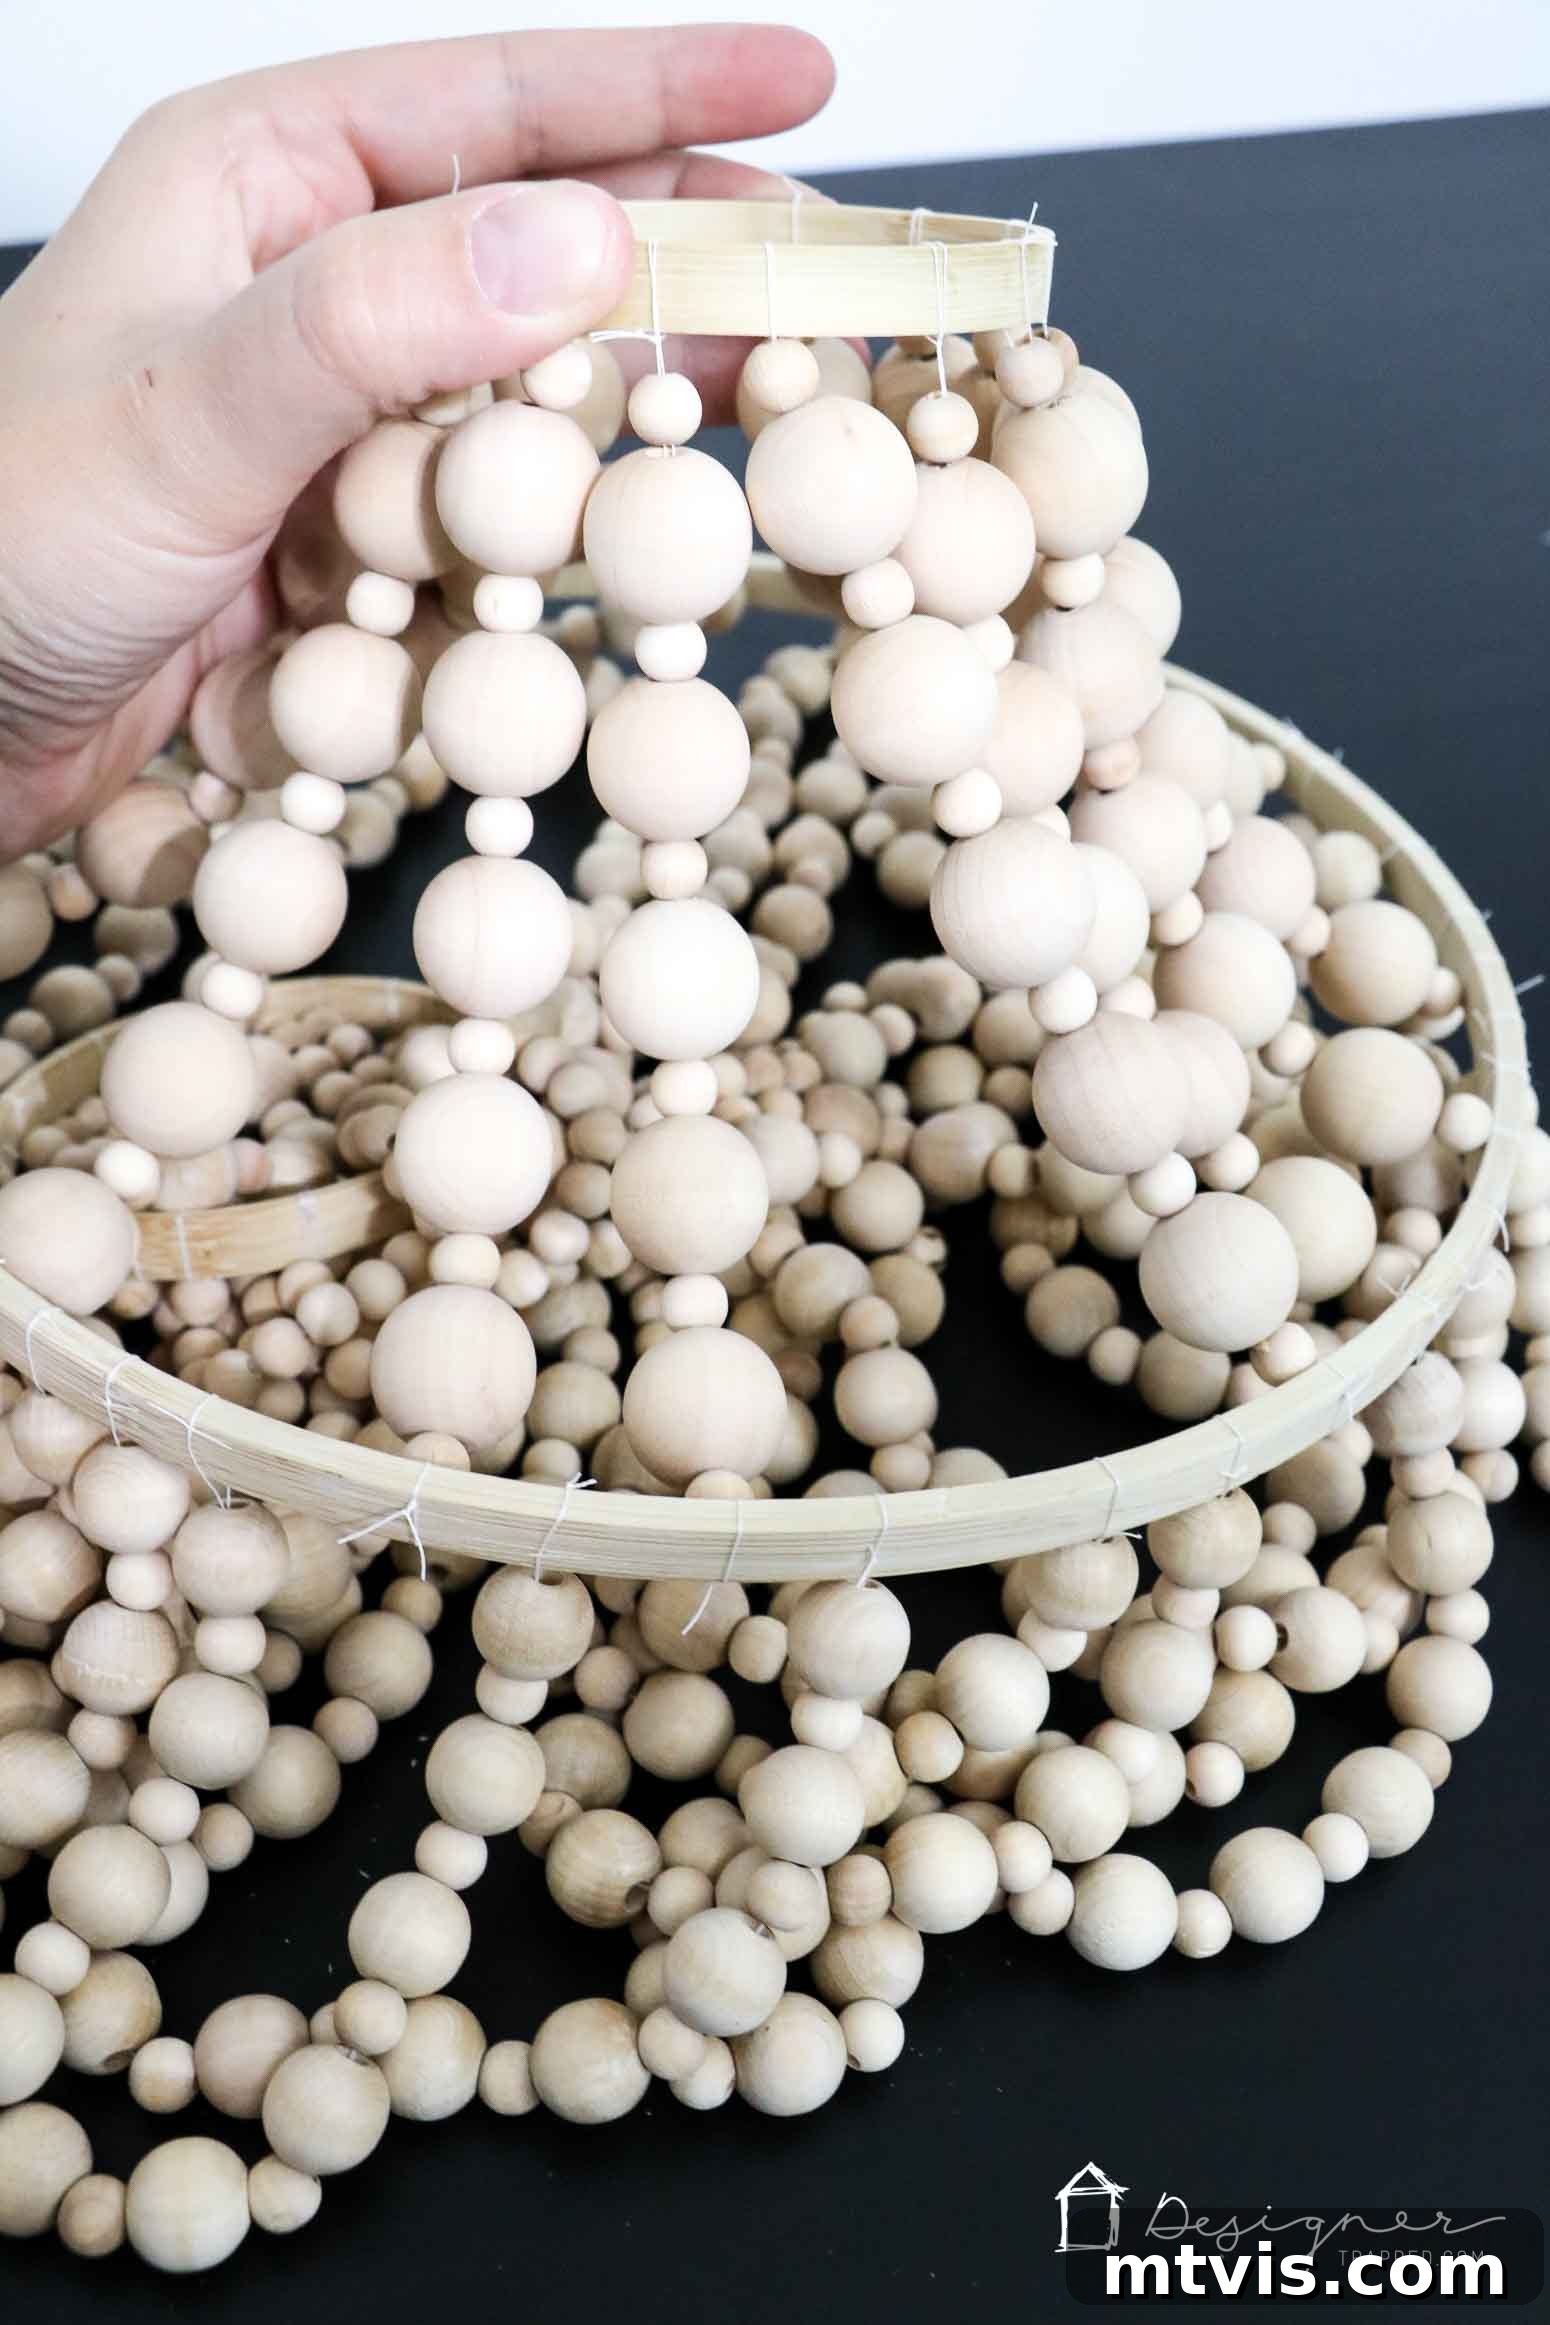
For the bottom tier, string your beads using a different pattern to create a distinct look. The pattern is 1 small bead, followed by 1 large bead. Repeat this ‘small, large’ sequence a total of 5 times for each strand. This creates a slightly heavier and more pronounced drop for the bottom layer.
- Attach Bottom Strands to the 10-inch Hoop.
Tie the end of each completed bottom-tier strand to the same 10-inch quilting hoop with a double or triple knot. When assembled, the 10-inch hoop will be positioned above the 3-inch hoop you’re currently working with, which will gracefully hang below as the chandelier’s base. It’s vital to ensure that these new strands also hang without crossing over the existing ones. At this stage, you’ll be working with the chandelier upside down. Continue adding these bottom strands until you’re happy with the overall density and appearance.
- Secure All Knots.
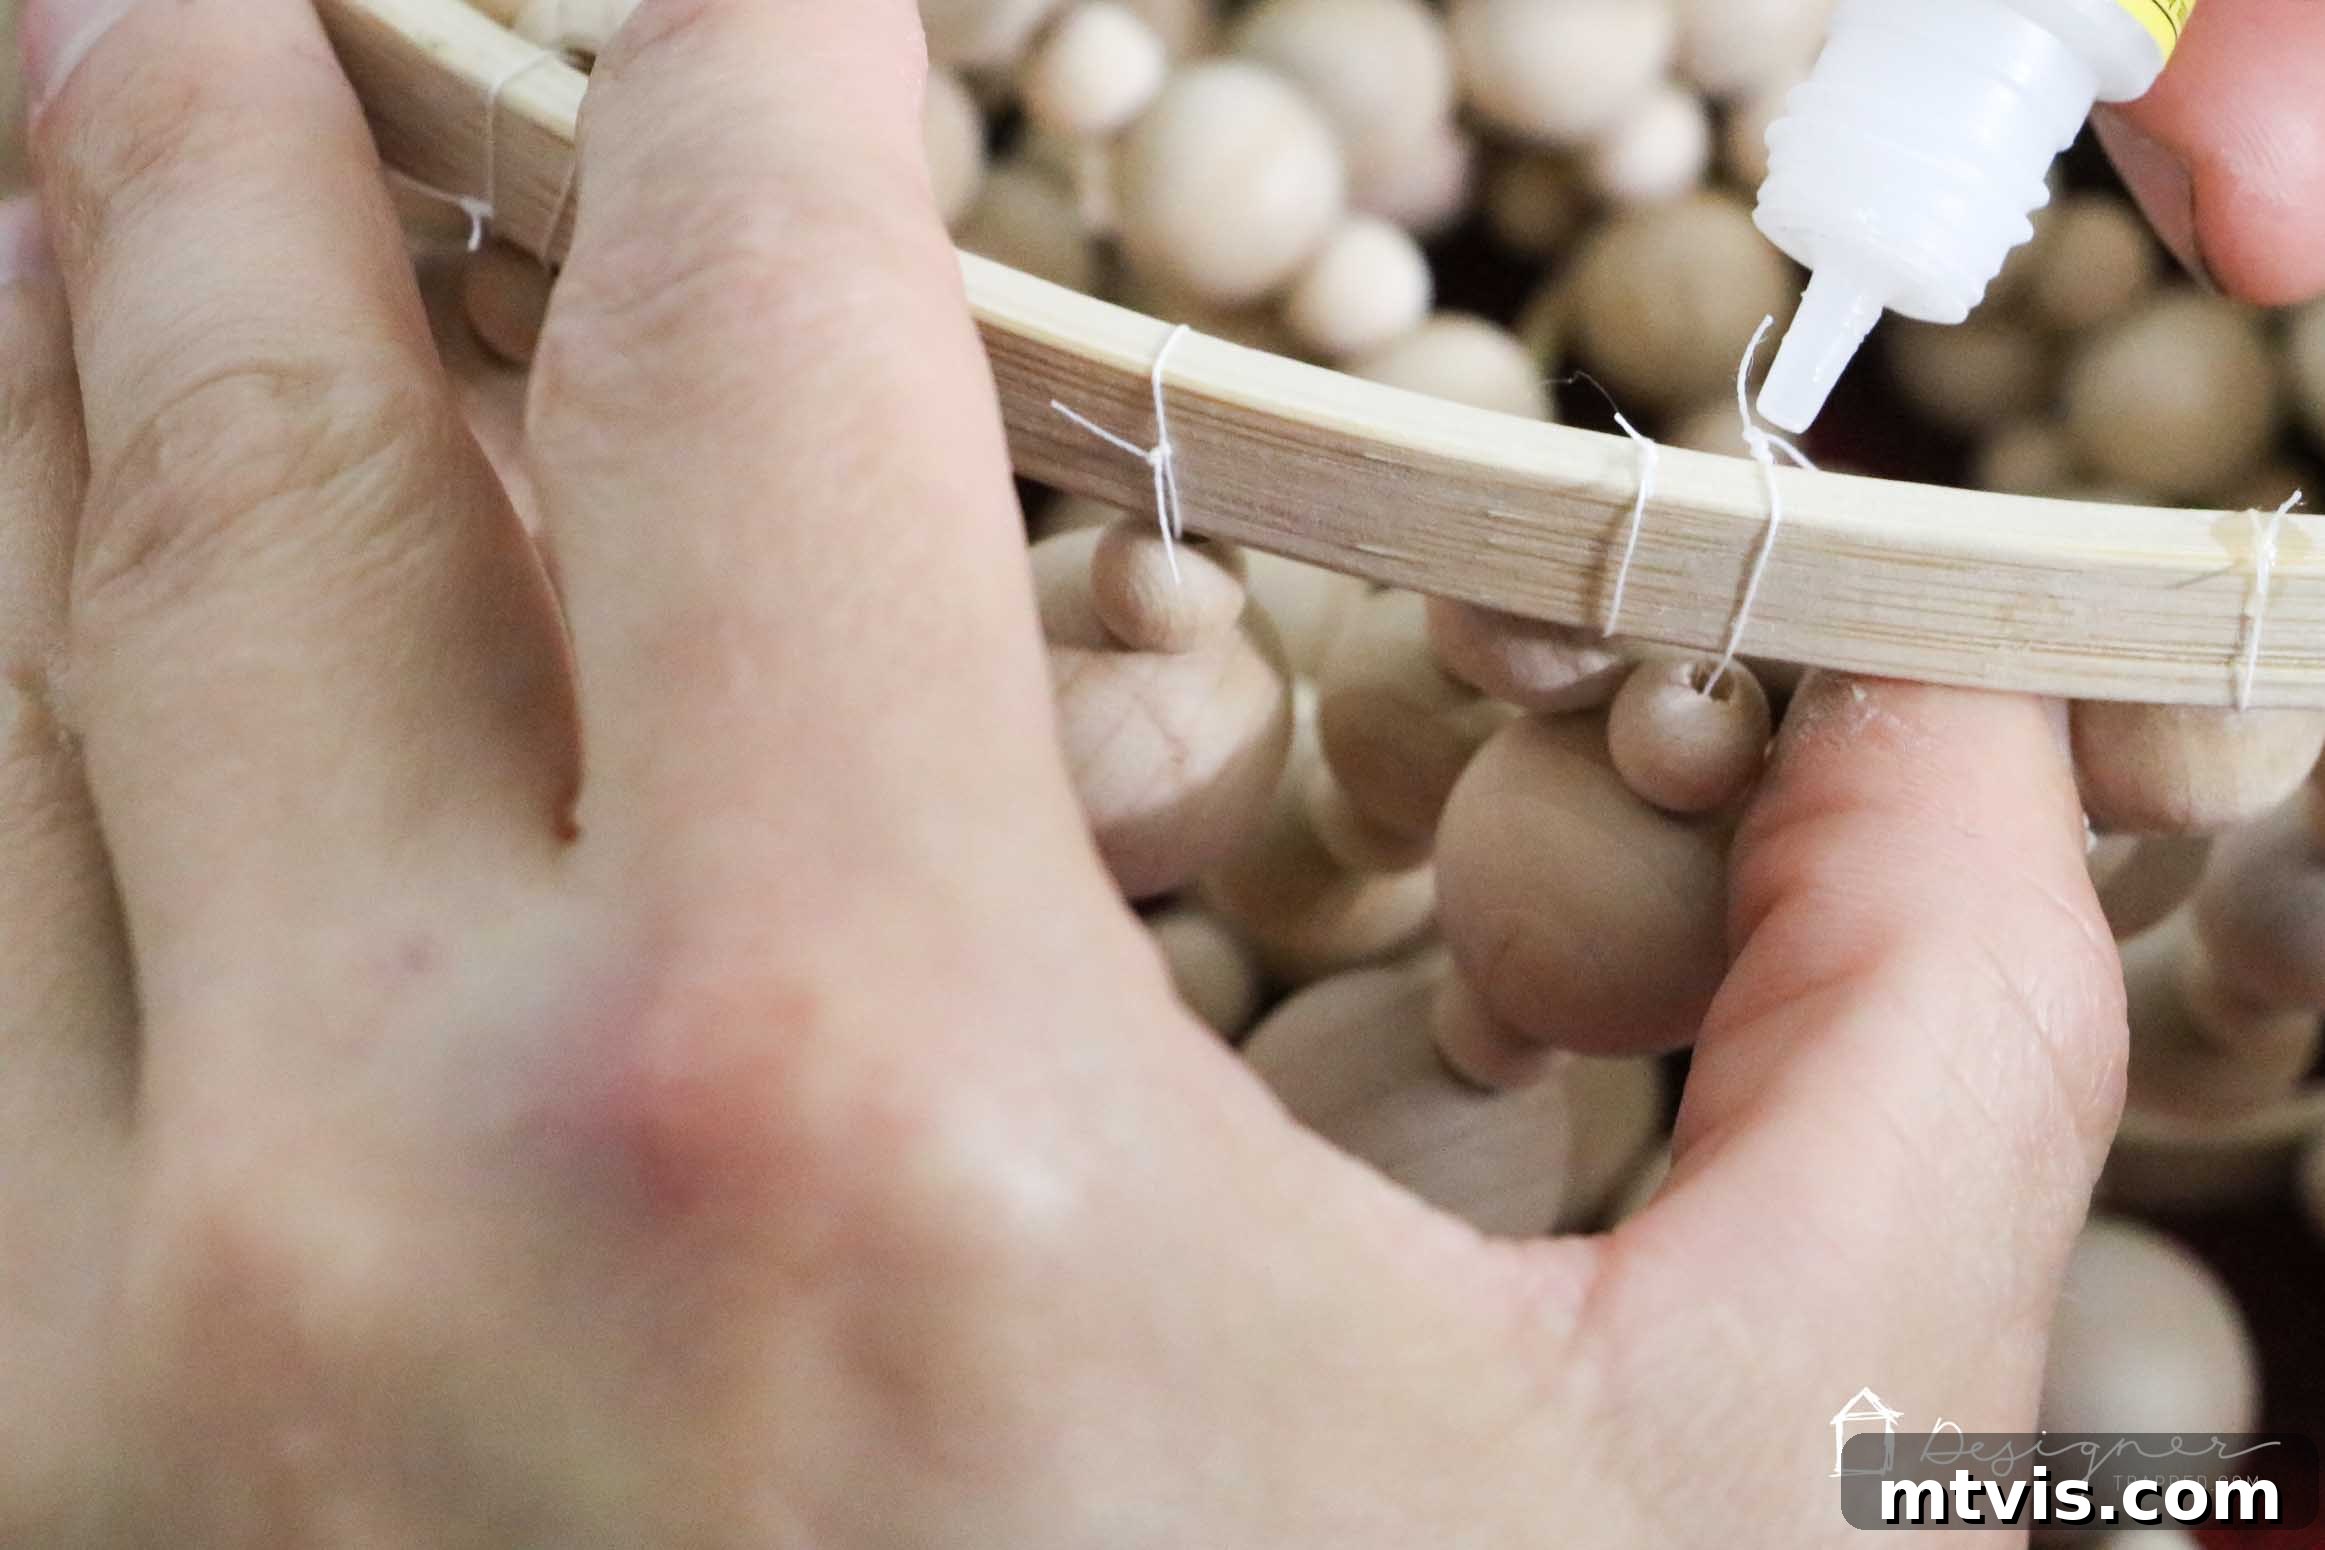
To guarantee the longevity and stability of your chandelier, apply a small drop of super glue to each knot you’ve tied on both the 3-inch and 10-inch hoops. This crucial step prevents the knots from loosening over time, ensuring your bead strands remain perfectly in place and your chandelier maintains its beautiful form.
- Glue Outer Hoops Over Inner Hoops.
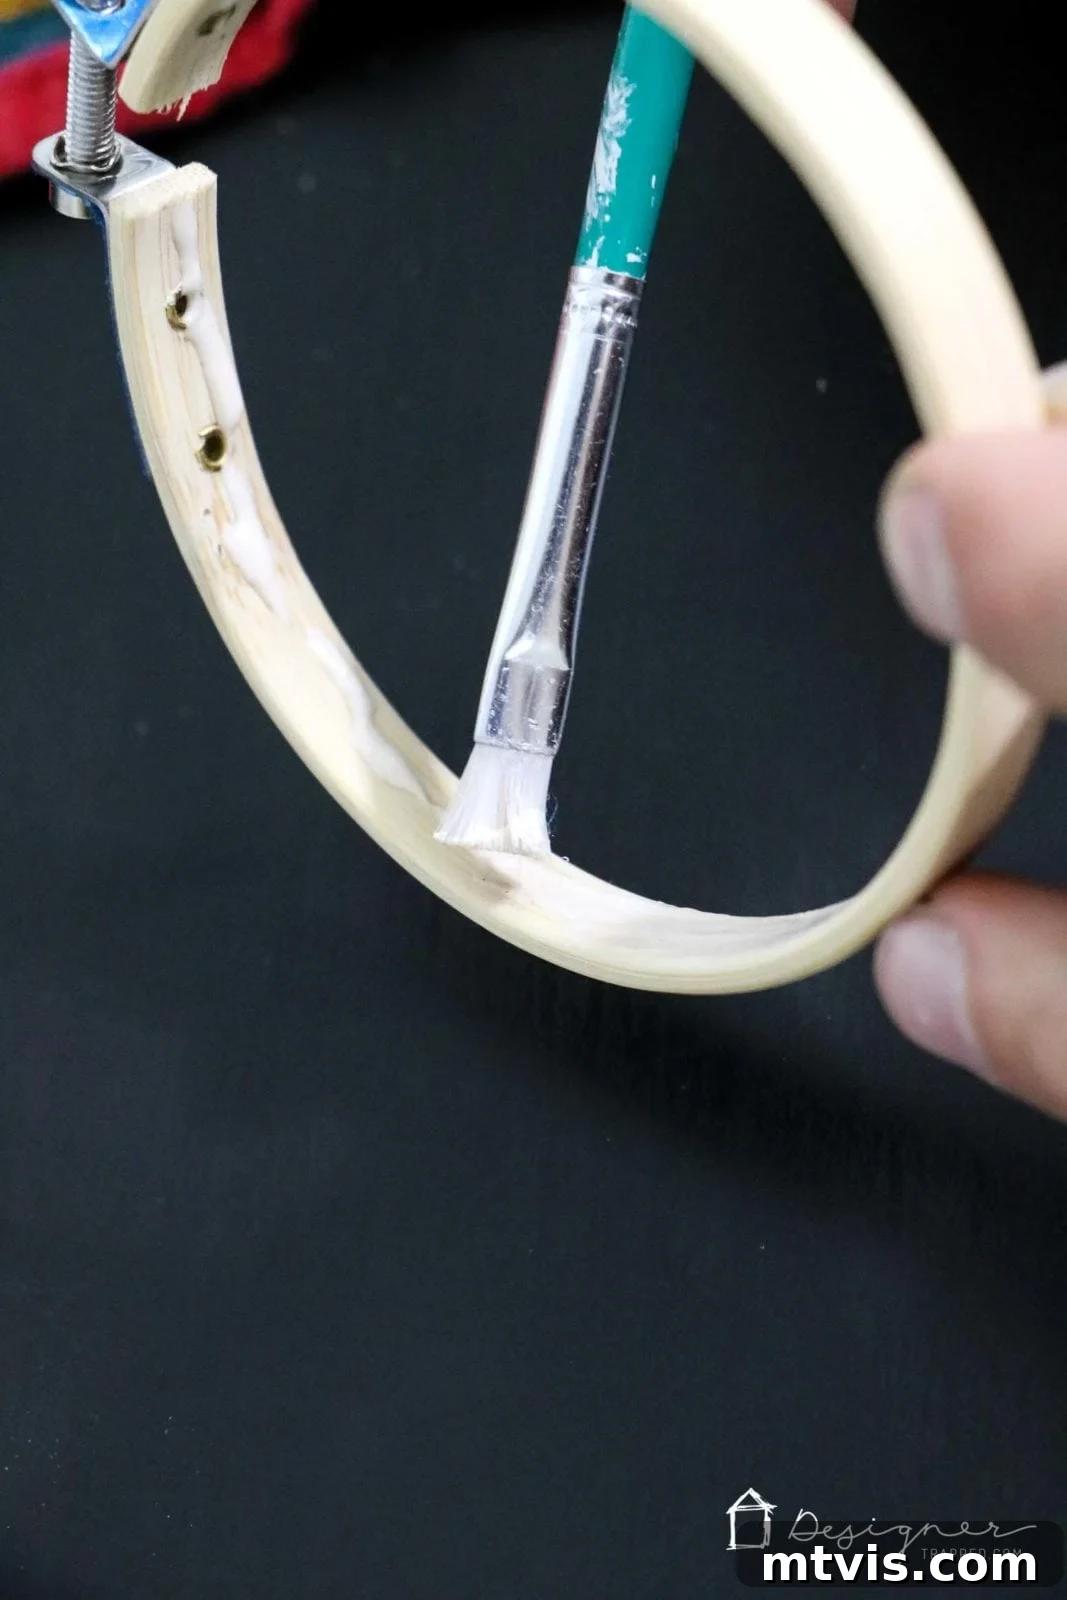
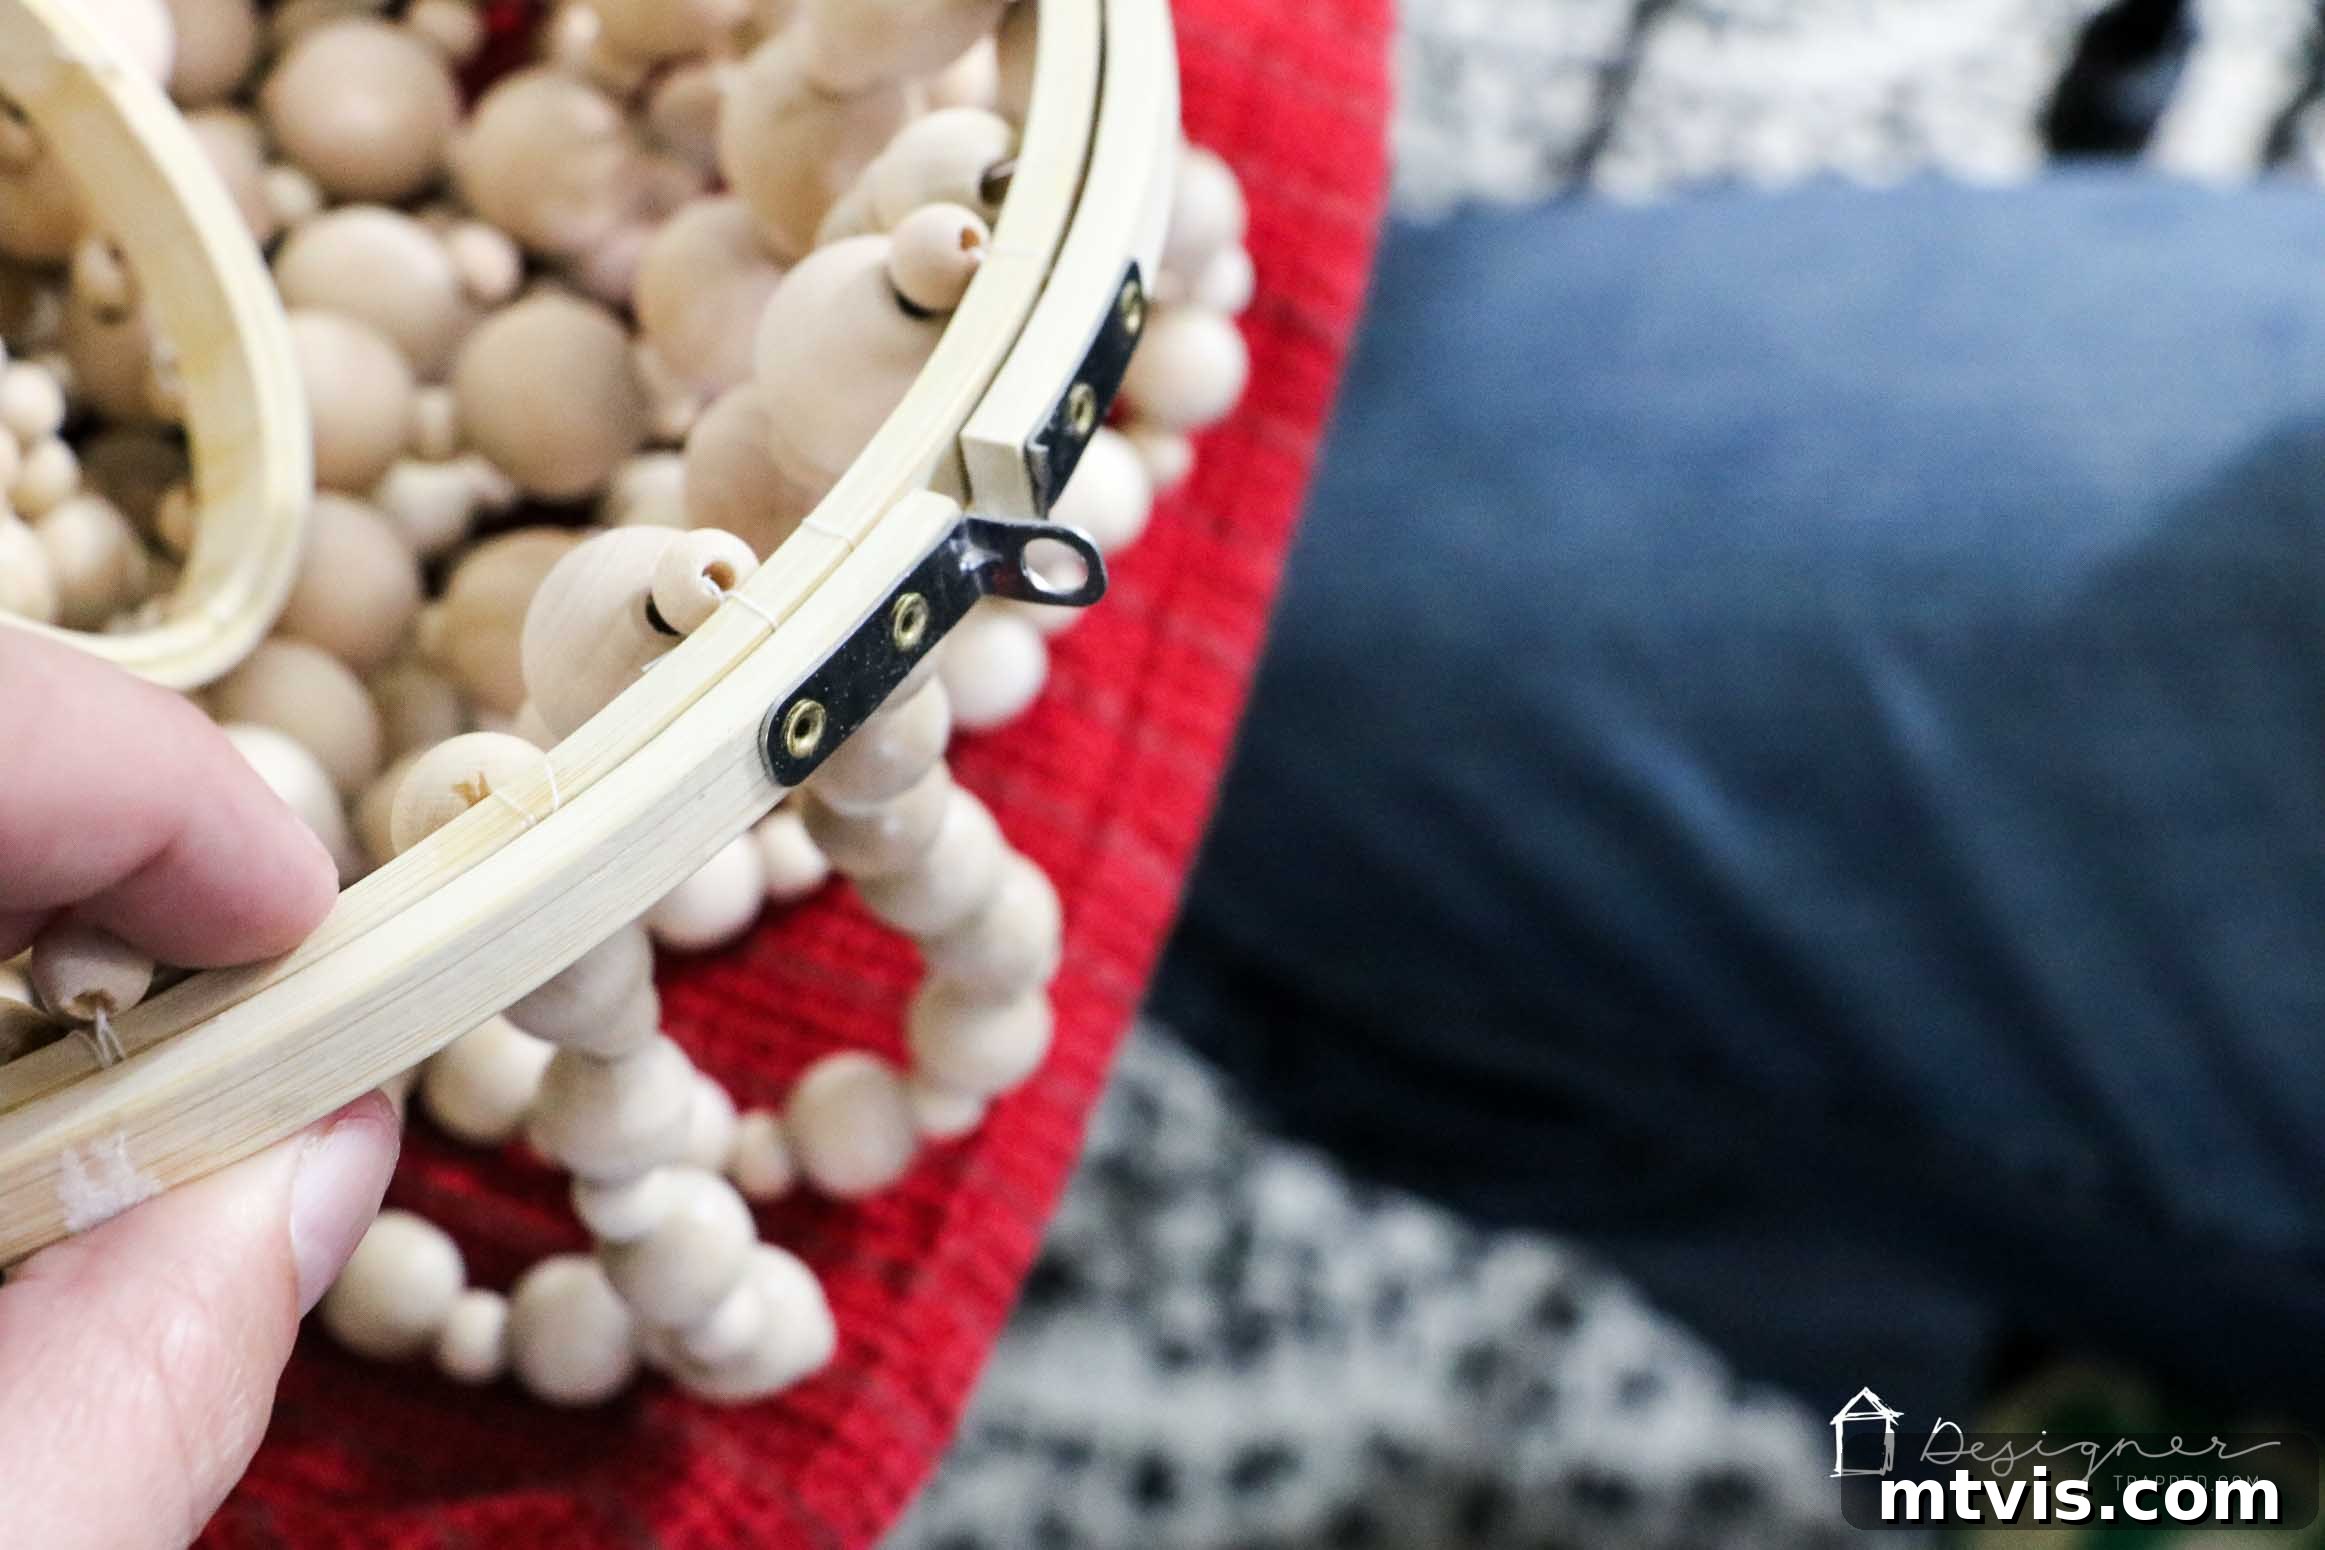
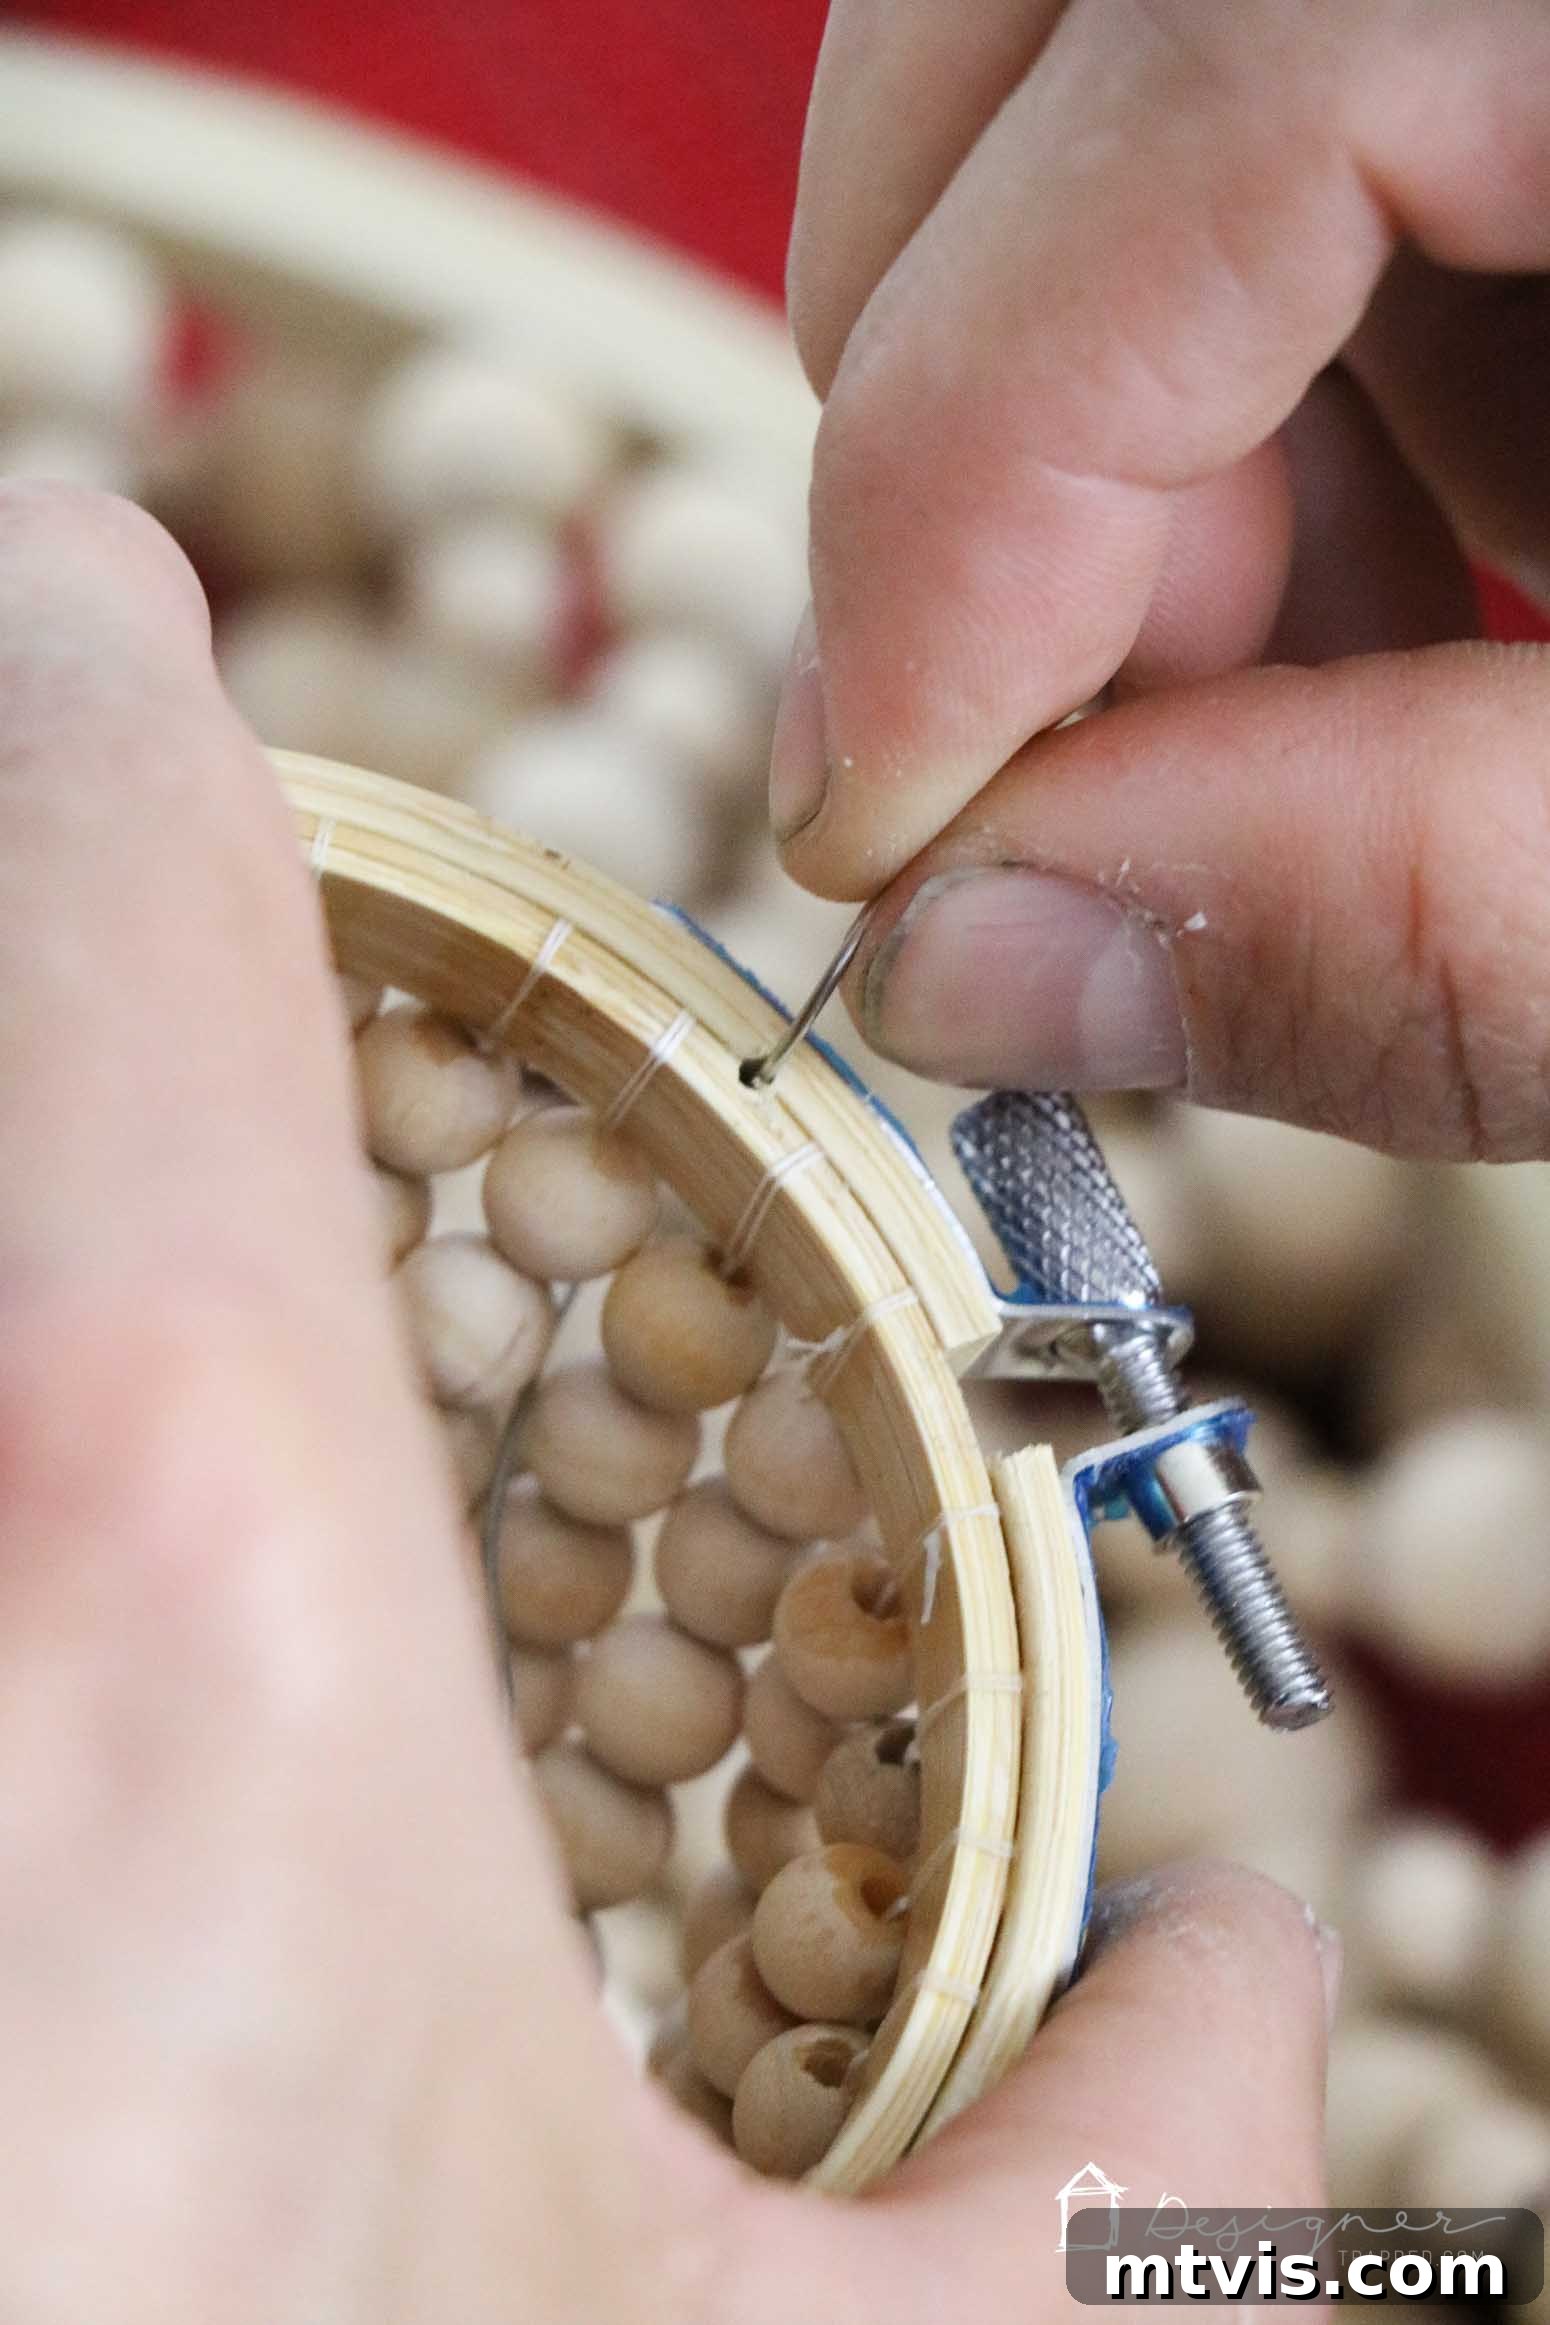
Retrieve the outer hoops you set aside earlier. Apply a thin layer of wood glue along the inside edge of each outer hoop. Carefully position them over their corresponding inner hoops (the ones with the beads attached), ensuring a snug fit. Tighten the outer hoops in place, effectively sandwiching the bead-tied inner hoops and providing a clean, finished edge to your chandelier structure.
- Remove Hoop Hardware.
Once the wood glue has completely dried and cured, you can remove the unsightly screw mechanism from each of the outer hoops. Use cutting snips to carefully remove the protruding part of the hardware. This will leave a small gap where the screw once was, but it’s not an issue since the hoops are now securely glued together and the gap will be hidden within the overall design.
- Attach Your Pendant Light Kit.
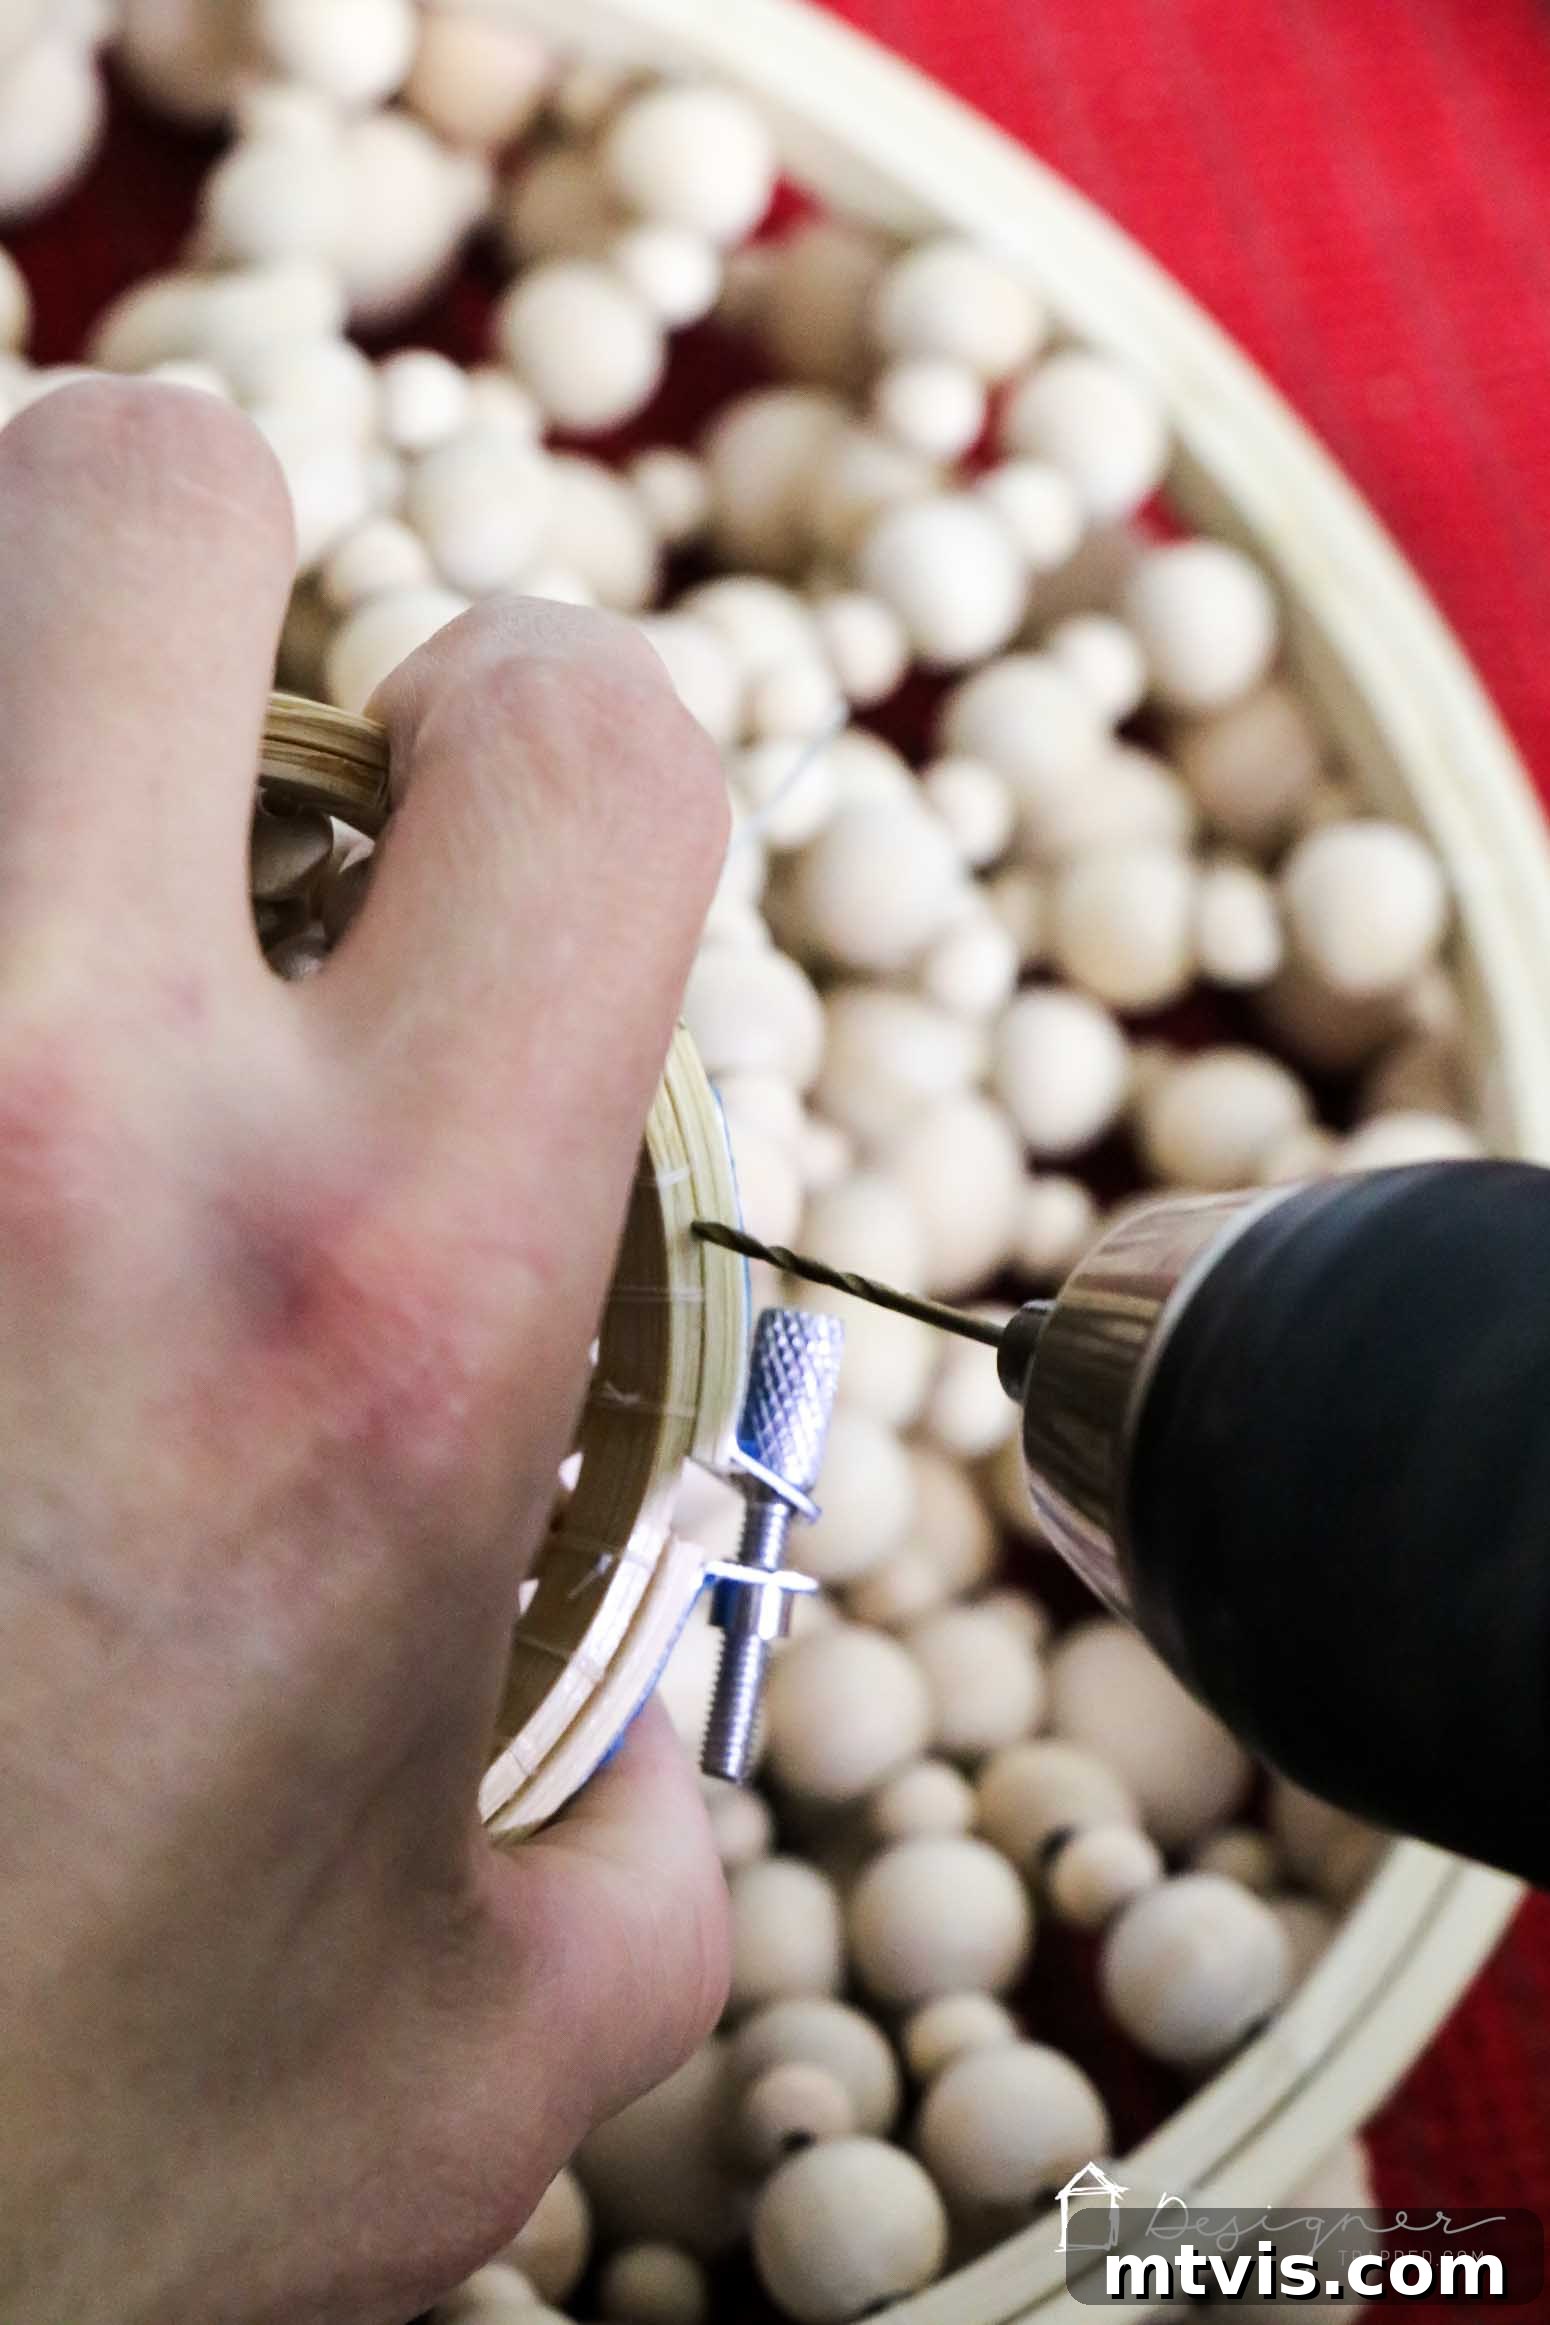
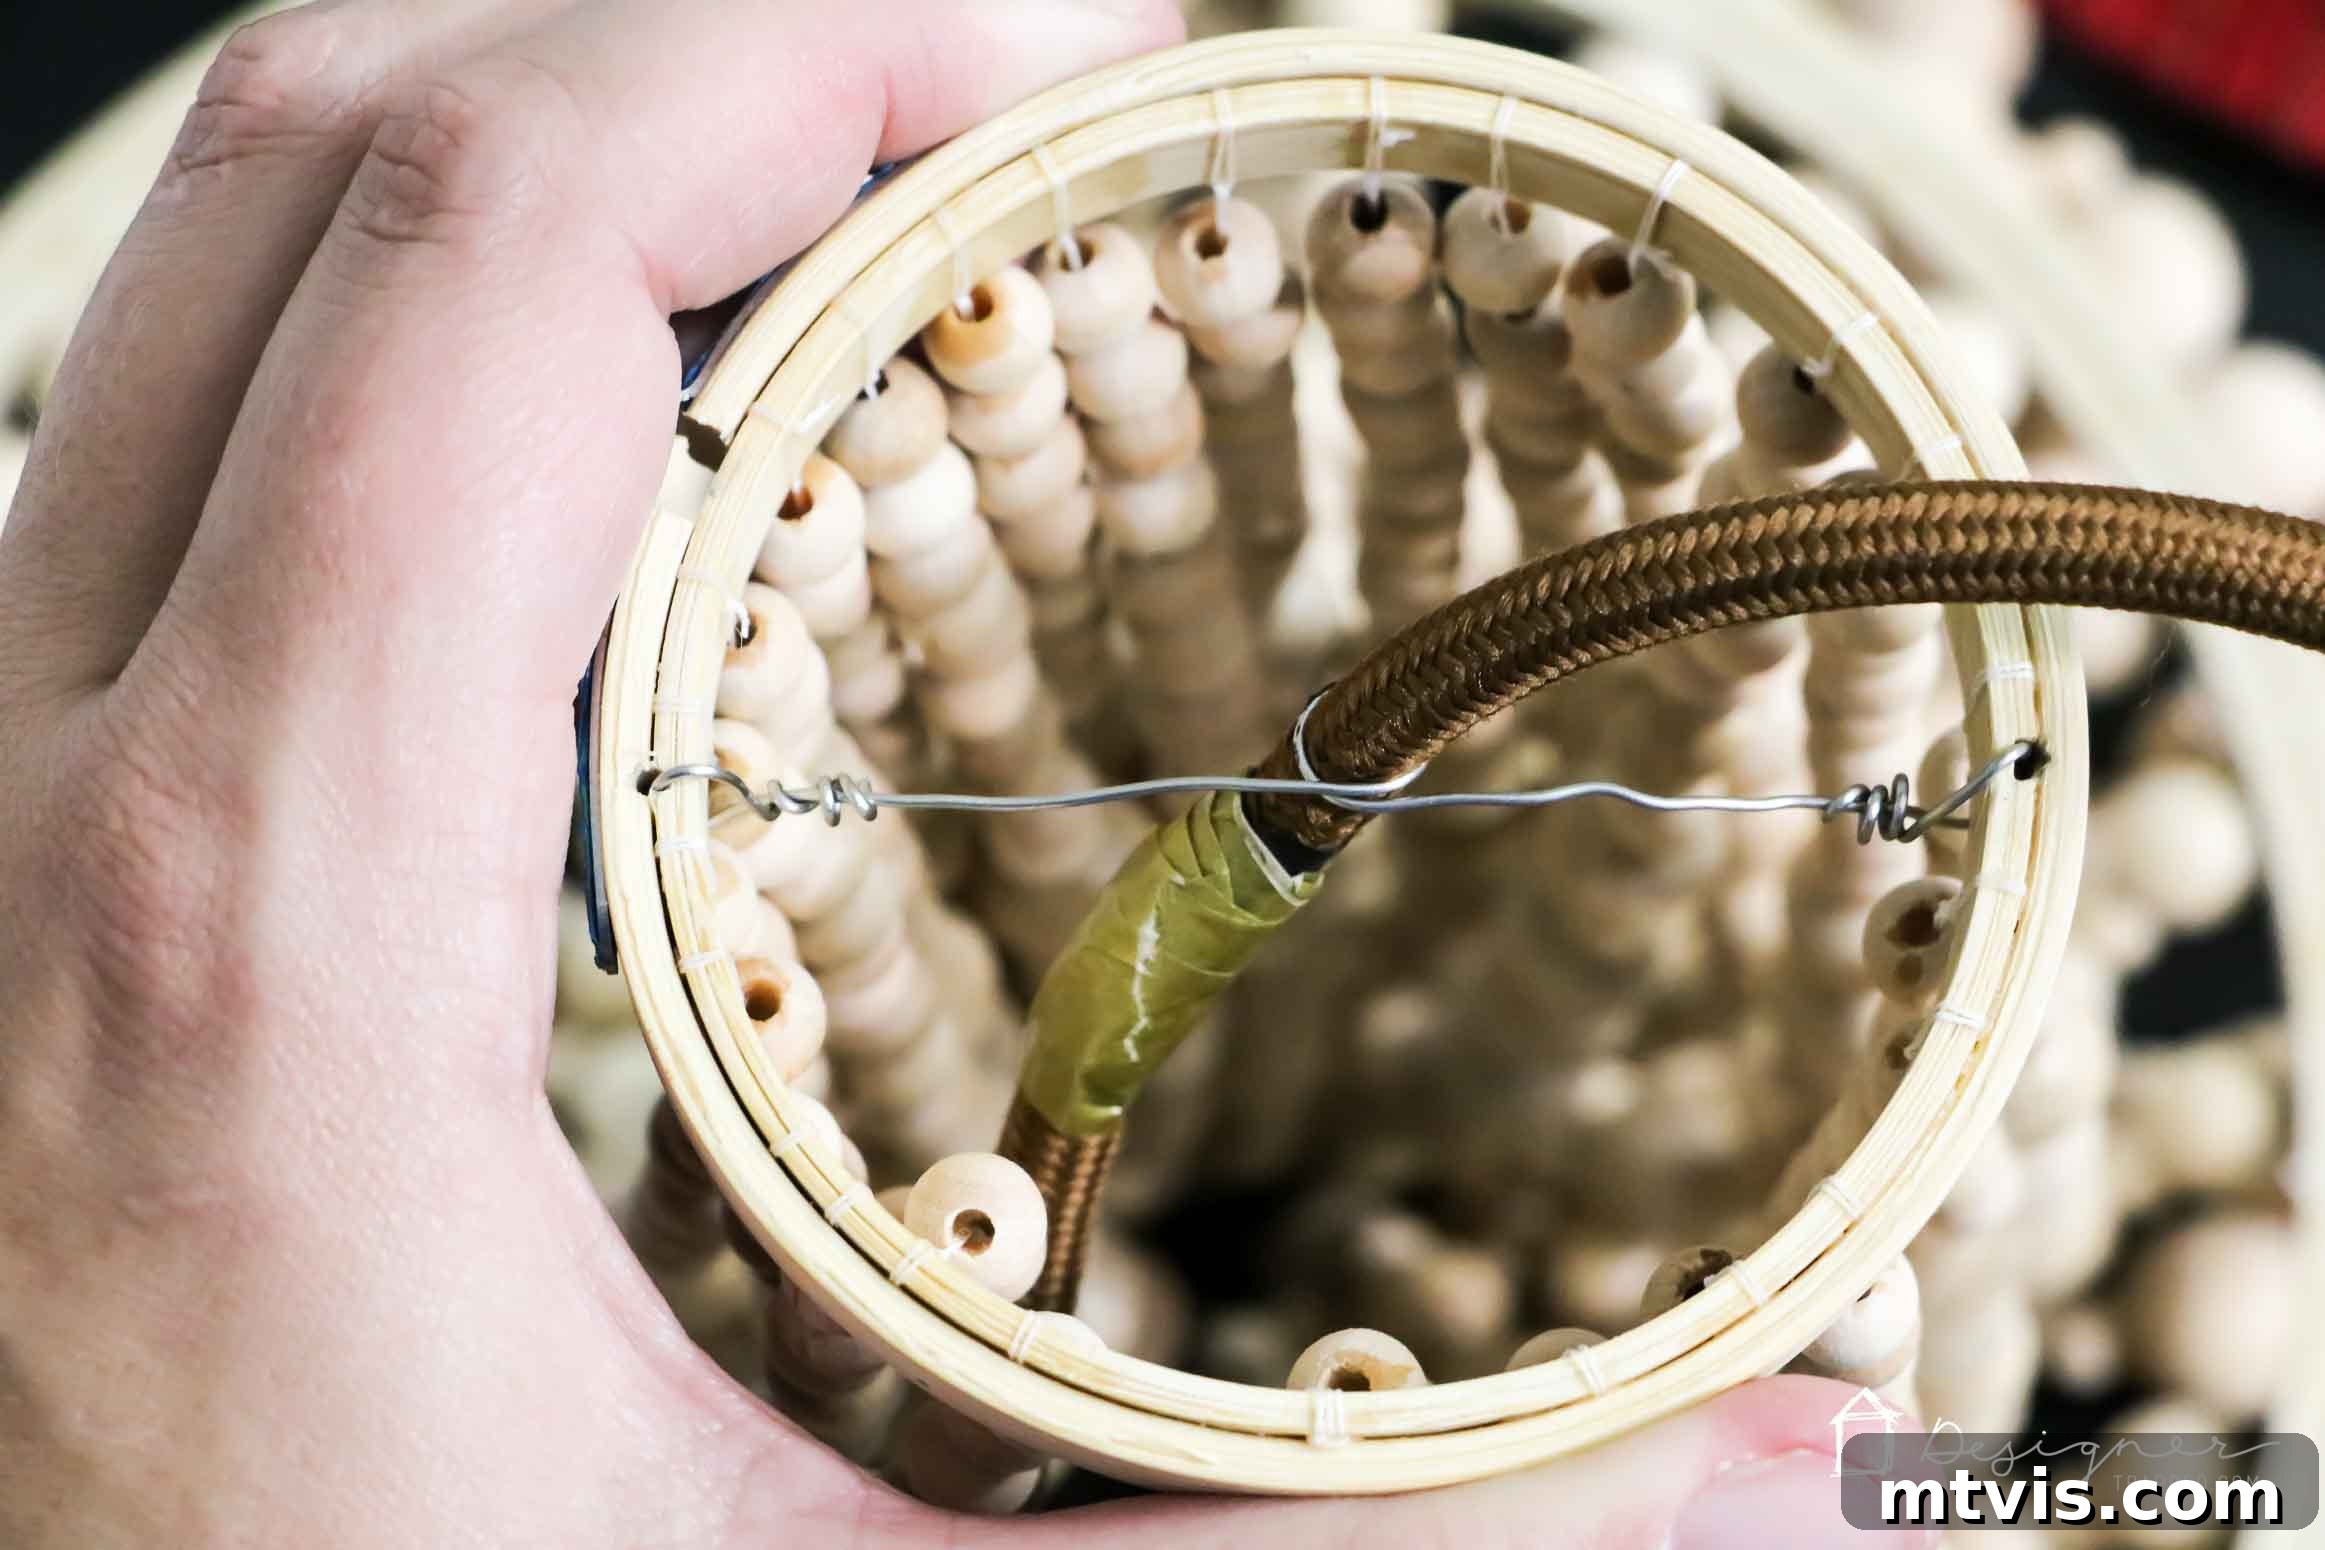
Using a very small drill bit, carefully drill two vertical holes, one on each side of the TOP 3-inch hoop. These holes will serve as anchor points for attaching your pendant light kit. Next, thread a piece of thin gauge wire through one hole, loop it securely around the cord of your pendant light kit, and then thread the wire back through the opposite hole. This creates a sturdy hanger that will hold the chandelier structure to the pendant light. Wrap electrical tape below the wire circle around your cord. This ensures the light fixture won’t slip down and keeps the lightbulb positioned correctly within the chandelier. To make the electrical tape less conspicuous, I chose to cover mine with some decorative gold washi tape. Always remember to securely wrap the ends of your wire to prevent any sharp edges or slippage. This is what the top of your DIY chandelier will look like when viewed from above, showcasing the secure attachment of your light source.
- Hang Your Light.
With your chandelier structure complete and the pendant light kit securely attached, you are now ready to install your beautiful new fixture. Follow the specific wiring and attachment instructions provided with your pendant light kit. If you are unsure about electrical wiring, it is always best to consult a qualified electrician to ensure safe and proper installation. Once hung, step back and admire your stunning, handmade creation!
Customizing Your Wood Bead Chandelier
That’s it! Your bespoke wood bead chandelier is now ready to illuminate your space. We proudly hung ours in our guest room, easily replacing an outdated flush mount fixture without the need for professional installation. The transformation was instant and we are absolutely in love with the sophisticated charm it adds! The best part about this DIY project is the incredible freedom it offers for customization. Unleash your creativity by experimenting with different colored beads, creating multiple tiers for a grander statement, or using larger quilting hoops for a more substantial chandelier. Consider adding playful tassels for a touch of bohemian flair, or varying the sizes and shapes of beads to create unique textures and patterns. Whether your home leans boho, farmhouse, modern, or somewhere in between, you can truly make this chandelier your own, perfectly matching your unique style and vision.
Safety Tips and Maintenance
When working with electrical components, always prioritize safety. Ensure your pendant light kit is rated for the correct voltage and wattage. If you are not comfortable with basic electrical wiring, please consult a professional electrician for installation. Once hung, maintaining your wood bead chandelier is simple. Dust regularly with a soft cloth or a feather duster to keep the beads looking fresh and vibrant. For any stubborn spots, a slightly damp cloth can be used, but avoid excessive moisture on the wood beads. Periodically check the knots and wire connections to ensure everything remains secure. With proper care, your handmade chandelier will continue to be a dazzling focal point for years to come.
Conclusion
Crafting your own wood bead chandelier is a deeply rewarding project that brings high-end style into your home without the high-end cost. It’s an opportunity to inject personal character and warmth into your living spaces, transforming a simple room into a stylish sanctuary. The versatility of this design allows it to adapt to almost any decor, making it a perfect addition to modern, farmhouse, bohemian, or even traditional settings. Not only will you save money, but you’ll also gain the immense satisfaction of creating something beautiful and unique with your own hands. We hope this guide inspires you to take on this enchanting DIY project and create a statement piece that truly shines in your home.
Other posts you may enjoy:
- Stylish Flush Mount Alternatives to Elevate Your Home
- How to Make a DIY Outdoor Chandelier
- 20 DIY Chandeliers That Will Blow Your Mind (but not your budget!)
- DIY Lampshade – Ombre Style!
- Creative DIY Light Fixtures That Won’t Break the Bank
- DIY Bentwood Pendant Tutorial
Wondering how I approach transforming rooms and spaces in our home? Check out Designer in a Binder®.
For exclusive content, behind-the-scenes sneak peeks, and more DIY inspiration, be sure to subscribe to our newsletter before you go! Don’t miss out on our latest projects and expert tips.