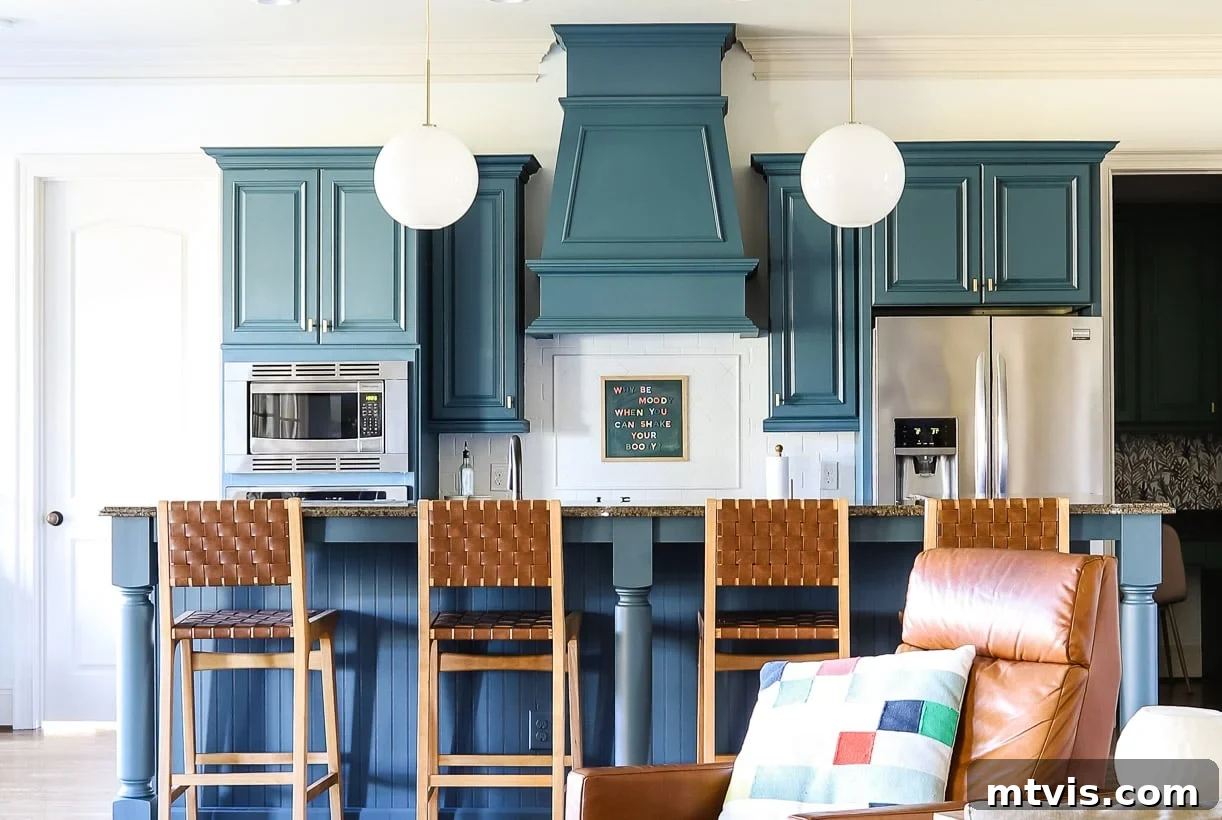
Transform Your Kitchen on a Budget: A Stunning DIY Makeover Reveal
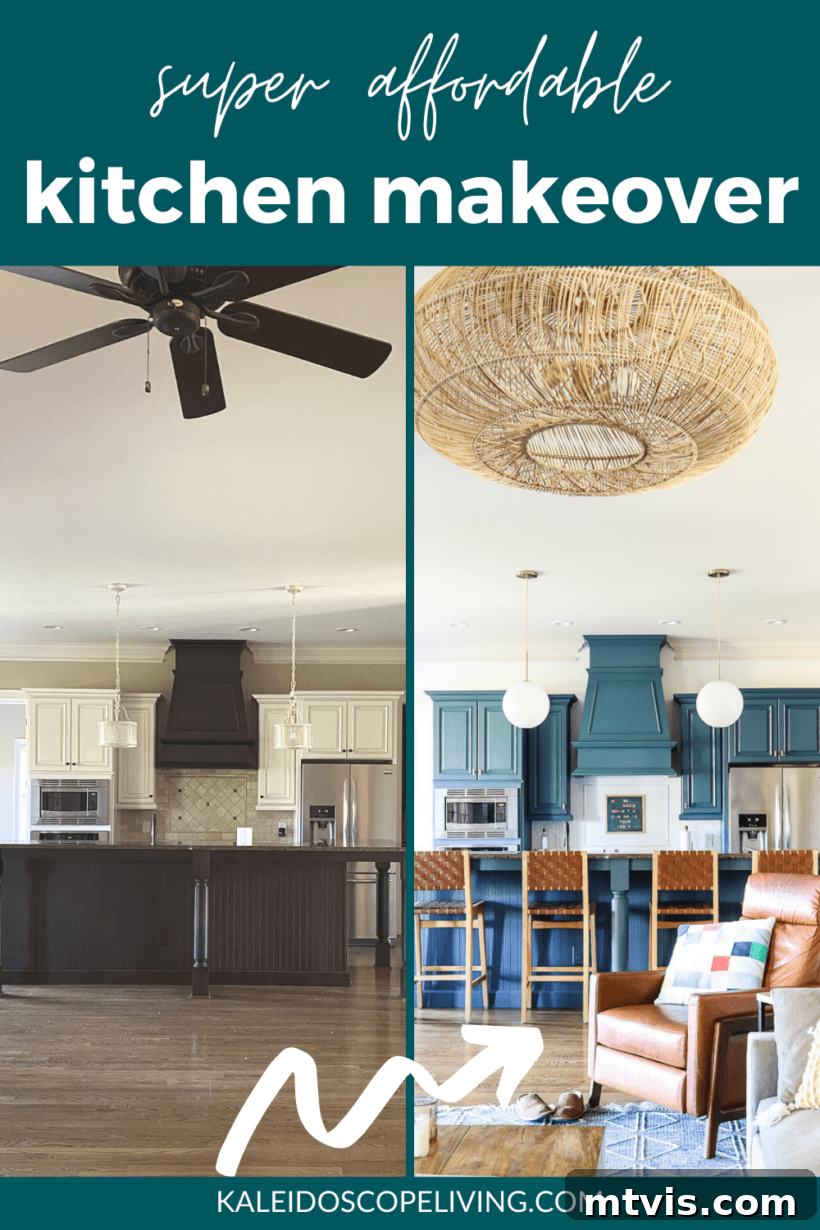
There’s nothing quite like the excitement of a reveal day, especially when it culminates months of hard work, creative problem-solving, and a deep desire to transform a space into something truly special. Today, I’m absolutely thrilled to pull back the curtain and share our incredibly budget-friendly kitchen makeover with you! Having moved into this house just three months ago, this kitchen project has undoubtedly been our most ambitious undertaking yet. If you followed along with our initial house tours, you’ll know that we inherited a home with immense potential but also a number of spaces that desperately needed a touch of our personality. The kitchen, with its overwhelming beige and brown palette, was a prominent candidate on that list.
Our vision for this kitchen was clear: to create a bright, inviting, and highly functional space without breaking the bank on a full renovation. We proved that with strategic planning, a lot of paint, and clever organization, a dramatic transformation is not only possible but also incredibly rewarding. From refreshing the cabinets and backsplash with paint to upgrading hardware and lighting, every step was carefully chosen to maximize impact while minimizing cost. This isn’t just a story about a kitchen makeover; it’s a testament to what you can achieve with creativity and a budget-conscious mindset.
The Before: A Journey From Drab to Fab
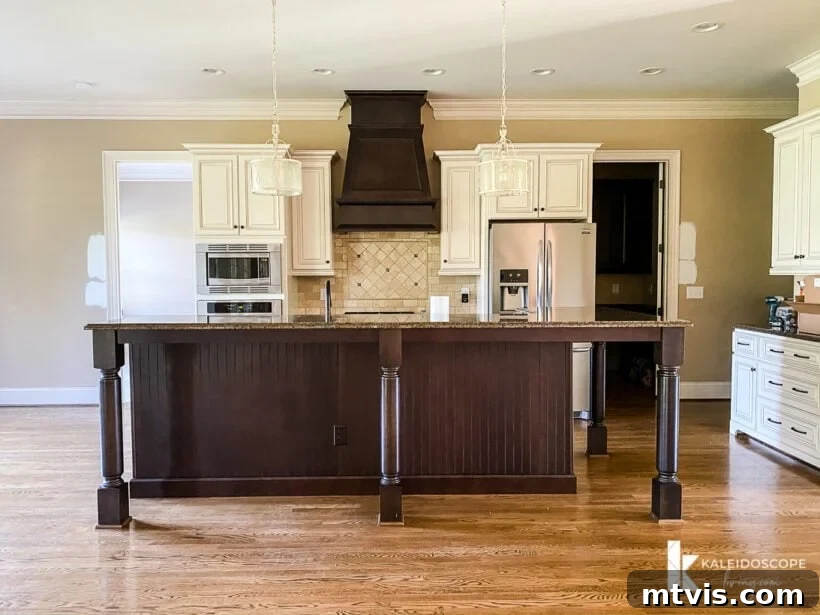
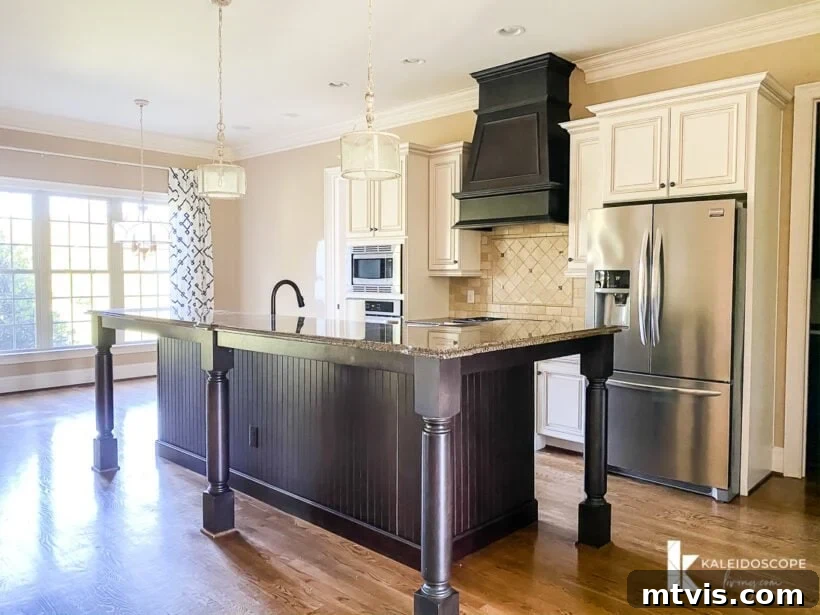
When we first stepped into this house after closing, the kitchen presented a scene that was, let’s say, less than inspiring. It was a sea of monotonous browns and beiges, from the dark cabinetry to the earthy tile backsplash, creating a rather heavy and uninviting atmosphere. The countertops blended seamlessly (and not in a good way) with the rest of the muted tones, making the entire space feel dated and somewhat closed-off. It lacked the vibrancy and warmth that we longed for in the heart of our home. Imagine a kitchen that absorbed light rather than reflected it, where every surface seemed to hum with the same, tired note. This was the “before” – a blank canvas, albeit a rather dull one, awaiting a splash of color and a fresh perspective.
This post contains affiliate links for your convenience. Click here for my full disclosure policy.
Initial Sparkle: Small Tweaks with Big Impact
Our journey to a brighter kitchen began even before we fully unpacked. Recognizing the immediate need to combat the overwhelming brown, one of the first things we did was paint the walls a crisp, clean white. This single change instantly lifted the entire space, making it feel more expansive and airy. The transformation was truly remarkable, breathing new life into every corner and setting the stage for future updates.
As Christmas approached, my daughters and I embarked on our next DIY adventure: painting the brown stone tile backsplash white. This was a surprisingly simple yet incredibly effective project that further brightened the kitchen. I even shared a fun Instagram Reel documenting our progress and the immediate visual difference it made. If you’re considering tackling your own tile backsplash, you can find my detailed tutorial here, offering step-by-step guidance for a successful outcome. Simultaneously, we updated the cabinet hardware and replaced the outdated pendant lights above the island. These seemingly minor changes worked in harmony to infuse a fresh, modern aesthetic, making the kitchen feel much more aligned with our personal style just in time for the holiday season.
Choosing new hardware was an exercise in finding pieces that offered both functionality and an elevated design, while the pendant lights were selected to cast a warmer, more inviting glow, enhancing the overall ambiance. These early adjustments were crucial; they built momentum and gave us a glimpse of the kitchen’s potential, fueling our excitement for the grander transformation yet to come.
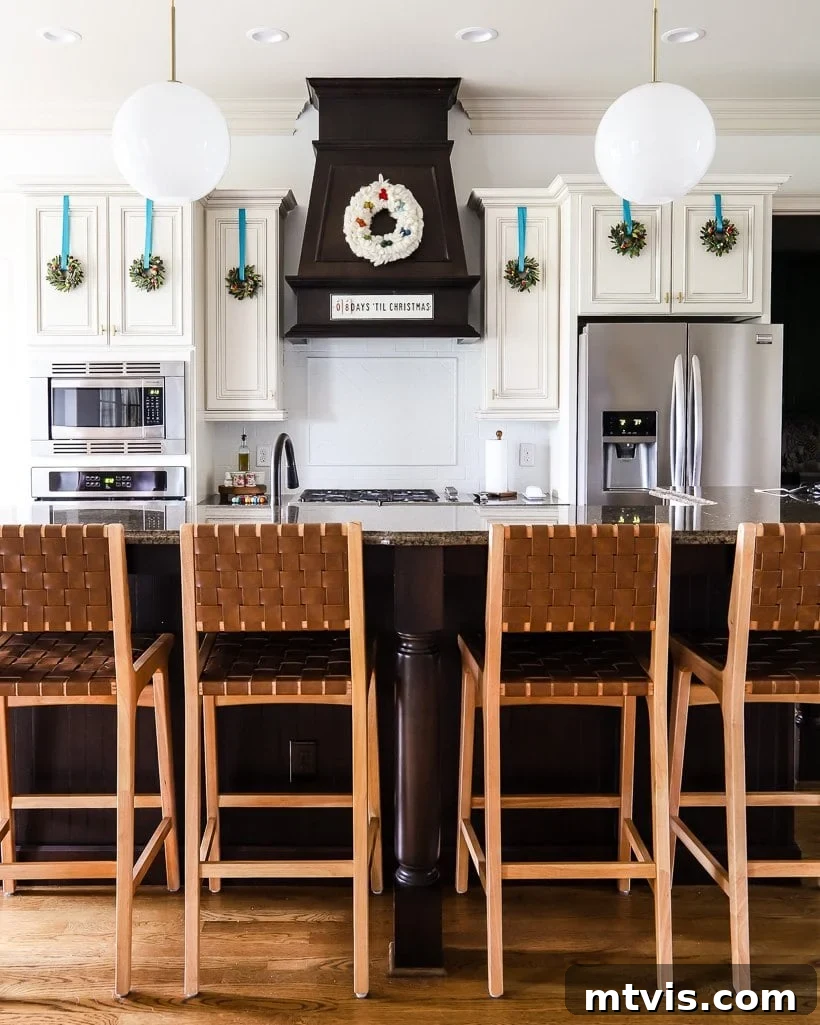
The Ultimate Transformation: Painting the Kitchen Cabinets
From the moment we decided on a budget-friendly makeover, painting the kitchen cabinets was always the cornerstone of our plan. We knew this singular task held the power to unlock the kitchen’s true potential and deliver that “WOW” factor we were chasing. And I was absolutely right! The transformation achieved through paint was nothing short of miraculous, making the entire space feel brand new.
For this pivotal step, I relied on the same trusted process I’ve honed over time, which you can explore in detail in my comprehensive guide on how to paint kitchen cabinets (2 methods). This resource offers a step-by-step tutorial, ensuring that anyone can achieve professional-looking results. Additionally, I’ve created an IGTV video answering common questions about cabinet painting and dedicated an Instagram story highlight to the entire process. These resources are packed with tips and insights to help you conquer your own cabinet painting project with confidence.
The star product of this transformation was Fusion Mineral Paint in the stunning shade “Seaside.” This paint truly impressed me with its exceptional coverage, providing a rich, vibrant finish in just one coat. For our entire kitchen, I only needed four pints of paint – an incredible testament to its efficiency and cost-effectiveness. To ensure lasting durability and a beautiful matte finish, I applied the Natural Stain and Finishing Oil as a topcoat, requiring only a tiny can for the whole project. What’s more, I tackled this entire job by myself, completing it over three partial days. The minimal preparation required by Fusion Mineral Paint, typically just a thorough cleaning and a light hand-sanding, significantly streamlined the process. This ease of application, combined with its self-leveling properties, made it an absolute dream to work with, even for a solo DIYer.
EXCLUSIVE DISCOUNT
I’ve never been sponsored or paid by Fusion Mineral Paint, but they have generously offered my readers a 10% discount, which will be automatically applied when you click and orderhere.
Remember, a little bit of this paint goes a LONG way, so you don’t need much (we used only 4 pints to paint the wood surface of our kitchen cabinets as part of our budget-friendly kitchen makeover). Its minimal prep, often just a light hand-sanding, means less time and effort. We saw this first-hand in Thea’s kitchen, where a light sanding took no more than 30 minutes for all her cabinets combined. Her cabinets turned out beautifully and remain in perfect condition, with no peeling or chips despite daily use. This paint’s durability truly stands out, making it an excellent choice for a high-traffic area like a kitchen.
Fusion Mineral Paint is one of only two paints that I wholeheartedly recommend for painting kitchen cabinets due to its superior performance and longevity. You can read about the other paint method I have used in this detailed post. While both methods deliver durable results, I now strongly prefer Fusion Mineral Paint because it requires fewer steps and only a single layer of topcoat, saving valuable time and effort. It truly simplifies the DIY process without compromising on quality or appearance.
Budget-Friendly Kitchen Makeover REVEAL: A Fresh New Look
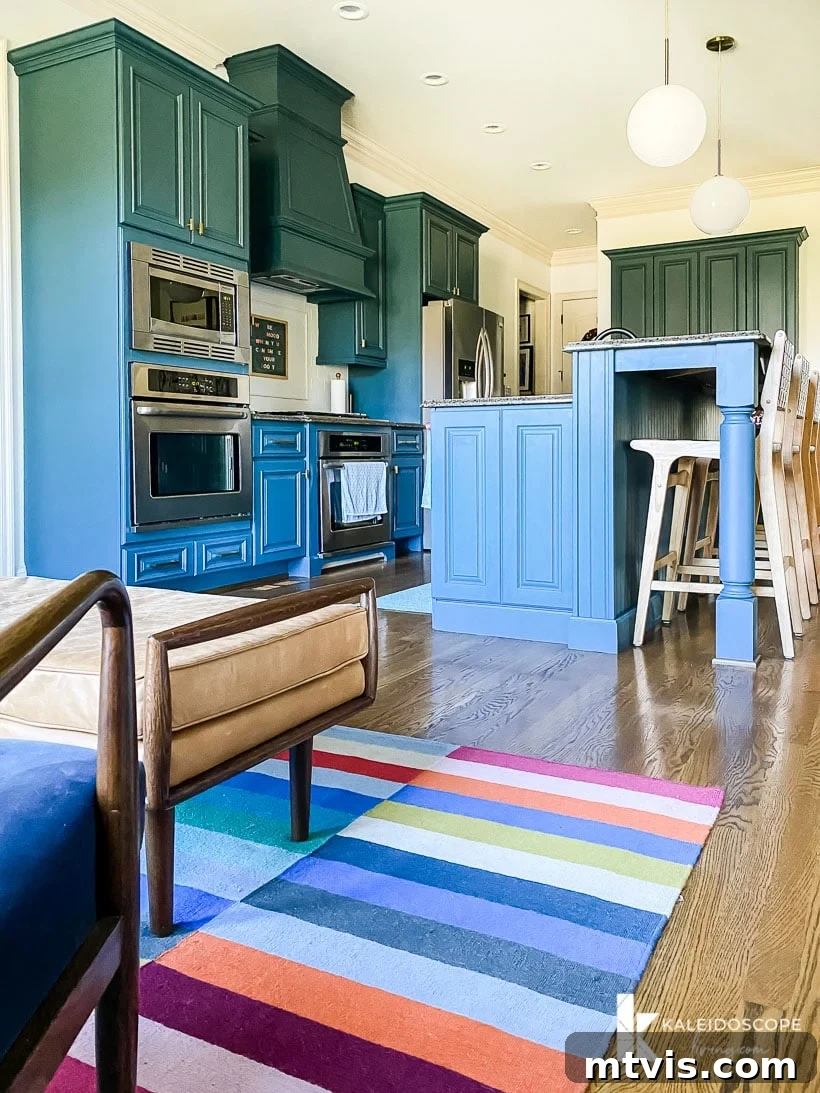
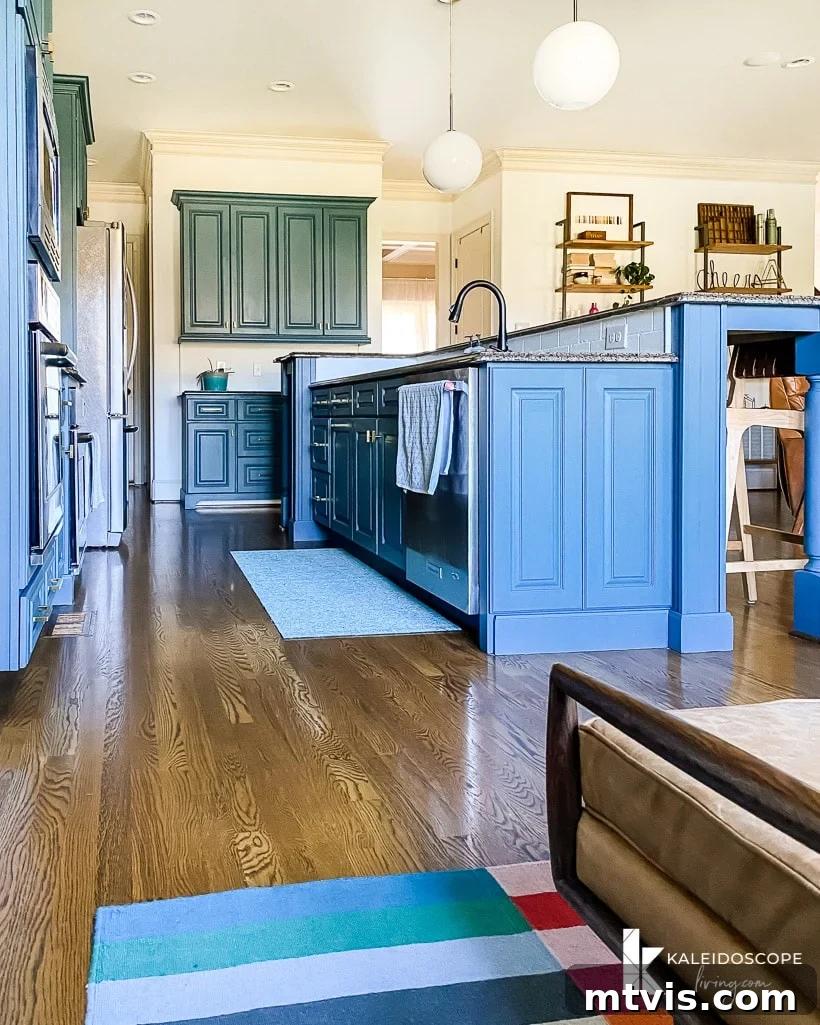
Now, let’s unveil the heart of our home! The chosen color, Seaside, is one of my absolute favorite blue paint colors. It’s a truly captivating greenish-blue that possesses a unique chameleon-like quality, subtly shifting its hue throughout the day depending on the light. Our cabinets can appear more green or distinctly blue, all contingent on the lighting conditions and the angle from which you view them. These changes, while very subtle and enchantingly lovely in person, can sometimes be drastically exaggerated by a camera lens. Photography can be tricky, and for some reason, the camera tends to capture these shifts with a much harsher contrast than the human eye perceives.
You’ll notice this phenomenon in some of the photos below. It’s not uncommon for the cabinets to appear in different shades even within the same photograph, simply due to how the light interacts with the painted surface. While I wish I possessed the skills of a professional photographer to perfectly capture what I see in real life, I can only assure you that the true beauty and nuanced depth of the Seaside color are far more harmonious and beautiful in person. Trust me when I say your eyes interpret the light and color in a much more forgiving and accurate way than a digital sensor. The overall effect is one of serene freshness and modern elegance.
These first two photos, however, are very accurate representations of the Seaside color, mirroring precisely what the color chip of the paint looks like. They showcase the serene, calming greenish-blue that provides the perfect balance of warmth and coolness to our kitchen.
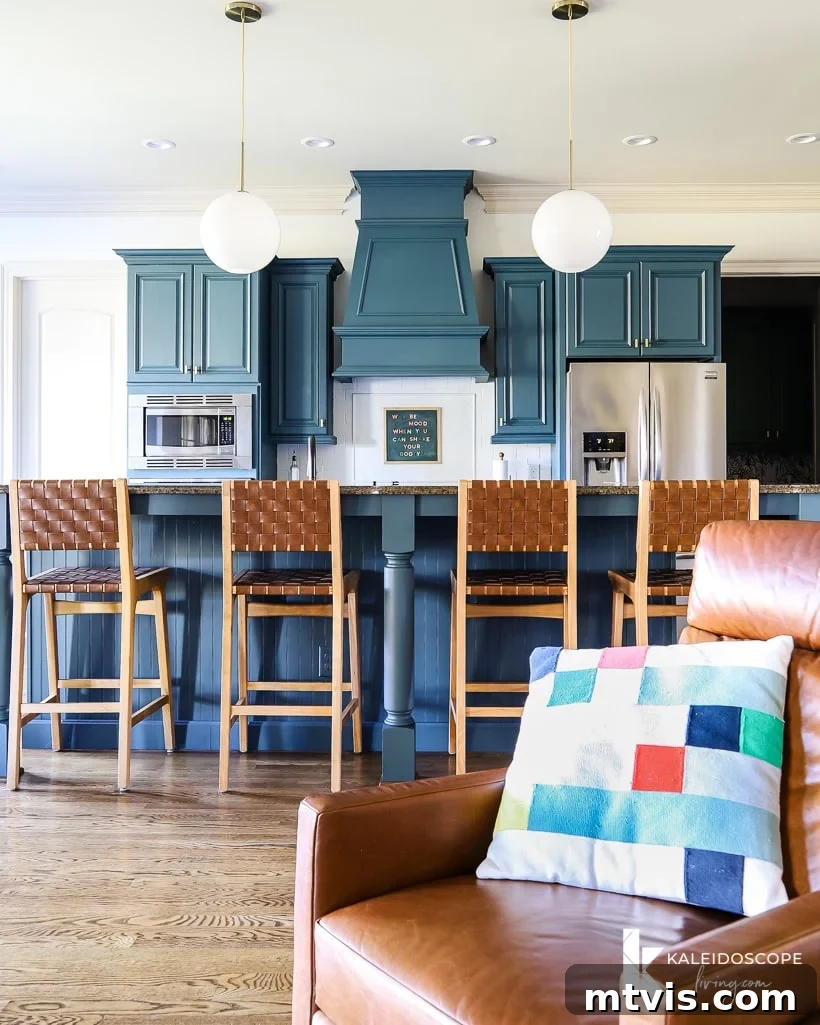
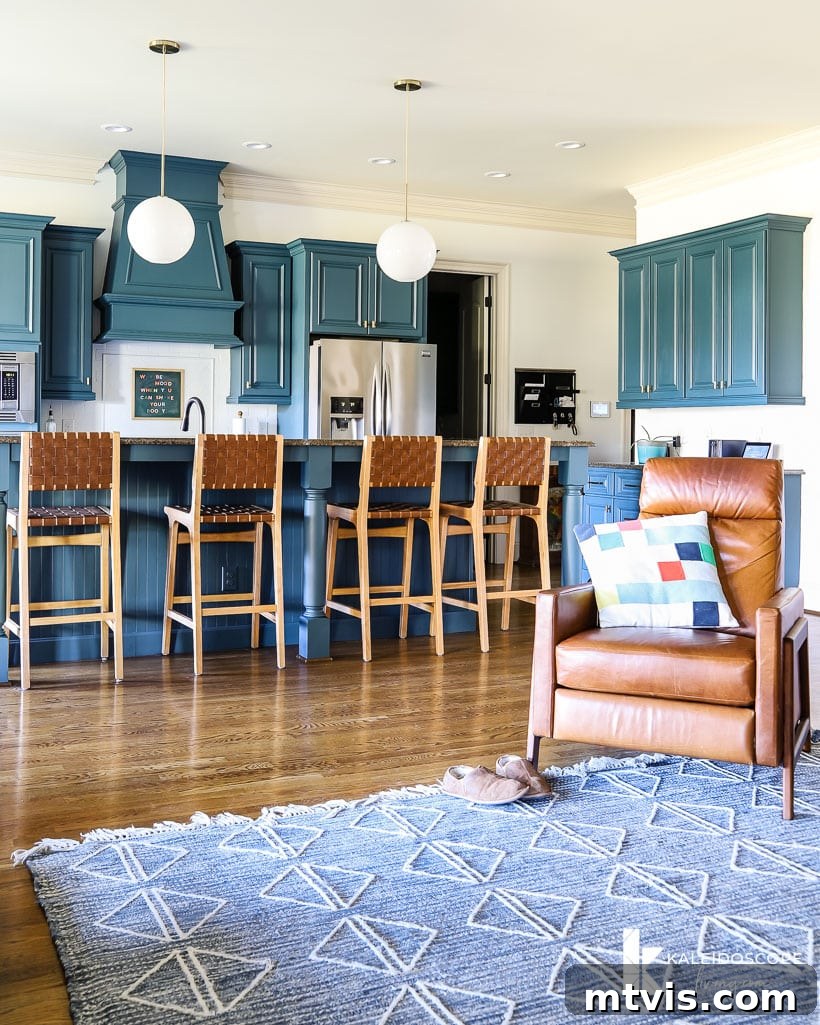
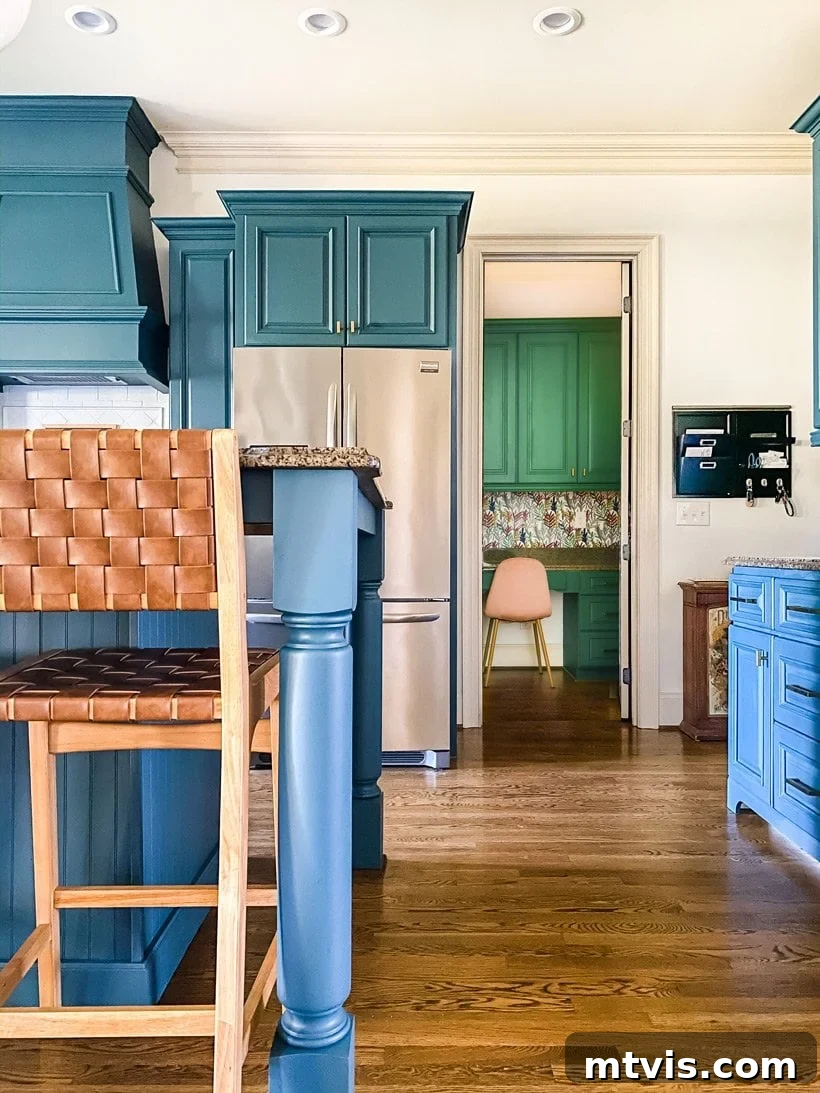
I absolutely adore the view below, which offers a delightful peek into our built-in office, a space I also gave a refreshing makeover back in November! In this particular shot, the upper cabinetry perfectly reflects the true Seaside color. However, notice the bright light streaming onto the island and the cabinets to the right? It makes them appear intensely blue. This is a classic example of the camera’s interpretation versus the reality; in person, that deep blue cast isn’t present, highlighting the challenge of capturing the true essence of this dynamic color.
The photos below exhibit a similar challenge with lighting and color representation, but I still wanted to share these angles to give you a comprehensive view of our transformed kitchen. Despite the camera’s occasional distortion, these images convey the significant shift from a drab, outdated space to a vibrant, personalized culinary haven. They showcase the flow and the renewed energy that paint and updated elements brought to the entire room.
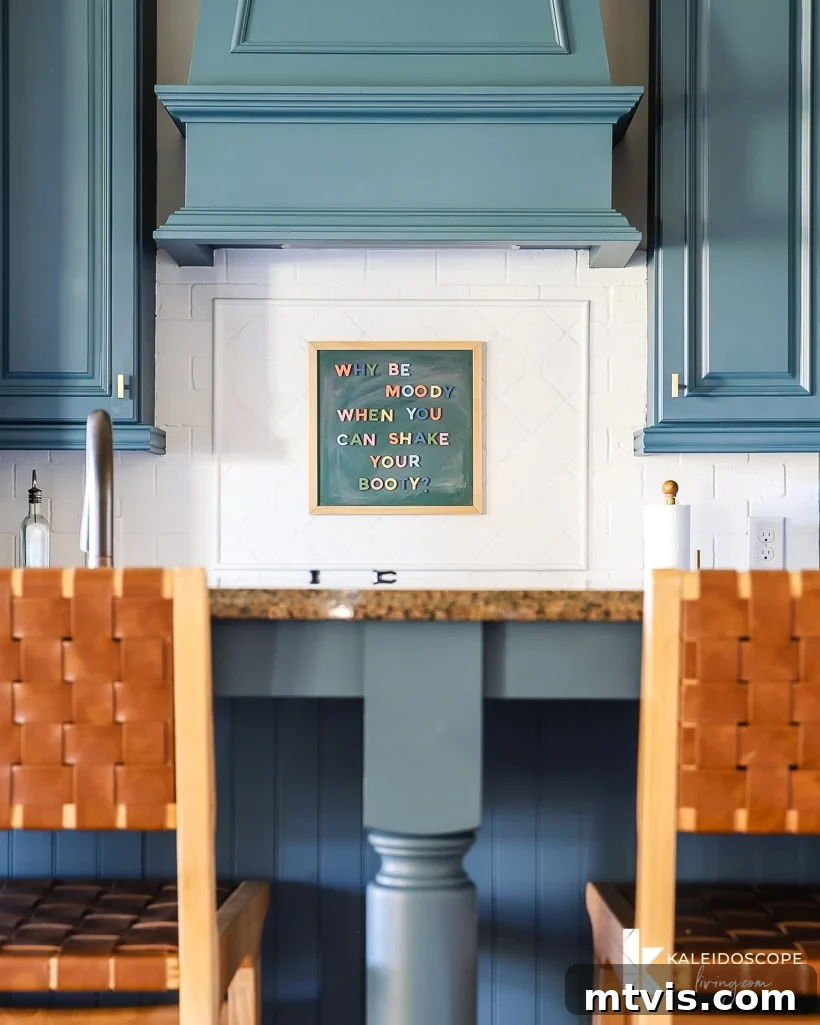
Okay, let’s return to a photo that beautifully captures the true essence of our kitchen, free from any peculiar lighting or color discrepancies. This image perfectly illustrates the fresh, inviting ambiance we achieved, truly reflecting the Seaside shade and the overall success of our budget-friendly makeover.
The Organizing Goodness: Maximizing Kitchen Functionality
As those who follow me on Instagram already know, our budget-friendly kitchen makeover wasn’t solely about aesthetics. A major focus was on maximizing function, especially since we don’t anticipate a full gut renovation like we undertook in our last house. This meant embarking on a diligent hunt for the perfect interior drawer and cabinet organizers. And I must say, I truly outdid myself in this department – even Joe, who is notoriously hard to impress, was genuinely amazed!
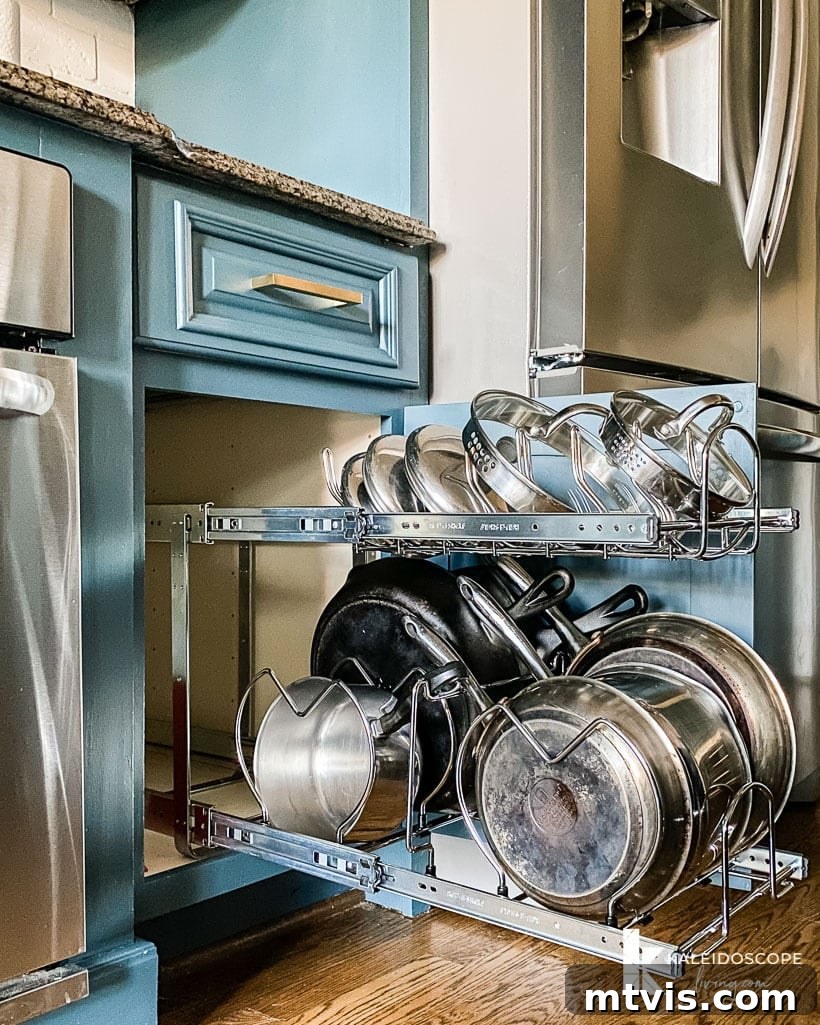
One of our key installations was a brand-new pull-out trash can and recycling system, which instantly streamlined waste management and kept unsightly bins out of view. Beneath the sink, we added a dedicated organizer to neatly store cleaning supplies and other essentials, preventing clutter and making everything easily accessible. For our cookware, a specialized pots and pans organizer ensures each item has its designated spot, eliminating the clatter and chaos of rummaging through stacked items. Furthermore, we installed a double-pull out system specifically designed for our larger pots and pans, offering robust storage and smooth access. You can explore photos of all these functional additions below. For a more interactive experience, be sure to watch this story highlight where I demonstrate and discuss how each organizer is used and its benefits.
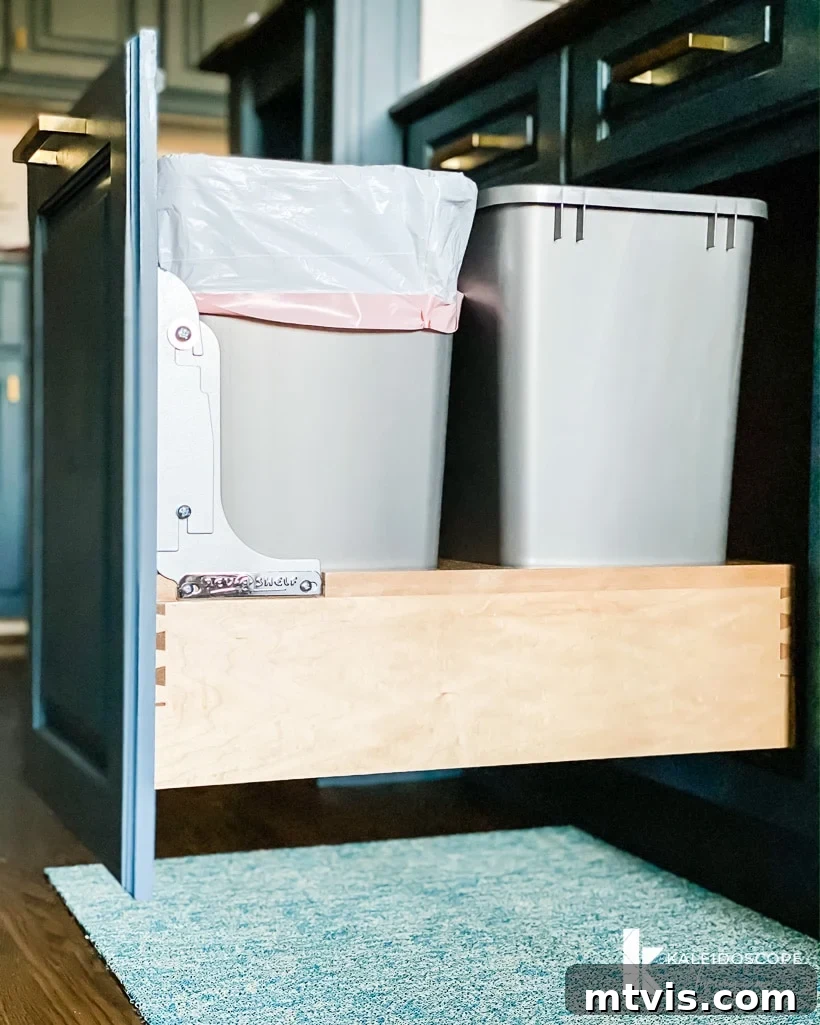
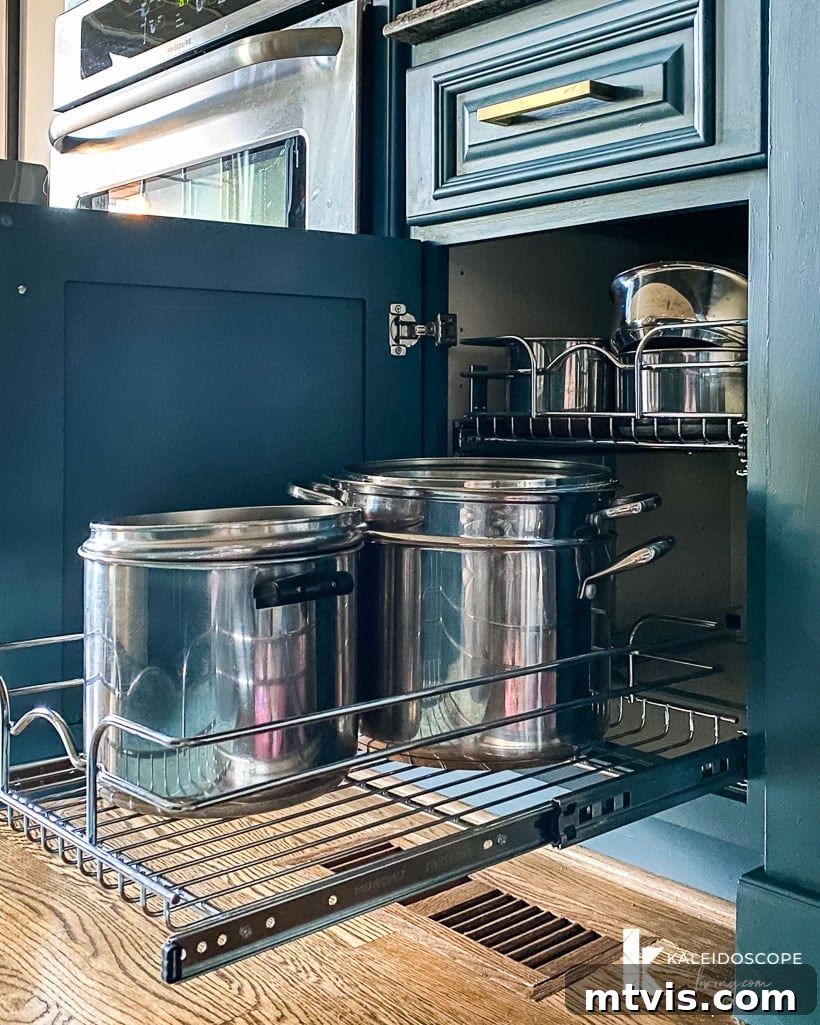
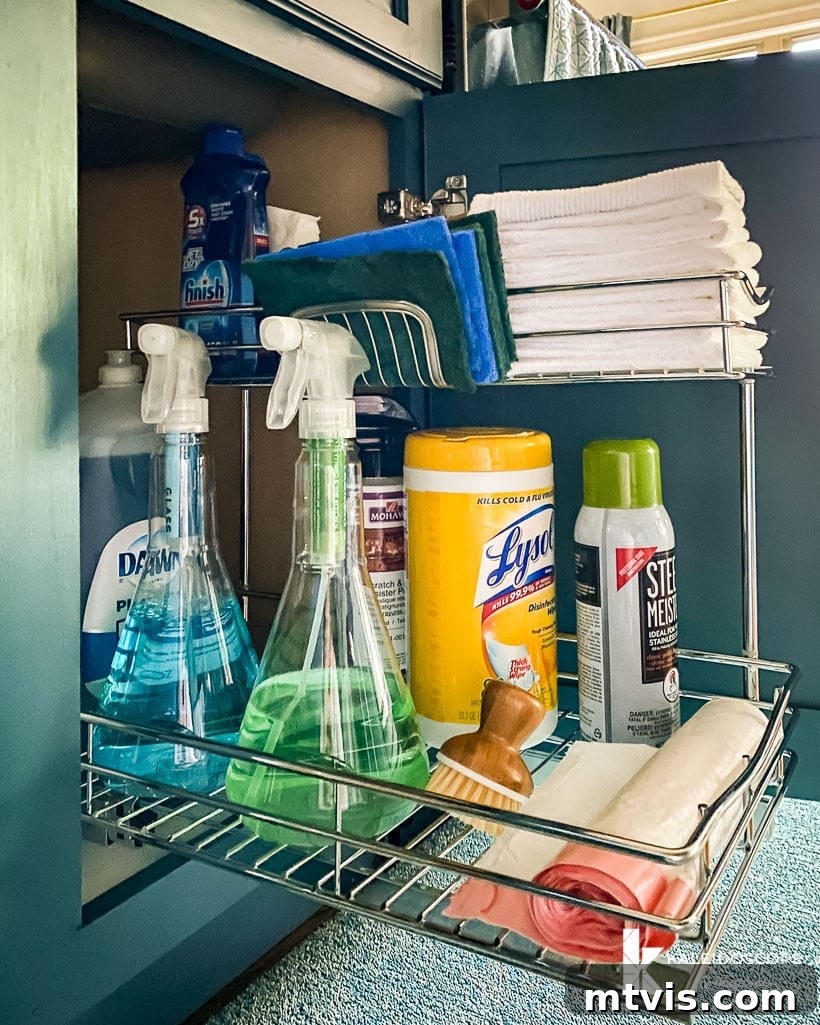
Beyond the cabinets, we dedicated significant effort to maximizing our drawer storage, a critical need given the limited drawer space in our kitchen’s main work zone. This involved finding innovative solutions to consolidate and organize various kitchen items efficiently.
I stumbled upon the most AWESOME space-saving utensil and knife storage solutions. These ingenious products allowed us to combine two drawers’ worth of items into a single, compact drawer! Yes, you read that correctly – all of our utensils AND knives now fit perfectly into one small drawer. And, critically, the drawer still opens and shuts with remarkable ease. I even demonstrate this smooth functionality in my Instagram stories, which you can watch HERE. This clever reorganization freed up valuable space elsewhere, making our kitchen feel much more efficient and less cluttered.
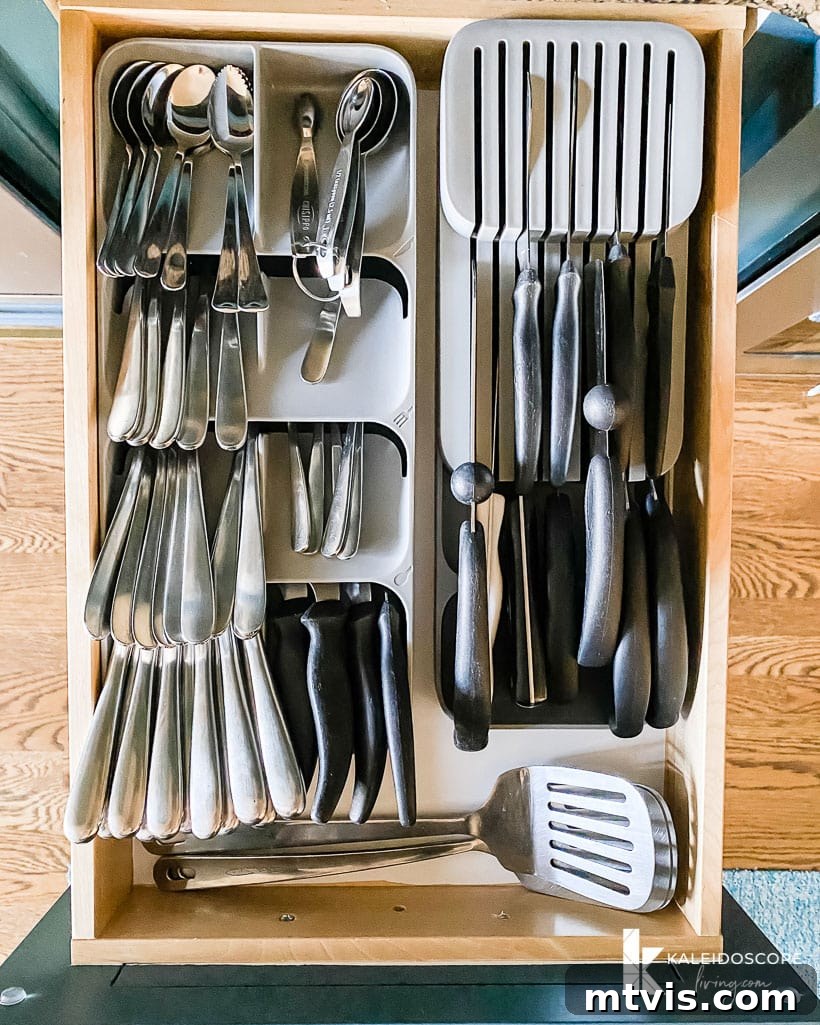
I also discovered these incredibly cool clear stacking organizers, which proved invaluable for condensing a variety of our miscellaneous kitchen items. Their clever design allows the top stack to slide smoothly back and forth, or even be removed entirely, providing easy access to the contents stored below. This adaptability made them perfect for maximizing vertical space within our drawers and cabinets, ensuring every inch was utilized efficiently. They’re a game-changer for keeping smaller, often-used items tidy and easily locatable.
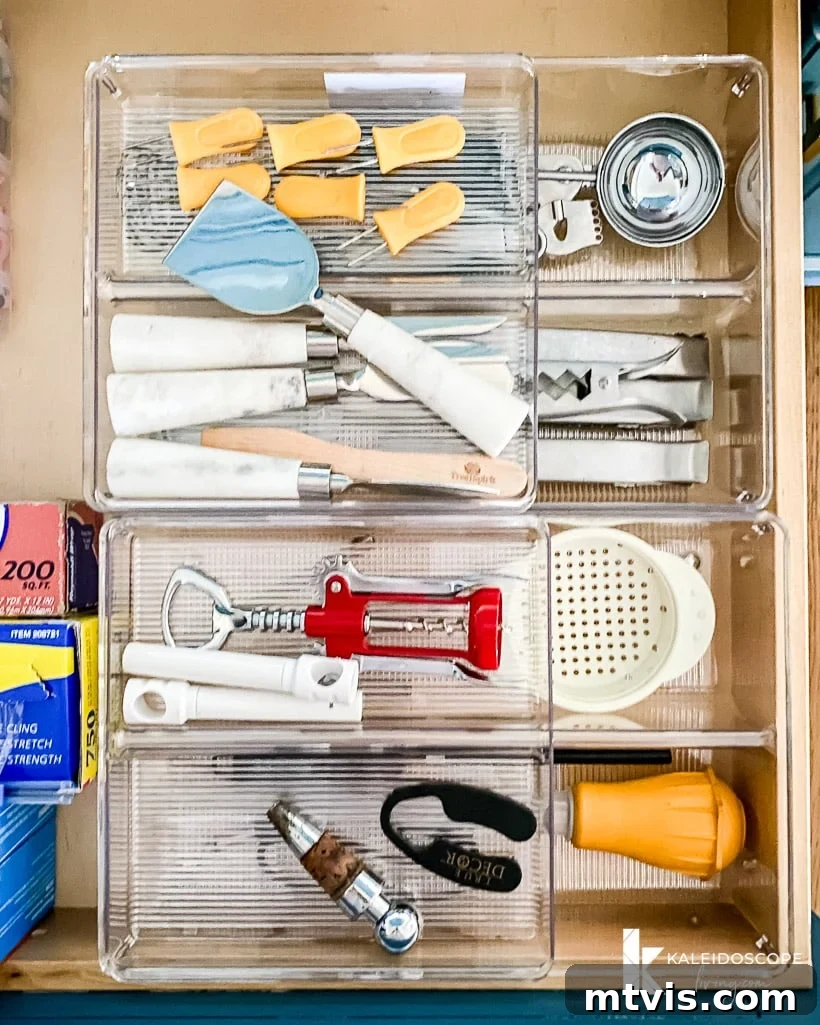
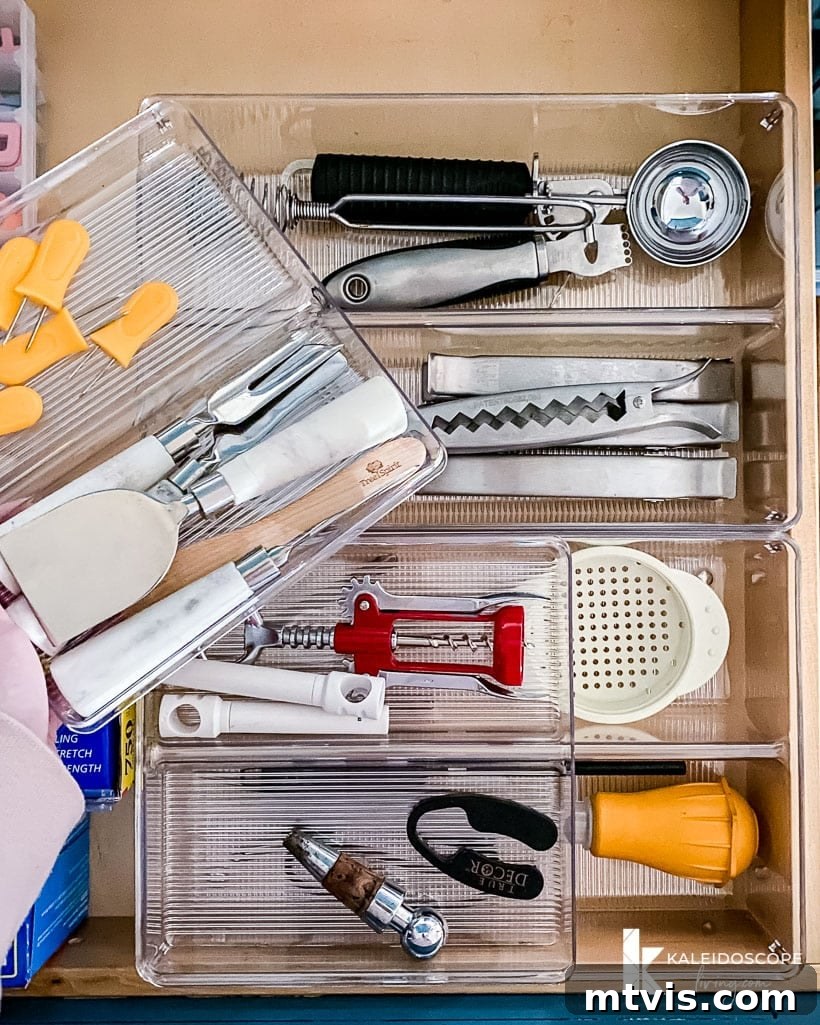
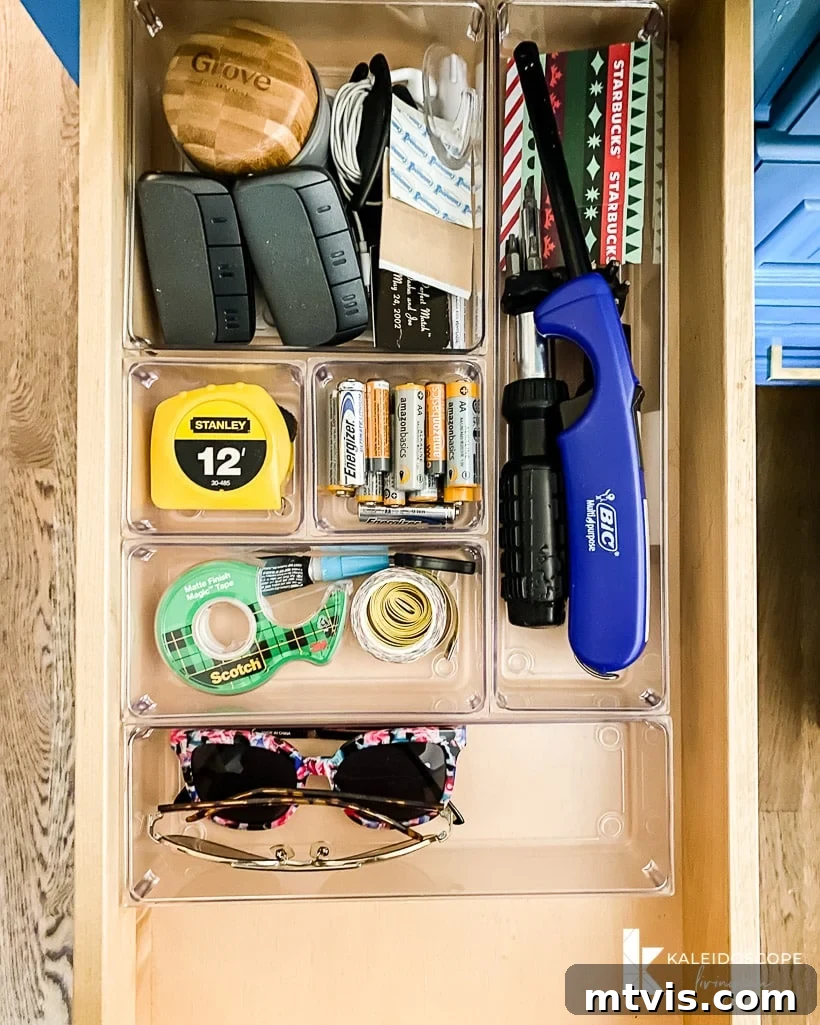
And finally, no kitchen organization project would be complete without tackling the dreaded “junk drawer”! I organized ours with this simple set of drawer organizers, and I have absolutely no regrets. It’s amazing how a designated spot for everything, even in a drawer for miscellaneous items, can bring such a sense of calm and order to the kitchen. These small, thoughtful additions have collectively transformed our kitchen into a space that not only looks beautiful but also functions seamlessly for our family’s daily needs.
The Joy of a Transformed Kitchen
Y’all, we truly LOVE our kitchen now. It has been completely transformed into a space that not only reflects our style but also functions incredibly well for our busy family. This makeover is a powerful reminder that you should never underestimate what you can accomplish with a little paint, some thoughtful organizing supplies, and a clear vision. The satisfaction of walking into a space that you’ve personally revitalized, on a budget, is truly unparalleled.
In addition to the key elements of our makeover, you might spot a few other details in the photos, such as our comfortable barstools, which contribute to the overall inviting atmosphere. Each piece was chosen to enhance the functionality and aesthetic of our renewed kitchen, proving that every detail counts in creating a harmonious space.
If you’re wondering how I approach transforming rooms and spaces throughout our home, I highly recommend checking out Designer in a Binder®. It’s my comprehensive guide to decorating your home with confidence and clarity, designed to help you create spaces you love without the guesswork.
And for even more exclusive content, behind-the-scenes sneak peeks of upcoming projects, and personal insights into our home transformations, be sure to subscribe to my newsletter before you head out! I share tips, tricks, and inspiration that you won’t find anywhere else.