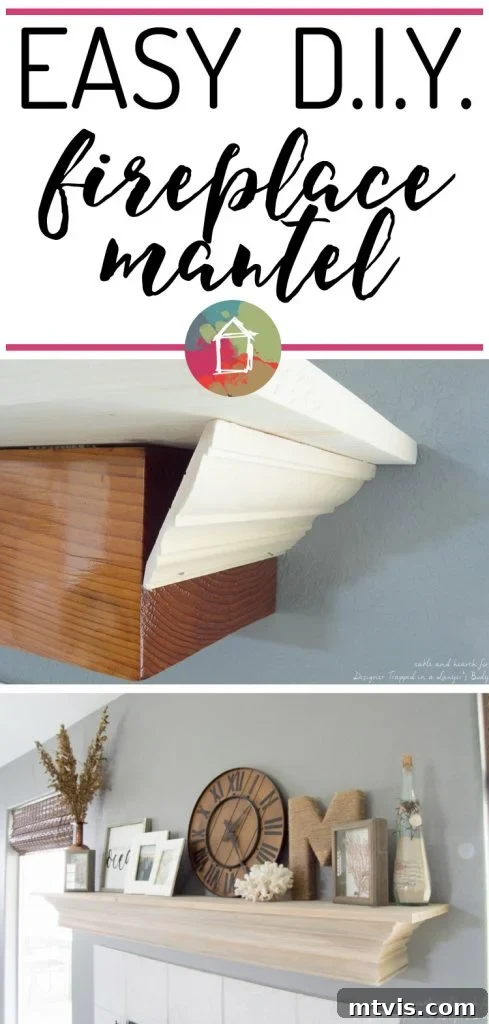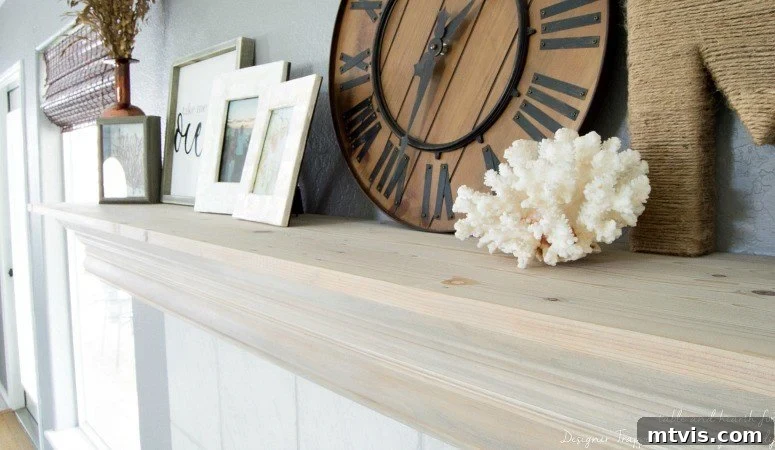
Hello fellow home enthusiasts and DTLB readers! Emily from Table & Hearth here, and I’m thrilled to be back to share another one of my absolute favorite home improvement projects. This month, we’re diving into a DIY fireplace mantel update that completely transformed the heart of our living room. Get ready to banish that old, dated mantel and welcome a stunning, custom-designed centerpiece with a beautiful weathered driftwood finish.
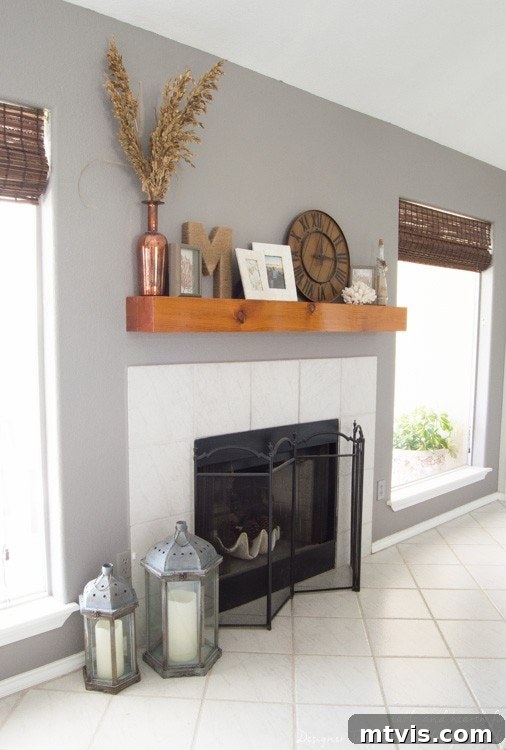
For too long, one of the biggest eyesores in our home stared back at me every day: our super orange-y, utterly boring fireplace mantel. It was a standard 7-inch by 7-inch square beam of pine, slathered with so much lacquer that it radiated an intensely shiny, artificial orange tone. There was absolutely nothing special about it, and it clashed terribly with our preferred neutral, light, and coastal-inspired decor. I knew a change was desperately needed, but the thought of stripping and refinishing seemed like a monumental task. Plus, I felt it needed more visual weight; it was frustratingly the same width as the surrounding fireplace tile, making it look undersized and uninspired.
Why a Fireplace Mantel Makeover is a Game-Changer
A fireplace mantel isn’t just a shelf; it’s often the focal point of an entire room. It dictates style, provides a canvas for seasonal decor, and can significantly impact the overall ambiance of your living space. An outdated or mismatched mantel can drag down the aesthetic of even the most thoughtfully decorated room. Our old mantel was a prime example – its vibrant orange hue and stark, utilitarian design drew attention for all the wrong reasons. We craved something that felt organic, serene, and truly reflective of our personal style. This DIY fireplace mantel project offered the perfect solution: a way to enhance its size and presence while achieving a sophisticated, coastal-inspired driftwood look without the hassle of a full demolition.
After careful consideration and a few measurements, I realized that with a wide enough top board and some strategically chosen molding, I could essentially “wrap” the entire existing structure, giving it a much-needed upgrade. This approach meant I could avoid the tedious stripping process and instead build a whole new aesthetic right on top of the old one. The vision for this DIY fireplace mantel was clear: a wider, more substantial piece that would exude rustic charm and coastal elegance. And so, the orange mantel’s days were officially numbered. Read on to discover the exact steps I took to bring this vision to life. This post contains some affiliate links for your convenience. Click here to read my full disclosure policy.
DIY Fireplace Mantel Tutorial: Achieving a Stunning Driftwood Finish
This project is surprisingly accessible, even for those new to woodworking. With the right tools and a bit of patience, you can create a high-impact transformation that looks professionally done. Let’s gather everything you’ll need for this exciting DIY fireplace mantel journey.
Essential Supplies for Your DIY Fireplace Mantel Project:
- Tall Pine Crown Molding (approximately 3 inches or more in height, chosen to complement your desired profile and mantel depth)
- Pine Flat Trim (such as a chair rail molding or similar decorative trim that pairs well with your crown molding. Browse options to find a profile you love, as its width and design will contribute significantly to the new mantel’s character)
- Pine Project Panel Board (mine was 3/4″ x 12″ x 72″, providing a new, wider top surface for the mantel. Ensure it’s long enough to extend beyond your existing mantel and provide sufficient overhang)
- Power Sander (a good orbital or random orbit sander is invaluable for preparing wood surfaces. This cordless model is my personal favorite and what I used, offering freedom of movement)
- Brad Nailer (I highly recommend this specific brad nailer; it’s battery-powered and doesn’t require an air compressor, making it incredibly convenient for DIY projects)
- Wood Filler (for seamlessly patching nail holes and minor gaps, ensuring a smooth, finished appearance)
- Compound Miter Saw or Handsaw with a Miter Box (essential for making precise angled cuts on your molding. A compound miter saw will make the job much easier, especially for crown molding)
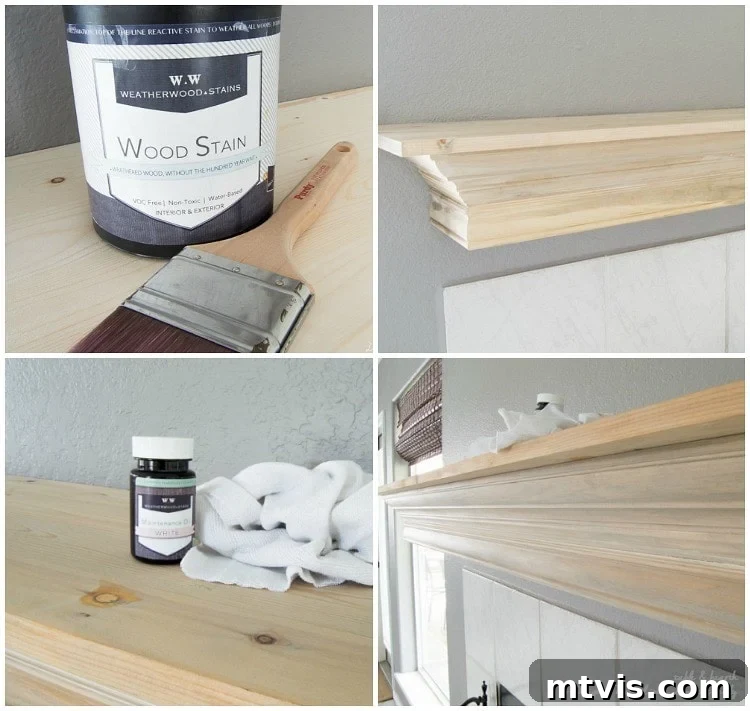
- Driftwood Stain (I achieved my desired look using Weatherwood Stain in Reclamation, a reactive stain that authentically ages new wood)
- Top Coat / Sealer (I used Weatherwood Stain’s White Maintenance Oil, which not only seals but also imparts a subtle whitewashed effect, enhancing the weathered look)
Step-by-Step Guide to Your DIY Fireplace Mantel Transformation:
1. Prepare and Level the Top Board:
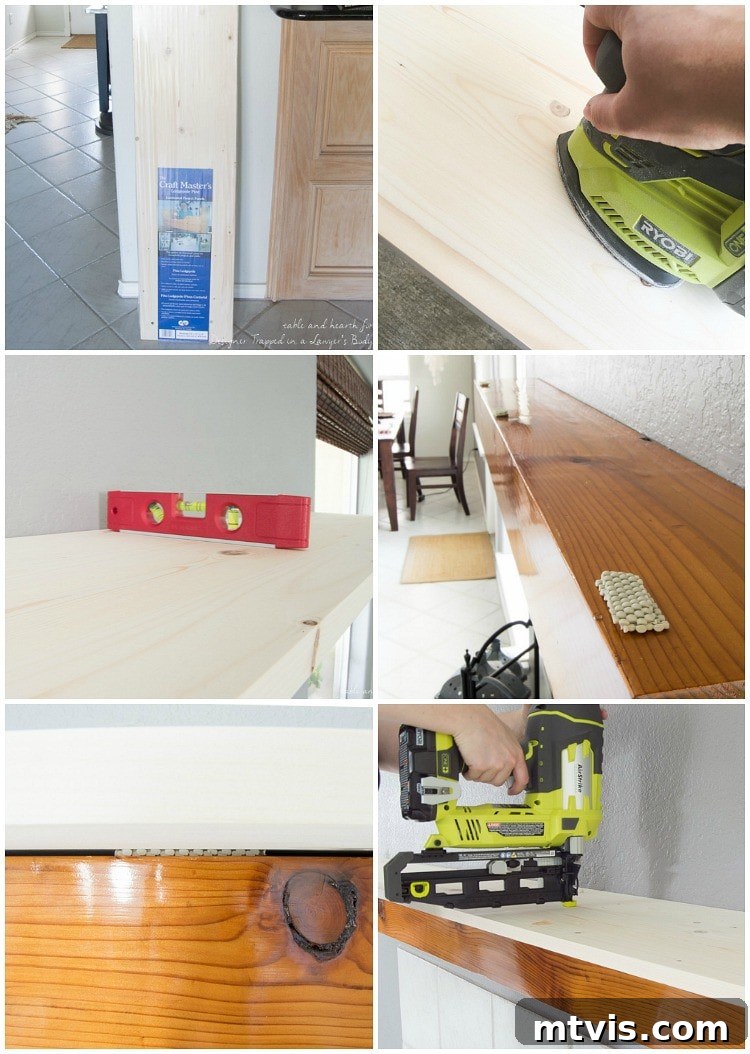
The first crucial step involved thoroughly sanding the new pine project panel. This prepared the wood to accept the stain evenly and ensured a smooth finish. Our existing mantel, unfortunately, wasn’t perfectly level; it slanted about 1/4 inch towards the front. To correct this and ensure our new, wider top board sat perfectly flat, we improvised with some “super high-tech leveling devices”—strips of non-slip grip material strategically placed at the front edge of the old mantel. These subtle shims effectively lifted the front edge, allowing the new panel to rest levelly. Once the new wood panel was centered and perfectly aligned over the old mantel, I securely fastened it in place using my trusty brad nailer, driving nails every 8-10 inches along its length to prevent any movement.
2. Select and Plan Your Molding Layout:
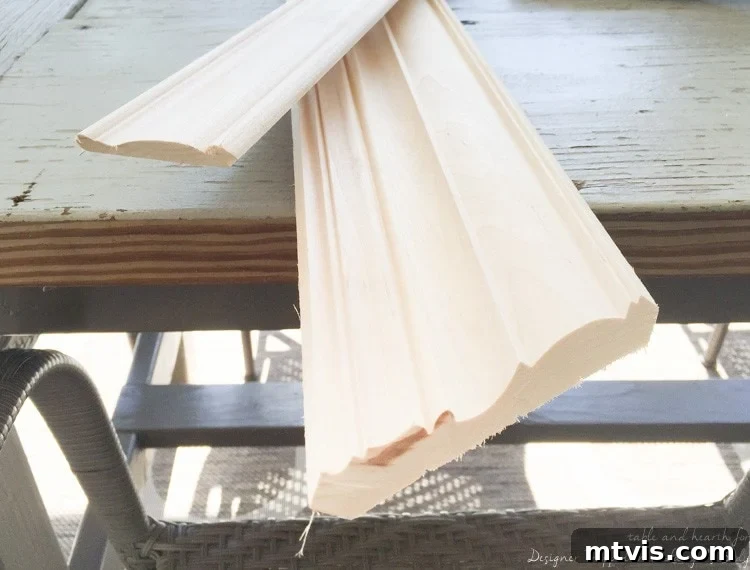
To give the mantel its impressive new depth and character, I opted for two distinct types of molding: a wide crown molding and a complementary flat molding. Using two separate pieces significantly simplified the cutting process, especially when dealing with the complex angles of crown molding. The crown molding required precise miter and bevel cuts to create seamless corners, while the flat molding typically only needed simple 45-degree miter cuts for its corners. This combination of profiles added rich architectural detail and bulk to the formerly meager mantel, making it feel substantial and grand.
3. Master Crown Molding Cuts (Practice Makes Perfect!):
If you’ve never worked with crown molding before, let me emphasize this: practice, practice, practice! I was certainly not a math major, and cutting crown molding can feel intimidating at first due to the compound angles required. After a brief crash course in understanding miter and bevel settings and how the molding sits against the wall/ceiling (or in our case, the mantel), I started with a few scrap pieces of inexpensive crown molding. This “practice crown” was invaluable. It allowed me to experiment with different angles and visualize how the pieces would join without risking my good, unstained pine. It took several tries to get the hang of it, but investing time in practice saved me money and frustration in the long run. Seriously, do not skip this step!
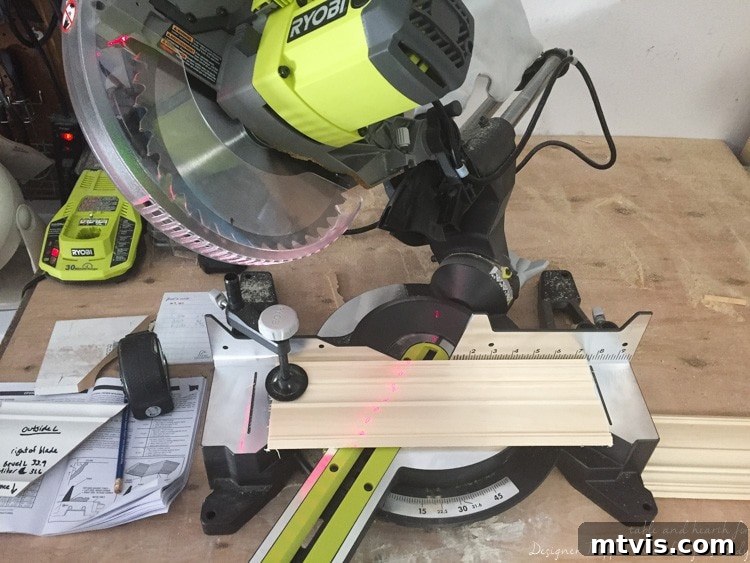
4. Cut, Dry Fit, and Secure the Molding:
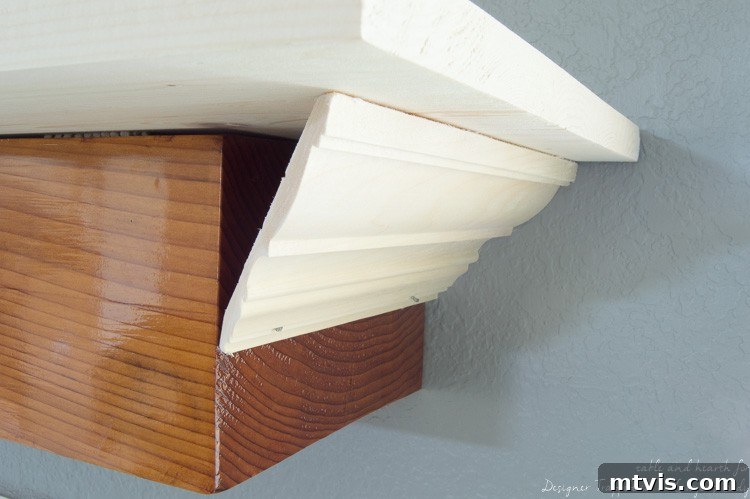
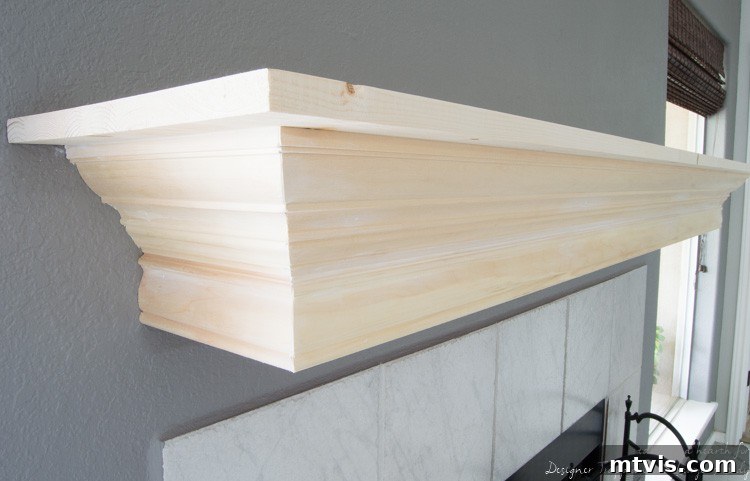
Once I felt confident in my cutting abilities, the real work of assembling this DIY fireplace mantel began. I carefully cut all three pieces of the good crown molding (front and two sides) and the corresponding flat trim pieces. Before applying any nails, I performed a “dry fit” – temporarily placing all the pieces into position around the mantel. This crucial step allowed me to check that all the mitered corners met perfectly and that the overall fit was snug and precise. Any minor adjustments could be made at this stage. Once satisfied with the fit, I used my brad nailer to securely attach each piece of molding to the existing mantel and the newly installed top board. I then went back and carefully hammered in any brad nails that were not fully flush and filled all nail holes and any slight gaps at the joints with wood filler. This creates a seamless, professional finish.
5. Achieve the Beautiful Driftwood Finish:
After the wood filler had completely dried, I lightly sanded the patched areas to ensure they were smooth and flush with the surrounding wood. I then vacuumed away all dust and debris, ensuring a clean surface for staining. Now for the magic: the driftwood finish! I applied the Weatherwood Stain in Reclamation evenly over all surfaces of my DIY fireplace mantel. This reactive stain is hands-down my favorite method for achieving a gorgeous, authentic driftwood appearance on new wood. Unlike traditional stains that simply add color, Weatherwood Stain reacts with the tannins in the wood, creating varying shades of weathering that literally change before your eyes! On pine, which I used for this project, it produces a stunning, subtle gray tone that mimics years of natural exposure. It’s incredibly cool to watch the transformation unfold.
After the initial coat, I carefully reapplied a little more stain to any areas that hadn’t grayed as much as I desired, ensuring a consistent weathered look. I then allowed the stain to dry thoroughly for a few days to allow the chemical reaction to fully develop. Finally, I wiped on a coat of Weatherwood White Maintenance Oil over everything. This oil serves a dual purpose: it acts as a protective top coat, sealing the wood beautifully, and it also imparts a delicate, subtle whitewash finish, further enhancing the weathered, coastal aesthetic. The combination creates a depth and authenticity that’s hard to achieve with regular stains.
The Stunning Result: A Transformed Living Space
This entire project, from sanding to the final coat of oil, only took an afternoon to complete, spread over a couple of days to allow for drying times. The impact, however, has been monumental. We now have a beautiful DIY fireplace mantel with a captivating driftwood finish that we absolutely adore. The mantel is no longer a small, garish detail; it’s bigger, wider, and so much more reflective of our home’s style. It perfectly complements our neutral palette and coastal decor, making the living room feel more cohesive and inviting. This method truly beats the labor-intensive process of stripping, sanding, and refinishing an existing piece.
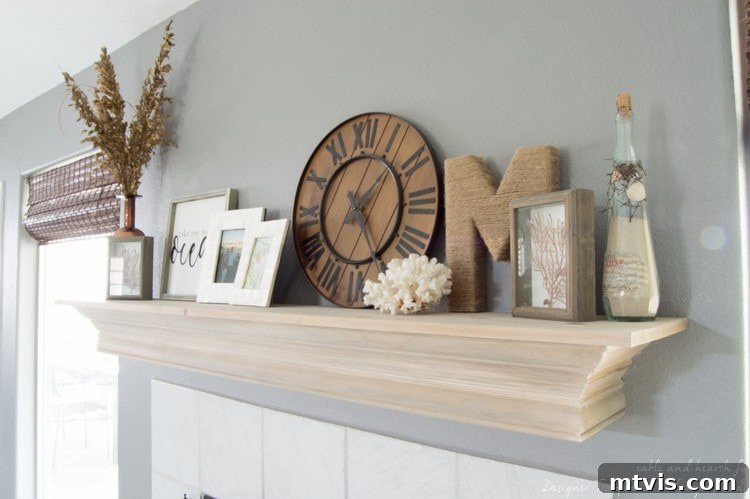
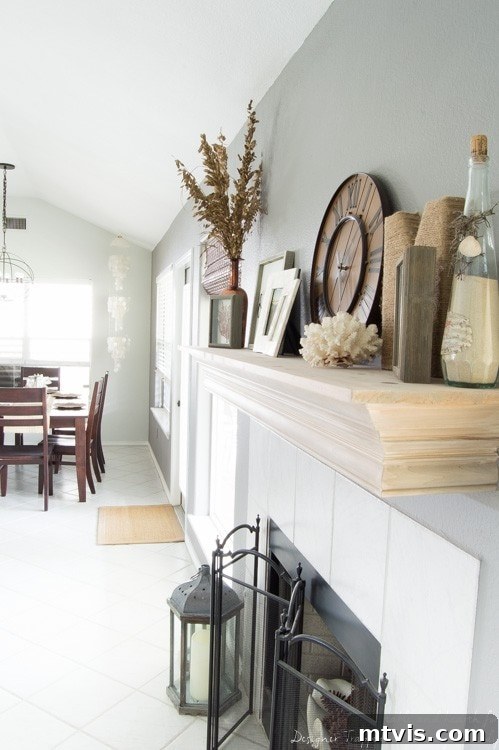
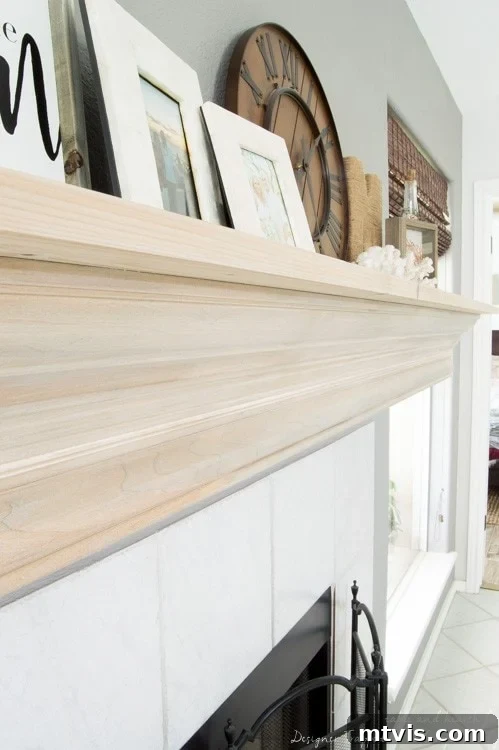
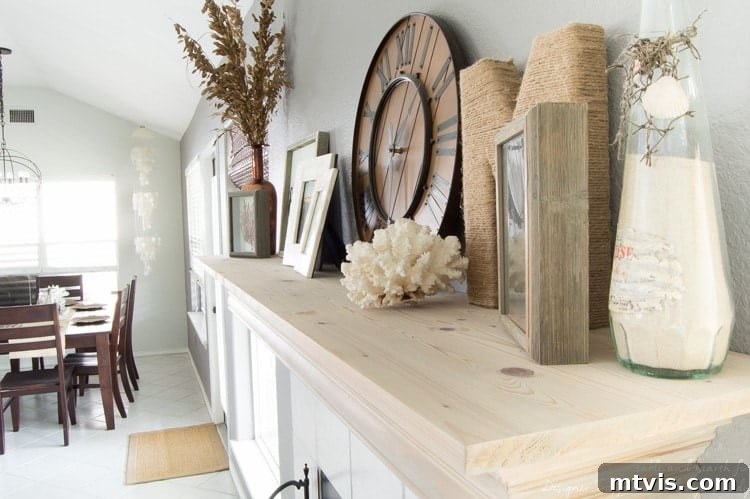
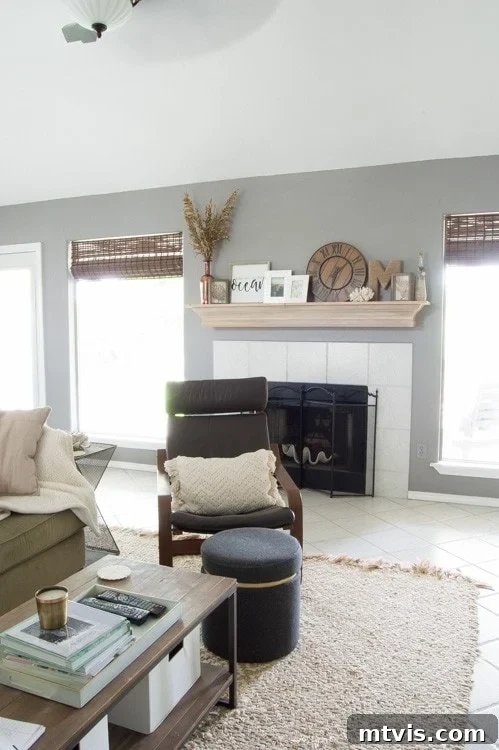
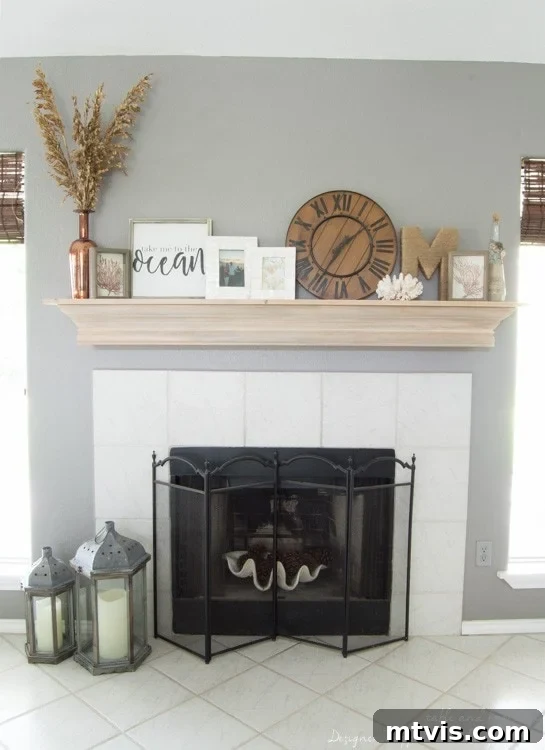
I sincerely hope this DIY fireplace mantel makeover tutorial inspires anyone out there contending with an unsightly orange bar, or any similarly outdated and underwhelming mantel. It truly is a quick and relatively easy update that yields dramatic results, transforming your fireplace into a much prettier and more impactful focal point. I am SO incredibly happy to have this bigger, more beautiful mantel that now blends seamlessly into the rest of our decor. And the best part? It was significantly easier to achieve than I had initially anticipated!
Thank you for joining me on this creative journey! I’d love for you to visit me over at Table & Hearth for more home inspiration and DIY projects. You can also connect with me on social media: find me on Facebook, Instagram, Twitter, or Pinterestto see what I’m up to! If you enjoyed this project, you’ll probably also love these other popular projects from my blog (click on each photo to view the full post):
If you found this post helpful and inspiring, please be sure to pin it! This way, you can easily refer back to it when you’re ready to embark on your own fireplace mantel transformation.