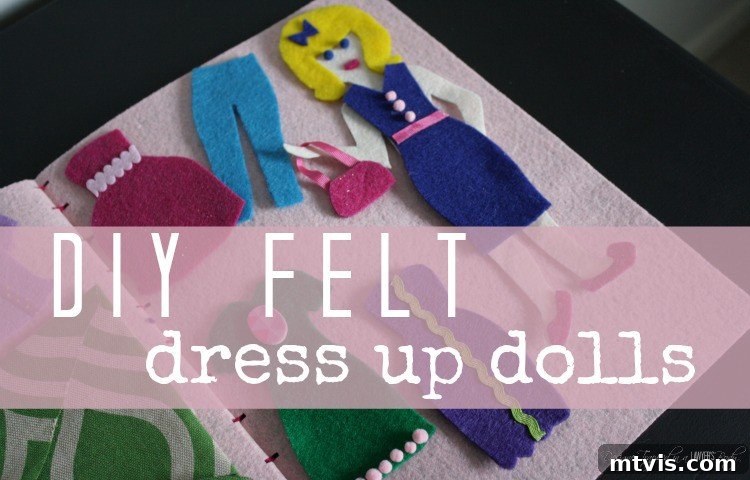
Unleash a world of imagination with these delightful DIY felt dress-up dolls! This project is not only incredibly fun and easy but also remarkably inexpensive, making it the perfect craft to bring joy to any little girl in your life. The best part? You don’t need any complex sewing skills or fancy tools to create these charming, durable toys. Get ready to dive into a creative adventure that promises hours of imaginative play and a truly personalized gift!
DIY Felt Dress-Up Dolls: An Easy No-Sew Craft for Endless Imaginative Play
Table of Contents
Do you remember the sheer delight of playing with dress-up dolls as a child? For many of us, those memories evoke a sense of nostalgia for simpler times, when imagination was our most prized toy. I certainly do! My own childhood was filled with paper dolls, their delicate clothes held on by tiny, often fragile, paper tabs – a detail that might reveal my age to some of you!
While those paper dolls brought endless fun, their durability left something to be desired. That’s why, for my own sweet girls, I wanted to create a more robust and long-lasting version of dress-up dolls that could withstand countless hours of creative play. The solution? Felt! This versatile material makes for incredibly durable, tactile, and endlessly customizable dolls that are perfect for little hands. This project was not only fun and easy to make, but it also resulted in a cherished toy that will stand the test of time. Read on for the complete, step-by-step tutorial to make your very own felt dress-up dolls.
This post contains affiliate links for your convenience. Click here for my full disclosure policy.
How to Make Felt Dress-Up Dolls: A Detailed Tutorial
Creating these felt dress-up dolls is a rewarding project that combines simple crafting techniques with boundless creative potential. The beauty of felt lies in its texture, its ability to stick to itself, and its durability – qualities that make it ideal for this kind of interactive toy. Follow this detailed tutorial to craft personalized dolls that will inspire storytelling and imaginative scenarios for years to come.
Materials You’ll Need
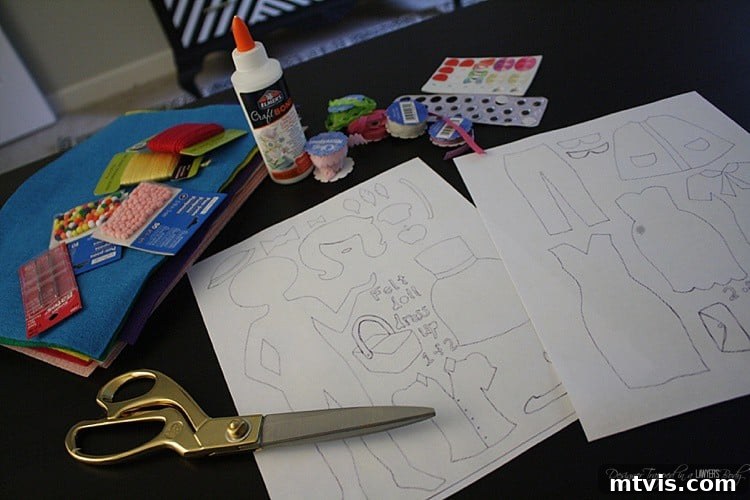
Gathering your materials is the first exciting step in bringing your felt dolls to life. The key is to select a variety of colors and textures of felt to ensure a vibrant and diverse wardrobe for your dolls. Here’s a comprehensive list:
- 2 pieces of Sticky Stiff Felt: This will form the sturdy covers of your doll’s “book,” providing structure and protection. Choose a color that will be appealing for the cover.
- 2 pieces of stiff felt in a skin tone color: Opt for a peach, brown, or cream color to create the doll bodies. Stiff felt helps the dolls maintain their shape during play.
- 5 or more sheets of regular felt in assorted colors: This is where the fun really begins! These sheets will be used for all the doll’s clothing, accessories, and imaginative embellishments. Think about a rainbow of colors to allow for diverse outfits.
- 1 piece of felt in yellow, brown, or black: For the doll’s hair. Consider various shades to allow for different hair colors and styles.
- Elmer’s Craft Bond Fabric and Paper Glue: A reliable craft glue is essential for securely attaching all the felt pieces without the need for sewing. Look for one that dries clear.
- Yarn and a Yarn Knitting Needle: For stitching the “book” cover together. Choose a yarn color that complements your felt covers.
- Hole punch: A rectangle hand punch or a standard single-hole punch works perfectly for creating neat holes for stitching.
- Scrap fabric: Ideal for creating the storage envelope within the book. Repurpose old cotton fabrics or remnants.
- Ribbon, ric rac, Tiny Pom Poms, and other embellishments: These decorative touches will add personality and flair to your dolls’ outfits. Beads, glitter glue, or small buttons (ensure they are securely attached for young children) can also be used.
- Doll and clothing templates: The wonderful templates from Smile and Wave are an excellent starting point, saving you time on design. Alternatively, you can sketch your own!
- A ruler: For precise measurements, especially when preparing the book covers.
- A marker: For tracing templates and marking stitching points.
- Scissors and/or a cutting machine: Sharp fabric scissors are a must for clean cuts. If you own a cutting machine like a Silhouette CAMEO, it can significantly speed up the process for intricate designs.
Crafting Your Doll and Her Wardrobe
This is where your felt truly transforms into a beloved toy. Taking time with each step will ensure your dolls are not only beautiful but also sturdy enough for endless adventures.
- Cut out your doll templates: Begin by carefully cutting out all your doll body and clothing templates. Accuracy here will make the assembly much smoother.
- Prepare your doll’s body:
- First, cut out the main doll body using your chosen skin-tone stiff felt. The stiffness will give the doll a firm base, perfect for dressing.
- Next, select a regular felt color for the doll’s hair. Whether you envision a blonde, brunette, or even a vibrant purple doll, cut out the hair shape using your template. My girls are blonde, so we chose a lovely golden yellow felt for their dolls’ hair. Use your craft glue to secure the hair firmly onto the doll’s head.
- To add facial features, cut out small lip shapes from a contrasting felt color (e.g., pink or red) and glue them into place.
- Finally, for eyes, glue small pom-poms, tiny felt circles, or even draw them on with a permanent fabric marker. Ensure all glued parts are dry before proceeding.
- Cut out clothes and accessories: Now for the fun part – creating the wardrobe! Using your regular, soft felt sheets, carefully cut out a variety of outfits, shoes, hats, and accessories based on your templates. Think about different occasions: a party dress, pajamas, a casual outfit, or even a superhero costume. The more variety, the more imaginative the play will be!
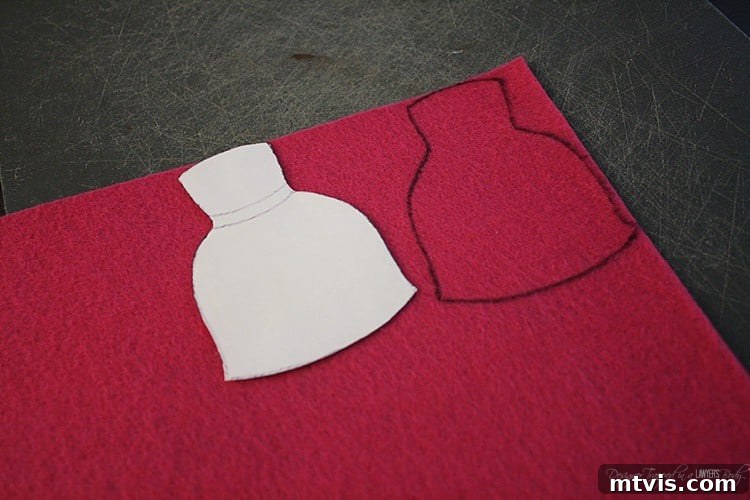
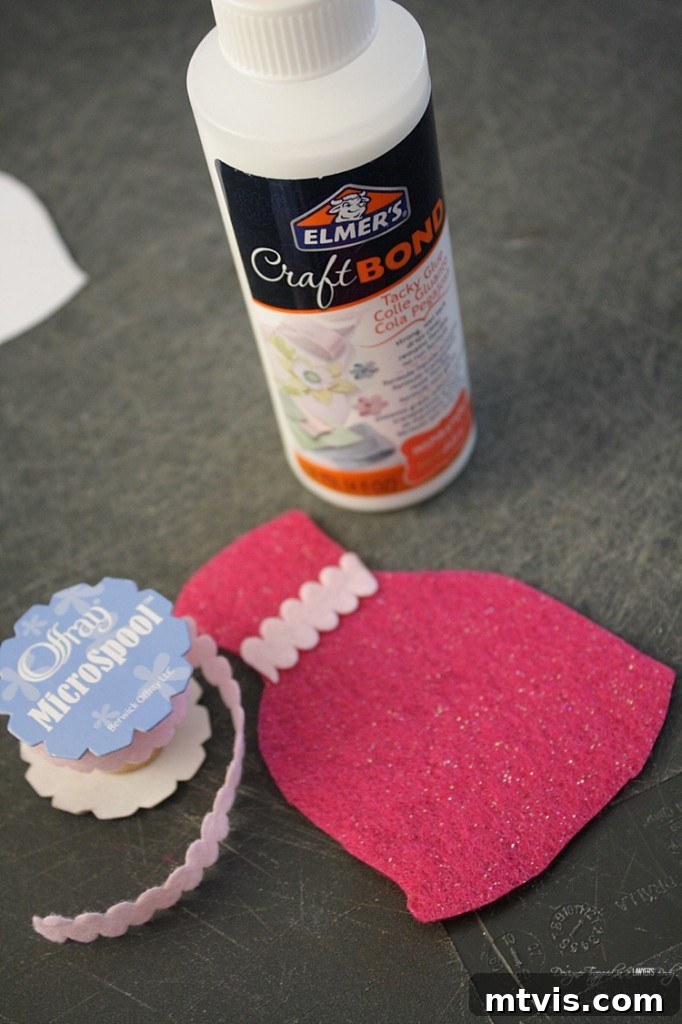
- Embellish your clothes and accessories: This is where you can truly let your creativity shine! Glue tiny ribbons, ric rac, miniature pom-poms, small buttons (again, securely attached!), or even glitter glue onto the felt clothes to add unique details. Don’t be afraid to mix and match colors and textures. There are no rules in imaginative play, so encourage whimsical designs! Think about creating patterns, adding small “buttons” or “zippers” with felt scraps, or even little pockets.
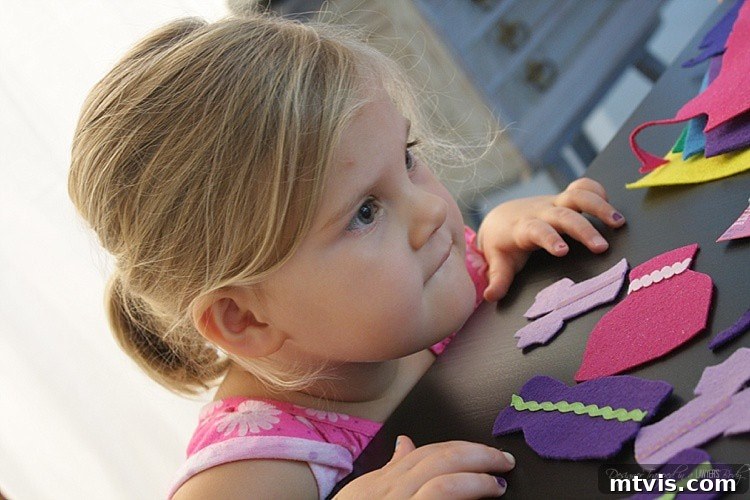
And remember, crafting is always more enjoyable when you have cute little assistants eager to help every step of the way! Their enthusiasm is contagious and adds an extra layer of joy to the project.
Assembling the Dress-Up Doll “Book”
The “book” is a genius addition to this project, providing a portable and organized home for your dolls and their extensive wardrobes. It makes the felt dolls perfect for travel, quiet time, or just keeping everything neatly together.
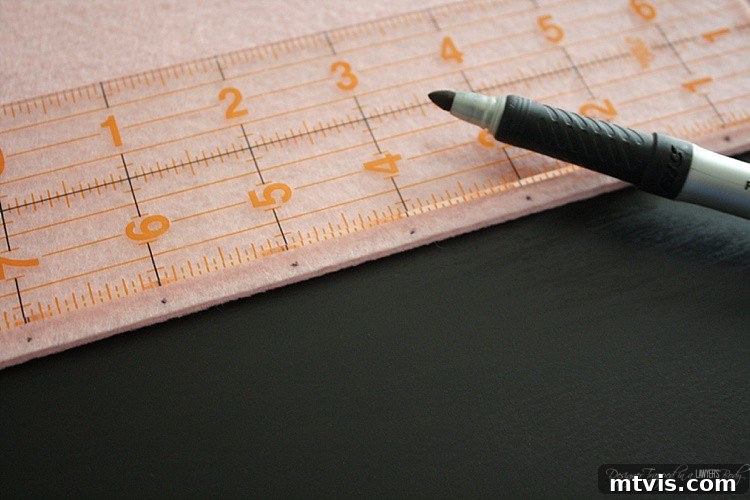
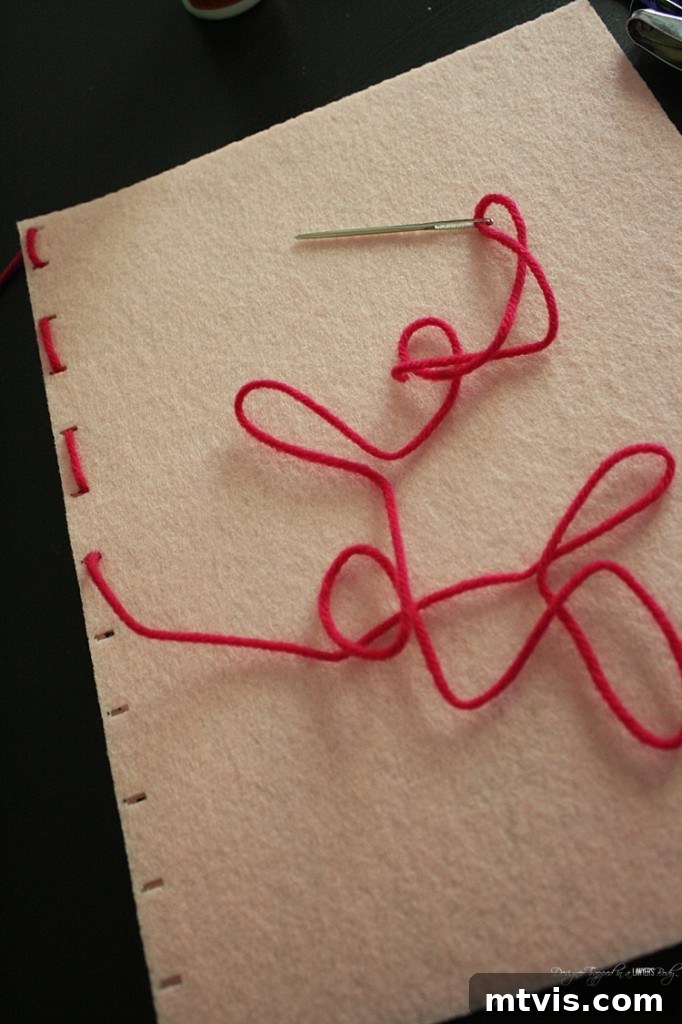
- Prepare your book covers: Take two pieces of your chosen color of sticky stiff felt. These will be the front and back covers of your felt doll book. Using your ruler and marker, mark 1-inch increments along one long edge of both felt pieces. These marks will guide your hole punching.
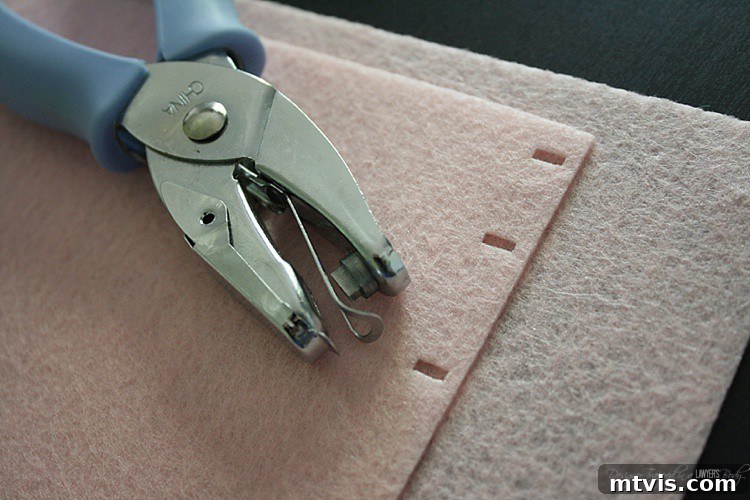
- Punch the binding holes: Carefully punch holes on each of the marks you just made on both pieces of stiff felt. The rectangle hand punch creates a unique, decorative edge, but a standard hole punch works just as well. Ensure the holes align perfectly when the two pieces are laid together.
- Stitch the book together: Thread your chosen yarn through the large eye of your yarn knitting needle. Then, carefully stitch the two pieces of stiff felt together along the punched edges. This creates a durable binding for your felt book. You can use a simple running stitch or a blanket stitch for a more decorative finish. Secure the ends of the yarn with a knot.
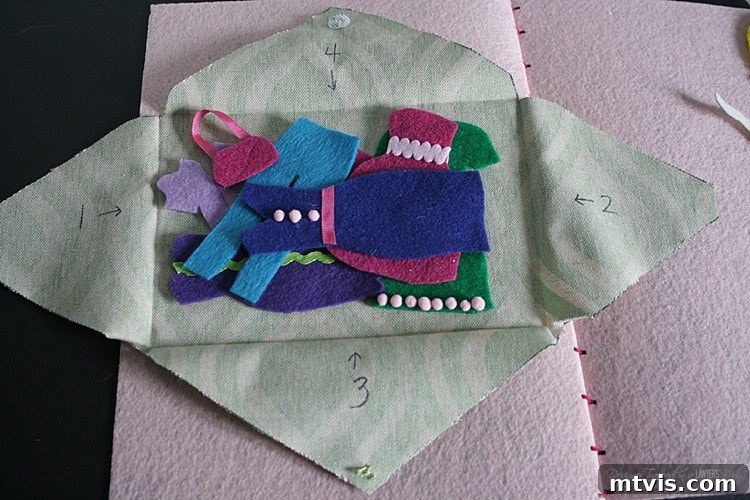
- Create a storage envelope for clothes: A critical element for keeping all those tiny outfits organized!
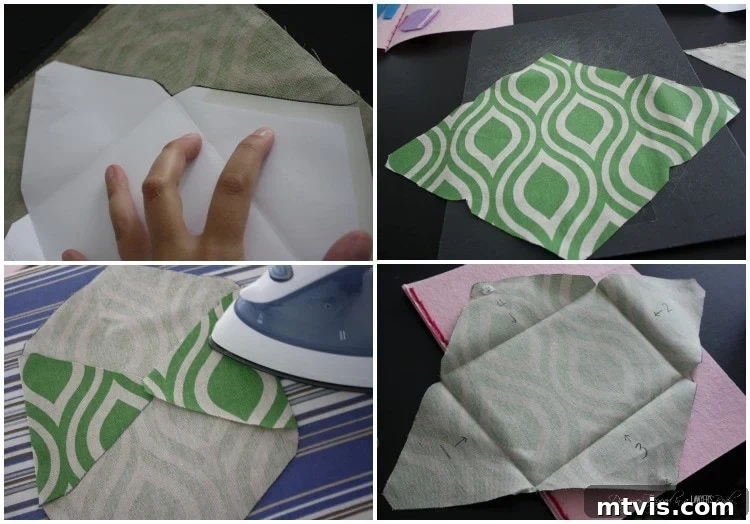
- I found it easiest to use a standard paper envelope as a template. Trace its shape onto a piece of scrap fabric – cotton or a similar sturdy material works well. Cut it out.
- Next, iron the seams of your fabric envelope for crisp edges.
- To keep the envelope closed, sew or glue on small round Velcro circles. This allows for easy opening and closing for little hands.
- Labeling the flaps with numbers or simple instructions (e.g., “Fold 1,” “Fold 2”) using a permanent marker can help children learn to fold and put away the clothes themselves – a great practical life skill!
- Finally, use your craft glue to firmly attach this fabric envelope to the inside of your felt “book.” This provides a perfect, self-contained storage solution for all the doll’s accessories.
Personalize Your Doll’s Book Cover
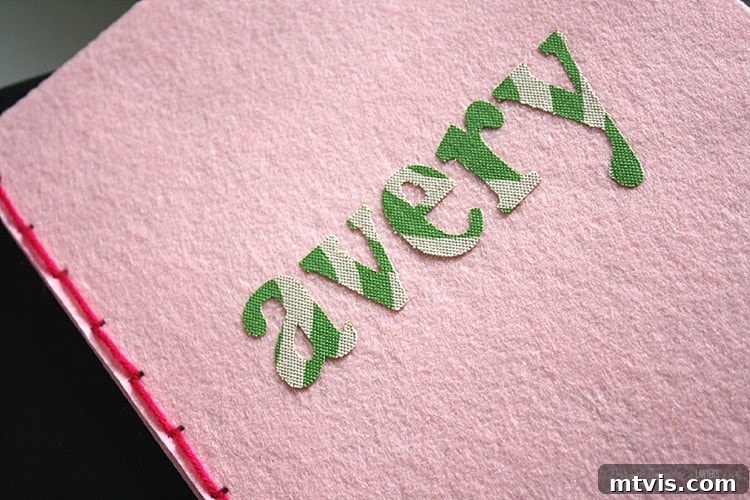
Adding a child’s name to the book cover makes this handmade gift even more special and reduces sibling squabbles, especially if you’re making multiple! While this step is entirely optional, it adds a wonderful touch of personalization.
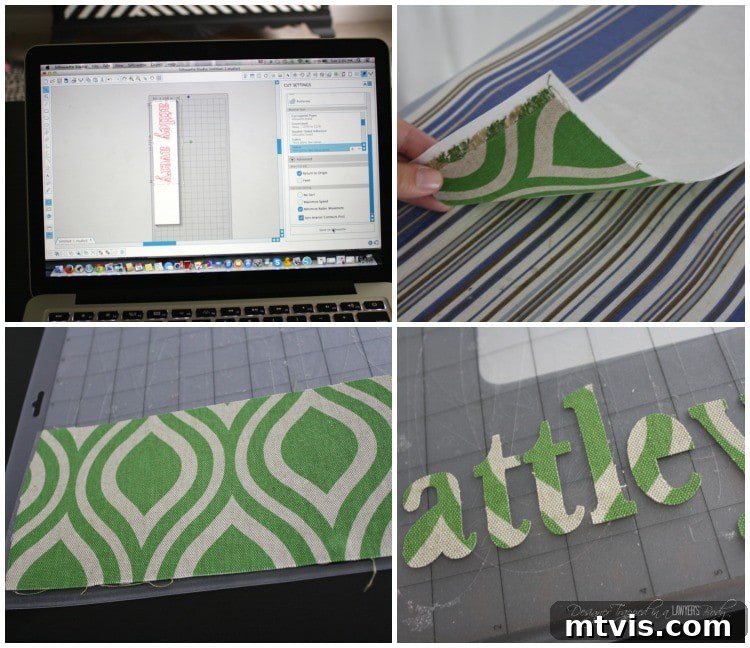
- Prepare your fabric for cutting: If you have a cutting machine like a Silhouette CAMEO, you can easily cut out fabric letters. To do this, iron a piece of Silhouette Clean Cut Fabric Interfacing to the back of your chosen fabric. This interfacing provides stability, allowing the fabric to be cut cleanly. If you don’t have a cutting machine, you can simply hand-cut letters from felt or fabric.
- Cut out the name: Using your Silhouette Fabric Blade and Silhouette Studio software (or your sharp scissors), precisely cut out the letters of your child’s name.
- Attach the name to the cover: Finally, use your craft glue to carefully attach each letter onto the front of the felt “book.” Arrange them neatly for a polished finish.
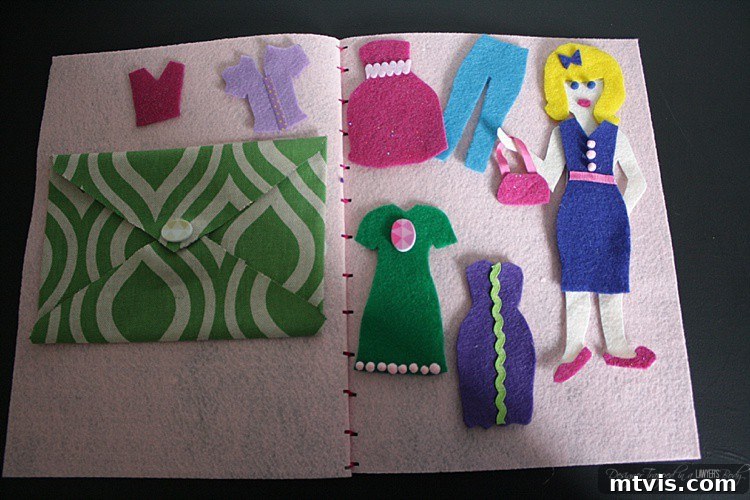
And just like that, you’ve created a truly unique and engaging toy! Witnessing the final product is incredibly satisfying. These felt dress-up dolls make the PERFECT Christmas, Hanukkah, or birthday gift for any little girl, promising endless hours of screen-free fun.
The Joy and Benefits of Felt Dress-Up Dolls
My girls, Attley and Avery, absolutely adore their felt dress-up doll sets! They’ve already spent countless hours immersed in creative play, and I’m thrilled to report that these durable felt dolls are holding up wonderfully. It’s fascinating to watch them invent elaborate stories about their dolls’ daily lives. For instance, their dolls often “come home from work” and immediately change into their pajamas – I have absolutely no idea where they observed that behavior, but it always brings a smile to my face!
Beyond the sheer fun, these DIY felt dress-up dolls offer a wealth of developmental benefits for children:
- Fosters Imagination and Creativity: With a variety of outfits and scenarios, children are encouraged to create their own narratives, fostering imaginative thinking and storytelling skills.
- Enhances Fine Motor Skills: Manipulating the small felt clothes and attaching them to the dolls helps develop dexterity and hand-eye coordination.
- Promotes Independent Play: These dolls are perfect for quiet, independent play sessions, allowing children to entertain themselves while building self-reliance.
- Encourages Role-Playing: Dressing dolls up for different roles (e.g., doctor, princess, chef, everyday person) helps children explore various social situations and understand the world around them.
- Boosts Decision-Making Skills: Choosing outfits and accessories involves making choices, which subtly hones decision-making abilities.
- Durable and Travel-Friendly: Unlike traditional paper dolls, felt is incredibly resilient, making these dolls ideal for car rides, waiting rooms, or simply moving from room to room without fear of damage. The “book” design keeps everything contained and organized.
- Sensory Engagement: The soft, tactile nature of felt provides a pleasant sensory experience for young children.
If you think this is a fantastic idea for a child in your life, I would be so grateful if you’d share it on Pinterest or Facebook to inspire other crafters and parents!
More Inspiring Ideas for Kids’ Spaces
SEE ALL kid’s spaces
-
IKEA Billy Bookcase Hack for Loads of Storage
-
Fun and Stylish Playroom Décor Ideas & Tips
-
28 Dreamy Bedroom Ideas for Girls
-
How to Decorate Bedroom Doors to Look Like Apartment Doors
-
25 Unique Bedroom Ideas for Teen Boys and Girls
-
30 Genius Shared Bedroom Ideas for Kids
Wondering how I approach transforming rooms and spaces in our home? Check out Designer in a Binder®, my comprehensive guide to affordable and stylish home decoration.
And if you want exclusive content and behind-the-scenes sneak peeks, be sure to subscribe before you head out!