
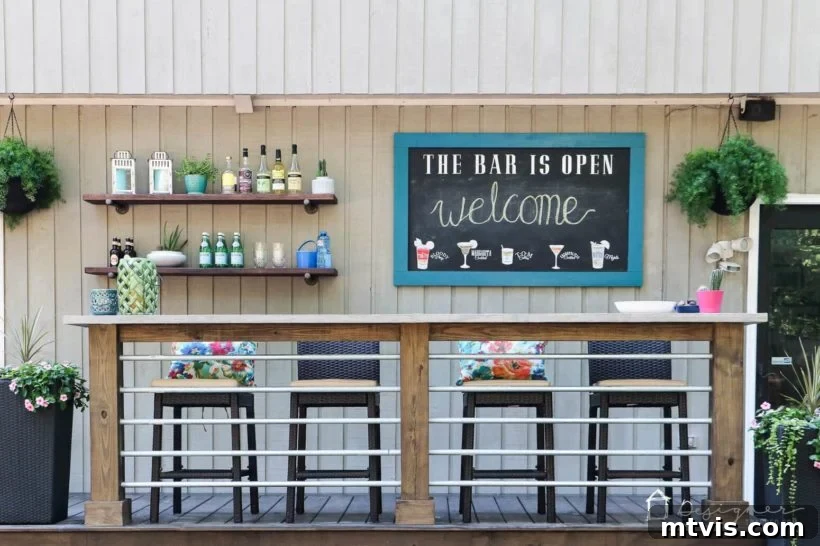
Craft Your Own Durable DIY Outdoor Chalkboard: A Comprehensive Guide
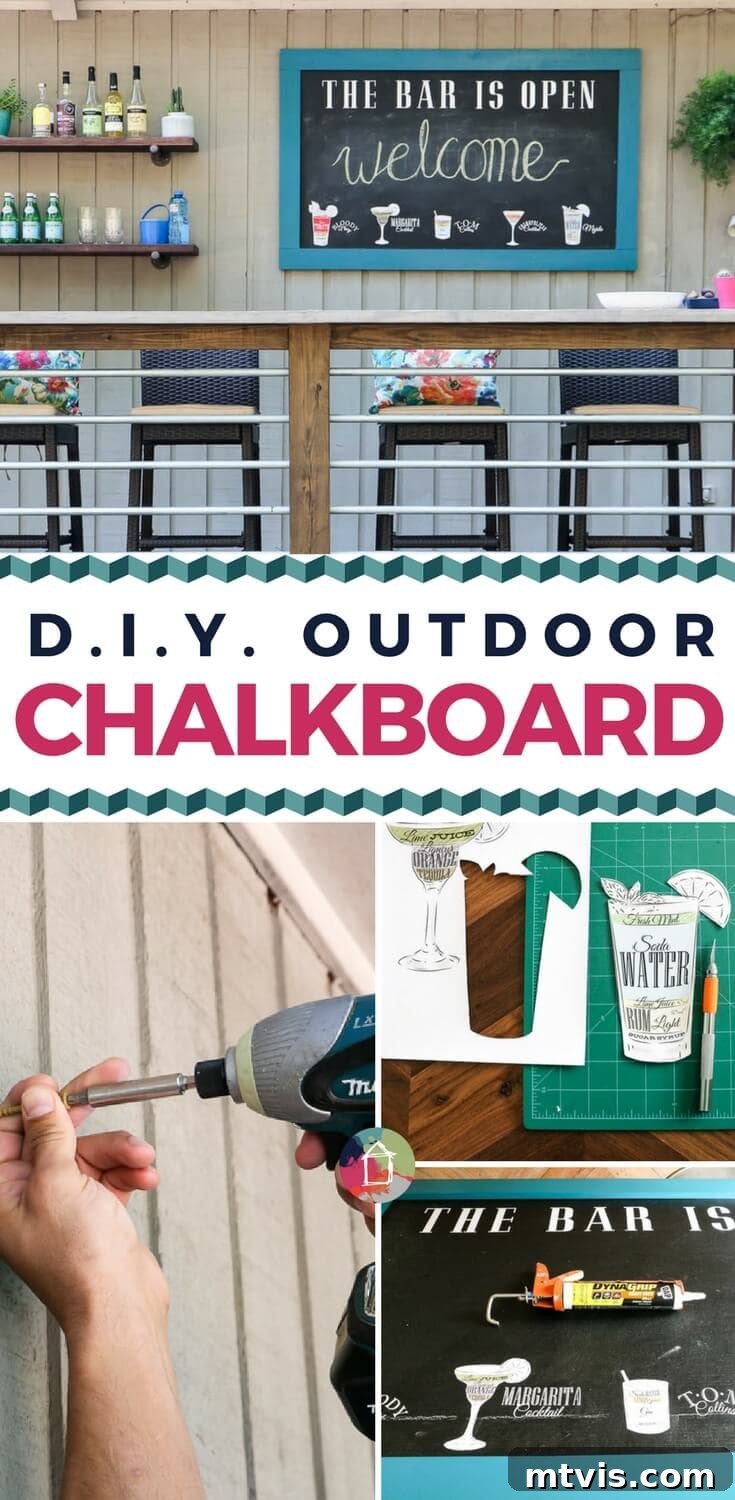
Transforming your outdoor living space into a hub of creativity and fun is easier than you think! If you’ve ever dreamt of having a dedicated spot for messages, art, or even a delightful drink menu on your patio, then learning how to make a durable DIY outdoor chalkboard is the perfect project for you. This comprehensive tutorial will guide you through every step, ensuring you create a charming and resilient chalkboard that stands up to the elements.
It’s quite amusing to reflect on how long it’s taken to finally share this tutorial, considering our own DIY outdoor chalkboard has been a cherished part of our outdoor setup for nearly a year! However, this delay offers a significant advantage: I can confidently attest to its exceptional durability and resistance to various weather conditions. It has truly endured the seasons without a single issue, proving its worth as a fantastic addition to our DIY deck bar and the larger deck renovation project we completed last year. Full disclosure: it still proudly displays “welcome” after all these months, which, admittedly, is a bit overdue for an update. But I’ve made a firm commitment to start jotting down new messages and seasonal greetings very soon! Read on to discover just how simple it is to craft your very own weatherproof outdoor chalkboard.
This post is proudly sponsored by DAP, and contains affiliate links for your convenience. This means that if you make a purchase after clicking on one of my links, I may earn a small commission, but at no extra cost to you. Click here to read my full disclosure policy.
Why You Need a DIY Outdoor Chalkboard
An outdoor chalkboard isn’t just a simple DIY project; it’s an investment in outdoor fun, decor, and functionality. Imagine a dedicated space where children can unleash their artistic talents, drawing vibrant pictures and practicing their ABCs in the fresh air. For adults, it can serve as a stylish menu board for summer parties, a welcome sign for guests, or a convenient spot to jot down grocery lists or garden tasks. It adds a touch of whimsy and personality to any backyard, patio, or garden wall, transforming an ordinary space into an interactive and engaging one. Unlike indoor chalkboards, an outdoor version needs to be robust, capable of withstanding sun, rain, and humidity without warping, fading, or developing mildew. This tutorial focuses on using materials specifically chosen for their outdoor resilience, ensuring your creation remains beautiful and functional for years to come.
How to Make a Durable Outdoor Chalkboard
Creating an outdoor chalkboard that truly lasts requires thoughtful material selection and careful execution. This guide breaks down the process, ensuring you achieve a professional and long-lasting result.
Materials You’ll Need:
- Solid Wood for the Frame: We repurposed old, brightly painted scrap wood, but if you’re purchasing new, opt for 1 x 4 inch lumber to achieve a similar classic look. For enhanced durability and weather resistance, consider using pressure-treated wood or naturally rot-resistant species like cedar or redwood. Even standard pine can work beautifully if properly primed and painted with exterior-grade products.
- Cement Board (Hardie Board): This is arguably the most critical component for an outdoor chalkboard. You’ll need a sheet, typically a 3 x 5 foot section depending on your desired chalkboard size.
- Why Cement Board? Unlike wood or plywood, cement board is inherently resistant to water damage, mold, and mildew. Even sealed and painted wood can eventually succumb to outdoor moisture, leading to warping or rot. Cement board provides a stable, impervious surface that will not degrade, making it ideal for a long-lasting outdoor application. You can find cement board at most hardware or home improvement stores, often in the tiling section.
- Chalkboard Paint: Click here to see the exact chalkboard paint we recommend. Ensure you choose a high-quality product for the best finish and durability. Both brush-on and spray-on options are available; choose what you are most comfortable working with.
- DAP Dynagrip Construction Adhesive: This strong construction adhesive is essential for securely bonding your frame to the cement board, providing a bond that can withstand outdoor temperature fluctuations and moisture.
- Mirror Hanging Kit: A sturdy mirror hanging kit is necessary to safely and securely mount your heavy-duty chalkboard. Look for kits that include robust D-rings or similar hangers and strong picture wire.
- Exterior-Grade Paint for the Wood Frame: Select an outdoor-quality paint in your desired color. We used “Velvet Curtains” by Valspar, a leftover from our front door project. Ensure it’s suitable for exterior use to protect the wood frame from moisture, UV rays, and temperature changes. A primer is also recommended if you’re using raw wood.
Optional Materials (for adding custom text and graphics):
- Cutting Machine: Such as a Cricut or Silhouette. These machines allow you to precisely cut vinyl designs for text or intricate graphics.
- If you’re considering investing in one, you can read my detailed comparison of Silhouette vs. Cricut in this post to help you decide.
- Printable Vinyl: This type of vinyl allows you to print full-color graphics and then cut them to shape.
- Premium Outdoor Vinyl (e.g., in white): Designed for exterior use, this vinyl is durable and resistant to fading, making it perfect for permanent text.
- Craft Knife: Indispensable for fine-tuning cuts or if you opt to hand-cut your designs.
- Cutting Mat: Provides a protective surface for cutting with a craft knife and helps with accurate measurements.
- Cute Graphics: You can find a wide array of designs online. The drink menu graphics I used are incredibly charming and can be found here.
Step-by-Step Instructions:
1) Prepare and Paint Your Cement Board:
Begin by laying your cement board on a protected, flat surface in a well-ventilated area. Using your chosen chalkboard paint, apply an even first coat to one side of the board. Allow it to dry completely according to the manufacturer’s instructions. Once dry, apply a second coat, ensuring full and opaque coverage. For an even smoother finish, you can lightly sand with fine-grit sandpaper between coats, but this is optional. Proper drying between coats is crucial for a durable and uniform chalkboard surface.
2) Cut Your Wood Frame Pieces:
While your chalkboard paint is drying, measure and cut your wood frame pieces to size. For a 3×5 foot cement board, we cut the horizontal frame pieces to just over 5 feet long (approximately 60.5 inches) and the vertical pieces to 28.5 inches long. These dimensions allow the frame to sit directly on top of the chalkboard edges, creating simple yet sturdy butt joints at the corners. Accuracy in cutting ensures a tight and professional-looking frame. If using raw wood, consider sanding any rough edges now for a smoother finish later.
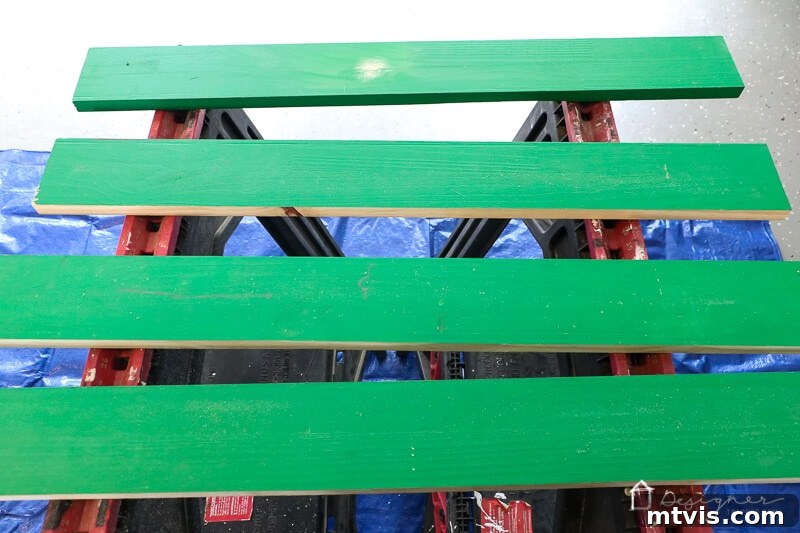
3) Paint Your Wood Frame:
Now it’s time to bring your frame to life with color! Apply your chosen outdoor-quality paint to all surfaces of your cut wood pieces. For optimal weather protection, it’s highly recommended to prime any raw wood before painting, especially the end grains, as these are most susceptible to moisture absorption. Apply at least two coats of exterior paint for maximum durability and color vibrancy. Allow adequate drying time between coats and before proceeding to the next step.
4) Apply Optional Text or Images to Your Chalkboard:
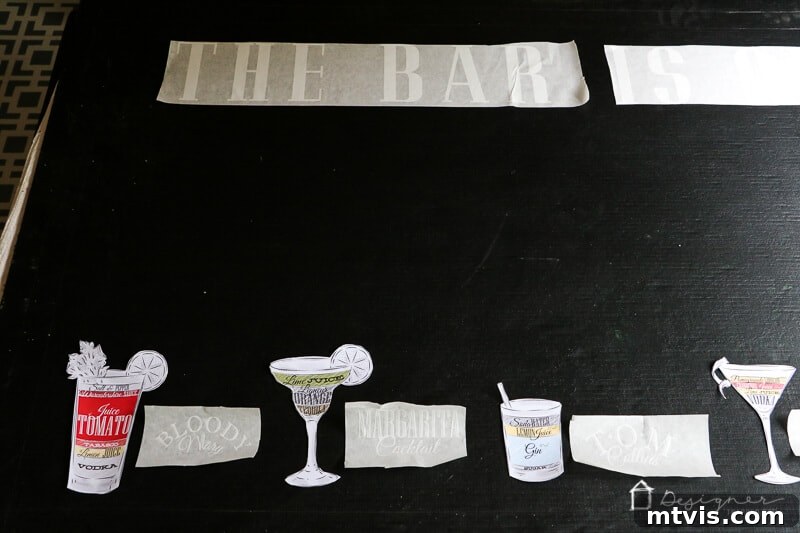
If you’ve decided to personalize your outdoor chalkboard with permanent text or graphics, this is the stage to do it. I used my Cricut Explore to cut out phrases like “THE BAR IS OPEN” and the names of various drinks from premium outdoor vinyl. For the drink recipe images, I printed them onto printable vinyl. Unfortunately, the intricate details of the specific drink designs I chose (which you can find here) were too complex for my Cricut’s print-and-cut feature, so I meticulously cut them out by hand using a craft knife. If using a cutting machine, ensure your vinyl is properly loaded and the cut settings are appropriate for outdoor vinyl. Once your designs are cut, carefully transfer them to your chalkboard surface. Remember that the wooden frame will sit slightly over the edges of the chalkboard, so position your designs accordingly to avoid them being obscured by the frame.
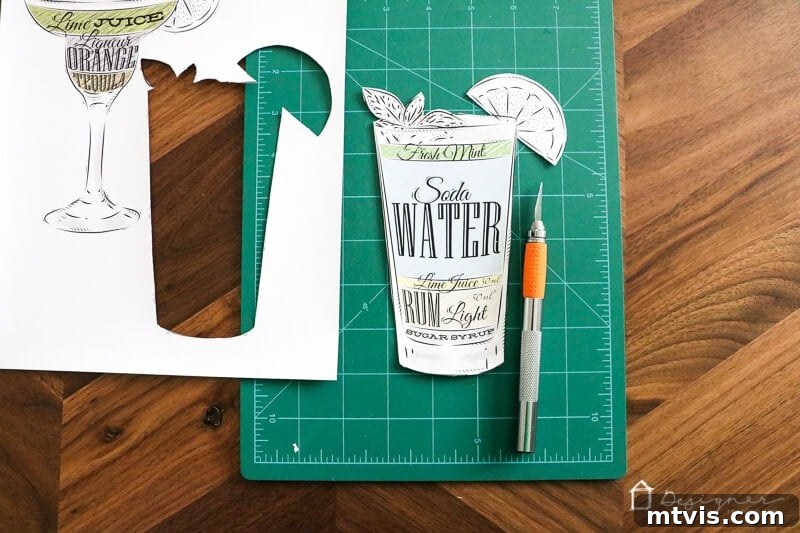
Ensure your text/designs are precisely positioned and smoothed onto the chalkboard surface before attaching the frame. A good trick is to use transfer tape for vinyl applications to maintain spacing and alignment. Press firmly to adhere the vinyl, then carefully peel back the transfer tape. Double-check that your design is not too close to the edges, as the frame will cover a small portion.
5) Attach Your Frame to the Chalkboard:
With your chalkboard surface prepared and any optional designs in place, it’s time to assemble the frame. We utilized our preferred construction adhesive, DAP Dynagrip, for its superior bonding strength and outdoor performance. Apply a continuous bead of adhesive along the back edges of your painted frame pieces where they will meet the cement board. Carefully position each frame piece, aligning the butt joints at the corners. Use clamps to firmly hold the frame in place, applying even pressure while the adhesive cures. Follow the adhesive manufacturer’s instructions for curing times. For added long-term security, you could also consider countersinking a few small, exterior-grade screws from the back of the cement board into the wooden frame, though the adhesive alone should provide a very strong bond.
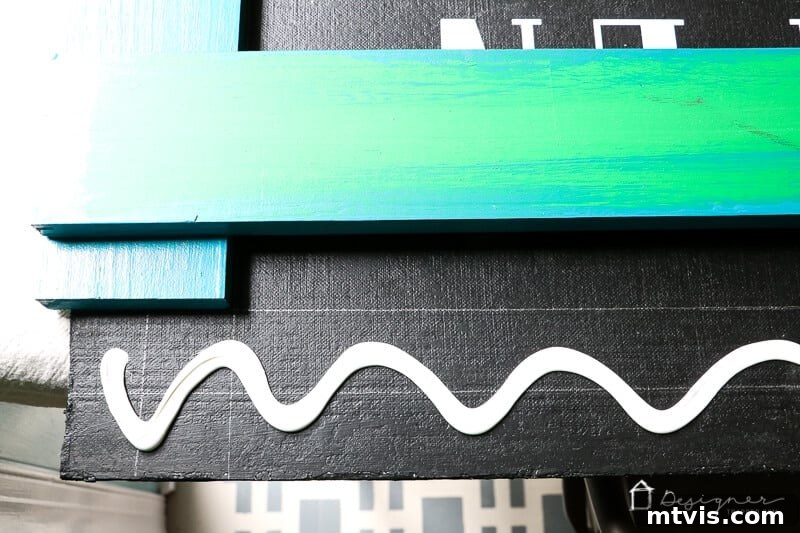
Ensure the clamps are securely tightened but not overly so, as to avoid damaging the frame. Allow the adhesive ample time to fully set and dry. This crucial step guarantees that your outdoor chalkboard frame remains firmly attached, even through varying weather conditions.
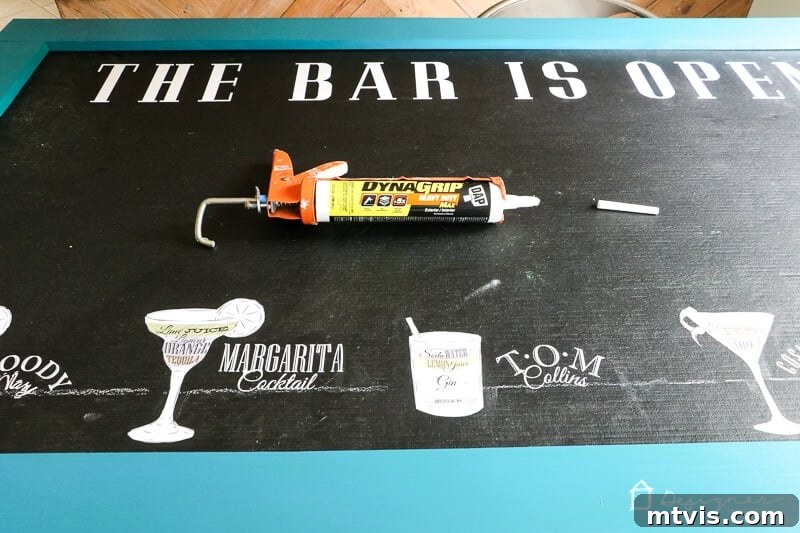
6) Season Your Chalkboard Surface:
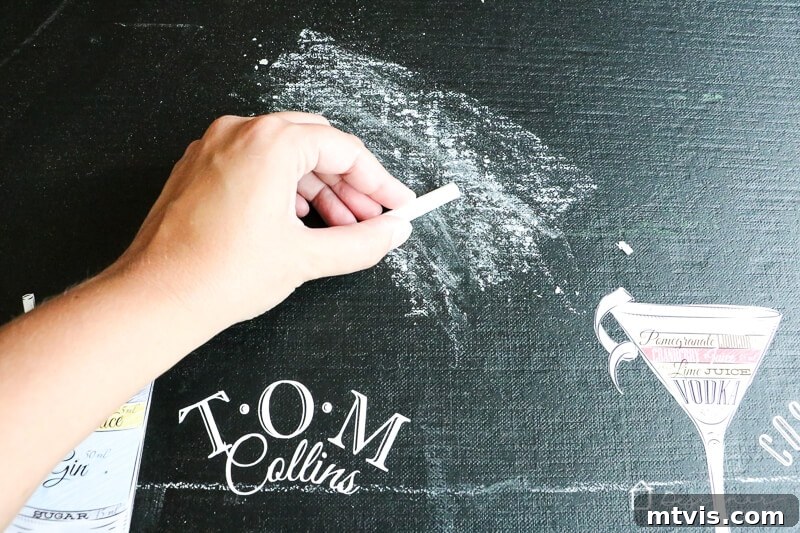
To ensure your chalkboard is ready for consistent use and to prevent “ghosting” (where previous writings remain faintly visible), it’s important to season it. Gently rub the side of a piece of white chalk all over the entire surface of your chalkboard. Cover it completely. Once fully coated, use a dry cloth or chalkboard eraser to wipe away the chalk. This process primes the surface, making it easier to write on and erase cleanly in the future, giving your vinyl designs a more authentic “chalked” appearance as well.
7) Attach Hanging Hardware:
Using your mirror hanging kit, securely attach the D-rings or other hangers to the back of your outdoor chalkboard frame. Position them symmetrically, typically about a quarter of the way down from the top on each side of the frame, to ensure even weight distribution. Once the hangers are firmly attached with appropriate screws, thread the hanging wire through them, ensuring it’s taut and securely fastened. Double-check that all components of the hanging kit are rated for the weight of your finished chalkboard. The stronger the hardware, the safer your installation will be.
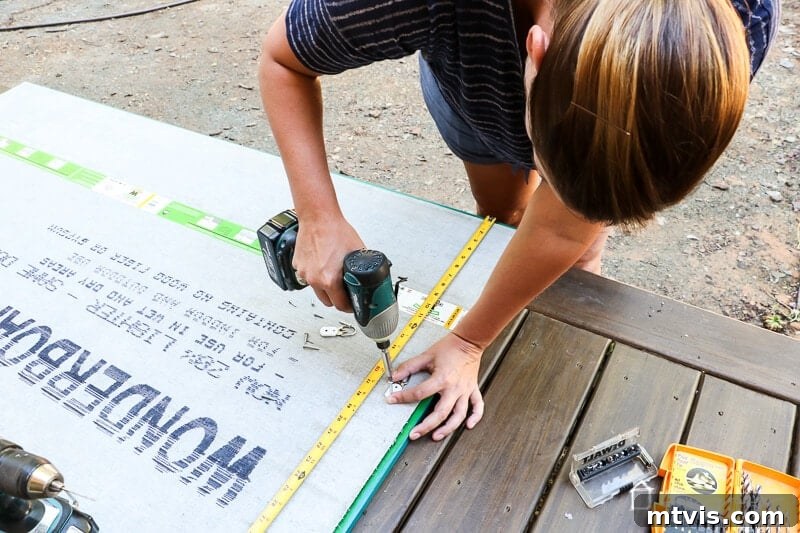
Ensure all connections are robust and capable of supporting the full weight of the chalkboard securely for long-term outdoor display.
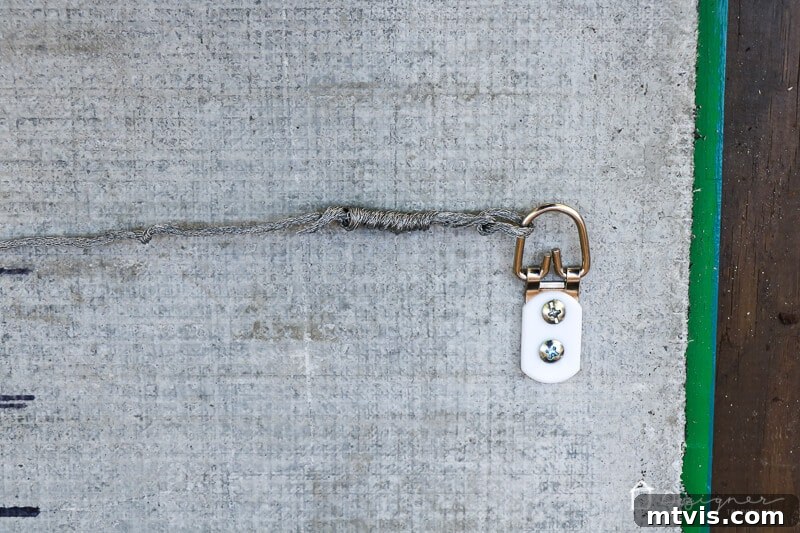
8) Install Your Outdoor Chalkboard:
Finally, select the perfect spot on your house or outdoor structure to hang your new creation. Attach appropriate hanging hardware to your house, ensuring it is sturdy enough to support the chalkboard’s weight and suitable for your siding material. Since our house features wood with cedar siding, a robust 3-inch deck screw was sufficient to create a strong anchor point for the hanging wire. If you have vinyl siding, you might need special hooks designed for that material. For brick or stucco, masonry anchors and screws will be required. Always ensure the hanging hardware is securely fastened into a stud or substantial structural element of your wall to prevent any accidental falls. Take your time with this step to ensure your beautiful, durable outdoor chalkboard is safely displayed for everyone to enjoy.
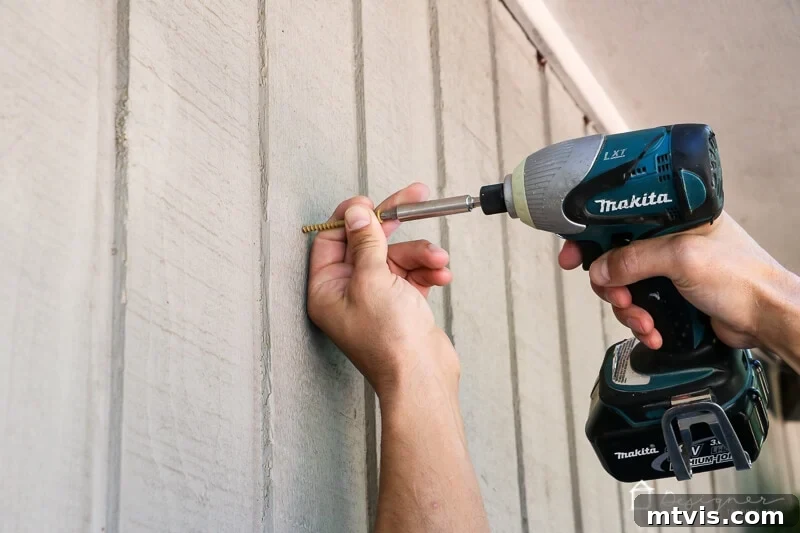
Enjoy Your Weatherproof Outdoor Chalkboard!
That’s it! Your durable DIY outdoor chalkboard is now complete and ready for countless hours of creative expression, message sharing, and decorative appeal. Hang it up in your favorite outdoor spot and watch as it transforms your space. Here’s a closer look at how ours turned out, beautifully complementing our deck area.
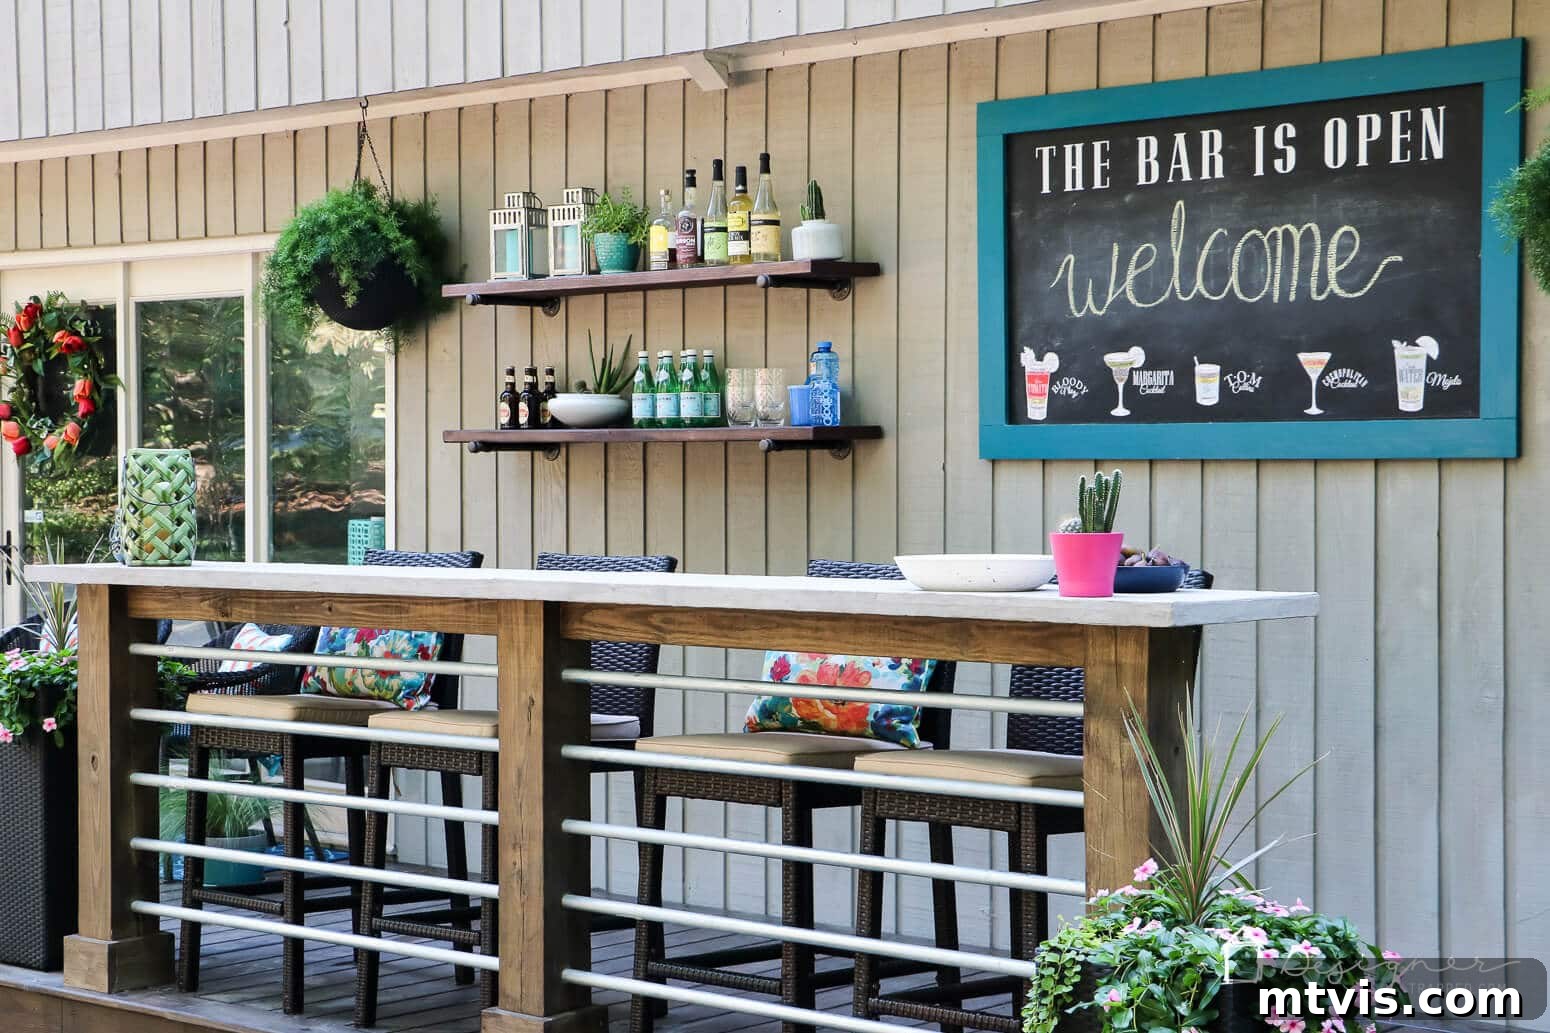
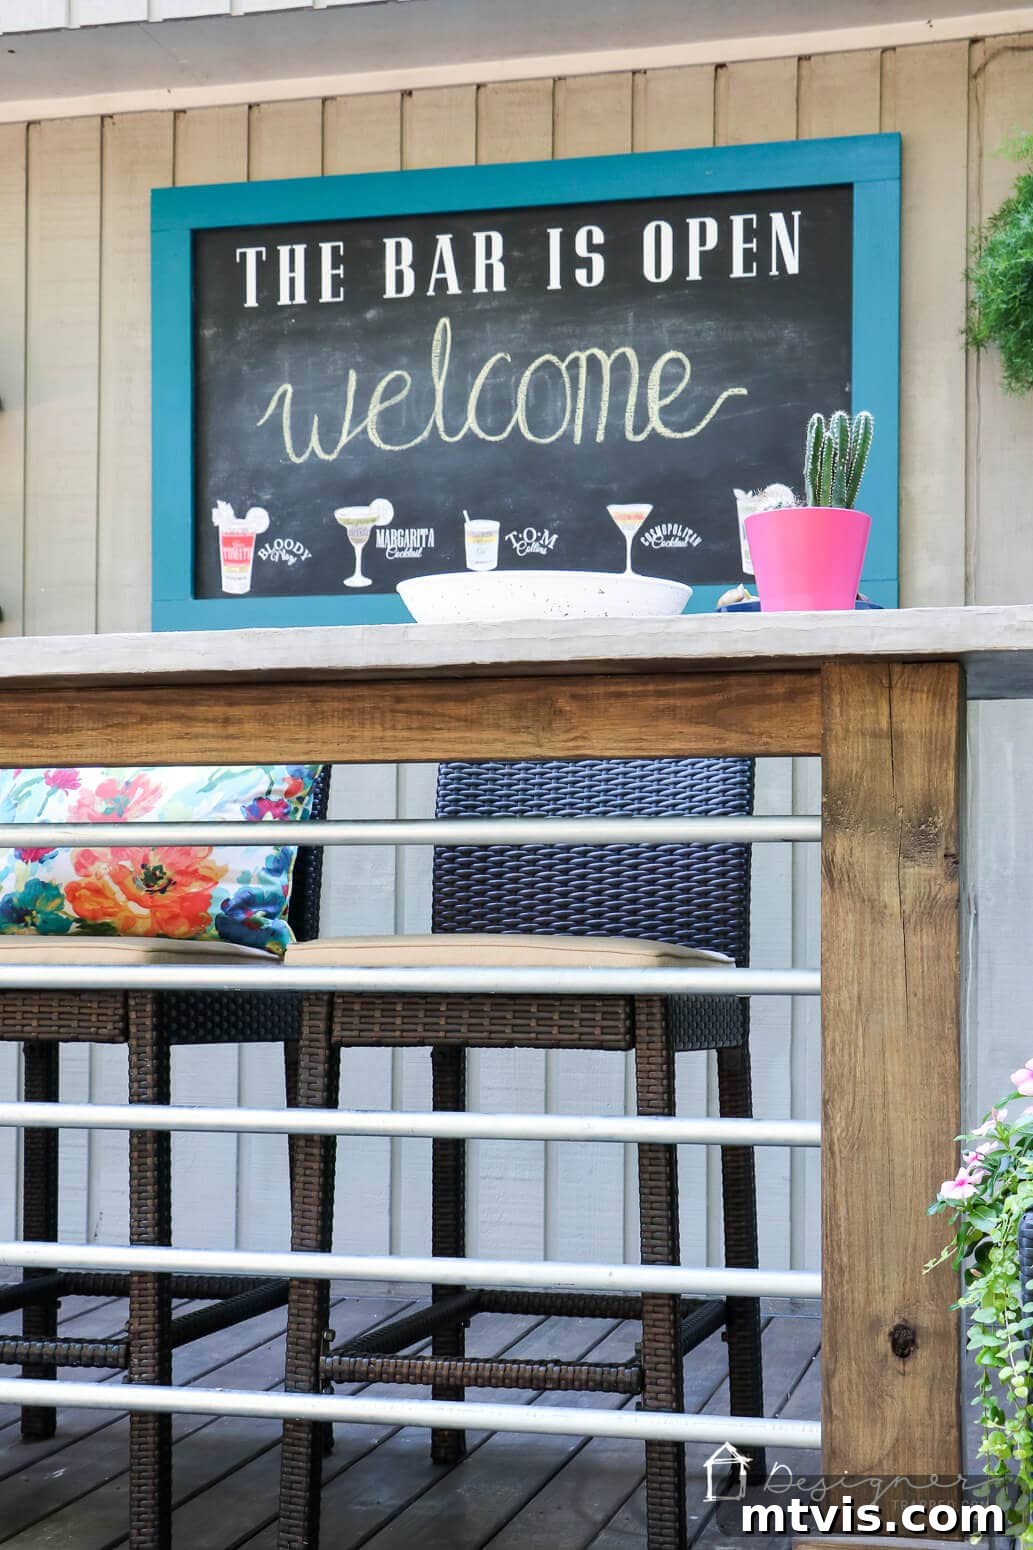
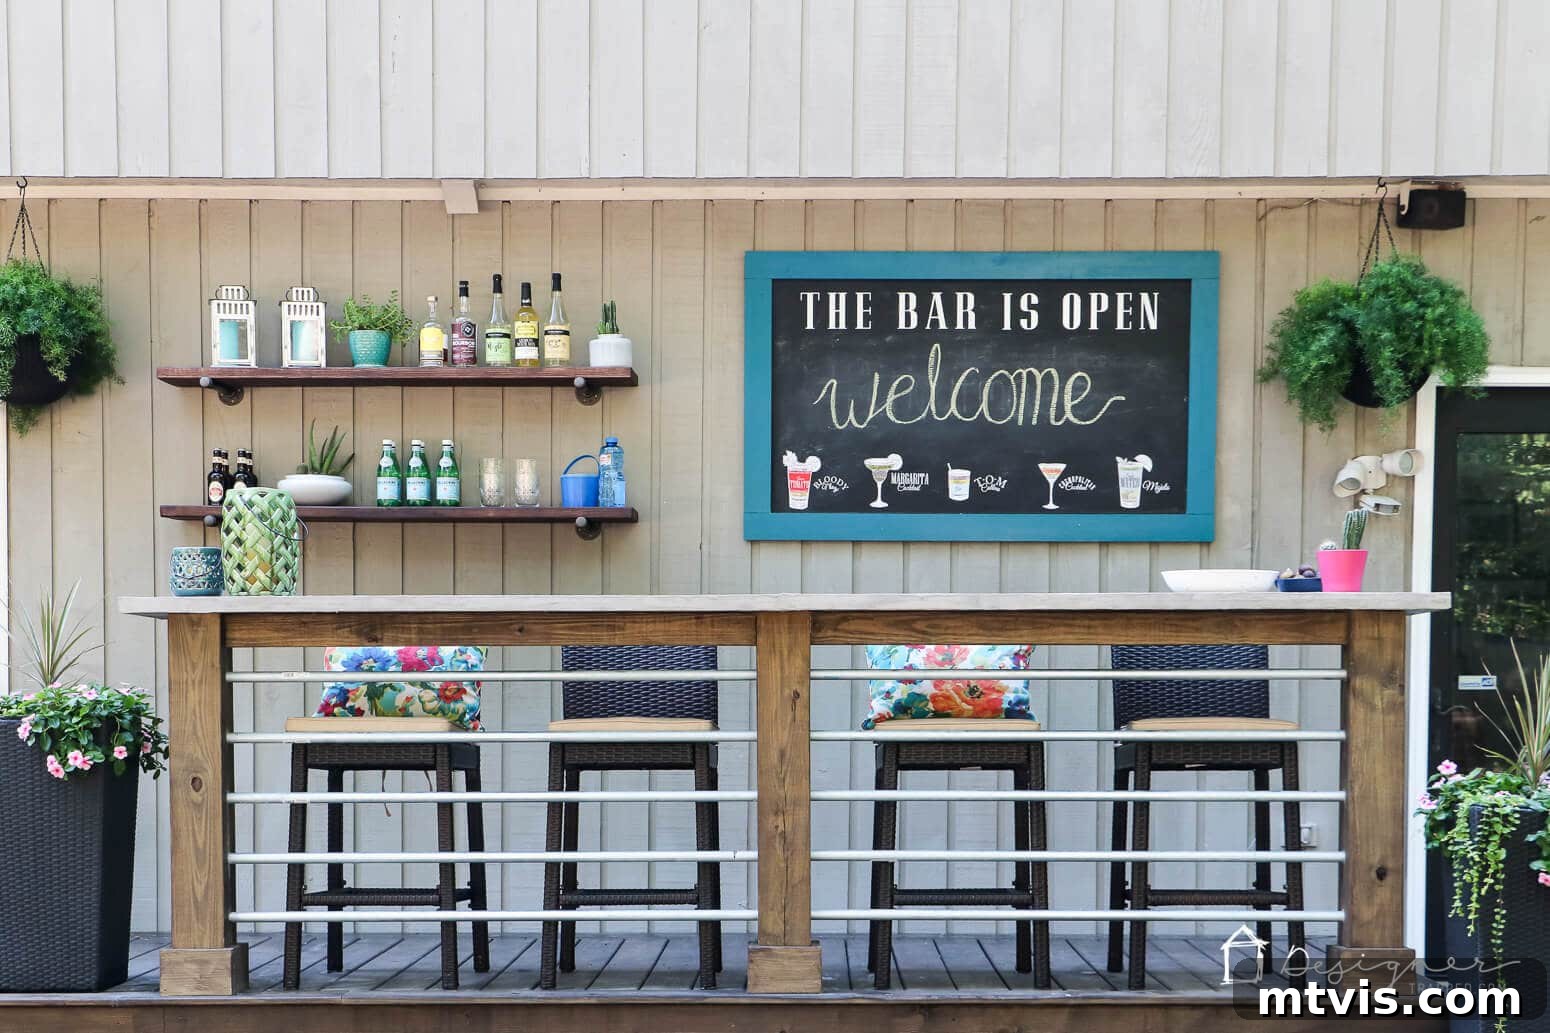
This project not only provides a fun and functional element to your outdoor space but also demonstrates how simple DIY can yield impressive, lasting results. For more ideas on enhancing your deck, you can explore how we crafted that amazing DIY deck bar in this post and see the full scope of our deck makeover reveal here. Additionally, discover the simple steps we took to create those stylish industrial pipe shelves in this tutorial.
Before you embark on your next DIY adventure, be sure to grab my brand new, absolutely FREE guide on the simple trick to understanding paint chips. This invaluable resource will significantly help you in choosing the perfect paint color, whether it’s for your outdoor chalkboard frame, an interior room, or any other project where color accuracy is key. Happy crafting!
