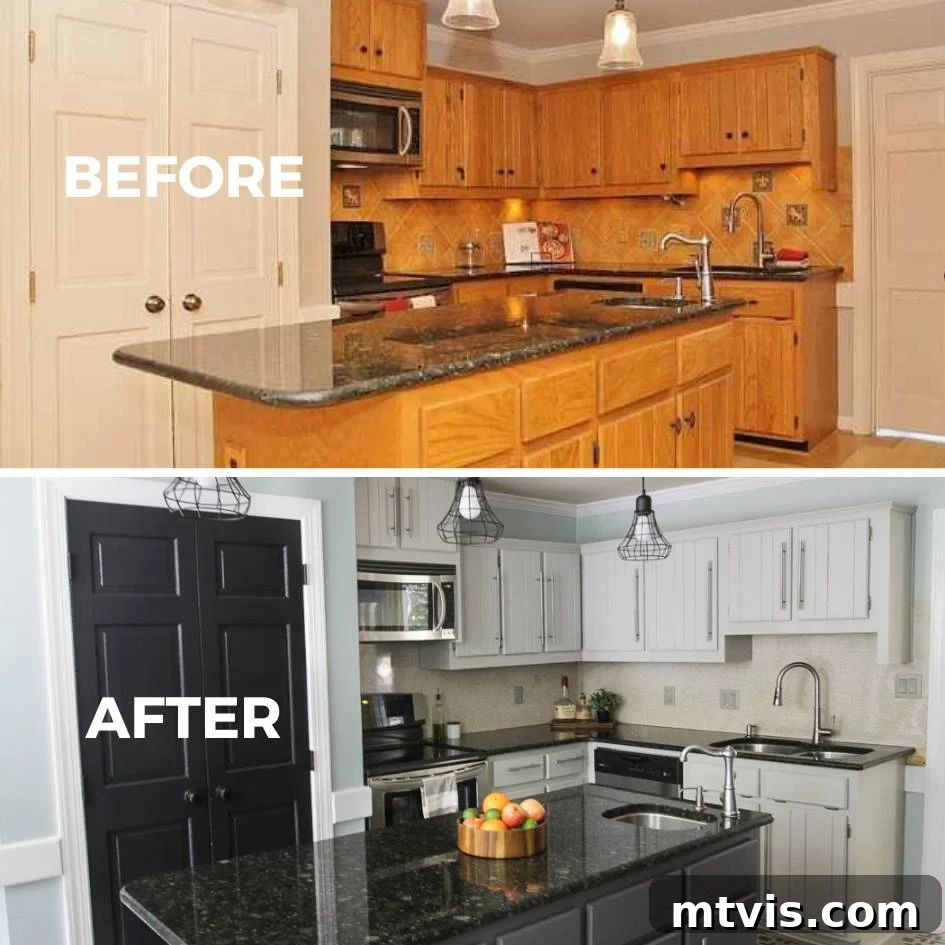
Let’s face it: the idea of painting your kitchen cabinets yourself often comes with a significant dose of skepticism. For every breathtaking DIY kitchen transformation shared online, you’ll inevitably find comments questioning the longevity, “It looks fantastic now, but how long will it truly last?” This concern is absolutely valid. Kitchen cabinets endure daily wear and tear, and no one wants to pour their precious time, effort, and resources into a DIY project only to see it chip and peel within a few months. This common apprehension is precisely why I’m excited to share a comprehensive update on how our DIY painted kitchen cabinets performed after five years of relentless daily use. Spoiler alert: the results are incredibly positive, especially when you commit to doing it right.
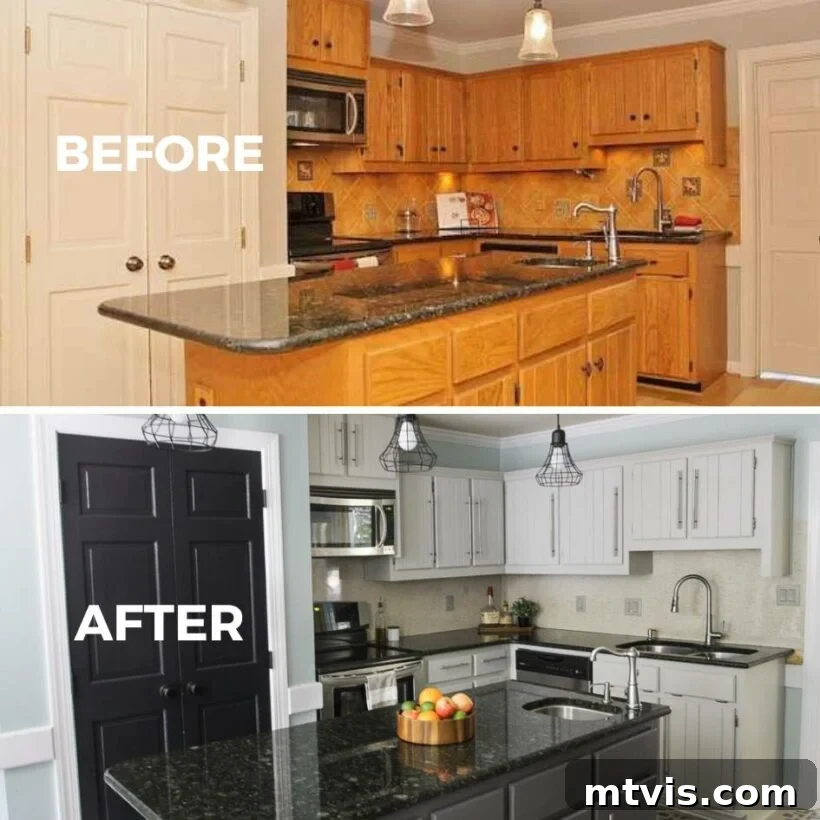
As a dedicated DIY enthusiast with over 23 years of hands-on experience, I’ve personally tackled painting kitchen cabinets not once, but three distinct times! This extensive background allows me to speak from genuine, hard-won experience. With that understanding, let’s delve straight into addressing the most frequently asked questions I receive about the durability and process of our DIY painted kitchen cabinets.
When Did We Embark on Our Kitchen Cabinet Painting Project?
Our initial venture into painting the kitchen cabinets took place in 2014. We transformed the then-outdated, notoriously orange oak cabinets in our kitchen. What might surprise you even more is that we achieved this without the arduous tasks of sanding or priming them. We didn’t even bother emptying the contents of our cabinets! I know, it sounds almost too good to be true, perhaps even a bit reckless, but trust me, the method was carefully chosen and highly effective for our specific cabinet type.
Fast forward to today, 2025, and it has been over eleven remarkable years since that initial coat of paint went on those cabinets. Despite the passage of time and their eventual renovation, I am still regularly asked, “How did your painted kitchen cabinets really hold up over the years?” Don’t worry, I promise to reveal the full, unvarnished truth. But first, it’s crucial to address some other pivotal questions that lay the groundwork for understanding their longevity.
Choosing the Right Products and Mastering the Process for Durable Results
The success of any DIY cabinet painting project hinges significantly on the products and techniques employed. Below, you’ll find a concise overview of the key products and the unique process we adopted. For those seeking an in-depth, step-by-step guide, our full tutorial is available here: how to paint kitchen cabinets without sanding or priming.
This post contains affiliate links for your convenience, meaning if you make a purchase through my links, I may earn a small commission at no extra cost to you. Click here for my full disclosure policy.
Overview of Our DIY Painted Kitchen Cabinets
- Time to complete: Approximately 4 days for the entire project, including drying times. This can vary based on kitchen size and experience.
- Durability: Proven to hold up perfectly after more than 5 years of intense daily use in a busy household.
- Paint used: General Finishes Milk Paint, an exceptionally high-quality acrylic paint renowned for its adhesion and robust finish.
- Topcoat used: General Finishes High-Performance Top Coat, which is crucial for sealing the paint and providing maximum protection.
- Full tutorial here: how to paint kitchen cabinets without sanding or priming – offering detailed instructions for achieving similar results.
- Overview of the process:
- We carefully removed all cabinet doors and drawers to ensure thorough and even paint application.
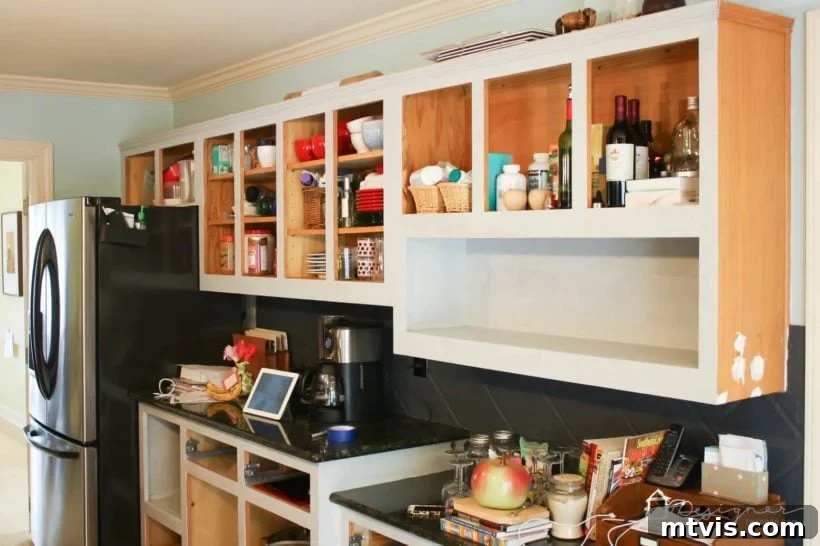
- Crucially, we did not need to pack up or remove the contents of our cabinets, saving immense time and hassle.
- The cabinetry was meticulously cleaned to remove grease and grime, ensuring proper paint adhesion.
- A key feature of our method: we did not sand or prime anything, a major time-saver due to the specific paint chosen.
- We applied three generous coats of the protective top coat to guarantee maximum durability and a professional finish.
- Pros of this method: Unbelievably durable finish, eliminates the messy and time-consuming steps of sanding and priming (especially for wood cabinets), provides excellent paint coverage and superior adhesion properties.
- Cons of this method: The paint line doesn’t offer an extensive range of colors, and three coats of topcoat are essential for optimal results, which adds to the drying time. For the best, smoothest finish, applying the topcoat with doors laying flat is recommended, requiring space.
Our DIY Painted Cabinets: A Testament to Five Years of Heavy Use
We continued to use these newly painted cabinets every single day for over five years before we embarked on a full-scale kitchen renovation in 2019, which involved completely gutting the space. If curiosity strikes, you can explore the before and after photos of that kitchen renovation to see the subsequent transformation.
It’s important to stress the intensity of our kitchen’s usage during those five years. We are a family who rarely eats out and has a deep passion for cooking and baking, meaning our kitchen was utilized heavily. At the time, our twin girls were young and full of energy, and we also shared our home with a large, active dog. This meant our painted cabinets were far from treated with kid gloves – they were subjected to spills, bumps, frequent cleaning, and the general chaos of a bustling family life. In short, we gave them a true run for their money.
The Unveiling: How Our Painted Cabinets Truly Held Up After Half a Decade
My friends, let me tell you, they held up beyond our wildest expectations. They performed beautifully. Frankly, their resilience surpassed even our own confident predictions. We had a strong belief in their durability, primarily due to our meticulous selection of high-quality paint and topcoat. However, deep down, I still anticipated some minor chipping, scuffs, or general signs of wear and tear to emerge after a couple of years of such heavy family use.
For visual proof, I created a video about 22 months after painting them, offering a close-up look at their condition at that point. It provides an honest assessment of their early durability:
(A video showcasing the cabinets’ condition after 22 months was previously available here, demonstrating their excellent durability.)
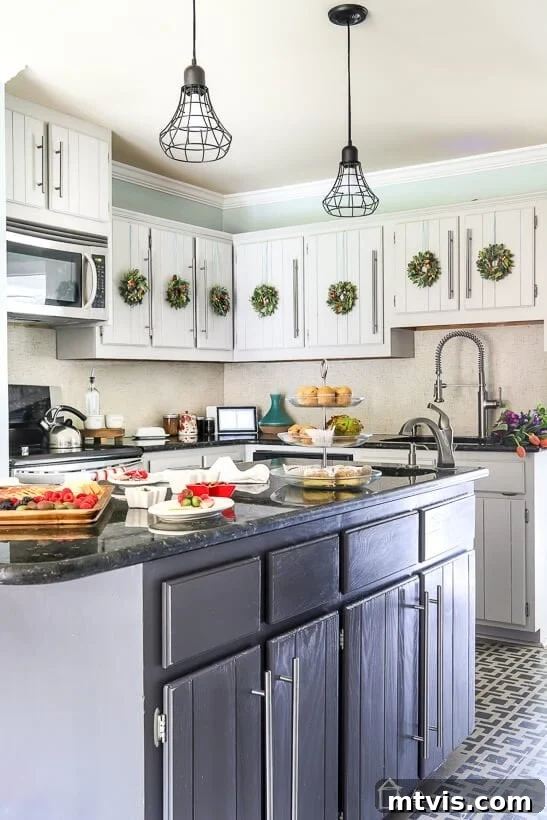
And to further emphasize their enduring quality, the accompanying photo below was captured approximately two months before these cabinets were ultimately removed as part of our comprehensive kitchen renovation. As you can clearly see, they still maintained an almost perfect appearance, with only the most minor, almost imperceptible wear and tear—exactly as detailed in the video and discussions within this post.
The Financial Advantage: Significant Savings Through DIY Cabinet Painting
One of the most compelling reasons many homeowners consider DIY projects is the substantial cost savings, and painting kitchen cabinets is no exception. Based on extensive research, hiring a professional to paint kitchen cabinets can be a considerable investment, typically ranging anywhere from $3,000 to $10,000. This wide range depends heavily on various factors, including the overall size and number of your kitchen cabinets, the specific type and quality of paint products used by the professionals, and of course, your geographical location, which influences labor costs.
In stark contrast, our entire DIY project, encompassing all the necessary high-quality supplies, came in at a remarkably affordable price point: under $250. When you compare our expenditure to the lower end of professional service costs, it becomes clear that we effectively saved ourselves a minimum of $2,700. This calculation vividly illustrates the incredible financial advantage of taking on this project yourself, especially when you achieve professional-level results like ours.
Zero Regrets: A Resounding Endorsement for DIY Kitchen Cabinet Painting
Let me state this unequivocally: I have absolutely NO REGRETS about choosing to paint my kitchen cabinets myself. Over the course of the past eleven years, I’ve not only painted kitchen cabinets once but a total of THREE different times, utilizing TWO distinct paint types and methods. Each time, my primary goal was to select methods that required the least amount of arduous prep work, ensuring the process was as quick, simple, and manageable as possible for a busy DIYer.
And every single time, without fail, I have been thoroughly satisfied with the outcome. I have never regretted the decision! The results consistently achieved a professional-grade appearance and, most importantly, demonstrated incredible long-term durability, standing up to the rigors of everyday life. This consistent success across multiple projects fuels my confidence in recommending this approach to others.
Beyond Paint: More Creative Ideas for Budget-Friendly Kitchen Makeovers
Absolutely! I am a passionate advocate for budget-friendly kitchen makeovers. While this post focuses on our very first DIY kitchen cabinet transformation, my journey didn’t stop there. Years later, we helped my dear friend Thea achieve an amazing kitchen makeover for less than $1,000. And upon moving to a new house, we eagerly embraced yet another budget-friendly kitchen makeover project.
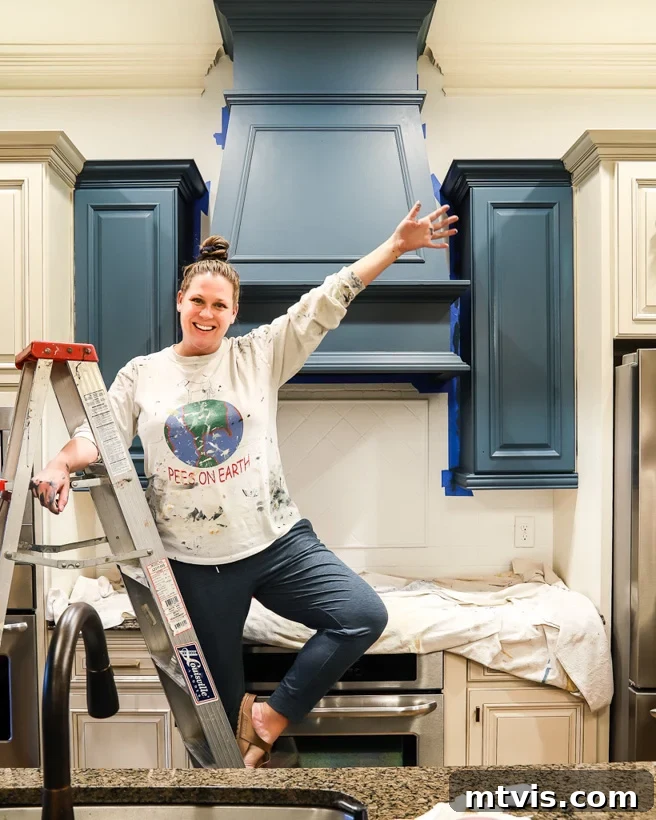
Naturally, painting the kitchen cabinets played a central role in all of these makeovers! But there are numerous other impactful and affordable ways to update your kitchen without breaking the bank. Here are some of my favorite budget-conscious ideas:
Transformative Kitchen Countertop Ideas
Don’t assume you need to rip out and replace your countertops to achieve a fresh look. You can dramatically update your existing countertops by painting them to mimic the luxurious appearance of marble (yes, we’ve successfully done this too!). This creative technique is just one of many affordable DIY countertop ideas available, which can include options like epoxy finishes, concrete overlays, or even simply refreshing existing laminate.
If your beloved butcher block countertops are showing significant signs of wear and tear, resist the urge to discard them! They are incredibly resilient and can be easily revitalized. You can effortlessly refinish your butcher block countertops, bringing them back to their original beauty and extending their life for many more years.
Creative Kitchen Backsplash Ideas on a Budget
The backsplash area offers a fantastic opportunity for a high-impact, low-cost refresh. There’s a wealth of budget-friendly backsplash ideas waiting to be explored. One of my personal favorites, which I’ve also successfully executed, involves painting and stenciling an existing tile backsplash. It’s an ingenious way to introduce new patterns and colors without the expense or mess of demolition. Here’s my detailed tutorial for how to paint a tile backsplash.
Alternatively, even installing a completely new tile backsplash can be surprisingly affordable if you strategically select an inexpensive tile. And for those who might feel intimidated by tiling, rest assured, installing a backsplash isn’t nearly as difficult as it might seem. Learn how to install a backsplash the easy way with our guide.
The Bottom Line: DIY Painted Cabinets Are a Winning Investment
So there you have it – the definitive answer straight from years of real-world experience. Our DIY painted kitchen cabinets didn’t just meet expectations; they absolutely stood the rigorous test of time. We experienced no peeling, no chipping, and absolutely no regrets. If you’ve been contemplating painting your kitchen cabinets yourself but have felt hesitant or unsure, I sincerely hope our long-term, proven results provide you with the confidence and motivation to embark on this rewarding project.
Take it from me, a seasoned DIYer who has successfully painted kitchen cabinets three different times, each with enduring success: with a manageable amount of patience, a commitment to proper preparation, and most importantly, the right selection of high-quality materials, you can achieve stunning, professional-looking, and incredibly durable cabinets without the hefty professional price tag. The fundamental secret to this success lies in making informed choices about your products and ensuring they are applied correctly, following the manufacturer’s instructions diligently. The transformation is not only aesthetic but also a significant source of personal satisfaction and financial saving.
More Kitchen IDEAS
SEE ALL kitchen POSTS
- Budget-Friendly DIY Backsplash Ideas for Kitchens
- How Durable are DIY Painted Kitchen Cabinets?
- How To Refinish Butcher Block Countertops & Maintain Them
- Designer Tips for Choosing Perfect Kitchen Rug Runners
- How to Paint Kitchen Cabinets (From a DIYer Who Has Done it 3 Times)
- Our Kitchen Renovation Reveal- It’s Neutral AND Colorful
Curious about my personal strategies for transforming rooms and spaces within our home? I invite you to explore Designer in a Binder®, my comprehensive guide to affordable and stylish home decorating.
And if you’re eager for exclusive content, behind-the-scenes sneak peeks, and direct updates on future DIY projects and design insights, be sure to subscribe to my newsletter before you go!