Unlock Your Creativity: The Ultimate Guide to Making Custom Labels with Cricut
This comprehensive guide is proudly sponsored by Cricut. Please note, this post contains affiliate links for your convenience. For more details, click HERE to review my full disclosure policy.
Table of Contents
The Power of Organization and Cricut Labels
As a passionate advocate for an organized home, I’ve discovered a golden rule: systems thrive when things are clearly labeled. Whether it’s a bustling pantry, a craft room full of supplies, or kids’ toys, well-defined homes for everything are essential. While traditional label makers certainly have their place for small, functional labels, they often fall short when it comes to creating impactful, easy-to-read, and aesthetically pleasing labels that truly enhance your organizational efforts. This is where my beloved Cricut cutting machines step in!
If you’ve ever pondered, “Can a Cricut machine truly function as a superior label maker?”, my unequivocal answer is: absolutely! Cricut machines transcend the capabilities of standard label makers, offering unparalleled customization in terms of size, font, color, and material. This allows you to create not just labels, but decorative elements that contribute to the overall style and functionality of your space. They transform mundane tasks into creative projects, ensuring your organizational systems are not only practical but also beautiful.
Choosing Your Perfect Cricut Machine for Label Making
Before diving into the exciting world of custom labels, it’s worth considering which Cricut machine best suits your needs, especially if you’re new to the Cricut family. I personally own and regularly use the Cricut Explore Air 2, the Cricut Maker, and the Cricut Joy. Each machine offers unique advantages for label making:
- Cricut Explore Air 2: A fantastic all-rounder, perfect for cutting a wide range of materials like vinyl, cardstock, and iron-on. It’s an excellent choice for crafting various label types and is often recommended for beginners due to its balance of features and affordability.
- Cricut Maker: The ultimate crafting powerhouse. With its adaptive tool system, the Maker can cut over 300 materials, including thicker materials like balsa wood and fabric. While perhaps overkill for basic labels, its versatility shines if you plan to make labels from unique materials or combine labeling with other advanced crafting projects.
- Cricut Joy: Compact and quick, the Joy is ideal for smaller projects and rapid label creation. Its ability to cut Smart Materials without a mat makes it incredibly convenient for on-the-go labeling tasks, perfect for those who want efficiency and simplicity.
If you’re still weighing your options, I encourage you to read my unbiased review of Silhouette vs. Cricut, and for a deeper dive into choosing the right Cricut for you, check out my guide on which Cricut machine is right for you. Once you have your machine ready, let’s explore my two favorite, highly effective methods for creating stunning custom labels.
Option 1: Crafting Durable Vinyl Labels with Your Cricut Machine
Vinyl labels are exceptionally popular for a reason: they are durable, waterproof, and offer a crisp, professional look. They adhere beautifully to a variety of surfaces, making them perfect for pantry bins, storage containers, bottles, and outdoor items. This method allows for endless customization and a polished finish that truly elevates your home organization.
Supplies for Vinyl Labels
- Cricut Cutting Machine: (I utilized my Cricut Explore Air 2 for this particular project, but a Cricut Joy or Cricut Maker would work equally well.)
- StandardGrip Cutting Mat: Essential for holding your vinyl securely during the cutting process.
- Cricut Premium Vinyl: Available in a vast array of colors and finishes. Consider whether you need permanent vinyl (for long-lasting labels on frequently handled items) or removable vinyl (for temporary or seasonal labels).
- Weeding Scraper Tools: These precision tools are invaluable for removing excess vinyl.
- StandardGrip Transfer Tape: Crucial for transferring your intricate vinyl designs from the backing paper to your chosen surface. Ensure it’s the correct grip level for your vinyl.
Step 1: Design Your Vinyl Labels in Cricut Design Space
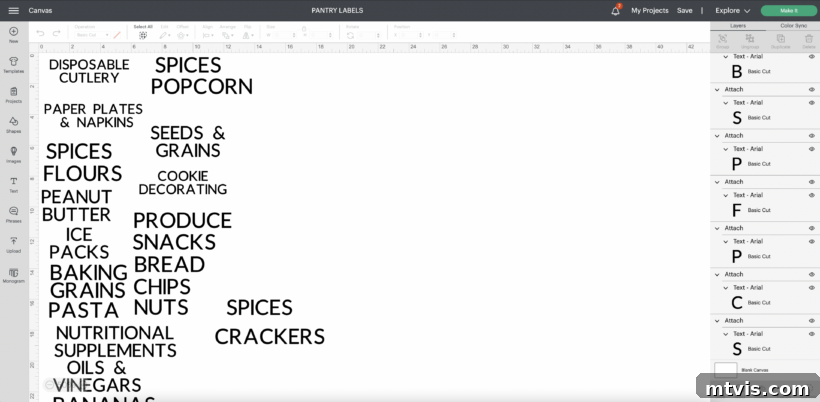
Begin by opening Cricut Design Space. For vinyl labels, especially when creating many, I highly recommend selecting simple, sans-serif fonts. They are significantly easier to weed, saving you time and frustration. To ensure accuracy, I first identified every item and bin in my pantry that required a label, jotting down the text on post-it notes. Then, I measured each bin to customize the label size perfectly, ensuring legibility and a harmonious fit. Each label, therefore, had slightly different dimensions to accommodate varying text lengths. This meticulous preparation ensures your labels look professional and are perfectly scaled for their intended use. After entering all the text, remember to “Attach” your text elements within Design Space. This critical step ensures that your Cricut machine cuts the letters in the exact layout you designed, rather than rearranging them for material optimization, which is essential for cohesive words and phrases. My design workspace, filled with multiple pantry labels, looked something like this:
Step 2: Precisely Cut Your Vinyl Labels
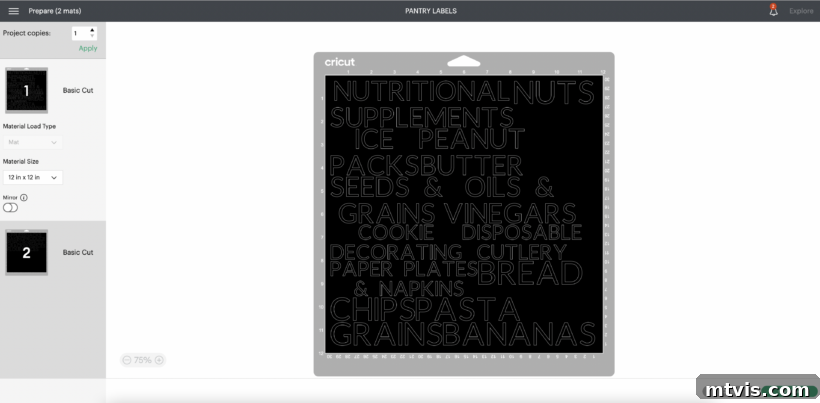
Once your designs are finalized in Design Space, click the “Make It” button. Cricut’s intelligent software will then display a preview of how your designs will be arranged on the cutting mat. For vinyl, the software usually optimizes the layout to minimize material waste, but since you “Attached” your text, the individual words will remain intact. Load your chosen premium vinyl onto your cutting mat, ensuring it adheres smoothly without bubbles or wrinkles. Follow the on-screen prompts to load the mat into your Cricut machine and select the appropriate material setting (e.g., “Premium Vinyl”). Double-check that your fine-point blade is correctly installed. Then, press the “Go” button on your machine to begin cutting. The precision of the Cricut machine ensures that even delicate fonts are cut cleanly and accurately. Here’s a glimpse of the prepared design, ready for cutting:
Step 3: Weed Your Vinyl Design for Perfection
After your Cricut machine has completed the cut, carefully unload the mat. The next step is “weeding,” which involves removing the excess vinyl from around and within your design, leaving only the desired label text on the backing paper. This step requires a steady hand and a good weeding tool. I consistently reach for my Cricut weeder tool, which, with its pointed hook, makes it incredibly easy to grab and lift even the tiniest vinyl pieces. Start by peeling a corner of the vinyl away from the backing, then slowly pull it back, using the weeding tool to hold down the parts of your design that you want to keep. Take your time, especially with intricate fonts, to ensure all the inner pieces of letters (like the center of an ‘o’ or ‘a’) are removed for a clean final look.
Step 4: Transferring Vinyl Labels: The Hinge Method
Once your vinyl designs are perfectly weeded, it’s time to transfer them to your chosen surface. This step can sometimes be tricky, but the “hinge method” simplifies the process and helps ensure straight, bubble-free application. First, cut a piece of transfer tape slightly larger than each individual label. Apply the transfer tape over the top of your weeded vinyl design, covering it completely. Use a scraper tool to firmly burnish (rub) over the transfer tape, ensuring the vinyl letters adhere strongly to it. Then, carefully cut each label out into its own rectangular piece.
Now for the hinge method: select one label and position it exactly where you want it on your surface. Once satisfied, place a strip of Scotch tape or painter’s tape across the top of the label, securing it to your surface – this forms your “hinge.” Flip the label upwards, away from the surface, and carefully peel off the vinyl backing paper. With the backing removed, gently lower the label back down, starting from the hinged top. As you lower it, use your scraper tool to rub from the top downwards, pushing out any air bubbles and ensuring the vinyl adheres smoothly to the surface. Finally, slowly peel back the transfer tape at a sharp angle. If any vinyl pieces resist, lay the transfer tape back down and burnish again. You’ll be left with a perfectly applied vinyl label!
For a visual demonstration of this effective technique, watch the video below:
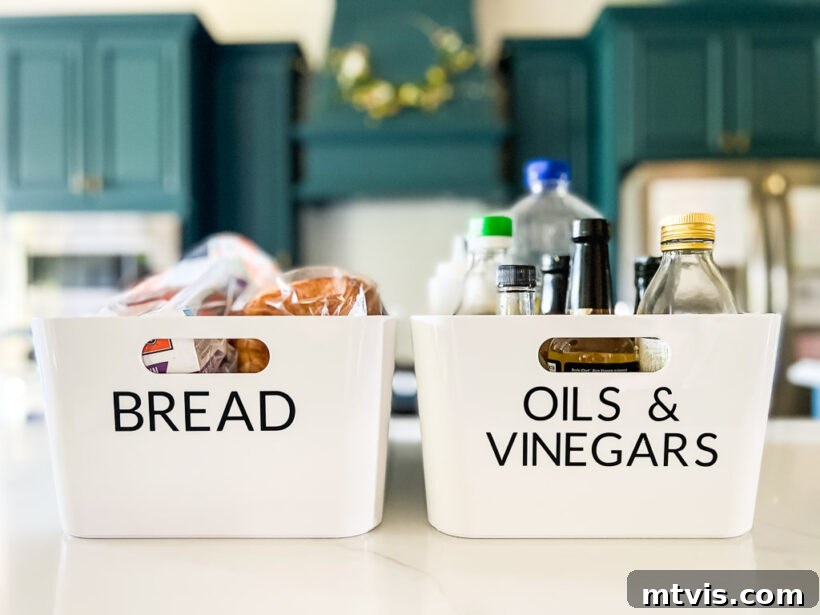
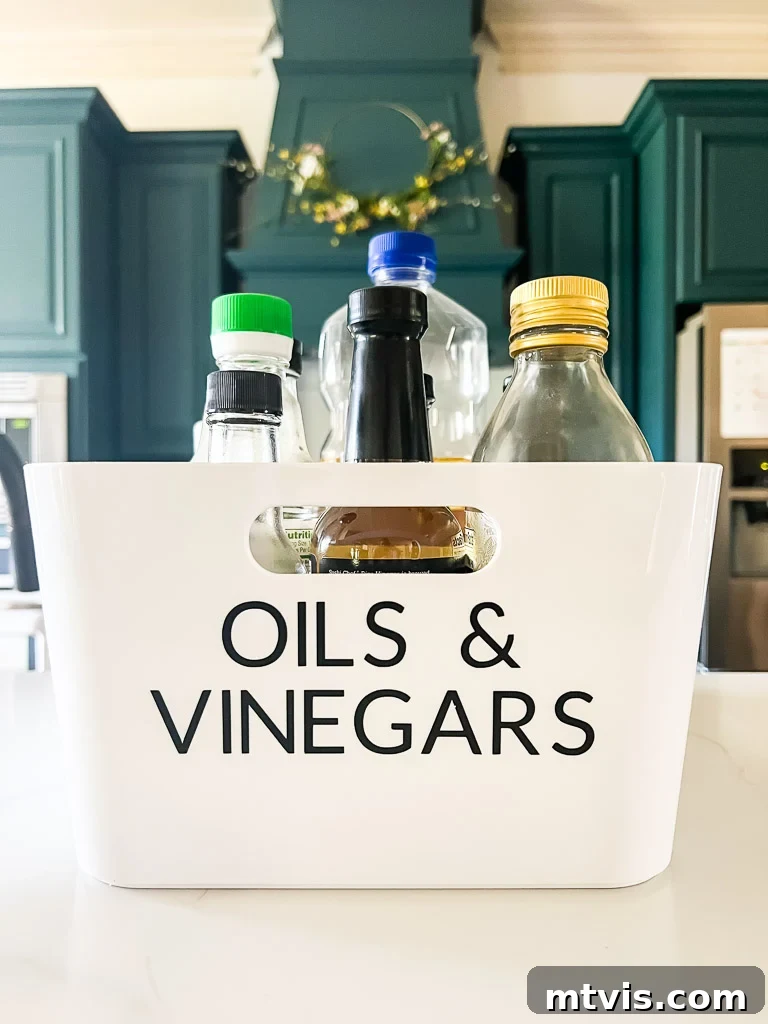
The results speak for themselves! You can see how the pantry bins transformed with these large, clear, and easy-to-read labels. This level of customization and impact simply isn’t achievable with a standard label maker, making organization a joy for both adults and kids.
Option 2: Elegant Paper Labels Using Cricut Pens and Markers
While vinyl labels are fantastic for durability, there’s a unique charm to labels that appear hand-written, yet are perfectly uniform and legible. This second method, leveraging your Cricut machine’s ability to draw with pens and then cut, is often overlooked but offers incredible versatility for a softer, more artisanal aesthetic. It’s particularly appealing if, like me, you prefer the look of beautiful calligraphy or handwriting but lack the skill or time to do it yourself. This method is perfect for gift tags, temporary labels, or projects where you want a charming, personalized touch on paper or cardstock.
Supplies for Paper Labels
- Cricut Cutting Machine: (For this project, I used my Cricut Joy, but a Cricut Explore or Cricut Maker would also be excellent choices, offering capabilities for larger designs.)
- Cricut Smart Paper Sticker Cardstock: (I opted for classic black, but a variety of colors are available.) This material is a game-changer as it has an adhesive backing, eliminating the need for glue, and can be used mat-free with Cricut Joy.
- Cricut Marker or Pen: (I used a metallic silver marker for a striking contrast.) Cricut offers a vast selection of pens in various colors, thicknesses (fine point, medium point, gel), and effects (glitter, metallic, calligraphy), allowing you to truly personalize the written element of your labels.
Step 1: Design Your Paper Labels in Cricut Design Space
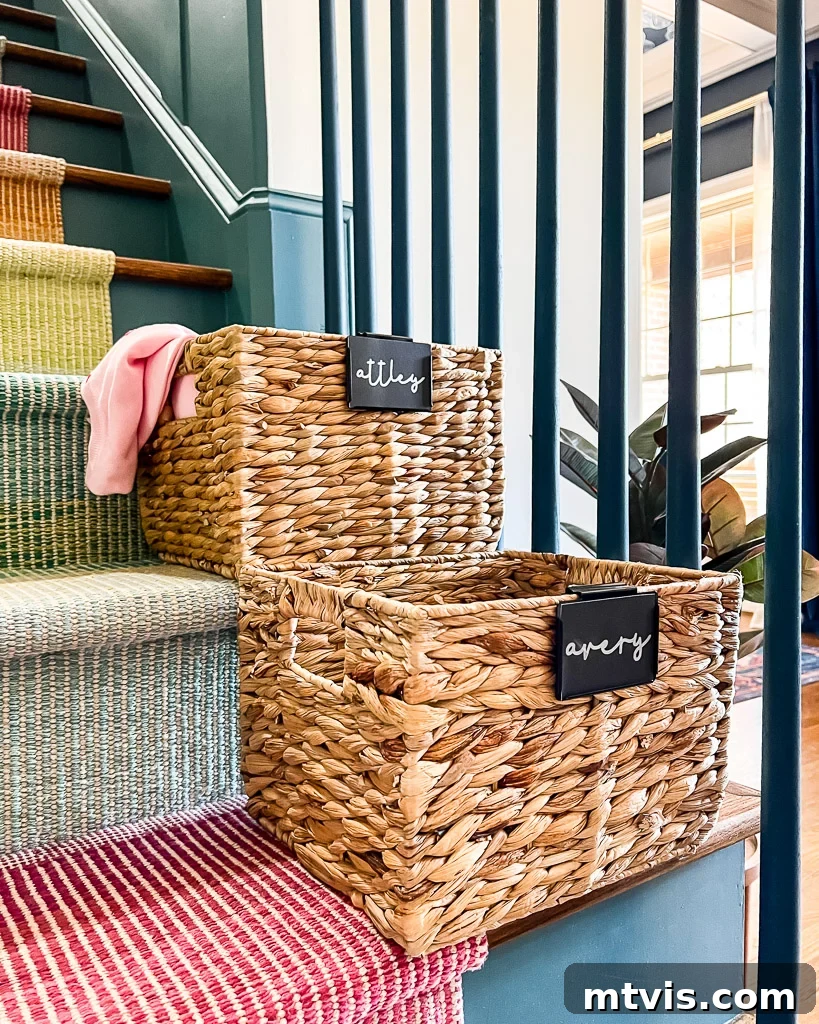
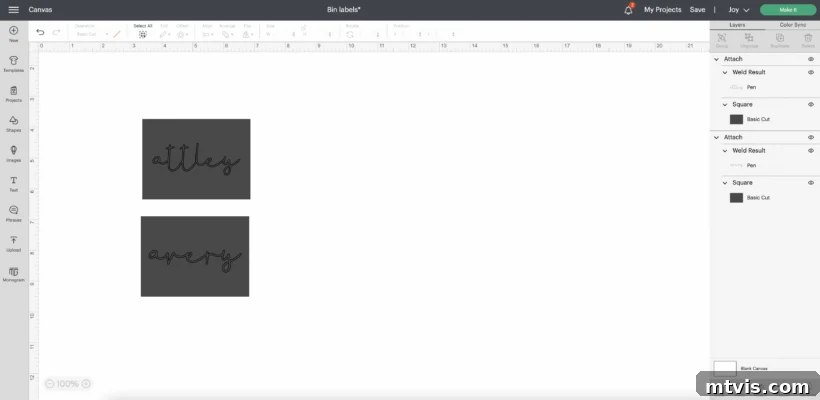
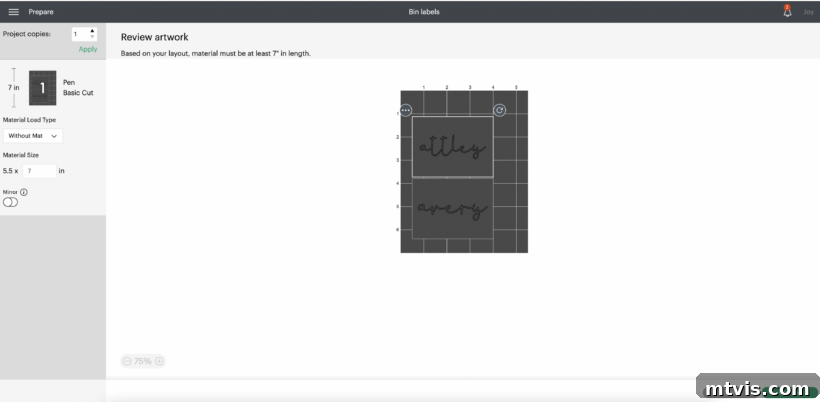
When creating labels using the “write then cut” method, you’ll focus on two main design elements: the shape and size of your label, and the text you want your Cricut pen to write. First, select a shape from Design Space’s library or upload your own. I chose a simple rectangular shape, custom-sizing it to fit perfectly into the basket bin labels that attach to my girls’ water hyacinth baskets, which we keep on our stairs. Next, add your desired text. For the font, I selected the charming Cricut Font “BFC Flannel Shirt.” This is a crucial step: ensure that the shape you want to cut is set to a “Basic Cut” operation, while the text you want the pen to draw is set to a “Pen” operation. After positioning your text perfectly within your chosen label shape, select both the text and the shape, and click the “Attach” button. This tells your Cricut machine to perform both the writing and cutting operations on the same piece of material, in the correct alignment. This is what my project looked like in Design Space:
Step 2: Send Your Design to Your Cricut for Writing and Cutting
With your design prepared and attached in Design Space, click “Make It” in the top right corner. The software will then guide you through the material loading process. A significant advantage of using Cricut Smart Materials, like the Smart Paper Sticker Cardstock, is that they can be loaded directly into the Cricut Joy without the need for a cutting mat, streamlining the process significantly. Design Space will prompt you precisely when to load your chosen Cricut pen or marker into clamp A (for the Joy, it simply prompts for pen loading) and when to load your fine-point blade into clamp B. In my experience, the Cricut machine always prioritizes the writing operation before it proceeds with the cutting. This ensures your text is perfectly drawn onto the material before the label shape is cut out, preventing any alignment issues. The process is remarkably straightforward and satisfying to watch.
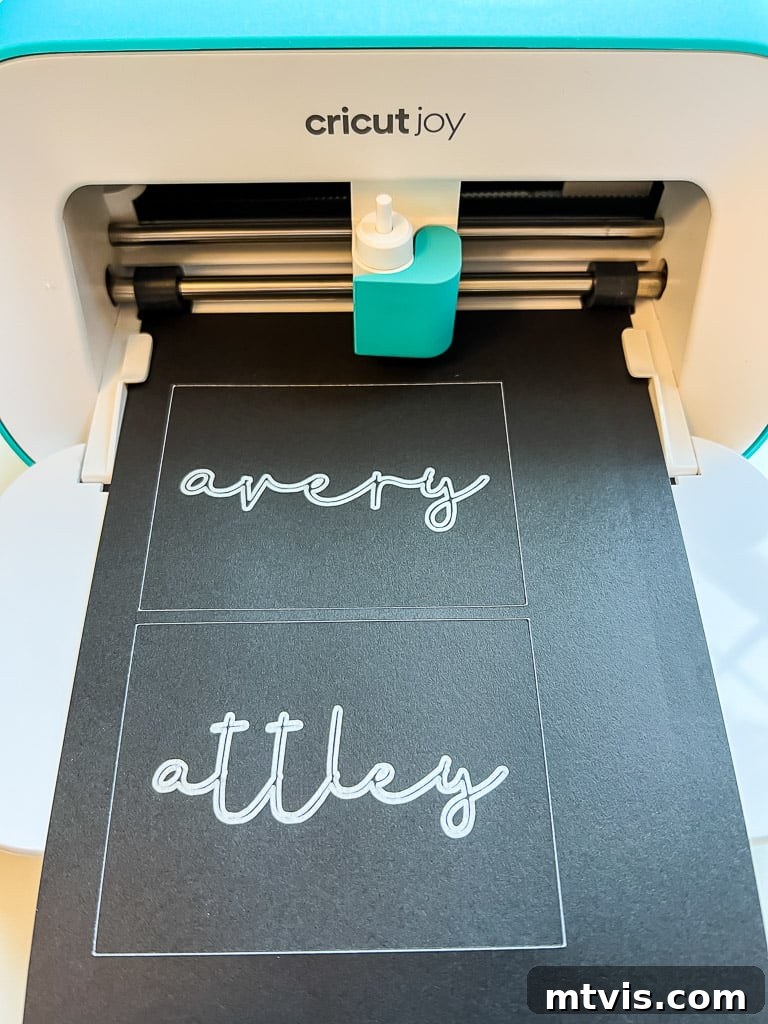
Here’s how my two custom labels looked after the Cricut Joy completed both the writing and cutting tasks. I chose to manually fill in the spaces within the double-lined font outlines with the metallic silver marker to give them a bolder, more finished appearance – a personal touch that truly highlights the versatility of this method!
Step 3: Apply Your Beautiful Paper Labels
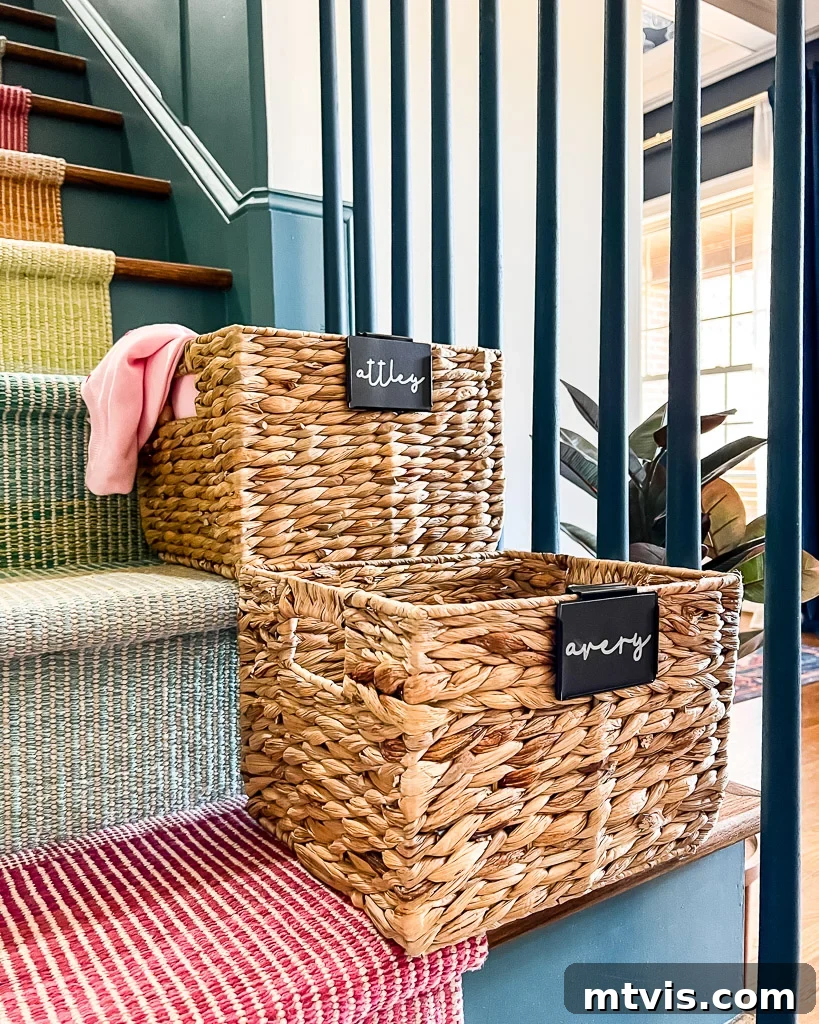
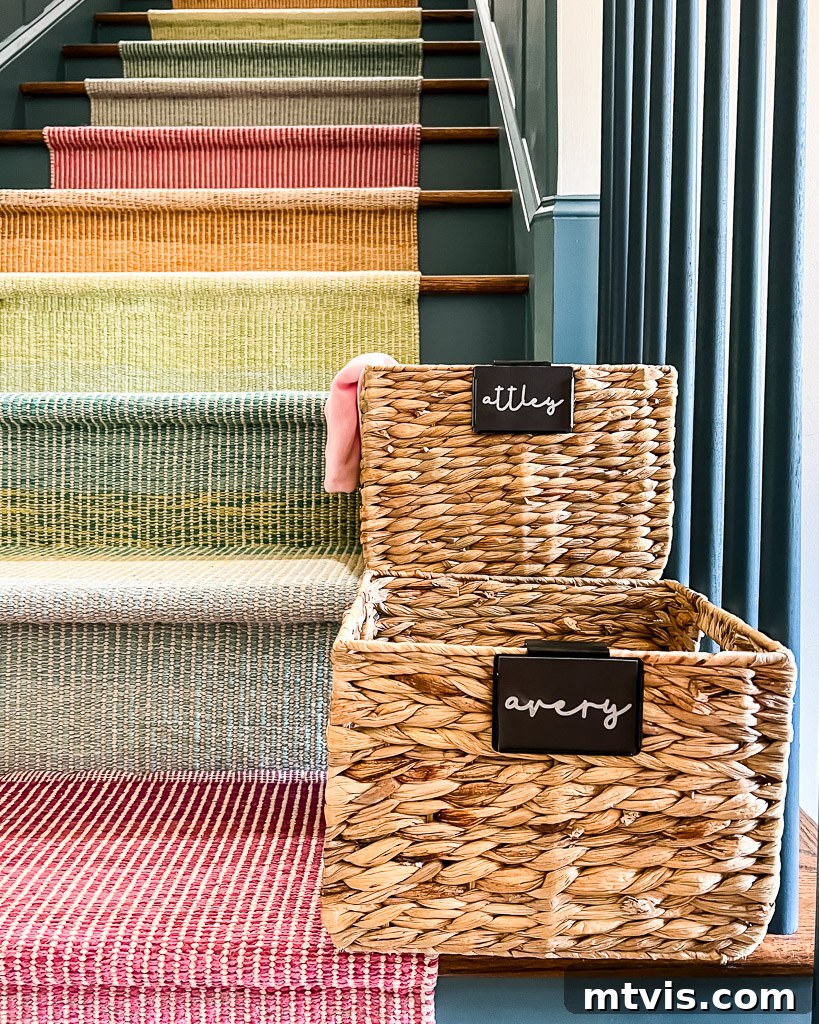
One of the best features of Cricut Smart Paper Sticker Cardstock is its inherent adhesive backing. For many surfaces, you can simply peel off the backing paper and directly stick your beautifully crafted label in place. However, for the water hyacinth baskets I intended to label, direct application wasn’t ideal due to their rough, natural texture. Instead, I carefully placed my custom paper labels onto these elegant basket bin labels. This allowed me to then clip the bin labels securely onto the baskets, creating a polished and easily changeable labeling system. The end result was not only organized but incredibly charming and cohesive with the decor!
There you have it – my two tried-and-true, most beloved methods for creating a wide array of custom labels using your Cricut cutting machine! From the crisp durability of vinyl to the charming elegance of pen-and-paper, your Cricut offers limitless possibilities for transforming your home organization and adding personalized touches. Which method will you try first?
Explore More Cricut & Crafting Inspiration:
- 26 Clever and Creative Gifts for Makers & Crafters
- Which Cricut Machine is Right for You? How to Choose
- Silhouette vs. Cricut – My Unbiased Review
- 10+ Best Gifts for Crafters: What Every Crafty Person Needs/Wants!
- Inspiring Cricut Projects for Your Home
- Personalized Cricut Ideas for Christmas
Curious about how I approach transforming rooms and spaces throughout our home? Discover the secrets in Designer in a Binder®.
For exclusive content and behind-the-scenes sneak peeks into my latest projects, don’t forget to subscribe before you go!