Few things are as frustrating as a door that refuses to close or latch properly. Whether you’ve just updated your door hardware, installed a new strike plate, or simply noticed your door isn’t catching anymore, this common household issue can disrupt your privacy, security, and even your home’s energy efficiency. It’s a problem many homeowners face, and while it might seem daunting at first, fixing a door that won’t close is often a straightforward DIY task. You don’t necessarily need to call a professional; with a few simple tools and techniques, you can restore your door to perfect working order. This comprehensive guide will walk you through identifying the root cause of the problem and provide a simple, effective solution that will have your doors functioning smoothly again in no time. Get ready to banish the annoyance of a perpetually ajar door!
Table of Contents
Identify The Problem: Why Won’t Your Door Latch?
Before diving into any repairs, the first and most crucial step is to accurately diagnose why your door isn’t closing or latching. There are typically two main culprits: an alignment issue with the door latch and the strike plate, or problems with the door’s hinges. A careful inspection will help you pinpoint the exact cause, saving you time and effort.
Check Your Door Latch Alignment
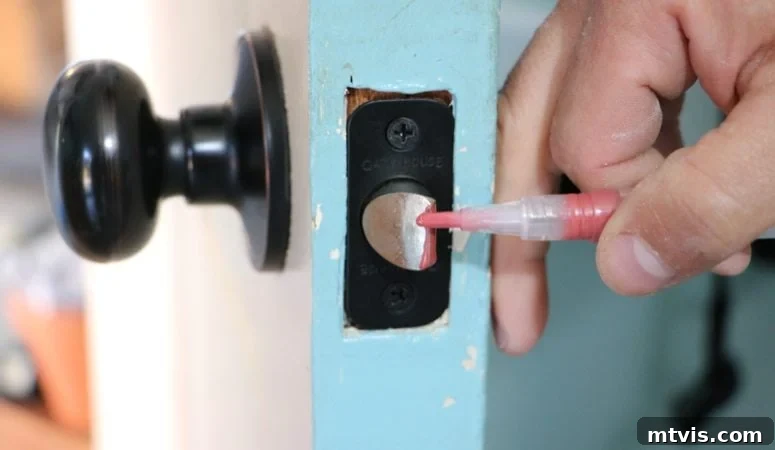
The most common reason a door latch won’t catch is misalignment between the latch bolt (the movable part on the door’s edge) and the strike plate hole (the metal plate on the door frame). This misalignment can be subtle, sometimes only a millimeter or two, but it’s enough to prevent the door from securely closing. To test for this, a simple trick is to use a tube of lipstick or any easily transferable marking agent like chalk or even a pencil. Apply a generous amount to the tip of the door latch bolt. Then, gently close the door as much as possible until the latch makes contact with the strike plate, but without forcing it to fully latch. Carefully open the door again and examine the strike plate. The transferred lipstick mark will clearly indicate where the latch is hitting. If the mark is above, below, or to the side of the strike plate hole, you’ve successfully identified an alignment issue. This problem often arises after changing door hardware, as new strike plates might have slightly different dimensions or screw hole positions, or due to natural house settling over time.
Check Your Hinges for Sagging or Shifting
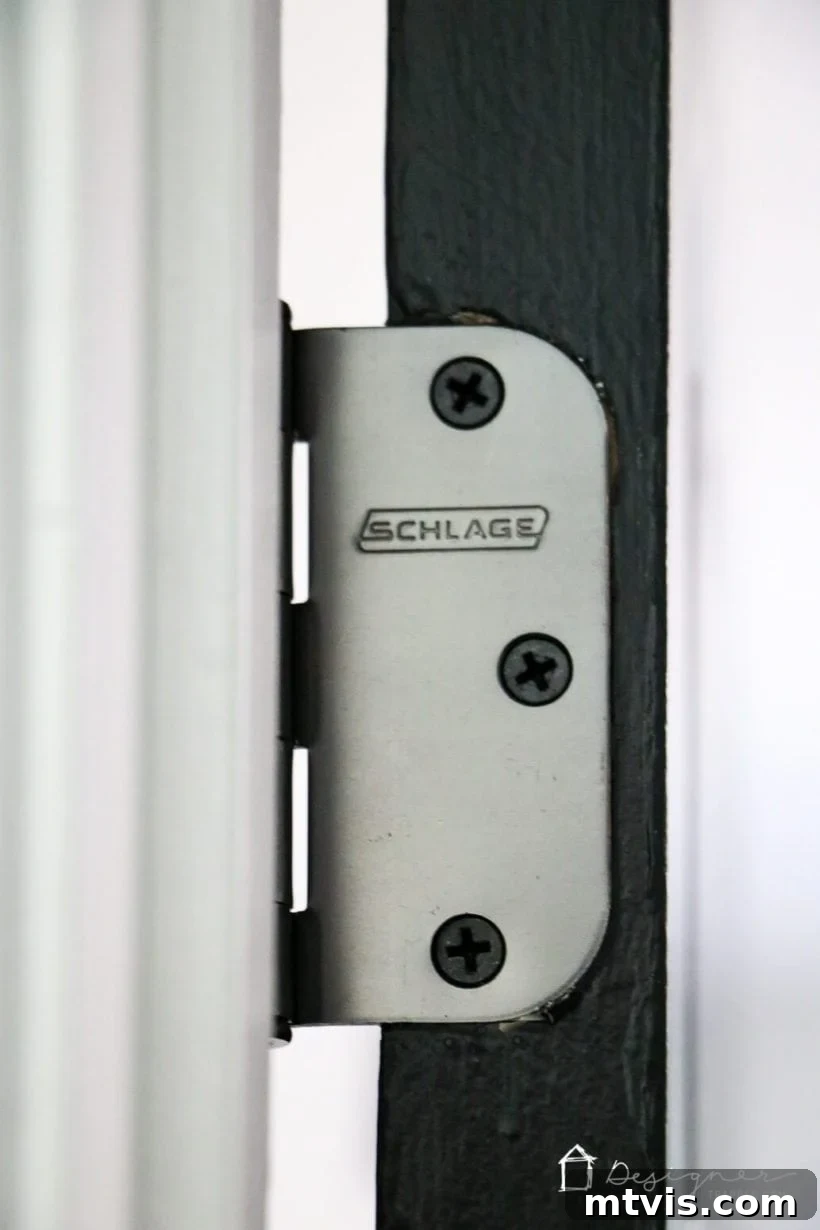
If your door latch is consistently too high or too low, indicating a vertical alignment problem, the issue might stem from loose or improperly seated hinges. Start by inspecting all the hinge screws on both the door side and the door jamb side. Over time, these screws can loosen, causing the door to sag. Tighten any loose screws with a screwdriver. If tightening alone doesn’t resolve the issue, you can try a more advanced hinge adjustment. Remove one of the short screws on the jamb side of the hinge – typically the middle screw. Replace it with a longer 3-inch screw. This longer screw will reach beyond the door frame into the framing stud, effectively pulling the entire door jamb closer and realigning the door. To raise a sagging door, use the long screw in the top hinge. Conversely, to lower a door whose latch is too high, use the long screw in the bottom hinge. This technique can often correct minor vertical misalignments caused by house settling or heavy doors.
The Challenge of Repositioning a Strike Plate or Hinges
Once you’ve identified the problem, whether it’s the strike plate or the hinges, the next step is often repositioning them. However, this is where many DIYers encounter a common hurdle. When the misalignment is only slight, moving the strike plate or hinge a tiny bit means drilling new screw holes extremely close to the old ones. The problem? You end up with a single, enlarged, and stripped-out hole that provides no grip for the new screws. This makes a secure, permanent fix impossible with traditional methods.
For example, when we installed new door hardware, our door wouldn’t latch because the new strike plate needed to shift just a fraction of an inch forward. Attempting to drill new screw holes directly adjacent to the existing, perfectly sized holes would simply create a large, irregular cavity. Screws wouldn’t have enough material to bite into, leaving the strike plate loose and the door still unlatched. This situation calls for a specialized solution to properly fill and reinforce the old screw holes before repositioning.
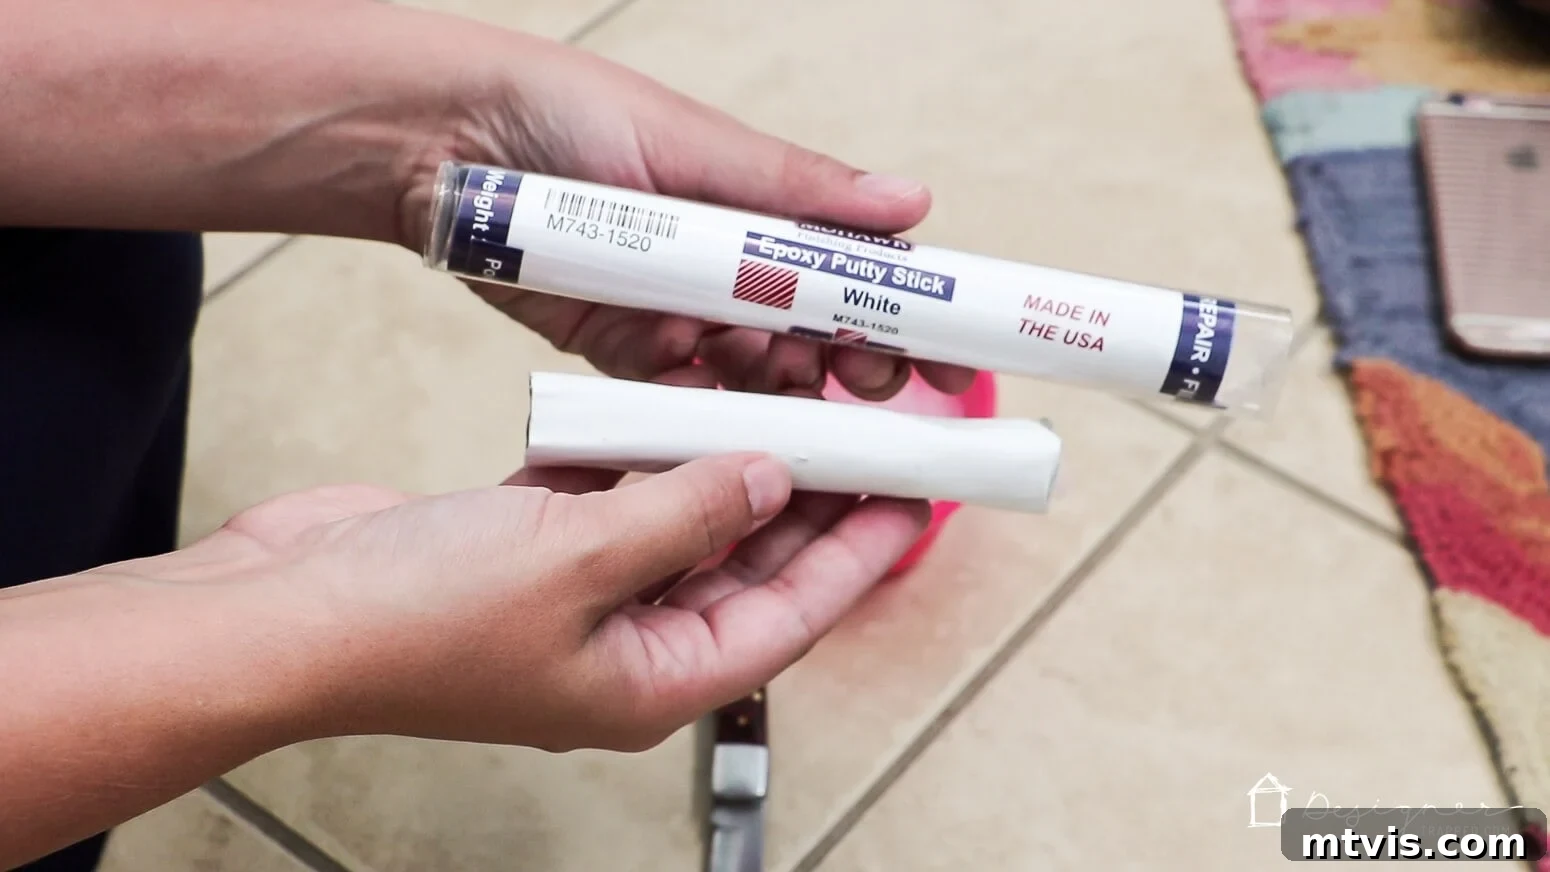
After extensive research, we discovered that a high-quality epoxy putty is the perfect tool for this particular challenge. Unlike wood filler or caulk, epoxy putty allows you to restore, rebuild, and repair wood with exceptional durability and a permanent bond. It’s ideal for reinforcing stripped screw holes, filling larger gaps, or even repairing broken corners in woodwork. We highly recommend the Mohawk Epoxy Putty Stick because it dries significantly harder than wood itself and doesn’t shrink over time. This makes it an excellent choice for creating new, rock-solid anchor points for your screws, ensuring your door hardware remains firmly in place for years to come.
This post contains affiliate links for your convenience. Click here for my full disclosure policy.
How to Reposition a Strike Plate (or Hinges) and Drill Fresh Holes That Work
This method provides a robust and lasting solution to repositioning your door hardware, whether it’s a strike plate or hinges. By properly filling old screw holes with epoxy putty, you create a new, solid surface that’s ready for fresh, secure screw placement.
Materials Needed
- Mohawk Epoxy Putty Stick (Choose a color as close to your trim as possible; white is a common choice)
- A leveler card or an old credit card (for smoothing the epoxy)
- A small dish of soapy water (to prevent sticking)
- A sharp utility knife (for cutting the putty)
- Lip gloss or lipstick (for marking the latch alignment)
- Screwdriver (to remove/install hardware)
- Drill with a small bit (optional, for pilot holes if needed)
Step-by-Step Tutorial for a Lasting Fix
This process is highly effective for repairing stripped screw holes and precisely repositioning your door’s strike plate or hinges. While the example focuses on a strike plate, the technique is identical for adjusting hinge placement. Follow these detailed steps for a successful repair.
For a visual guide, imagine a video tutorial demonstrating this process in detail. It would show each step from start to finish, offering clarity on the techniques described below.
Time needed: 45 minutes
Easily fix a door that won’t close by filling old screw holes with epoxy putty and repositioning the strike plate or hinges for perfect alignment.
- Prepare Your Supplies.
Begin by gathering all the necessary materials listed above. This ensures a smooth workflow without interruptions. Mix a small amount of liquid soap (just a few drops) into approximately 2 ounces of water in a small dish. This soapy water will be essential for keeping the epoxy putty from sticking to your fingers and tools during application, making it much easier to work with and achieve a clean finish.

- Cut a Piece of Epoxy Putty and Knead It.
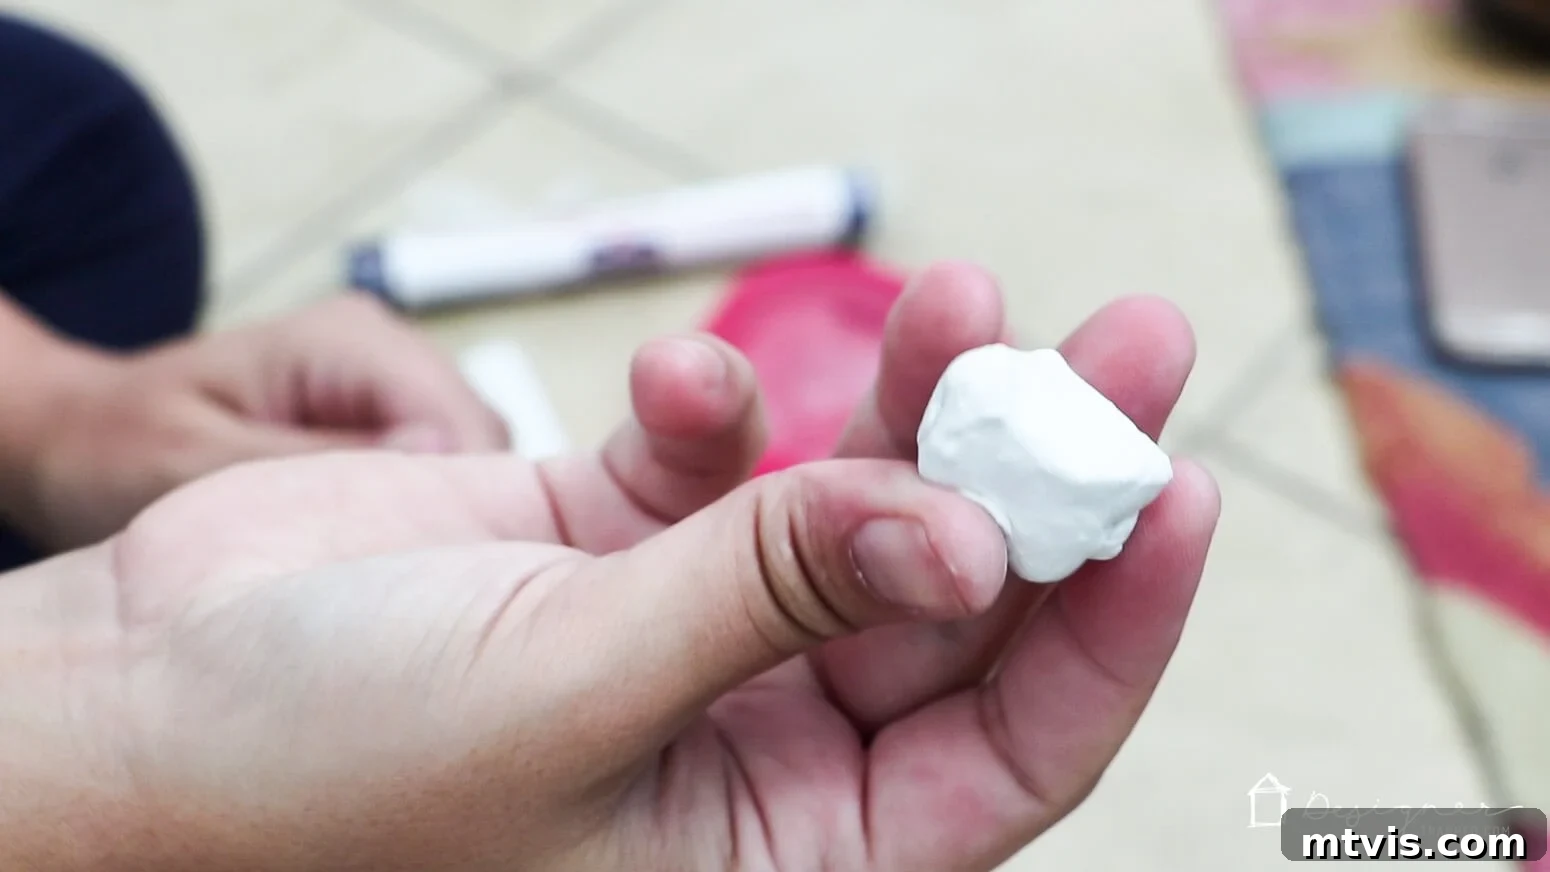
Using your sharp utility knife, carefully cut off a small section of your Epoxy Putty Stick. The amount needed will depend on the size and number of screw holes you are filling, but it’s better to start with a slightly smaller piece and cut more if necessary. Once cut, begin kneading the epoxy putty thoroughly with your fingers. You’ll notice a distinct change as the two components (resin and hardener) mix; the color will become completely uniform, and the putty will start to feel warm in your hands. This warming indicates the chemical reaction is beginning. If the epoxy starts to become sticky, dip your fingers into the prepared soapy water and continue kneading. It’s crucial to work relatively quickly here, as the epoxy has a short working life, typically around 6 minutes after mixing, before it begins to set.
- Push the Epoxy Putty into Your Old Screw Holes.
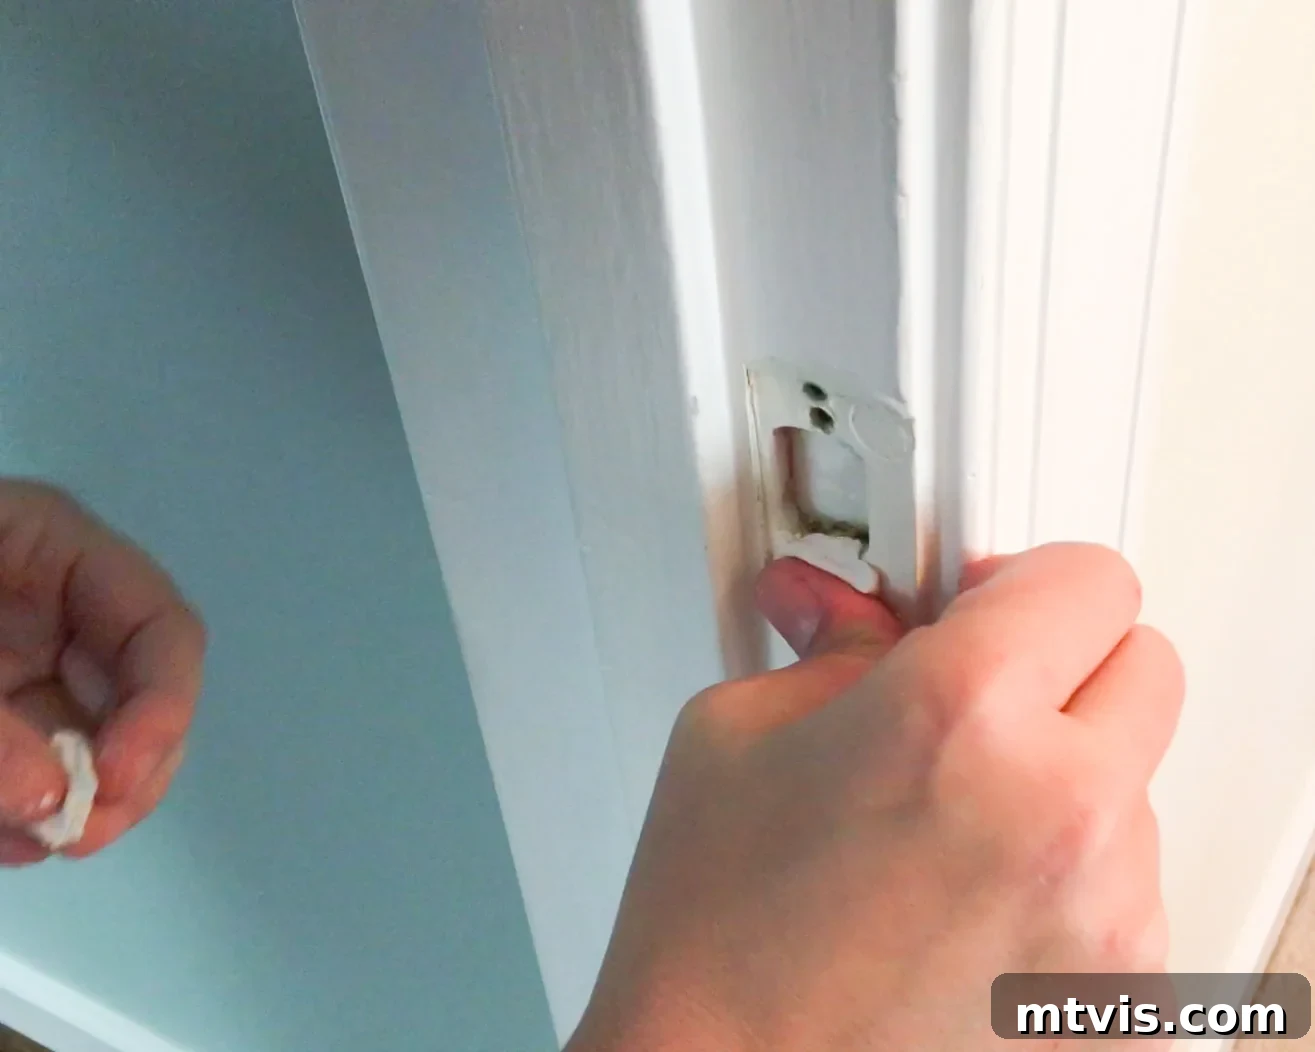
Once the epoxy putty has a uniform color and is warm, it’s ready for application. Firmly push the kneaded epoxy putty directly into the old, stripped screw holes using your fingers. Ensure the holes are completely filled, pressing the putty in firmly to eliminate any air pockets and create a dense fill. The goal is to overfill the holes slightly. After filling, use your leveler card or old credit card to scrape away any excess epoxy putty that protrudes above the surface of the wood. You want a perfectly flush, smooth finish, matching the surrounding wood. If the epoxy starts to stick to the card or your fingers during this process, simply rub them lightly with the soapy water mixture. This will help you achieve a clean, professional-looking repair that is ready for the next step.
- Allow the Epoxy Putty to Cure.
This is a critical step that ensures the durability of your repair. Allow the filled area to cure completely. For most epoxy putties, this takes a minimum of 20 minutes for a workable hardness, but often longer for full strength (check your product’s specific instructions). The remarkable aspect of epoxy putty is its composition: it’s a two-part resin and hardener system that creates an incredibly strong bond. Once cured, this epoxy putty can be sanded, drilled, stained, or painted, just like wood. In fact, its surface becomes even harder and more resilient than natural wood. This means that when you drive new screws into the repaired area, they will have an exceptionally strong, solid material to bite into, making the repaired spot even stronger and more secure than the original wood was.
- Reposition the Strike Plate or Hinges.
Once the epoxy putty has fully cured and hardened, you’re ready to reposition your strike plate or hinges. If you haven’t already, use the lipstick or lip gloss method on the door latch to accurately mark the ideal new position for the strike plate on the door frame. Align the strike plate with this new mark. You can now screw the strike plate into its correct position. The cured epoxy provides a perfectly solid surface for the new screws to grip firmly. If necessary, you can pre-drill small pilot holes through the epoxy for easier screw insertion, though often the screws can be driven directly into the hardened putty. Test the door multiple times to ensure it closes smoothly and latches securely. The door should now close effortlessly, providing the desired privacy and security.
That’s it! Fixing a door that won’t close or latch doesn’t have to be a complicated or costly endeavor. By systematically identifying whether the issue lies with your door’s latch alignment or its hinges, and by applying this smart technique for repairing old screw holes, you empower yourself to tackle common household repairs with confidence. The use of epoxy putty provides a professional-grade, durable solution, ensuring that your door remains securely in place for the long haul. Remember, a properly functioning door enhances not just your home’s aesthetics but also its security, privacy, and energy efficiency. With a little bit of effort and the right approach, you can have your doors working like new again, enjoying the peace of mind that comes with a perfectly closing door. If, after all your efforts, the door still presents complex issues like a severely warped slab or major structural problems with the frame, don’t hesitate to consult a professional carpenter or handyman.
More HOME REPAIR Posts
SEE ALL HOME IMPROVEMENT POSTS
-
How to Fix a Hole in the Wall Yourself the Easy Way!
-
How to Fix a Door That Won’t Close
-
How to Match A Paint Color That’s Already On A Wall
-
How to Repair Holes in Your Doors
-
How to Repair Drywall: Tips for “Smallish” Repairs
-
How to Repair Chipped Baseboards
Curious about transforming rooms and spaces in your home with a clear vision and actionable plan? Explore the principles behind Designer in a Binder® to learn how to approach home design like a pro.
For more exclusive content, behind-the-scenes sneak peeks, and fresh DIY and home repair tips delivered directly to your inbox, be sure to subscribe to our newsletter before you leave!