
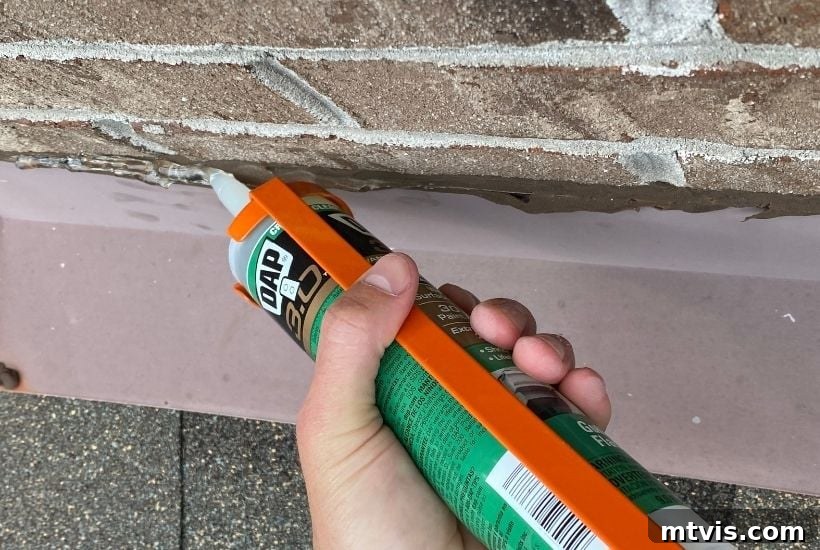
Restore Your Roof’s Defense: An Essential DIY Guide to Caulking Flashing for Leak Prevention
This comprehensive guide is proudly sponsored by DAP Products, whose innovative sealants make essential home maintenance projects like this accessible to everyone. All opinions expressed are 100% my own, ensuring an honest and practical approach to DIY home repair. This post contains carefully selected affiliate links for your convenience. To understand our commitment to transparency, please click here to read our full disclosure policy.
Maintaining the integrity of your home’s exterior, especially its roof, is paramount to preventing costly damage. While it might not be the most glamorous home improvement task, ensuring your roof’s flashing is properly sealed is incredibly important. Failing to address deteriorating flashing can lead to significant water damage, compromising your home’s structure and interior. The good news is that you don’t need to hire a professional roofer for this crucial maintenance; it’s an easy and rewarding DIY project. Dive into our step-by-step instructions to learn how to inspect, clean, and effectively caulk your flashing, safeguarding your home against leaks.
Understanding Flashing: Your Roof’s Unsung Hero
Before we delve into the repair process, let’s understand why flashing is such a critical component of your roofing system. Flashing, typically crafted from durable materials like aluminum, galvanized steel, or copper, acts as a protective barrier at various vulnerable points where your roof surfaces meet other structural elements. These critical junctions include the perimeter of your chimney, around dormer windows, along the edges where the roof meets vertical walls, and surrounding skylights or ventilation pipes.
The primary function of flashing is to channel water away from these seams and off your roof, preventing it from seeping into your home. Without properly installed and maintained flashing, rainwater would easily penetrate these gaps, leading to devastating leaks, wood rot, mold growth, compromised insulation, and even structural damage over time. It’s an often-overlooked yet incredibly vital defense mechanism against the elements, quietly working to keep your home dry and safe.
The Importance of a Watertight Seal
Imagine your roof as a meticulously designed shield against rain, snow, and ice. Flashing is the specialized sealant that reinforces the weakest points of this shield. Over time, due to constant exposure to harsh weather conditions—intense sun, freezing temperatures, heavy rains, and strong winds—the sealant around your flashing can degrade. It can dry out, crack, peel, or simply lose its adhesion, creating tiny pathways for water intrusion. Even a seemingly insignificant gap can allow a surprising amount of water into your home during a storm.
The consequences of a compromised seal are far-reaching. Beyond the immediate inconvenience of a drip, water ingress can lead to much more severe issues:
- Structural Damage: Water can rot wooden roof decking, rafters, and wall studs, weakening the entire structure.
- Mold and Mildew Growth: Damp, dark attic spaces are perfect breeding grounds for mold, posing health risks and requiring expensive remediation.
- Insulation Degradation: Wet insulation loses its effectiveness, leading to higher energy bills and creating more opportunities for mold.
- Interior Damage: Water stains on ceilings and walls are the visible signs, but plaster, drywall, and paint can also be ruined.
- Pest Infestations: Damp wood can attract insects like termites and carpenter ants.
Proactive maintenance, specifically ensuring a robust and flexible seal around all flashing, is the most effective and affordable way to avert these significant problems.
How to Thoroughly Inspect Your Flashing for Potential Leaks
Regular inspection is the cornerstone of effective roof maintenance. Ideally, you should inspect your flashing at least once a year, preferably in the spring or fall, and always after any severe weather events. Safety should be your absolute priority during this process. If you are uncomfortable working on a ladder or navigating your roof, please consider hiring a professional. For those confident in their abilities, here’s how to conduct a comprehensive inspection:
Safety Precautions:
- Always use a sturdy ladder and ensure it’s placed on level ground.
- Wear appropriate non-slip footwear.
- Never inspect your roof alone; have someone spot you.
- Avoid inspecting during wet, windy, or icy conditions.
Many areas where the roof meets the house can be inspected from a second-story window or even with binoculars from the ground. However, a closer look often requires roof access.
What to Look For:
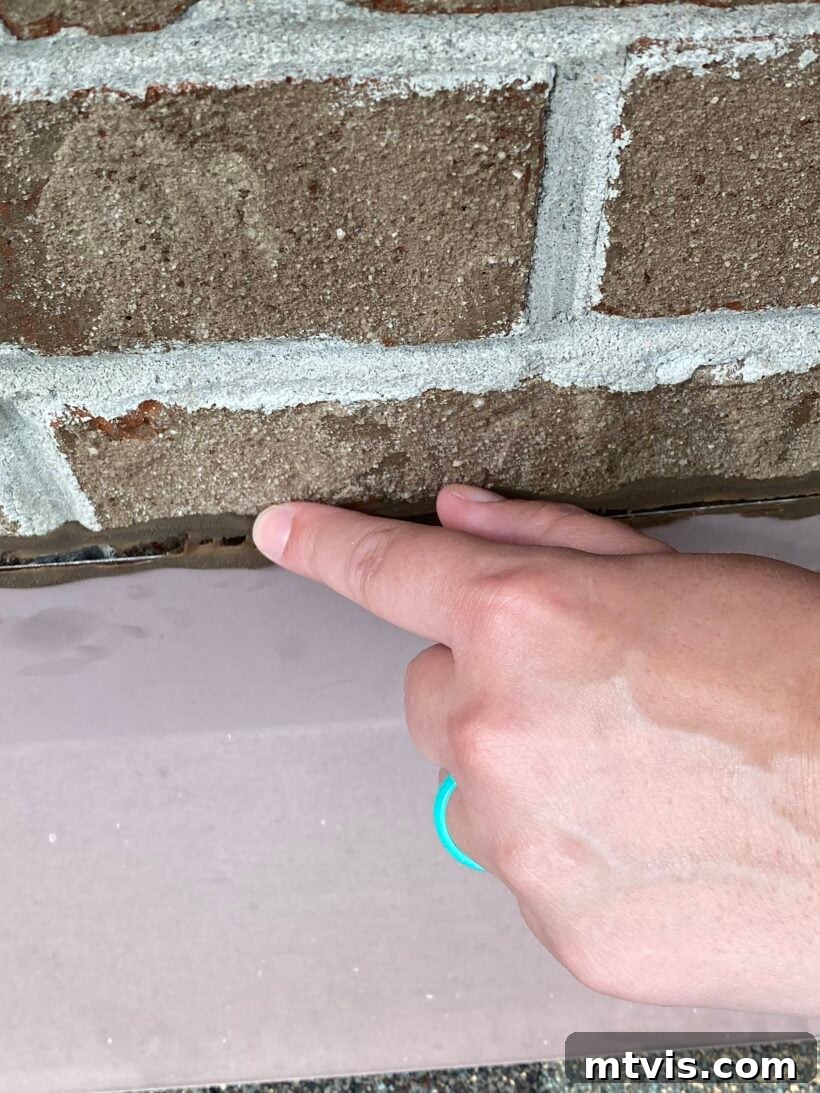
- Visible Gaps and Cracks: Carefully examine the seal around the base of your chimney, along the walls where the roof abuts them, and around dormers and skylights. Look for any visible separations between the flashing and the roof or wall surface. These gaps can be subtle hairline cracks or more obvious areas where the sealant has pulled away.
- Deteriorated Sealant: Check if the existing caulk or sealant is dry, brittle, cracked, or completely missing. Old caulk can lose its elasticity and adhesive properties over time.
- Loose or Rusted Fasteners: Inspect any areas where flashing is secured with nails. Ensure the nails are still firmly in place and that their heads are sealed. Rust around a nail could indicate a leak point.
- Corrosion or Damage to the Flashing Material: Look for signs of rust on metal flashing, or any physical damage like bends, dents, or holes that could compromise its integrity.
- Water Stains: Any discoloration or staining on the flashing itself, the shingles below it, or the adjacent wall indicates water is not being properly shed.
- Moss or Algae Growth: While not a direct sign of flashing failure, excessive moss or algae near flashing can trap moisture and accelerate material degradation.
Below is an example of what failed flashing might look like. Notice the distinct gap where the seal has been compromised, allowing water to potentially seep underneath.
Preparing for Flashing Repair: Tools and Materials
Before you begin applying new sealant, gather all your necessary tools and materials. Proper preparation is crucial for a long-lasting and effective repair.
Essential Tools and Materials:
- Caulking Gun: A standard caulk gun is required for dispensing the sealant.
- High-Quality Sealant: We highly recommend DAP Crystal Clear Premium Gutter and Flashing Sealant. This product is specifically formulated for gutters and flashing, offering excellent adhesion, flexibility, and weather resistance. An equally superb alternative is the newer Ultra Clear Roof Waterproof Rubberized Sealant from DAP, designed for superior waterproofing.
- Safety Gear: Due to the solvent-based nature of some sealants, always wear protective gloves and eye protection. Better safe than sorry!
- Caulk Removal Tool or Utility Knife: Essential for scraping away old, degraded caulk.
- Stiff Brush or Wire Brush: For cleaning dirt, debris, and loose particles from the flashing surface.
- Cleaning Rags and Solvent: To thoroughly clean the area before applying new sealant. A solvent like mineral spirits (check sealant instructions) can help remove stubborn residues.
- Ladder: A stable and secure ladder for safe access to your roof.
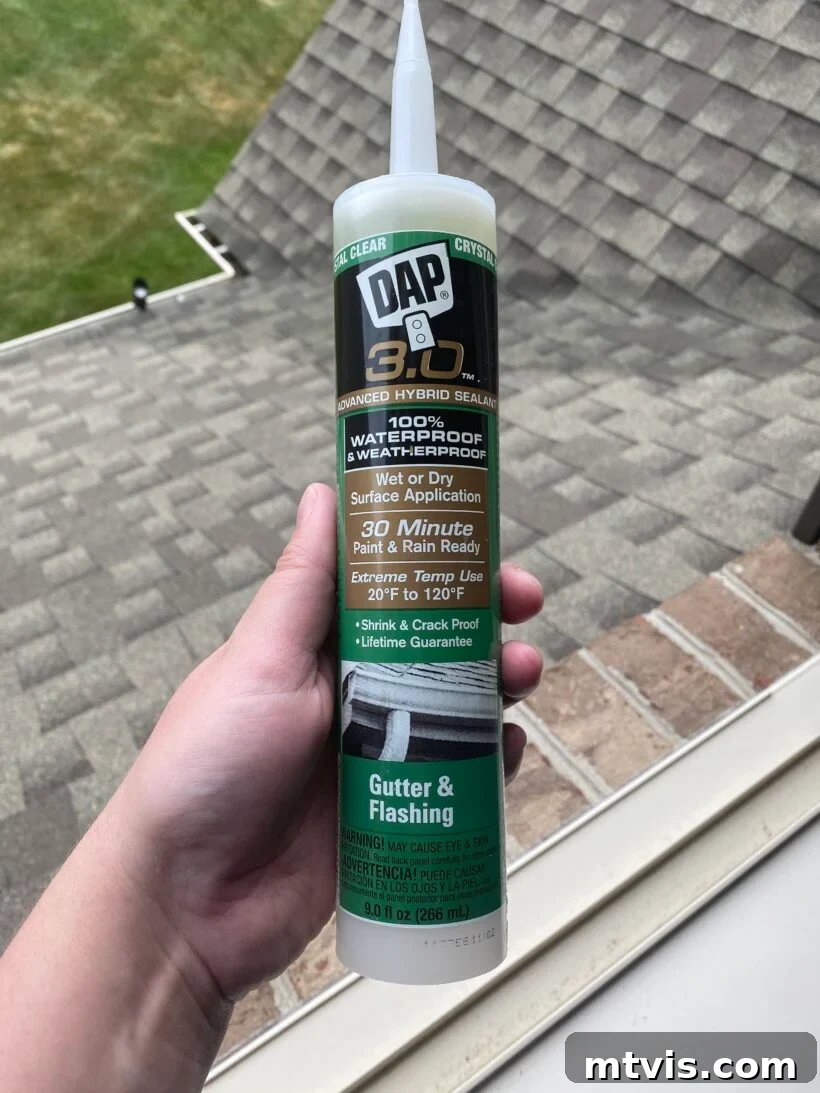
One of the standout features of DAP Crystal Clear Premium Gutter and Flashing Sealant is its versatility. It can be applied to both wet and dry surfaces, a huge advantage when dealing with unpredictable weather or dew. Moreover, it becomes water-ready in just 30 minutes, drastically reducing vulnerability to unexpected rain after application. Its crystal-clear finish ensures it blends seamlessly with any building material, making your repair practically invisible.
Step-by-Step Guide to Caulking Your Flashing
Once you’ve completed your inspection and gathered your materials, it’s time to repair those compromised seals. Follow these steps for a durable and effective flashing repair:
Step 1: Thorough Surface Preparation
This is arguably the most critical step for a lasting seal. Begin by carefully removing all old, cracked, or loose caulk from the gaps using your utility knife or caulk removal tool. Scrape away any dirt, moss, or debris with a stiff brush or wire brush. The surface must be as clean as possible for the new sealant to adhere properly. If there’s any greasy residue or stubbornly stuck grime, use a rag dampened with an appropriate solvent (check the sealant’s instructions for compatibility) to wipe the area clean. Allow the surface to dry completely if you are not using a sealant specifically designed for wet applications. Even with wet/dry sealants, a cleaner surface always yields better adhesion.
Step 2: Load the Caulking Gun
Cut the tip of the sealant cartridge at a 45-degree angle, making an opening just large enough to fill the existing gaps. Puncture the inner seal of the cartridge with the long metal rod on your caulk gun (or a nail/wire). Insert the cartridge into the caulk gun.
Step 3: Apply the Sealant Evenly
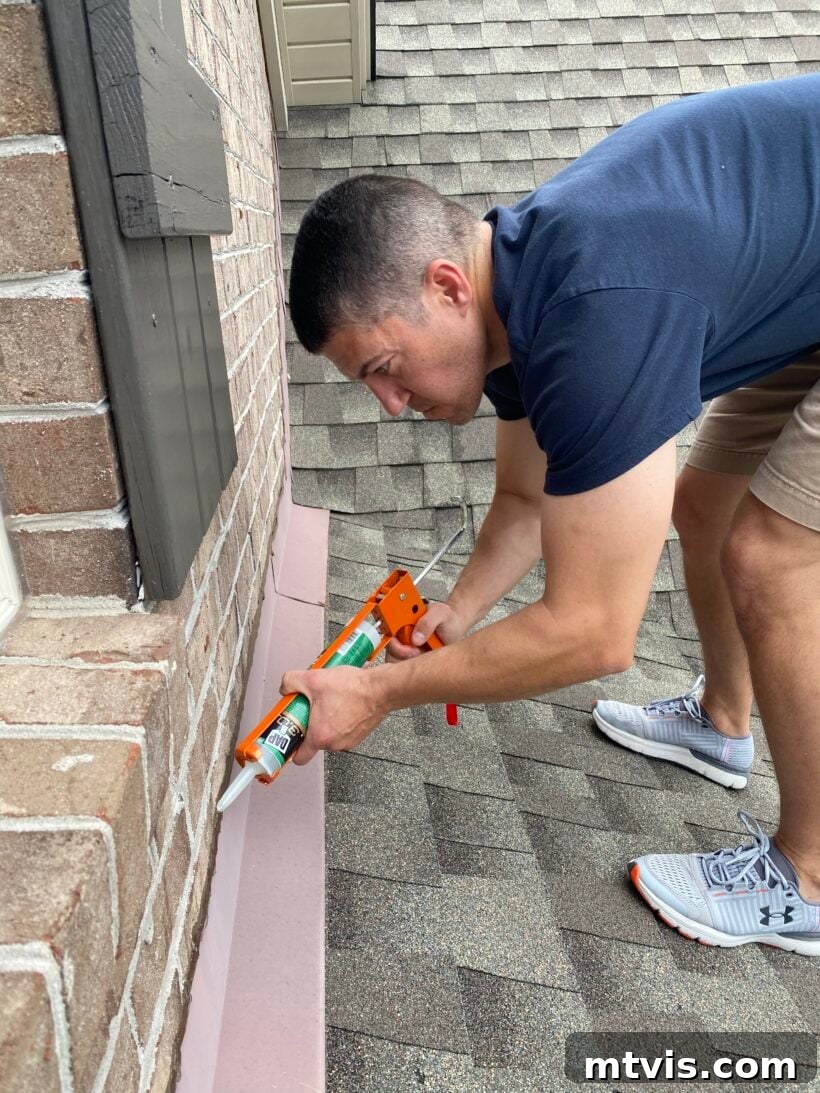
Position the tip of the caulk gun firmly against the gap you wish to seal. Apply consistent pressure to the trigger while moving the gun steadily along the seam. The goal is to create a continuous, even bead of sealant that completely fills the gap between the flashing and the adjacent surface. Don’t worry too much about making it look perfectly smooth or pretty at this stage; the priority is a complete and watertight seal. Work in manageable sections to ensure thorough coverage.
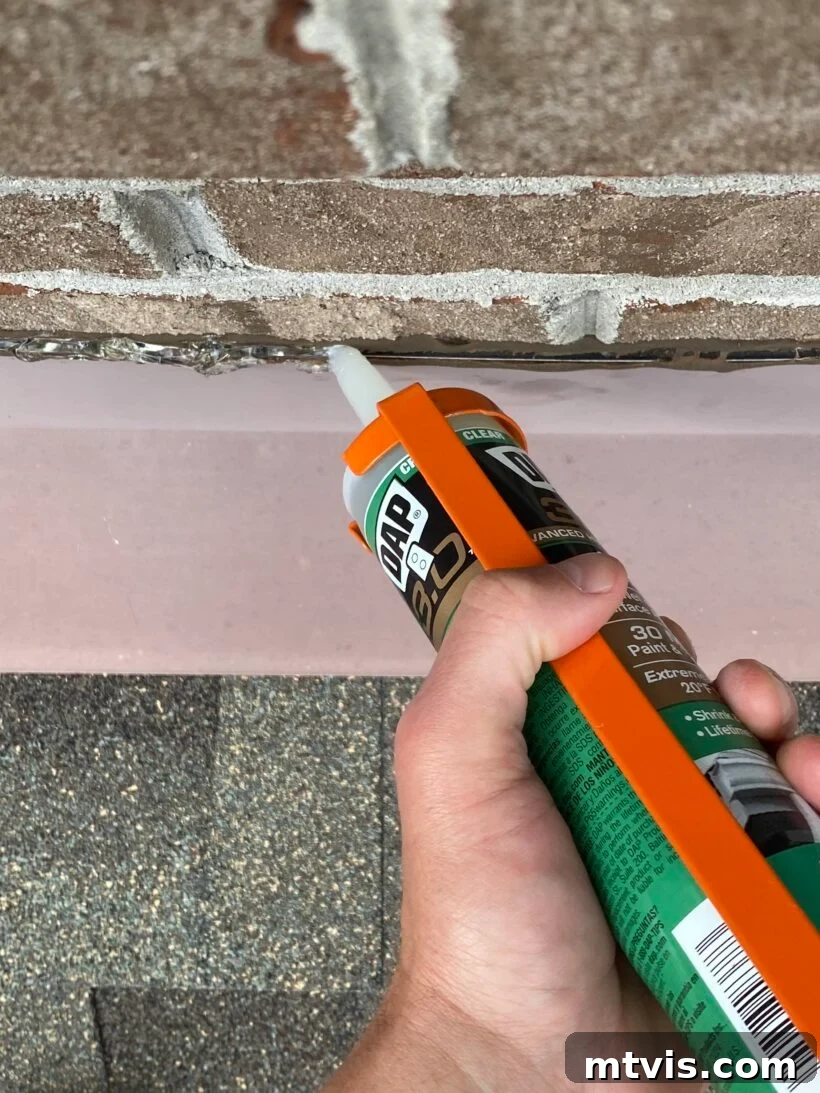
Step 4: Smooth the Bead (Optional, but Recommended for Durability)
While the primary objective is to fill the gap, smoothing the bead with a wet finger, a caulk tool, or even an old spoon can create a more professional finish and ensure better contact with both surfaces. This step helps push the sealant deeper into the gap and removes excess material. However, if the main concern is just water prevention and appearance is secondary, a less “perfect” bead is still highly effective.
Step 5: Allow for Proper Curing
Refer to the sealant manufacturer’s instructions for recommended curing times. While DAP Crystal Clear Premium Gutter and Flashing Sealant is water-ready in 30 minutes, it will take longer to fully cure. Avoid disturbing the newly sealed areas during this period. Complete curing ensures maximum durability and waterproofing.
Ongoing Maintenance and Prevention
Performing this crucial DIY flashing repair provides immediate protection, but ongoing vigilance is key to long-term roof health. Integrate these practices into your home maintenance routine:
- Annual Inspections: Continue to inspect your flashing and entire roof system at least once a year, or after any significant storms. Early detection of minor issues prevents major problems.
- Keep Gutters Clean: Clogged gutters can cause water to back up, overflow, and pool around flashing, accelerating its deterioration. Regularly clean your gutters and downspouts.
- Trim Overhanging Branches: Tree branches rubbing against your roof or flashing can cause abrasion and damage over time. Falling branches during storms can also cause significant impact damage.
- Address Minor Issues Promptly: Don’t procrastinate on small repairs. A small crack in the caulk can quickly become a significant leak if ignored.
This quick, easy, and incredibly important DIY project will save you money and headaches in the long run. Have you ever tackled this essential home maintenance task? If not, we wholeheartedly recommend you prioritize it soon to protect your valuable investment!
If you’re looking for more guidance on transforming spaces within your home, make sure to explore our acclaimed resource, Designer in a Binder®. It’s designed to empower you with the tools and confidence to create beautiful, functional living areas.
For exclusive content, behind-the-scenes sneak peeks, and the latest DIY tips delivered straight to your inbox, be sure to subscribe to our newsletter before you go!
Protecting your home from the elements doesn’t have to be a daunting or expensive endeavor. With a little time, the right tools, and this detailed guide, you can confidently tackle flashing repairs yourself, ensuring your home remains dry, safe, and secure for years to come.

Explore More DIY Home Improvement Projects
- Easy Gutter Cleaning Tips for Every Homeowner
- Preventing Ice Dams: A Winter Roof Maintenance Guide
- Top 5 Essential Tools for Every DIY Enthusiast