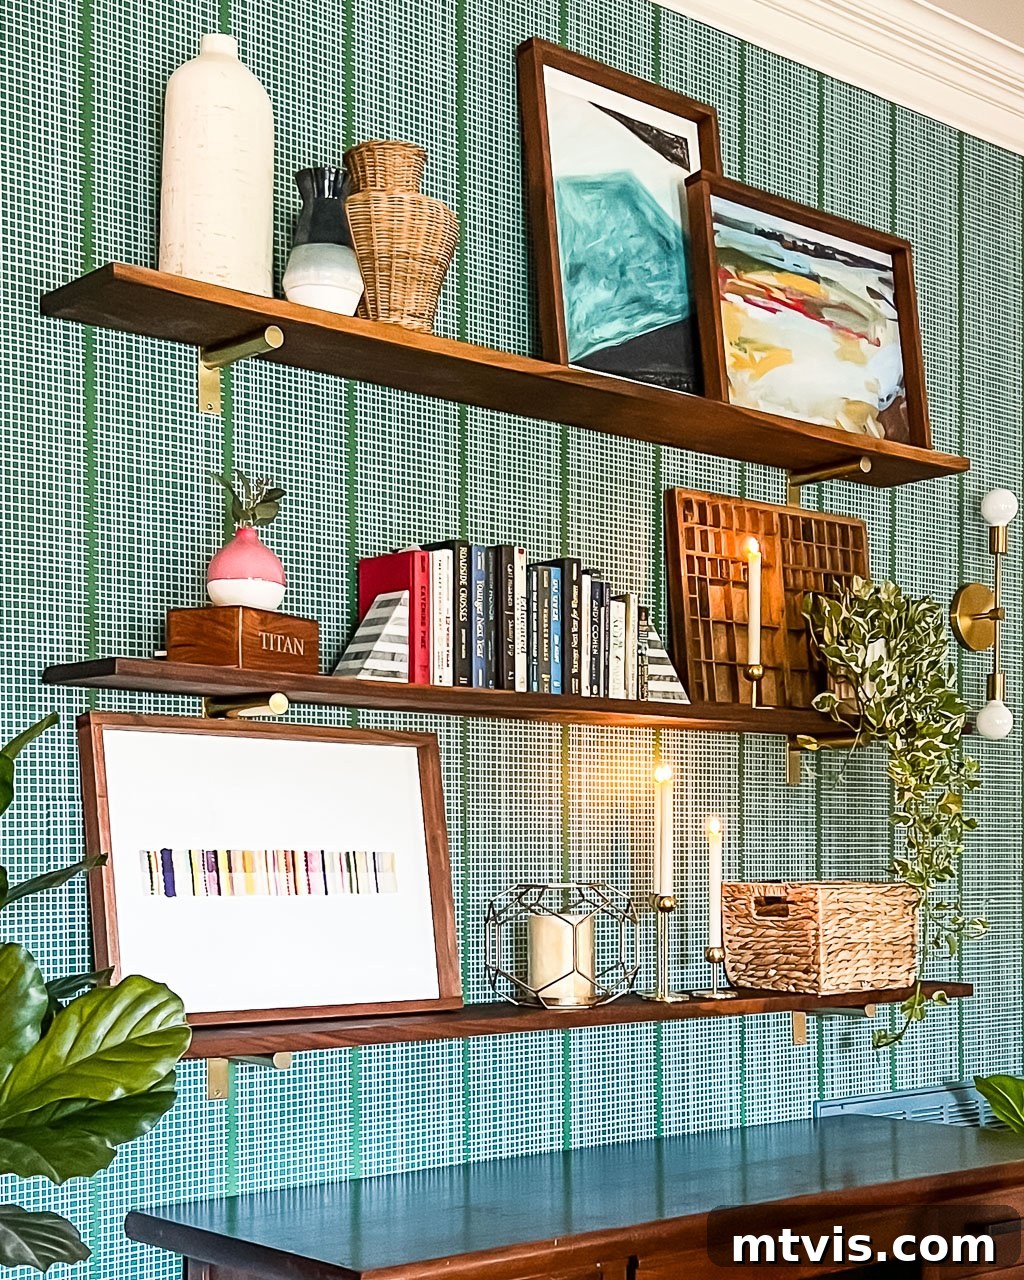
Are you searching for simple, yet impactful, ways to enhance your home’s storage and aesthetic appeal? Look no further! While countless DIY shelf tutorials exist, we’re here to unveil what we consider the absolute easiest and most rewarding method for creating stunning wall shelves. This project is incredibly beginner-friendly, allowing anyone to achieve professional-looking results. Not only do these shelves add valuable storage space, but they also transform bland walls into captivating focal points. Get ready to embark on a simple DIY journey that will elevate your home decor!
Why These DIY Wall Shelves Are Our Favorite
With over two decades of experience in DIY and home renovation projects, we’ve tackled countless builds. From DIY floating shelves to sturdy DIY pipe shelves, and even a magnificent DIY art ledge for our family room, we’ve explored numerous wall shelving solutions. Through all these projects, one particular style has emerged as our absolute favorite—not just for its effortless installation, but also for its high-end, custom look.
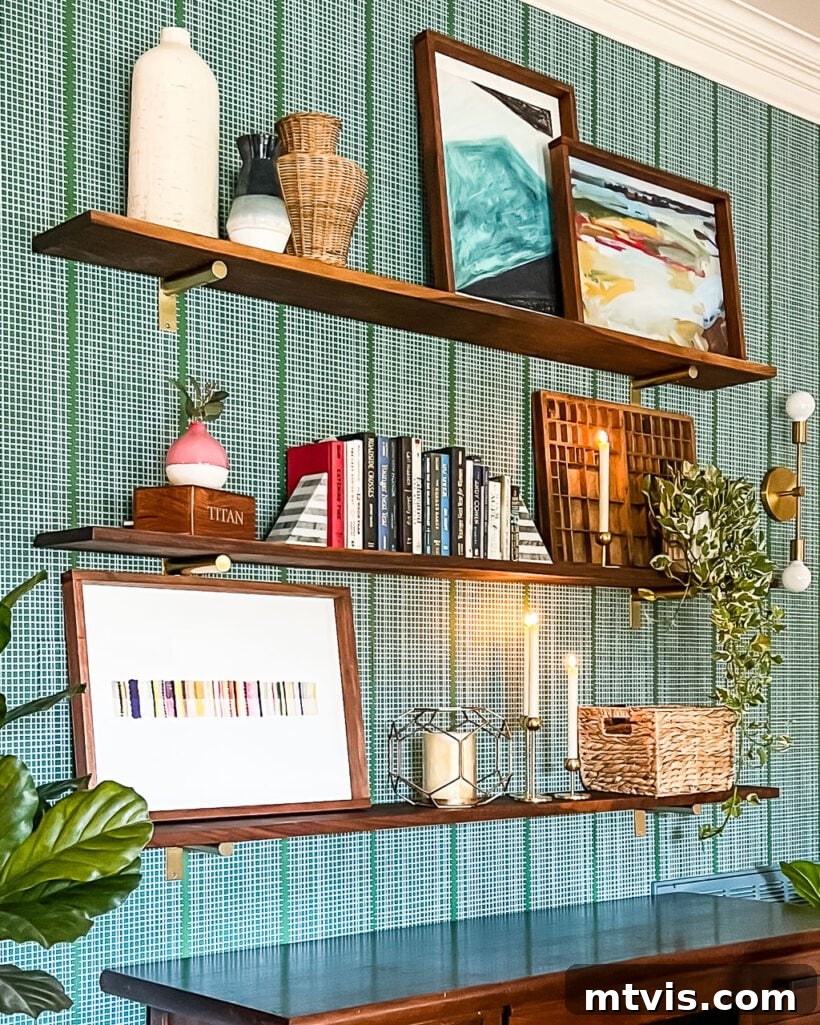
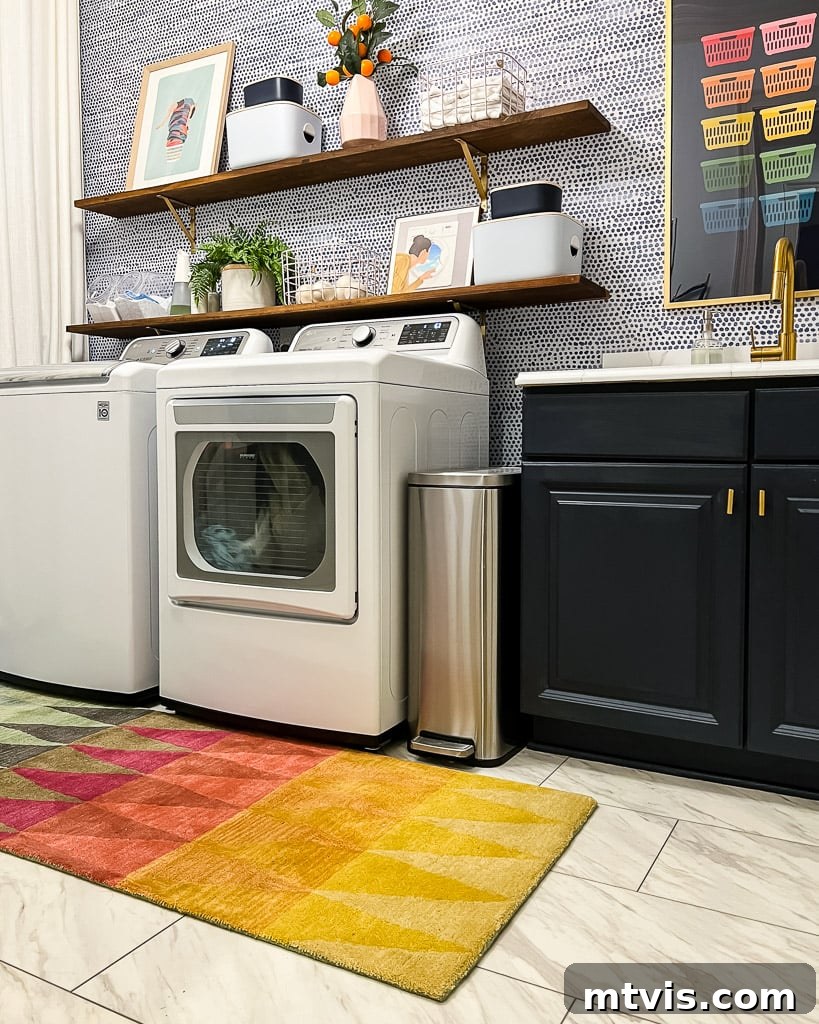
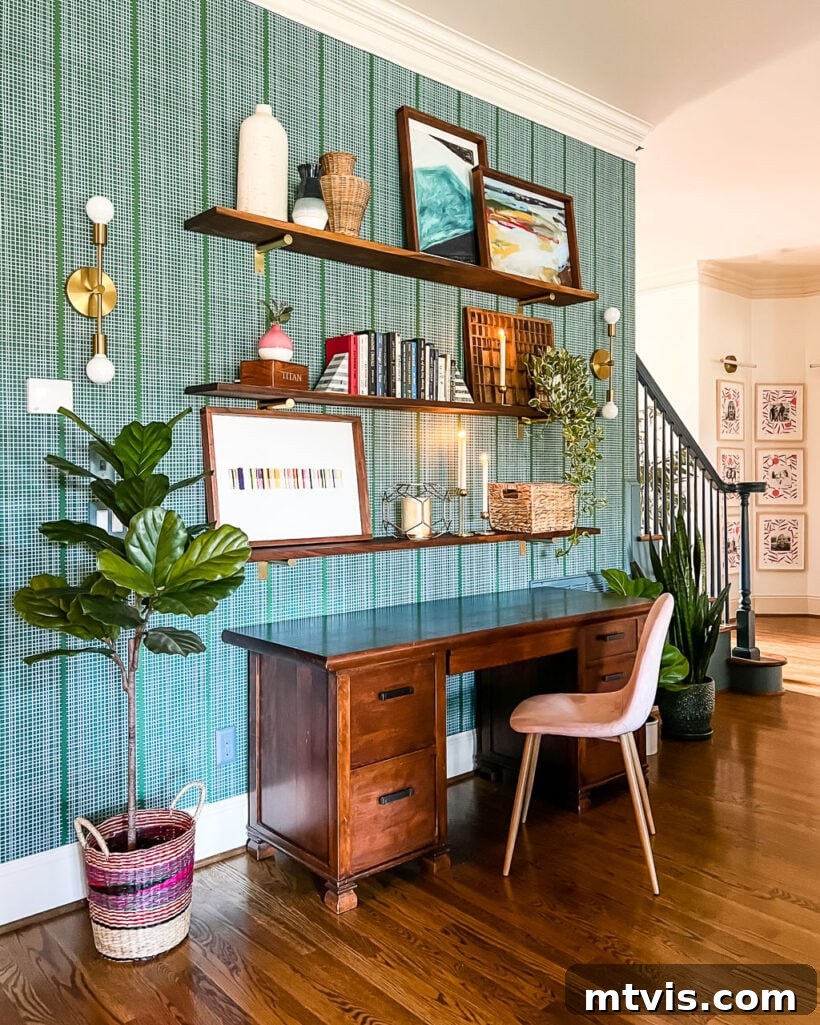
We adore these shelves so much that we’ve installed them in multiple rooms within our own home: prominently displayed in our living room (as seen in the image above) and providing practical storage in our laundry room (pictured below). The versatility of this design allows for personalization simply by choosing different shelf brackets, letting you adapt the style to any space.
This post contains affiliate links for your convenience. Click here for my full disclosure policy.
Planning Your Perfect Shelves: Design Considerations
Before you even pick up a saw, thoughtful planning is key to creating shelves that perfectly complement your space and meet your storage needs. Consider the following:
- Length: How long do you want each shelf to be? Measure your wall space carefully, taking into account any adjacent furniture, doorways, or windows. Longer shelves can create a dramatic statement, while shorter ones might fit better in a smaller nook. Our shelves, for example, are approximately 6 feet long, offering ample display and storage.
- Depth: What will you be storing or displaying on your shelves? Books require a certain depth, while small decorative items might need less. Standard shelf depth often ranges from 6 to 12 inches. Our shelves are 8 inches deep, striking a good balance between utility and visual lightness. If you desire deeper shelves than standard lumber provides, you can join two or more boards together using wood glue and pocket holes for a seamless look.
- Height and Spacing: How many shelves do you need, and at what height should they be installed? Think about what you’ll place on them. Taller items will require more vertical space between shelves. Use painter’s tape to mock up different arrangements on your wall to visualize the final outcome before drilling.
- Aesthetics: What style are you aiming for? The choice of wood and brackets will significantly influence the final look. From rustic industrial to sleek modern, the combination of these elements defines the character of your shelves.
Taking the time to plan ensures your DIY wall shelves are not only functional but also perfectly integrated into your home’s design.
How to Make DIY Wall Shelves
Materials & Tools Needed
Gathering all your materials and tools beforehand will make the installation process much smoother. Here’s what you’ll need:
- Wood Boards: Select boards long enough to span your desired shelf length.
- Pro Tip: Don’t assume expensive lumber is always necessary. We sourced solid walnut planks from a local supplier, and surprisingly, they were comparable in price to mediocre poplar from a big box store. Explore local lumberyards for unique and often better-quality wood options.
- Consider the type of wood – pine is inexpensive and easy to work with, oak offers durability and a classic grain, while walnut provides a rich, dark aesthetic.
- Pre-made Shelf Brackets: The style of your brackets greatly impacts the final look.
- For our laundry room, we opted for minimalist, sturdy brackets that blend seamlessly with the decor.
- In our family room, we used a different style of bracket that is unfortunately no longer sold separately, but similar designs are widely available. When choosing, ensure they are rated to support the weight you anticipate placing on your shelves.
- You can find a vast array of beautiful bracket options online and in hardware stores, from simple L-brackets to ornate decorative designs. Consider the material (metal, wood, leather) and finish (matte black, brass, polished chrome) to match your room’s style.
- Circular Saw or Miter Saw: Essential for cutting your wood to precise lengths. Many hardware stores offer cutting services, which can save you time and effort if you don’t own these tools.
- Stud Finder: A crucial tool for safely mounting your shelves. A magnetic stud finder is often praised for its accuracy and affordability.
- Painter’s Tape: Perfect for marking stud locations and shelf placement without damaging your walls.
- Drill and Electric Screwdriver: For pre-drilling pilot holes and driving screws efficiently.
- Measuring Tape: For accurate measurements of length, height, and spacing.
- Level: Absolutely essential for ensuring your shelves are perfectly straight. A long level (2-4 feet) is highly recommended for longer shelves.
- Safety Glasses: Always protect your eyes when cutting or drilling.
- Dust Mask: Recommended when sanding wood to avoid inhaling sawdust.
- Sandpaper: Various grits (e.g., 120-grit for initial sanding, 220-grit for a smooth finish) to prepare your wood.
- Wood Stain (optional) or Finishing Oil: To enhance the wood’s natural beauty and protect it. We highly recommend Danish Oil for a rich, matte finish.
For ideas on shelf brackets, consider searching online retailers for “decorative shelf brackets,” “industrial shelf brackets,” or “floating shelf brackets” to find the perfect style for your project.
While we can’t embed an interactive video here due to technical limitations, many excellent video tutorials for similar shelf installations are available on platforms like YouTube. Search for “easy wall shelf DIY tutorial” to find visual guidance.
Step-by-Step Tutorial
Time needed: Approximately 4 hours (excluding drying time for finish)
Learn how to install these stunning DIY wall shelves in an afternoon, transforming your space with ease!
-
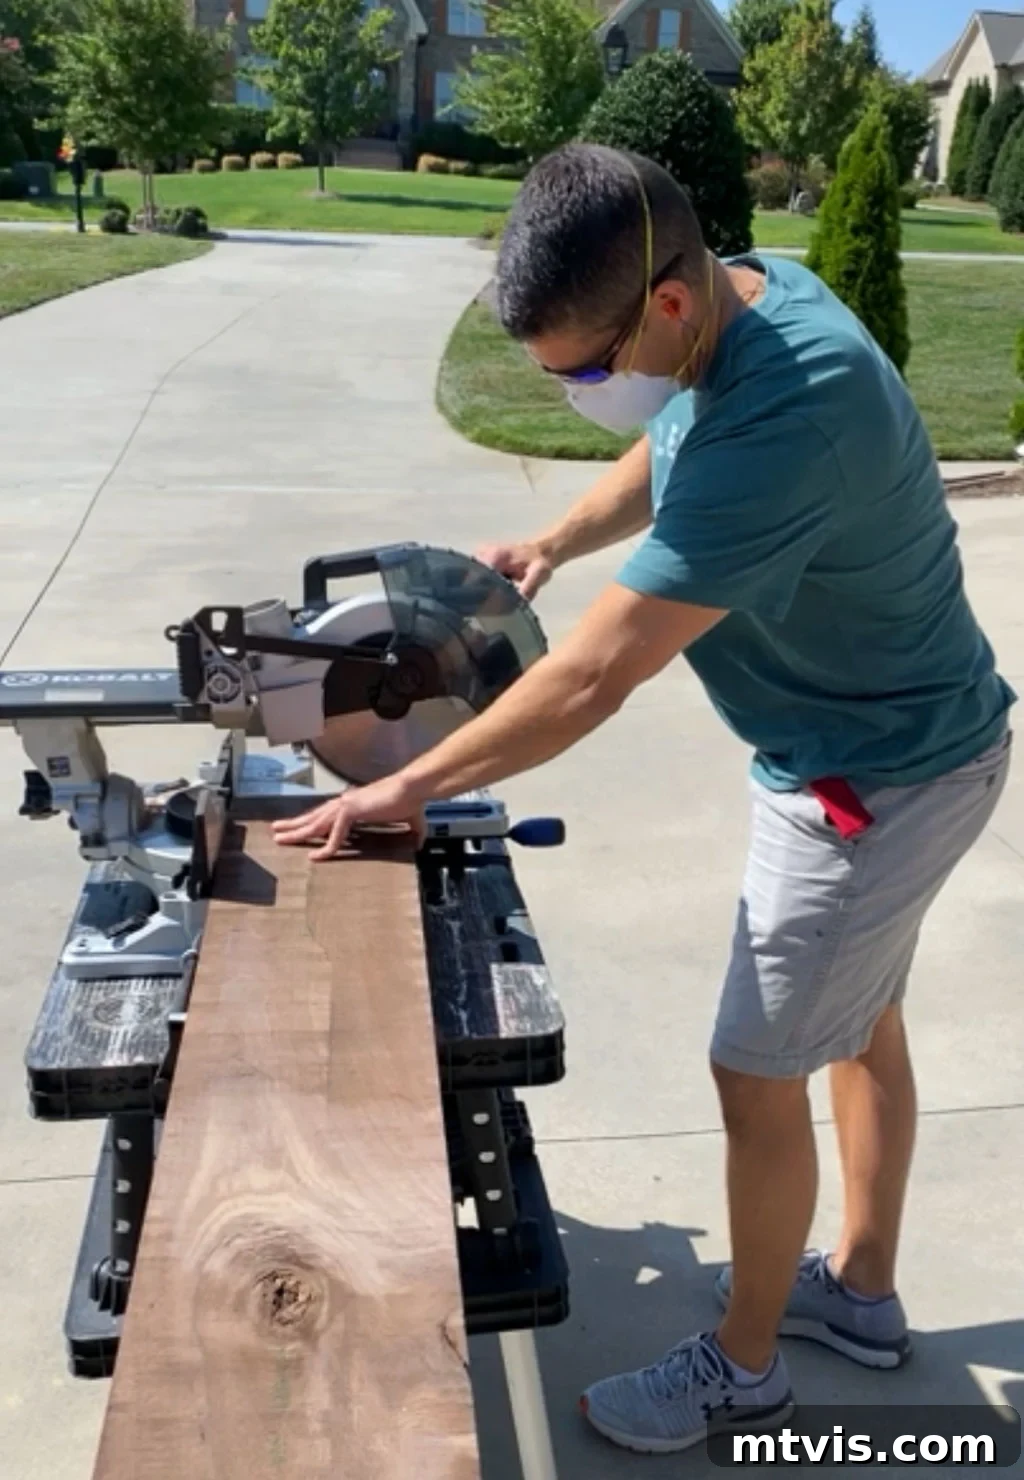
1. Cut Your Wood to Length
If your purchased wood boards aren’t already the precise length you need for your shelves, it’s time to cut them. Don your safety glasses and use a circular saw or miter saw for a clean, straight cut. If you don’t have access to power tools, a hand saw can also do the job, though it requires more effort and careful technique. Always measure twice and cut once! For the best results, mark your cut line clearly with a pencil and ensure the saw blade follows it accurately. If you had your wood cut at the store, you can skip this step.

-
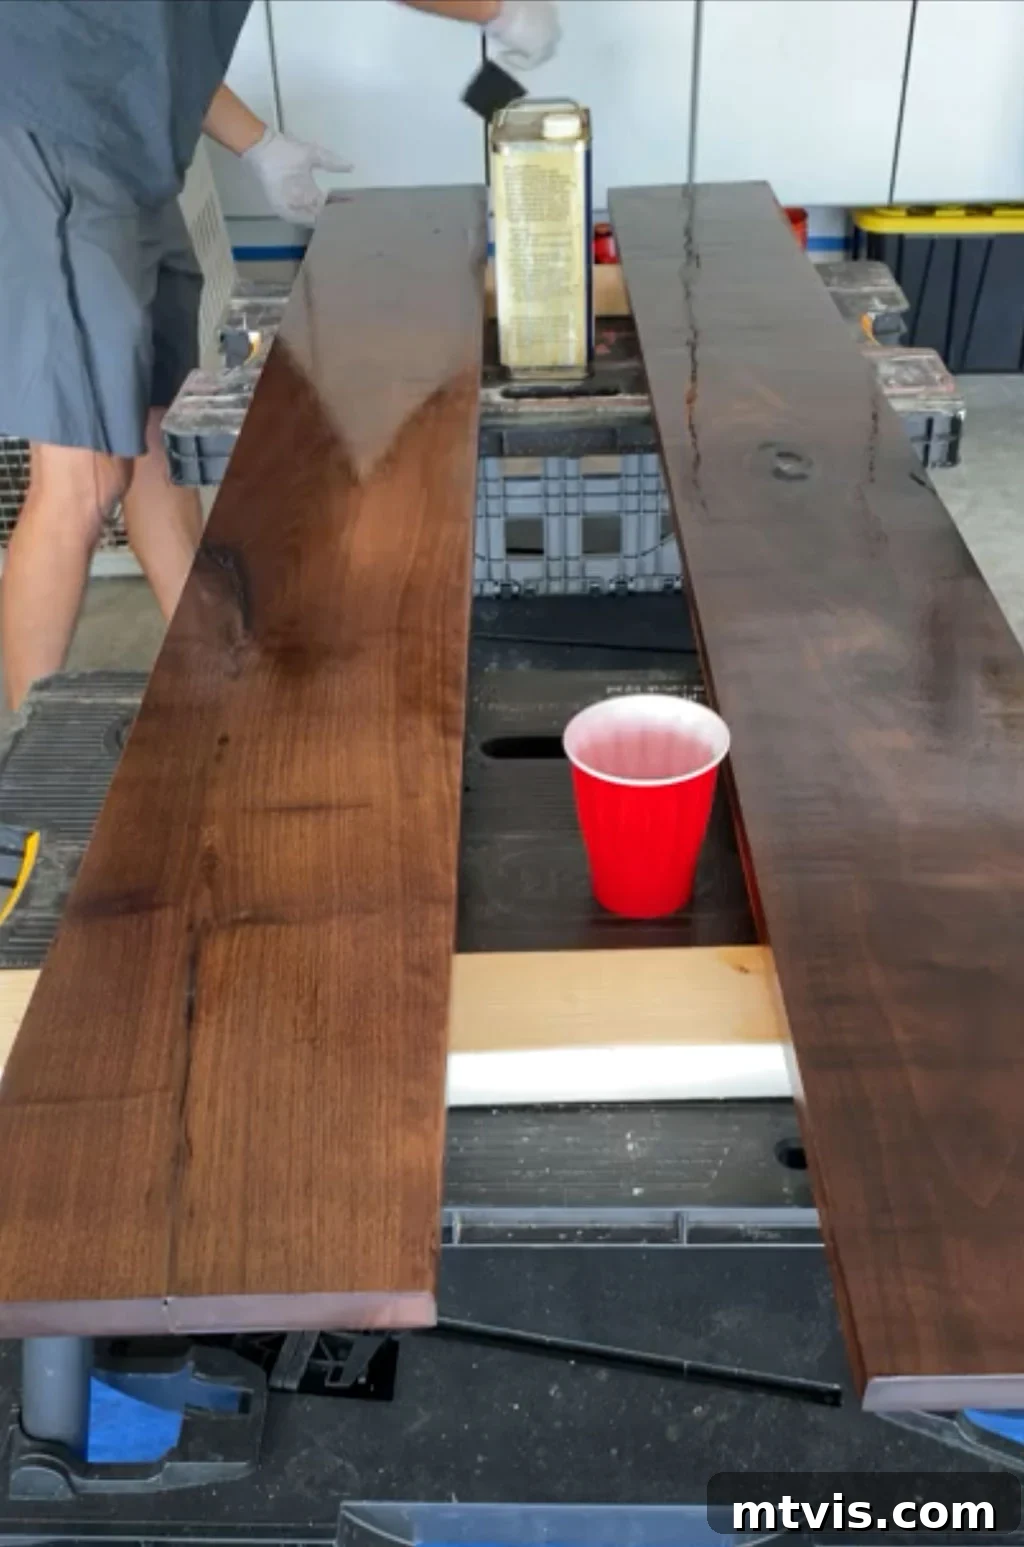
2. Sand and Stain or Oil Each Shelf
Achieving a professional finish starts with thorough sanding. Begin with a coarser grit sandpaper (e.g., 120-grit) to smooth out any rough edges or imperfections, then move to a finer grit (e.g., 220-grit) for a silky-smooth surface. Always sand with the grain of the wood. After sanding, wipe away all dust with a tack cloth or a slightly damp rag.
Now is the time to apply your chosen finish. If you wish to change the wood’s color, apply a wood stain in your desired hue, following the manufacturer’s instructions. We opted not to alter the beautiful natural color of our walnut shelves. Instead, we used Danish Oil to enhance the wood’s natural richness and provide durable protection. Apply Danish Oil liberally, let it penetrate for about 30 minutes, then wipe off any excess with a clean cloth. The result is a gorgeous, matte finish that truly brings out the character of the wood. Allow adequate drying time as specified by your product’s instructions, usually several hours or overnight.
-
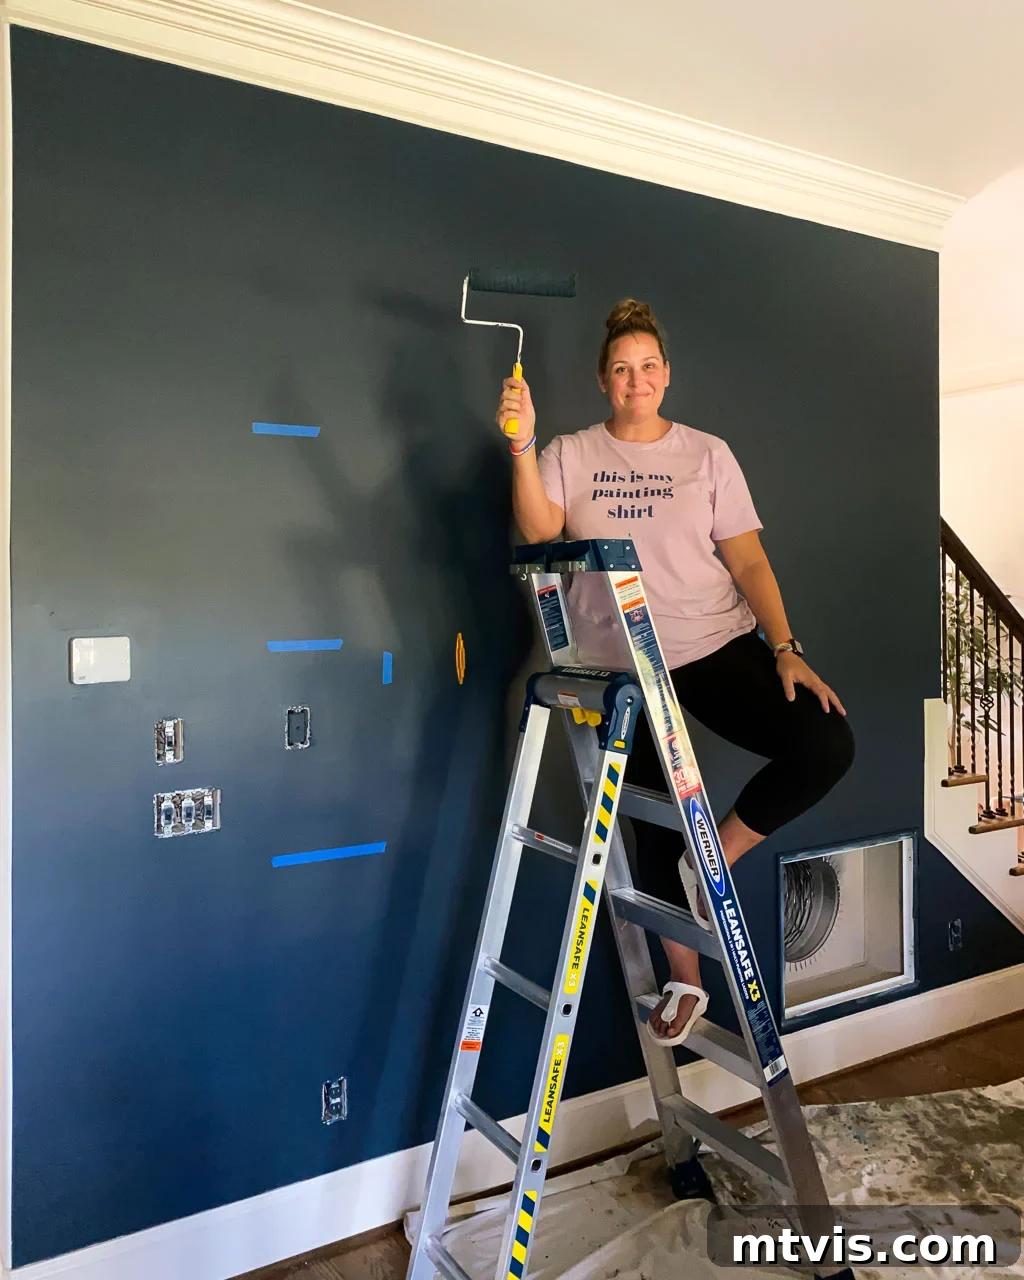
3. Mark Your Wall Studs & Shelf Placement
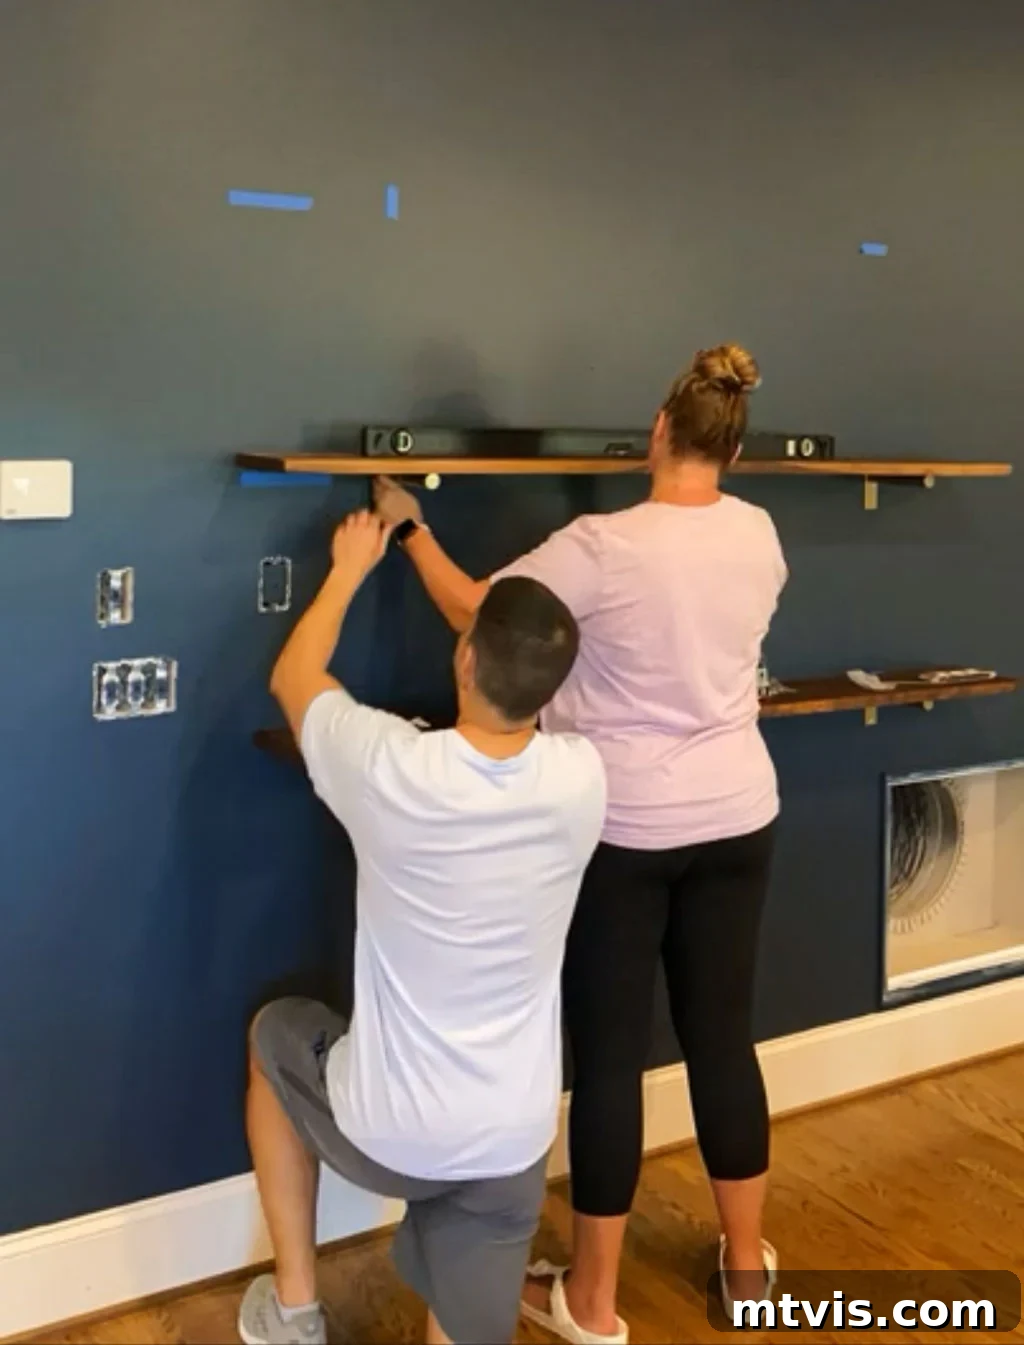
Safety and stability are paramount. Use your stud finder to locate and mark the wall studs where your shelves will be installed. Studs provide the strongest anchor points for your brackets. We find painter’s tape to be an excellent, non-damaging way to mark these locations. Next, decide on the exact height and horizontal position for each shelf. Use your measuring tape and a long level to mark these positions on the wall with painter’s tape, ensuring they are perfectly straight and evenly spaced. This visual guide will help you confirm your layout before any drilling begins.
-
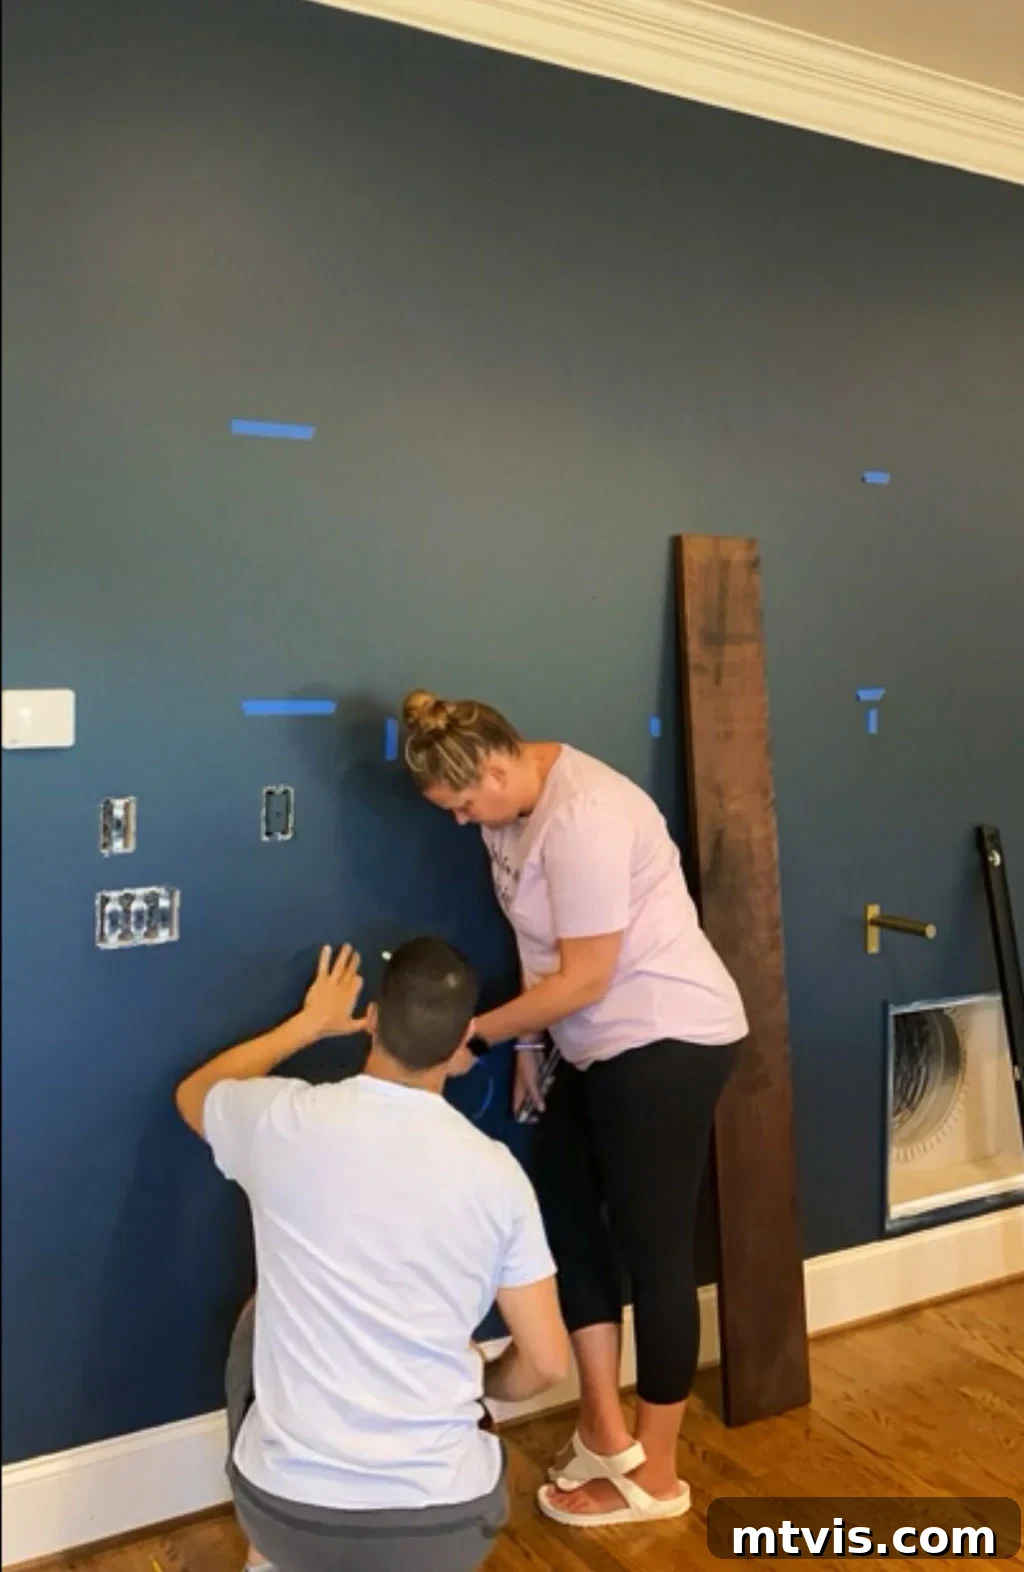
4. Install Your Brackets
For maximum stability, we highly recommend securing at least one bracket per shelf directly into a wall stud. Align your bracket with your marked stud locations and use your drill to create pilot holes before driving the screws. This prevents wood splitting and ensures a secure attachment. If a stud isn’t perfectly positioned for all bracket holes, you may need to use appropriate wall anchors for the remaining holes. Be extremely cautious when choosing wall anchors; they must be rated to support the combined weight of your shelves and whatever items you plan to display on them. Always use a level to ensure each bracket is perfectly straight before tightening all screws. Repeat this process for all brackets, confirming that they are all aligned horizontally for each shelf.
-
5. Install Your Shelves
With your brackets securely in place, carefully position each finished wood board on top of its corresponding brackets. Ensure the shelf is centered and that the brackets are evenly spaced on both sides for visual balance. Most pre-made shelf brackets include small set screws or pre-drilled holes for attaching the shelf to the bracket. Use your electric screwdriver to secure the shelves firmly to the brackets with these set screws. This crucial step prevents the shelves from shifting, sliding, or accidentally tipping off, providing both safety and peace of mind. Give each installed shelf a gentle tug to ensure it is robust and stable before loading it with your favorite items.
Styling Your New Shelves: A Touch of Personalization
Once your beautiful DIY wall shelves are installed, the fun truly begins: styling them! Thoughtful curation can turn simple storage into a stunning display. Here are a few tips to get you started:
- Vary Heights and Textures: Combine tall items with shorter ones, and mix different materials like ceramics, glass, metal, and natural elements (plants, wood).
- Create Vignettes: Group items in odd numbers (threes or fives) for a visually appealing arrangement. Think of each section of the shelf as a small, curated display.
- Add Greenery: Plants (real or faux) instantly add life and freshness to your shelves. Trailing plants look particularly lovely draped over the edges.
- Personalize: Include personal touches like framed photos, travel souvenirs, or meaningful objects that tell a story.
- Consider Functionality: If your shelves are primarily for storage, use stylish bins, baskets, or decorative boxes to hide clutter while maintaining an organized look.
- Layering: Place larger items at the back and smaller items in front to create depth and interest.
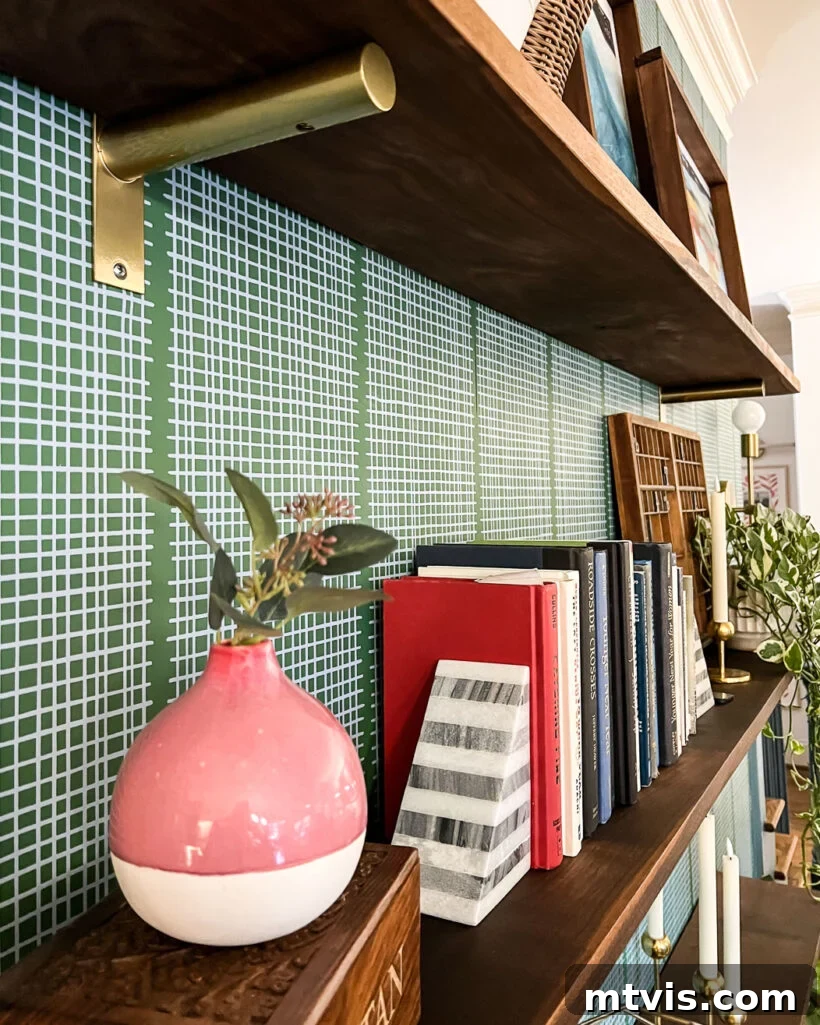
- Books, Glorious Books: Stack some books horizontally and arrange others vertically to break up monotony. Add a small decorative object on top of a horizontal stack.
Experiment with different arrangements until you find a look that you love and that reflects your personal style. Remember, styling shelves is an evolving process, so don’t be afraid to change things up!
Final Thoughts on Your DIY Success
That’s it! As promised, this is truly one of the easiest and most rewarding DIY wall shelf projects you can undertake. The sophisticated, high-end look you achieve belies the simplicity of the process. We frequently receive compliments and questions about both sets of shelves in our home, which is precisely why we felt compelled to share this detailed tutorial with you. We sincerely hope you’ve found this guide helpful and inspiring!
You might have noticed that the wall behind the shelves in our family room has undergone another transformation since these photos were taken. The navy blue paint has been replaced by a stunning wallpaper! We discovered a fantastic method to make any wallpaper removable and renter-friendly, ensuring future changes are a breeze.
More DIY Inspiration for Your Home
If you’ve enjoyed this project, you might be interested in exploring other creative ways to enhance your home:
- Easy DIY Floating Shelves & Desk for an Awkward Nook
- 19 Creative DIY Floating Wall Shelves
- DIY Shelving using Wood and Leather (Consider exploring this innovative approach for a unique look!)
- DIY Pipe Shelves: A Step-by-Step Guide for Industrial Charm
- Creative Hacks for IKEA Built-In Cabinets and IKEA Bookshelves
Curious about our holistic approach to transforming rooms and spaces in our home? Discover the strategies and insights shared in Designer in a Binder®.
For exclusive content, behind-the-scenes sneak peeks, and more DIY inspiration delivered straight to your inbox, be sure to subscribe to our newsletter before you go!