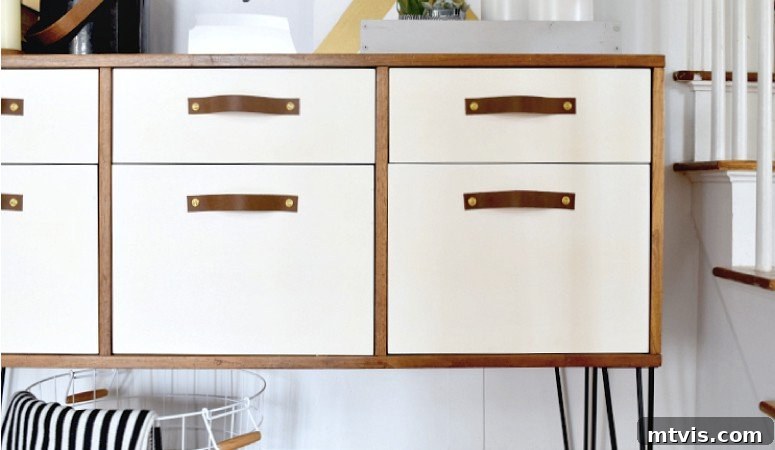
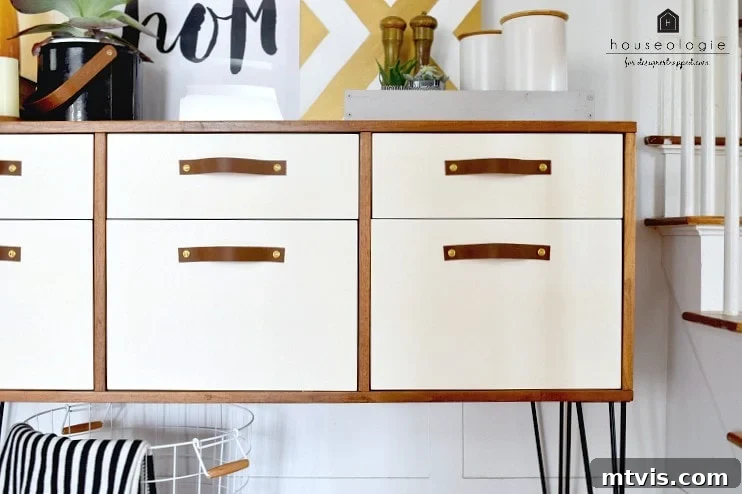
Are you dreaming of giving your furniture a fresh, custom look without the hefty price tag? DIY leather drawer pulls are the stylish, budget-friendly upgrade you never knew you needed. Imagine transforming a tired old dresser, a plain chest of drawers, or a mundane credenza into a statement piece with just a few simple materials and a little effort. Swapping out generic hardware for these elegant, handcrafted leather pulls can instantly elevate any furniture item, infusing it with modern rustic charm or a sleek, minimalist aesthetic. This comprehensive, step-by-step tutorial will guide you through the entire process of making your own leather drawer pulls, demonstrating just how easy it is to achieve a professional finish. And don’t worry if you’re not a seasoned DIYer—this project is incredibly straightforward, proving that even beginners can master it with confidence. Get ready to add a touch of bespoke craftsmanship to your home decor!
*Note: This post was thoughtfully contributed by the highly talented Leigh Anne Watts, formerly of Houseologie.com, a site no longer active.*
If you’ve spent any time exploring this site, you’ll know my passion for DIY furniture makeovers runs deep! There’s an incredible satisfaction in breathing new life into a piece, whether it’s a forgotten thrift store find or an inherited heirloom. My popular guide on how to paint a dresser continues to be a favorite, precisely because a fresh coat of paint can radically transform a furniture item. If you’re considering updating a piece with paint, be sure to consult my recommendations for the best paint for furniture of every type to ensure a durable and beautiful finish.
But paint isn’t the only powerful tool in your furniture transformation arsenal. Sometimes, the most dramatic changes come from the smallest details. Simply updating the knobs or drawer pulls can create a truly significant impact, completely altering the character and style of a piece. However, finding the perfect hardware that matches your vision can often be a frustrating scavenger hunt. That’s exactly how these custom DIY leather drawer pulls came into existence! They offer a unique blend of modern elegance and handmade charm that store-bought options rarely achieve. Now, let’s dive into how you can easily craft these stunning pulls yourself, adding a personalized touch to your home decor.
This post contains affiliate links for your convenience, meaning I may earn a small commission if you make a purchase through them, at no extra cost to you. Click here for my full disclosure policy and privacy details.
DIY Leather Drawer Pulls Tutorial: A Step-by-Step Guide to Custom Hardware
Creating your own leather drawer pulls is a rewarding project that allows for personalization and significantly enhances the look of your furniture. This tutorial outlines everything you need to know, from gathering materials to the final installation, ensuring a smooth and successful DIY experience. Pay close attention to the details, and you’ll have beautiful, sturdy, and unique pulls in no time.
Essential Supplies Needed for Your Leather Pulls Project
Note: It’s crucial to ensure all your brass hardware pieces are compatible in size and threading before you begin to avoid any frustration during assembly! This consistency ensures a secure and polished finish.
- 3/4 inch Leather Strip: This is a versatile width that offers a comfortable grip and a balanced aesthetic. However, feel free to experiment with different leather widths (e.g., 1 inch for a bolder look or 1/2 inch for a more delicate touch) to suit your furniture’s scale and your personal style. Consider genuine leather for durability and a luxurious feel, or a high-quality faux leather for a cruelty-free option.
- Ruler or Measuring Tape: Essential for precise measurements to ensure uniformity among your pulls and accurate hole placement. A metal ruler offers greater rigidity and accuracy.
- #8, 1-inch Brass Round Head Machine Screws: These screws are typically ideal for standard drawer thicknesses. The brass finish adds a touch of classic elegance that complements the leather beautifully. Ensure they are long enough to pass through your drawer front, the leather, and still have enough thread to secure the washer and nut.
- #8 Brass Finishing Washers: Also known as cup washers, these are placed on the front of the leather to give a clean, decorative finish around the screw head, preventing the screw from pulling through the leather over time and adding a polished look.
- #8 Flat Machine Washers: These are essential for the back of the drawer, providing a larger surface area for the nut to grip, distributing the pressure, and protecting your drawer material from damage when the nut is tightened.
- #8 Brass Machine Screw Nuts: These secure the entire assembly from the inside of the drawer. Make sure they are threaded to match your #8 machine screws perfectly.
- Drill: A cordless drill provides ease of use and portability.
- Drill Bit Set: You’ll need bits suitable for both the leather (slightly smaller than your screw diameter to create a snug fit) and potentially for widening existing holes in your drawers if necessary. Having a set ensures you have the right size for testing.
Safety Tip: Always wear appropriate safety glasses when operating a drill to protect your eyes from flying debris.
Step-by-Step Instructions to Craft Your Leather Drawer Pulls
Follow these instructions carefully to create durable and attractive leather pulls that will enhance your furniture for years to come.
1) Measure and Cut Your Leather Strips for Optimal Length
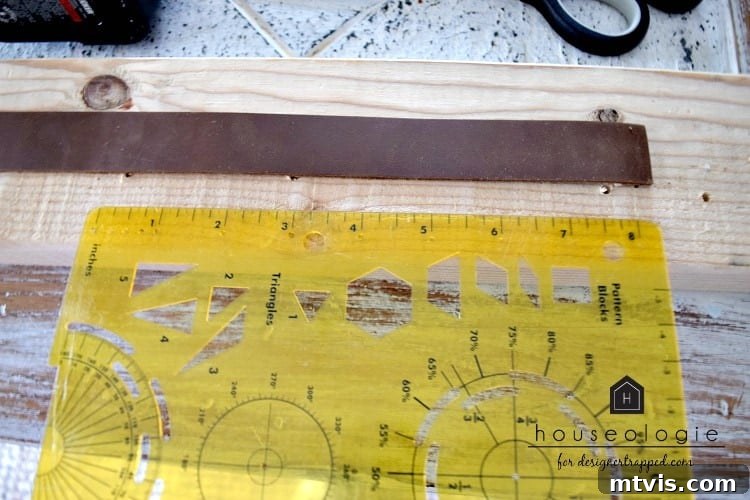
Before cutting, assess your existing drawer hardware or determine the desired spacing for new holes. In my case, the existing holes in my drawers were conveniently 6 inches apart from the previous handles. To ensure the leather would curve gracefully outwards and form a comfortable, functional handle loop, I added an extra 2 inches to this span. This meant each leather strip needed to be cut to an 8-inch length. If your existing holes are, for example, 4 inches apart, you would cut your leather strips to 6 inches. Always measure twice, cut once! Use your ruler and a sharp utility knife or heavy-duty scissors to cut your leather strips, ensuring clean, straight edges for a professional finish. Consistency in length is key for a uniform look across all your drawers.
2) Precisely Drill Holes Through the Leather
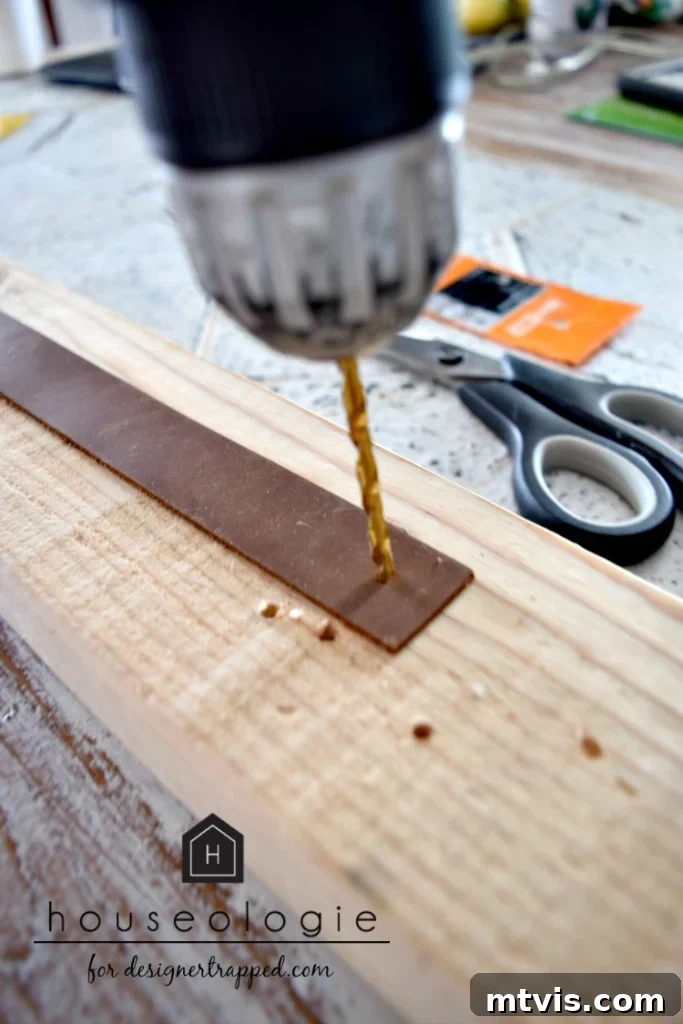
Drilling the holes through the leather is a critical step for a clean finish and proper fit. Attempting to cut the holes can often result in jagged edges or uneven sizing, which we want to avoid. The most effective method is to use your drill with an appropriately sized drill bit. Start with a bit that is slightly smaller than the diameter of your #8 machine screws; you want a snug fit. Here’s how to do it: First, fold each leather strip neatly in half, ensuring the ends align perfectly. Place the folded leather on top of a scrap piece of wood—this protects your work surface and allows the drill bit to pass cleanly through without damaging anything underneath. Mark precisely where you want your holes to be (typically 1 inch from each end when the strip is laid flat, or 0.5 inches from the fold when folded). Slowly and steadily drill through the folded leather. After drilling, unfold the leather and test the hole with one of your machine screws. If the screw doesn’t pass through smoothly, don’t force it. Simply switch to a drill bit that is one size larger and drill through the hole again until you achieve the perfect fit. Repeat this process for each end of every leather strip.
3) Assemble and Secure Your New Leather Drawer Pulls
With your leather strips perfectly prepared, it’s time for assembly. This is where your new pulls truly come to life. Start by taking one of your #8 machine screws. Thread a brass finishing washer onto it first. This decorative washer will sit flush against the leather on the front of your drawer. Next, carefully push the screw, with the finishing washer, through one of the pre-drilled holes in your leather strip. Now, position the leather strip on your drawer front, aligning the screw with one of the existing or newly drilled holes in the drawer. Push the screw completely through the drawer front. Repeat this for the other end of the leather strip, ensuring both screws are securely passed through both the leather and the drawer. On the inside of the drawer, thread a flat machine washer onto the exposed screw end, followed by a brass machine screw nut. Hand-tighten the nut just enough to hold it in place for now. Before fully tightening both nuts, take a moment to adjust the leather strip on the front of your drawer. Ensure it is perfectly straight, evenly curved, and centered for a clean, professional look. Once you are satisfied with the alignment, use a screwdriver to firmly tighten both screws from the inside of the drawer, making sure the pull is snug and secure, but without overtightening, which could damage the leather or the drawer material. Repeat these steps for all your remaining drawer pulls.
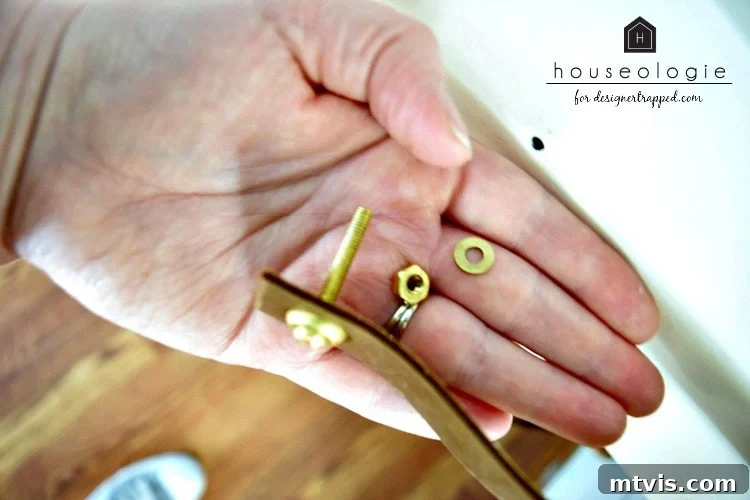
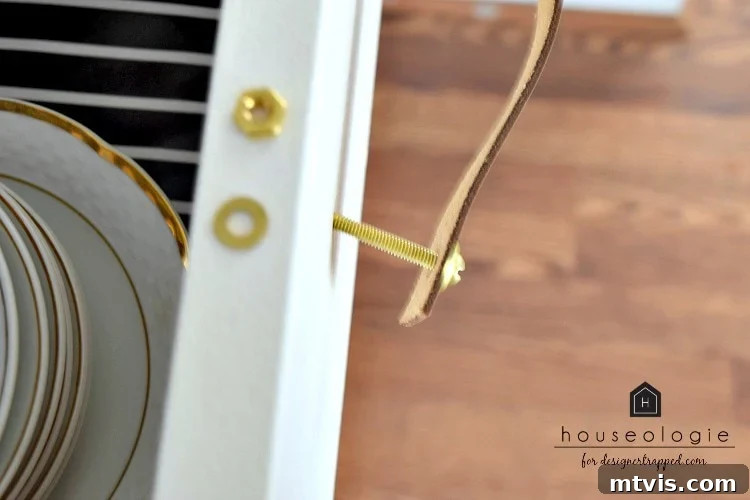
And that’s it! Take a moment to admire your handiwork and the incredible transformation. I absolutely adore them! They exude a beautiful, contemporary aesthetic that perfectly complements the modern credenza. Beyond their stunning looks, these DIY pulls boast superior sturdiness compared to many premade leather drawer pulls you might find in stores, which often aren’t even crafted from genuine leather. The custom fit and quality materials ensure a durable and long-lasting upgrade that truly enhances your furniture’s functionality and appeal.
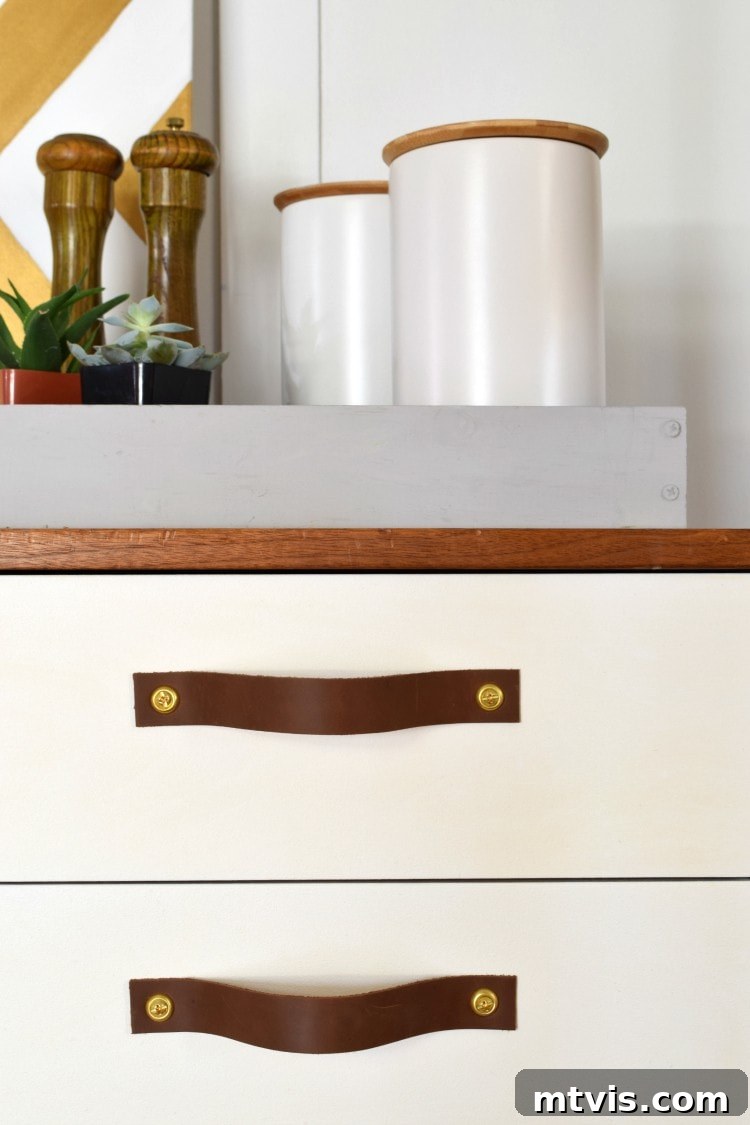
Just like that, you’ve successfully created a set of custom leather drawer pulls that inject serious style with minimal effort and expense. It’s truly remarkable how such a straightforward DIY project can completely revitalize the entire look and feel of a dresser, cabinet, or credenza. Whether your aesthetic leans towards modern minimalist, cozy rustic, industrial chic, or anything in between, this project stands as compelling proof that small, thoughtful details can make an overwhelmingly big impact on your home decor. So, don’t hesitate—gather your leather, a few essential tools, and embark on the satisfying journey of upgrading your furniture one beautiful, handcrafted pull at a time! This simple alteration can redefine a space, giving it a personalized touch that reflects your unique taste and craftsmanship.
Frequently Asked Questions About DIY Leather Drawer Pulls
Q: What type of leather is best for drawer pulls?
A: For durability and a refined look, full-grain or top-grain leather is highly recommended. Vegetable-tanned leather is also a popular choice as it ages beautifully and develops a rich patina over time. You can find leather strips specifically cut for crafting or purchase larger pieces and cut them yourself.
Q: Can I use different hardware finishes?
A: Absolutely! While brass offers a classic, warm aesthetic, feel free to choose hardware in other finishes like matte black, brushed nickel, oil-rubbed bronze, or chrome to match your existing decor or achieve a specific style. Just ensure all components (screws, washers, nuts) are compatible in size and threading.
Q: How do I determine the right length for my leather pulls?
A: The ideal length depends on the distance between your drawer’s existing holes or where you plan to drill new ones. A good rule of thumb is to add 2 inches to this distance. For example, if your holes are 6 inches apart, an 8-inch leather strip will create a nice, comfortable loop. Test with a paper strip first to visualize the curve.
Q: How do I ensure my pulls are perfectly straight and even?
A: Precision in measuring and marking your leather before drilling is crucial. During installation, loosely attach both screws and then carefully adjust the leather until it’s perfectly aligned and symmetrical before tightening the nuts completely. Using a small level can also help ensure horizontal alignment.
Q: Are these pulls durable enough for everyday use?
A: Yes, when made with quality leather and proper hardware, DIY leather pulls are surprisingly durable. The combination of strong leather, sturdy machine screws, and washers provides a robust handle that can withstand daily pulling and pushing. Unlike some mass-produced options, these are often built to last.
Q: Can I make these for cabinet doors too?
A: Absolutely! These leather pulls work wonderfully on cabinet doors, pantry doors, or even closet doors. The process is identical, simply ensuring the screw length is appropriate for the thickness of your specific door.
More DIY Furniture Posts
SEE ALL DIY POSTS
-
Easy DIY Floating Shelves & Desk for an Awkward Nook
-
How to Paint IKEA Furniture and Mistakes to Avoid
-
How to Make a DIY Dog Crate that Looks Like Furniture
-
How to Decoupage Furniture With Fabric
-
IKEA Lack Hack – A High-End Look on a Dime!
-
Easy and Gorgeous Ikea Desk Hack
Curious about my personal approach to transforming rooms and spaces within our home? Discover the detailed strategies and insights within Designer in a Binder®, my ultimate guide to decorating with confidence and achieving stunning results.
For those who crave exclusive content, behind-the-scenes sneak peeks, and fresh DIY inspiration directly in their inbox, be sure to subscribe to my newsletter before you go! Join our community of passionate DIYers and home decor enthusiasts.