
This post is proudly sponsored by Mohawk Consumer Products, whose exceptional products made this DIY project possible. All opinions expressed are 100% my own, born from hands-on experience.
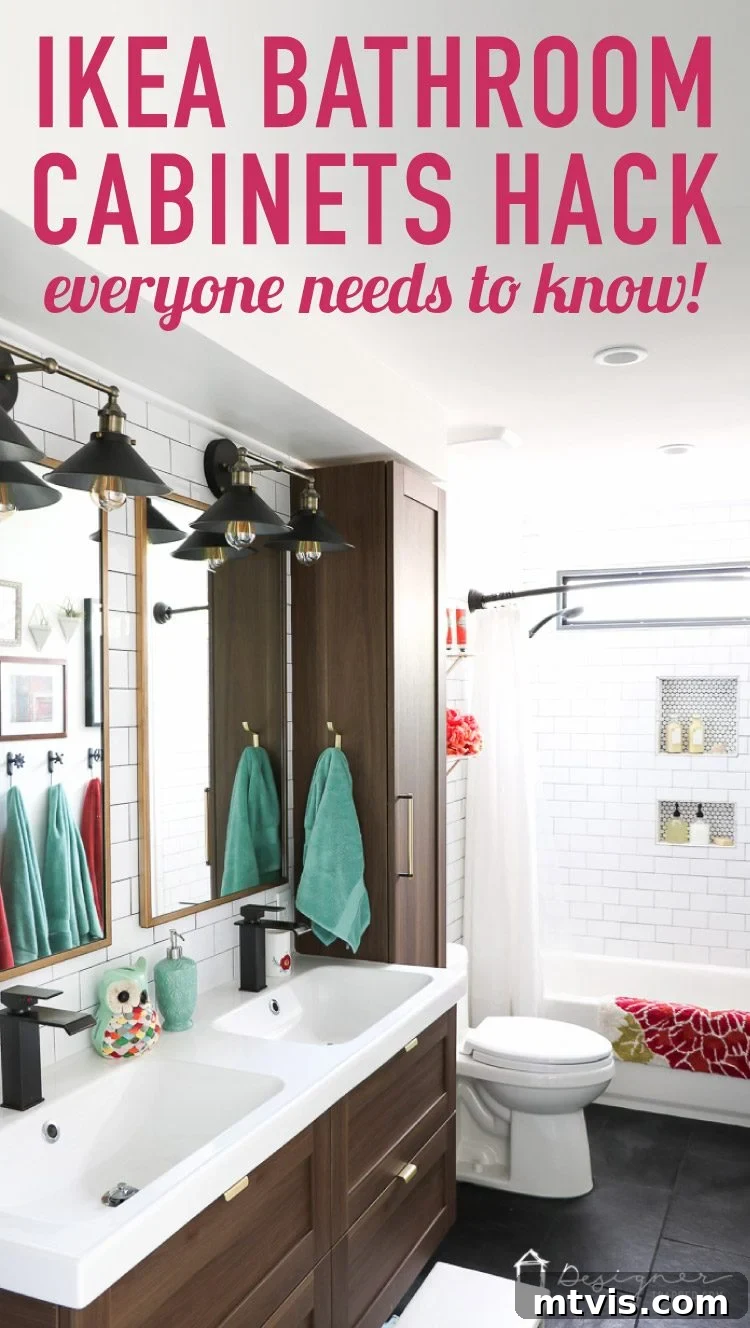
Are you an avid fan of Ikea cabinets, just like me? Their affordability, modern design, and robust functionality make them a go-to choice for countless home renovation projects, from full kitchen overhauls to stylish bathroom remodels. In our previous home, we integrated an entire Ikea kitchen, and the results were nothing short of spectacular. This positive experience made selecting Ikea cabinets for our recently renovated twin girls’ bathroom an absolute no-brainer.
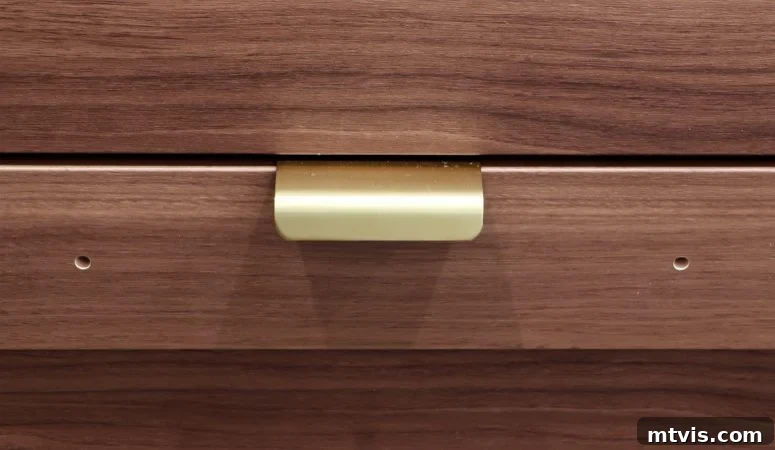
However, despite my love for Ikea’s cabinetry, there was one significant hurdle: the cabinet and drawer hardware options. Ikea cabinet doors and drawers often come pre-drilled with holes designed specifically for their proprietary hardware. While their hardware is functional, it didn’t align with the specific aesthetic I envisioned for the bathroom. My heart was set on elegant, distinctive hardware from Rejuvenation, which, of course, wouldn’t align with Ikea’s pre-drilled holes.
This common dilemma—loving Ikea’s cabinets but wanting personalized hardware—is a challenge many DIYers face. But what if I told you there’s a simple, incredibly effective hack to overcome this? I’ve discovered an ingenious solution that allows you to seamlessly fill those pre-drilled holes, granting you the freedom to install virtually any cabinet hardware you desire. This Ikea cabinet doors hack is not only easy but yields professional-looking results, liberating your design choices from standard limitations. Get ready to transform your Ikea cabinets into truly custom pieces!
This post contains some affiliate links for your convenience. Click here to read my full disclosure policy.
The Ultimate Ikea Cabinet Doors Hack: A Comprehensive DIY Tutorial
Customizing your Ikea cabinets to reflect your unique style is now easier than ever. This step-by-step tutorial will guide you through the process of filling pre-drilled holes on Ikea cabinet doors and drawers, empowering you to use the hardware of your dreams. Say goodbye to design compromises and hello to personalized perfection!
Materials You’ll Need for This Cabinet Hardware Transformation
Before diving into the process, gather these essential materials. Choosing the right products, especially the epoxy putty, is crucial for achieving a flawless finish that blends seamlessly with your existing cabinet surfaces.
- Mohawk Epoxy Putty Stick: This is the star of our hack. It’s an incredibly versatile and durable filler that hardens quickly. Crucially, it comes in a wide variety of colors. Select a shade that matches your cabinet material as closely as possible. A good color match from the start will minimize the need for extensive touch-ups later, making the repair virtually invisible. The epoxy’s strength ensures the filled holes will withstand daily use.
- Mohawk Pro-Mark Wood Touch-up Marker: Even with the closest epoxy color, slight variations can occur. This marker is perfect for fine-tuning the color of the filled area. If your epoxy appears a bit lighter than your cabinet, this marker allows you to darken it precisely. Remember, it’s always easier to build up color gradually, so start with a lighter application. (As a personal note, I sometimes go a bit too dark initially, but patience is key here!)
- Mohawk Brush Tip Graining Marker: For cabinet doors with a visible wood grain, this marker is indispensable for a truly undetectable repair. Choose a color that mimics the natural grain pattern of your cabinet. This step adds depth and texture, making the filled area blend seamlessly with the surrounding wood or laminate.
- A leveler card or an old credit card: This simple tool is vital for smoothing the epoxy and ensuring a perfectly flush finish with the cabinet surface. Its rigid edge allows for precise scraping.
- A small dish of soapy water: This acts as a release agent, preventing the epoxy from sticking to your fingers or the leveling card during application.
- A sharp knife or utility blade: Essential for cutting off manageable portions of the epoxy putty stick.
Detailed Steps to Flawlessly Fill Ikea Cabinet Holes
This project is surprisingly straightforward, but paying attention to detail will ensure the best results. For those who prefer visual guidance, a video tutorial typically accompanies these steps, as some techniques are best demonstrated. (Imagine a video plays here after a brief ad, showing the process in action!)
1) Prepare Your Soapy Water Mixture: Begin by pouring about 2 ounces of water into a small dish. Add just a few drops of liquid soap – dish soap works perfectly. Stir gently to mix. This soapy solution will be your secret weapon, preventing the sticky epoxy from adhering to your fingers or tools during the application process, making the job much cleaner and smoother.
2) Activate and Knead the Epoxy Putty: Using your sharp knife, cut off a small, manageable piece from your Epoxy Putty Stick. The size should be enough to fill a few holes without being unwieldy. Now, with your fingers, begin to knead the piece of epoxy vigorously. You’ll notice the color gradually changing and becoming completely uniform as the two components within the stick mix together. As you knead, you’ll also feel it start to warm up in your fingers—this is a sign that the chemical reaction has begun, and the epoxy is activating. If the putty starts to become too sticky and adheres to your fingers, simply dip your fingertips into your prepared soapy water mixture and continue kneading. It’s crucial to work relatively quickly here; the working life of the epoxy after mixing is short, typically around 6 minutes before it starts to harden. Ensure the color is fully uniform before moving to the next step.
3) Fill the Predrilled Holes with Precision: Once your epoxy putty is uniformly mixed and activated, it’s time to apply it. Firmly push the kneaded epoxy putty directly into the pre-drilled holes on your Ikea cabinet doors or drawers using your fingers. The goal is to slightly overfill the hole, creating a small mound of epoxy above the surface. Immediately after filling, grab your leveler card or old credit card. Hold it at a slight angle and firmly scrape away any excess epoxy putty that protrudes higher than the surface of the wood. You want the epoxy to be perfectly level and flush with your Ikea cabinet doors, leaving no raised areas. If the epoxy starts sticking to your card, lightly moisten the card’s edge with the soapy water mixture to help it glide smoothly and cleanly over the surface. A smooth, level finish at this stage is key to an invisible repair.
4) Allow the Epoxy to Cure: After successfully filling and leveling the holes, patience is a virtue. Allow the filled area to cure for at least 20 minutes. While the epoxy sets relatively quickly, giving it ample time to harden completely ensures a durable and long-lasting repair. Avoid touching or disturbing the area during this crucial curing period.
5) Fine-Tune the Color Match with a Touch-up Marker (Optional but Recommended): Once the epoxy is cured, inspect the filled areas. If the epoxy’s color is slightly off or a bit lighter than your cabinet’s finish, reach for your Mohawk Pro-Mark Wood Touch-up Marker. Carefully apply the marker over the filled hole to adjust its color, aiming for a closer match to your Ikea cabinet doors and drawers. Apply a small amount, then immediately blend it with your finger to diffuse the color and prevent harsh lines. Remember my earlier note: start lighter! You can always add more color if needed, but removing it is harder. If your epoxy putty matches perfectly from the start, you can confidently skip this step.
6) Recreate the Wood Grain for an Invisible Finish (Optional but Highly Effective): For cabinets with a visible wood grain, this step elevates your repair to an undetectable level. Take your Mohawk Brush Tip Graining Marker, chosen to match your cabinet’s grain color. Lightly draw fine lines over the repaired hole area, mimicking the natural grain pattern of the surrounding cabinet surface. Just like with the touch-up marker, blend these lines gently with your finger to soften them and integrate them seamlessly into the existing grain. This creates an incredibly convincing illusion of natural wood, making the filled area truly disappear.
7) Consider a Protective Top Coat (Optional): The areas where the holes were filled on Ikea cabinet doors are quite small. In most cases, I found that an additional top coat wasn’t strictly necessary, as the epoxy itself is very durable. However, if you desire an extra layer of protection, particularly in high-traffic areas or on bathroom cabinets exposed to moisture, you could certainly apply a clear protective top coat over the repaired holes. This would further enhance durability and blend the repair with the cabinet’s original finish.
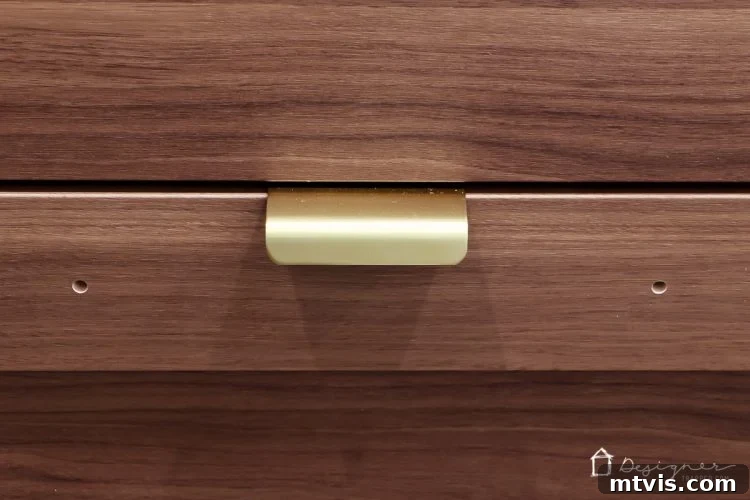
That’s it! You’ve successfully hacked your Ikea cabinet doors. If you scrutinize the surface and actively hunt for the filled holes, you might, under certain lighting conditions, discern the repaired areas. However, from even a slight distance – the kind of distance people typically view your cabinets from – those pre-drilled holes are completely GONE. This remarkable transformation allows you the unparalleled freedom to select and install ANY cabinet hardware your design heart desires. Woo hoo! No more limitations, only endless possibilities for personalization.
 |
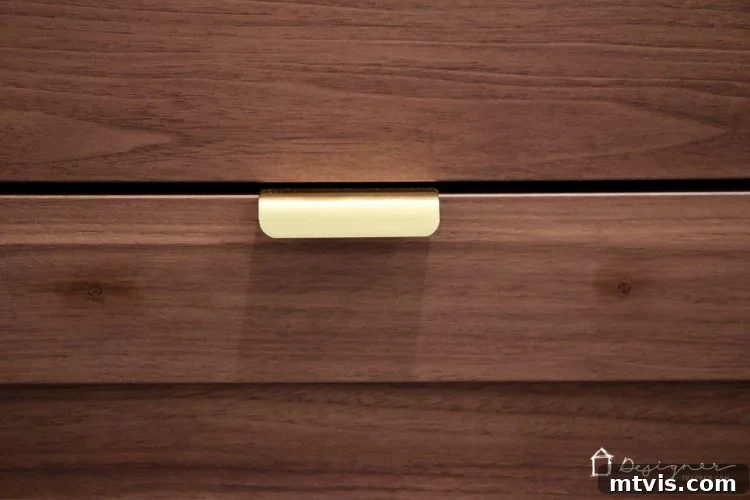 |
The “before” and “after” close-up images above truly highlight the effectiveness of this hack. While the “after” picture might draw attention to the repaired spots up close for illustrative purposes, the true magic is revealed when you step back. Here’s the result when I take a few steps back with my camera, capturing the broader impact of the transformation:
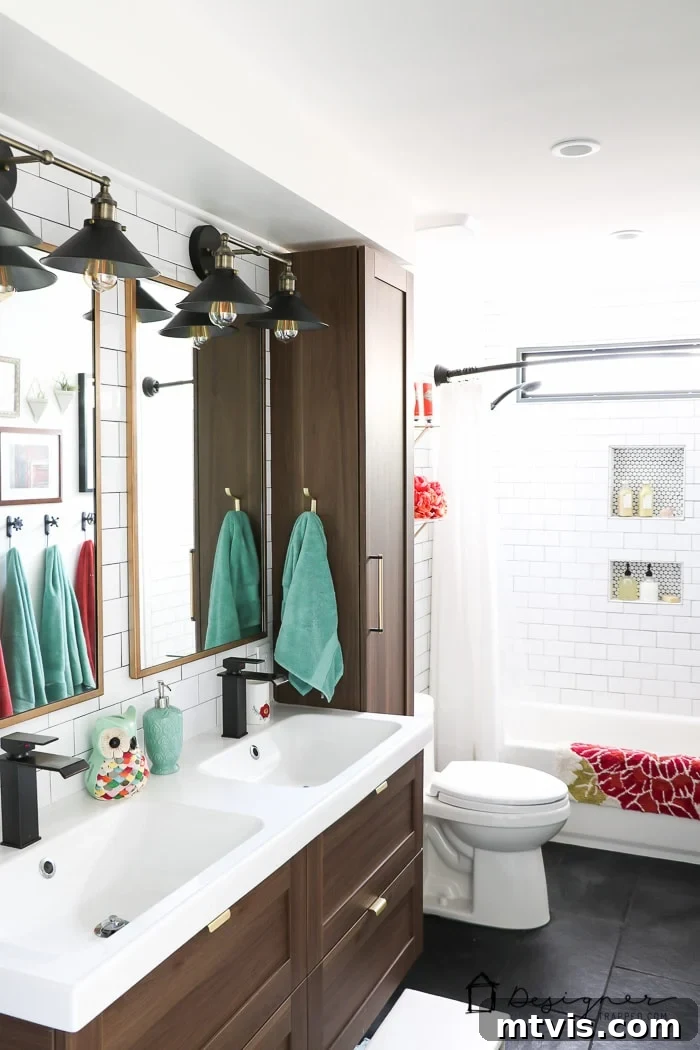
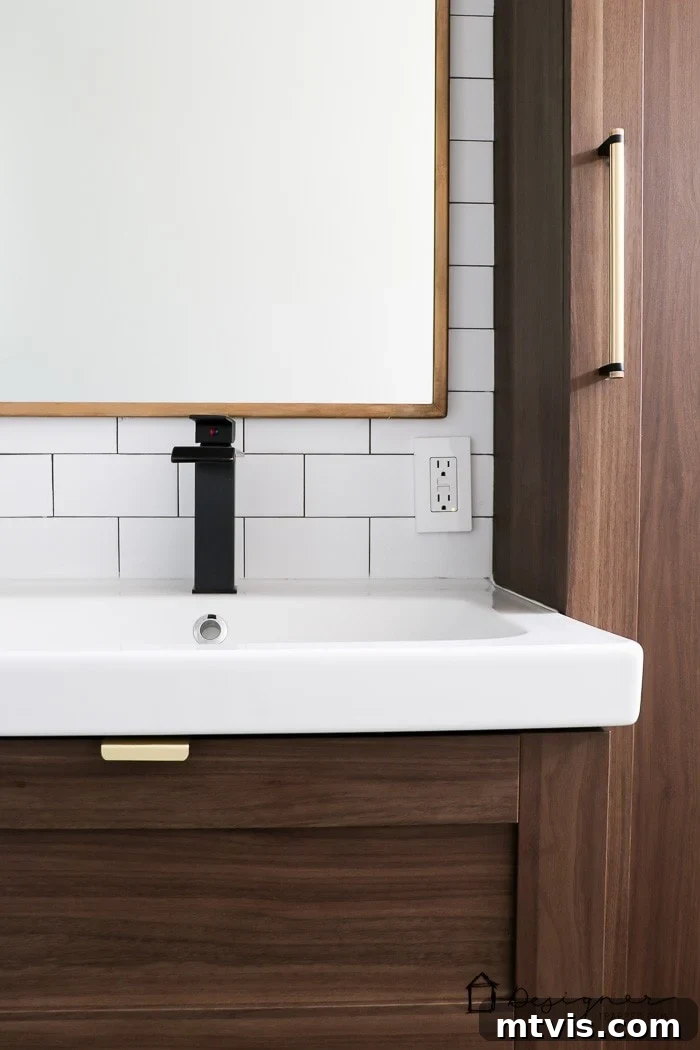
Pretty awesome, wouldn’t you agree? This simple yet powerful Ikea cabinet hack opens up a world of design possibilities, allowing you to achieve a custom look without the custom price tag. If you’re undertaking any home renovation, especially involving Ikea cabinetry, this technique is an invaluable tool in your DIY arsenal. It demonstrates that with a little creativity and the right products, you can overcome common design challenges and achieve truly personalized spaces. If you want to check out the full details of our DIY bathroom remodel, including how these cabinets fit into the larger design, just click here.
Explore More Inspiring Home Improvement Projects
If you loved this hack and are looking for more ways to enhance your home, be sure to explore our collection of popular DIY projects. From small updates to major transformations, we’re always sharing creative and budget-friendly ideas to help you craft the home of your dreams.
