
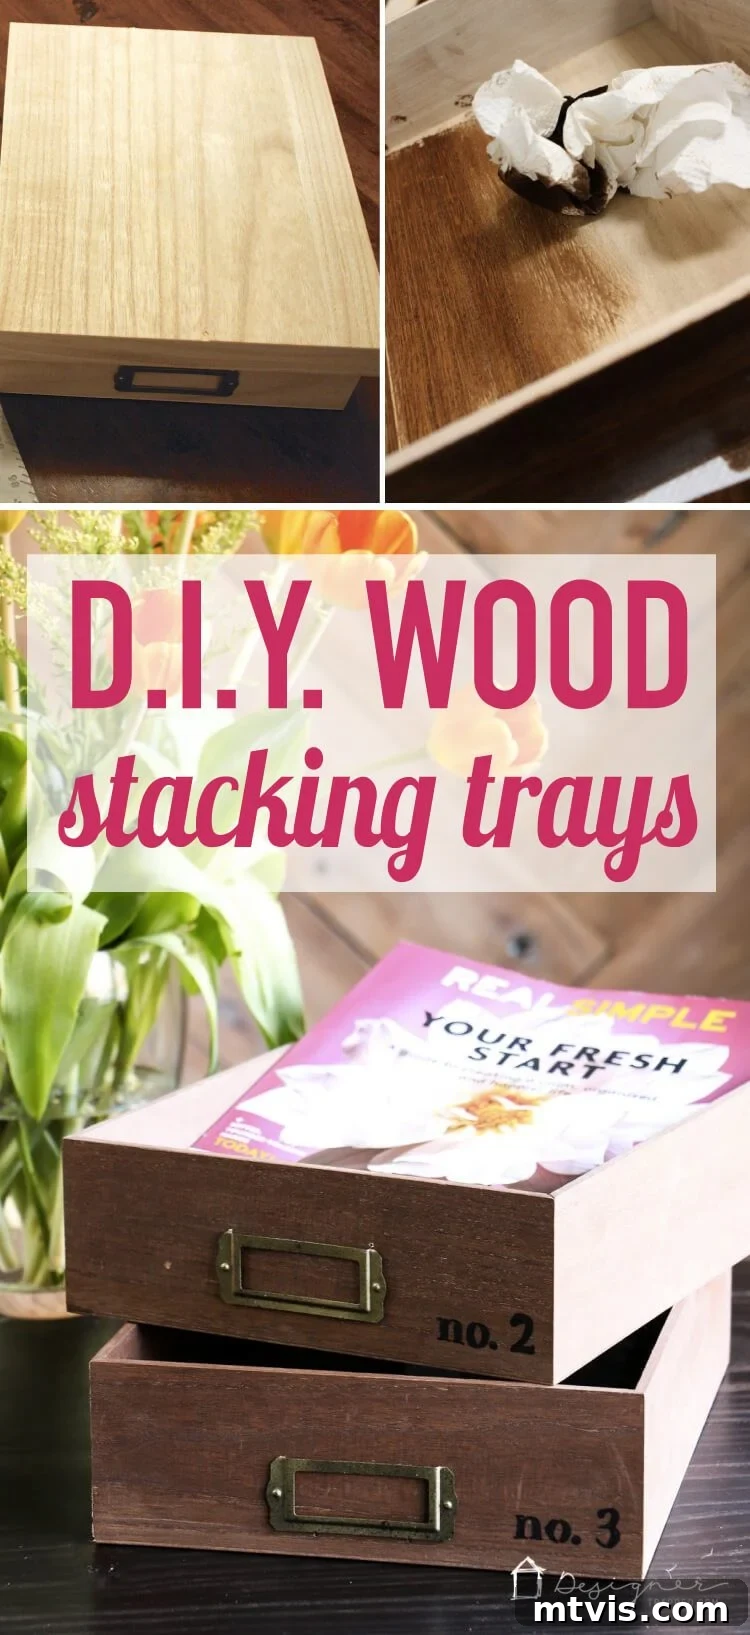
DIY Anthropologie-Inspired Stacking Desk Organizer Trays for a Stylish & Tidy Workspace
Hey friends! Are you tired of looking at a cluttered desk at the end of a long workday? Even for someone who considers themselves fairly organized, the desk can quickly become a magnet for papers, documents, and miscellaneous items. For me, the secret to maintaining order lies in a simple yet effective strategy: sorting documents and papers by category. This isn’t just a practical approach; it’s also a fantastic excuse to seek out stylish storage solutions that elevate your workspace aesthetics.
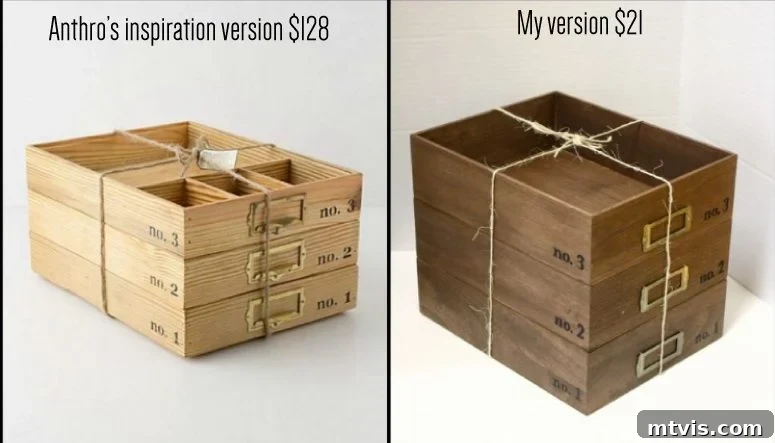
Like many of you, I often fall in love with beautiful, high-end decor pieces, only to be deterred by their hefty price tags. My latest obsession was a set of gorgeous stacking wood trays from Anthropologie, priced at an eye-watering $128.00. While undeniably chic, that wasn’t going to fit my budget. So, I decided to take matters into my own hands and create these fun, super cute, and incredibly functional DIY desk organizer trays for a mere $21! Imagine transforming your messy desk into an organized haven, all while saving a significant amount of money. Join me as I walk you through how to make these for yourself!
This post contains some affiliate links. Click here to read my full disclosure policy.
Why Effective Desk Organization is Crucial for Productivity and Peace of Mind
A well-organized desk does more than just look good; it profoundly impacts your productivity, focus, and overall well-being. When your workspace is tidy, your mind feels less cluttered, allowing for clearer thinking and improved concentration. Searching for important documents becomes a thing of the past, saving valuable time and reducing stress. Furthermore, a stylish and organized desk can be a source of inspiration, making your work environment more enjoyable and inviting. These DIY stacking trays are designed to bring that crucial organization right to your fingertips, helping you sort everything from bills to project papers into designated categories, ensuring everything has its place.
The Inspiration: High-End Style Without the High Price Tag
The allure of designer home goods is undeniable, and Anthropologie is a master at creating pieces that blend vintage charm with modern elegance. Their stacking wood trays, with their rich finish and sophisticated design, captivated me instantly. They promised a solution to my desk clutter with a touch of luxury. However, the price tag was a stark reminder that high style often comes at a premium. This common dilemma is precisely why DIY projects are so empowering. Instead of lamenting the cost, I saw an opportunity to replicate that desirable aesthetic using affordable materials and a bit of creativity. My goal was to achieve a similar look and functionality for a fraction of the cost, proving that chic desk organization doesn’t have to break the bank. This project is not just about saving money; it’s about the satisfaction of creating something beautiful and functional with your own hands, perfectly tailored to your needs and style.
DIY Stacking Desk Organizer Trays: Step-by-Step Tutorial
Ready to transform your desk? This tutorial will guide you through each step of crafting your personalized stacking organizer trays. You’ll be amazed at how simple it is to achieve a high-end look on a budget!
Materials You’ll Need (for One Tray):
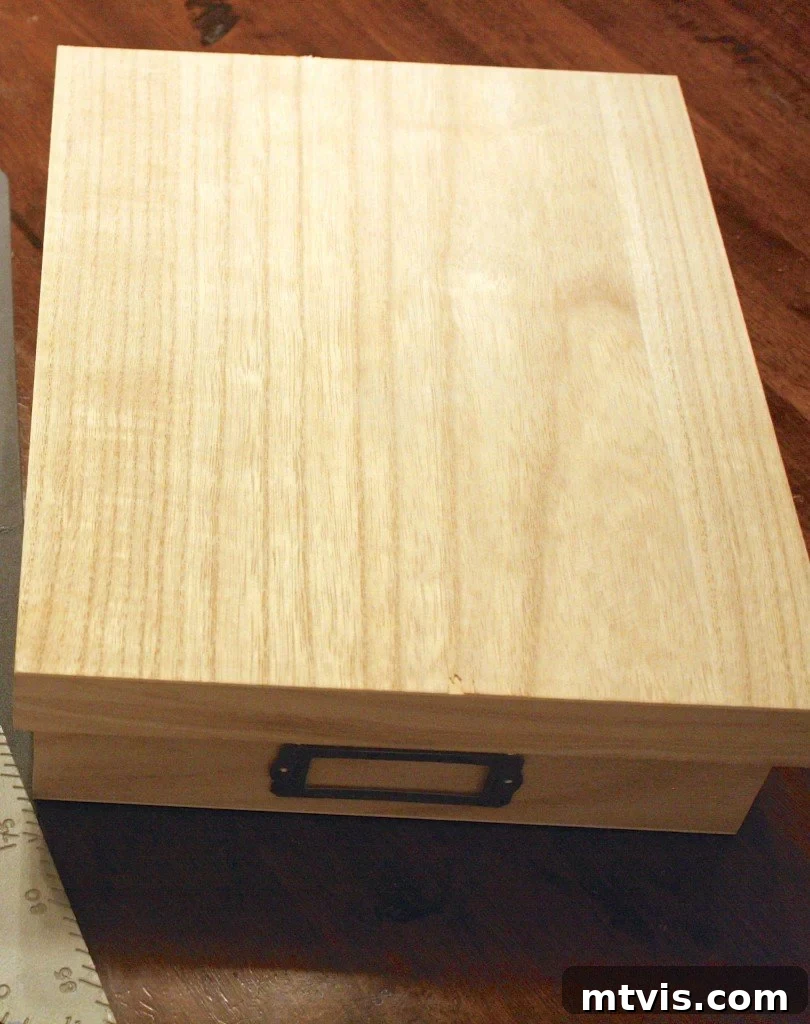
- 1 unfinished wooden box with cardholder: Look for these at craft stores or online. Ensure it’s a size that comfortably holds standard papers or documents you intend to organize. The cardholder is key for the Anthropologie-inspired detail, allowing for labeling.
- Wood stain: Choose a color that complements your existing decor. I opted for a darker stain to mimic the Anthropologie aesthetic and because I had it on hand, making it a free resource for this project! Popular choices include walnut, espresso, or even lighter oak if you prefer.
- Paper towels or old rags: Essential for applying and wiping off excess stain.
- Spray paint: For your metal cardholder. Gold, bronze, or copper tones work wonderfully to replicate that high-end look. I used a combination of gold and oil-rubbed bronze to create a unique, aged finish.
- Carbon paper: This is your secret weapon for transferring typography outlines cleanly onto the wood. It allows for precise detailing without the need for stencils.
- Black Sharpie marker (fine or medium point): For coloring in your transferred text, giving it a crisp, permanent finish.
Tools & Supplies Checklist:
- Small screwdriver (to remove cardholder)
- Gloves (for staining)
- Drop cloth or newspaper (to protect your work surface)
- Damp wash cloth (for wood prep)
- Printer and paper (for typography)
- Scissors (to cut carbon paper and printed text)
Getting Started: Preparing Your Wooden Box
Step 1: Remove the Lid and Metal Card Holder. Carefully detach the lid from your wooden box. Don’t discard it! You’ll want to save your lid because it can be repurposed into Anthropologie-inspired monogram clips or other creative projects down the line. Next, use a small screwdriver to gently remove the metal cardholder. Keep it in a safe place, as we’ll be customizing it later. This initial separation ensures you can work on each component individually, achieving a cleaner finish.
Achieving the Perfect Stain Finish
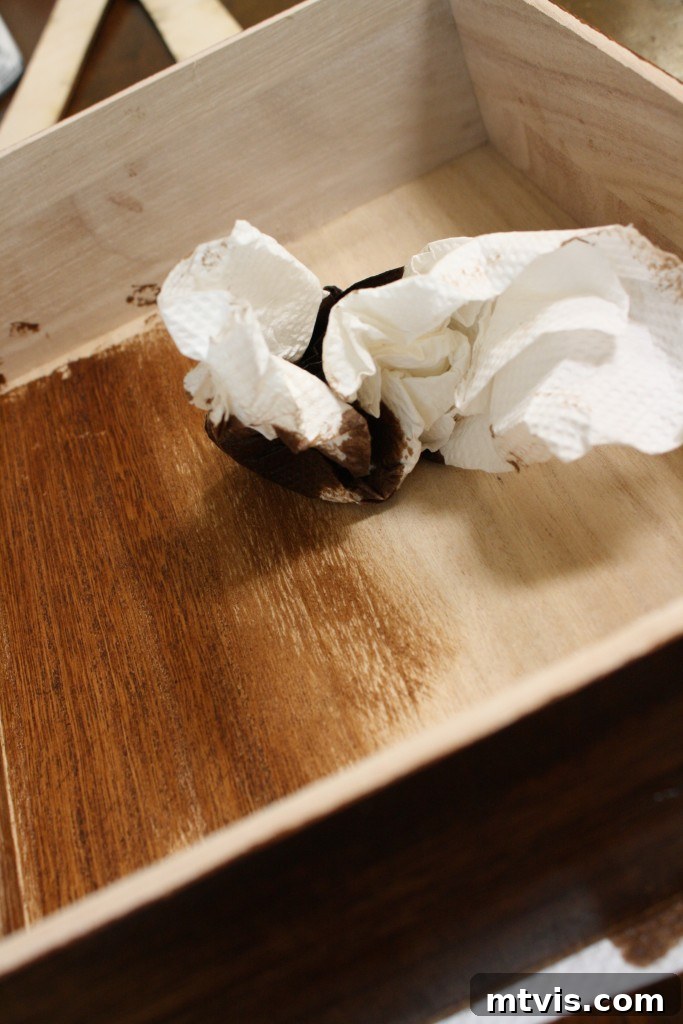
Step 2: Stain Your DIY Desk Organizer Tray. Before applying the stain, I highly recommend wiping down your unfinished tray with a slightly damp wash cloth. This simple step helps open the wood grain, allowing the stain to penetrate more deeply and evenly, resulting in a richer, more consistent color. Once the wood is dry, apply your chosen wood stain according to the product instructions, typically by wiping it on with a paper towel or rag and then wiping off the excess. I opted for a darker stain than the original Anthropologie tray, partly because I personally prefer its depth, and partly because I already had it on hand, which made it a free material! Feel free to experiment with any stain color that aligns with your personal style and desk aesthetic. Allow sufficient drying time as per the stain manufacturer’s recommendations, usually several hours or overnight, before proceeding to the next step. Proper drying is crucial to avoid smudges and ensure durability.
Personalizing Your Trays with Custom Typography
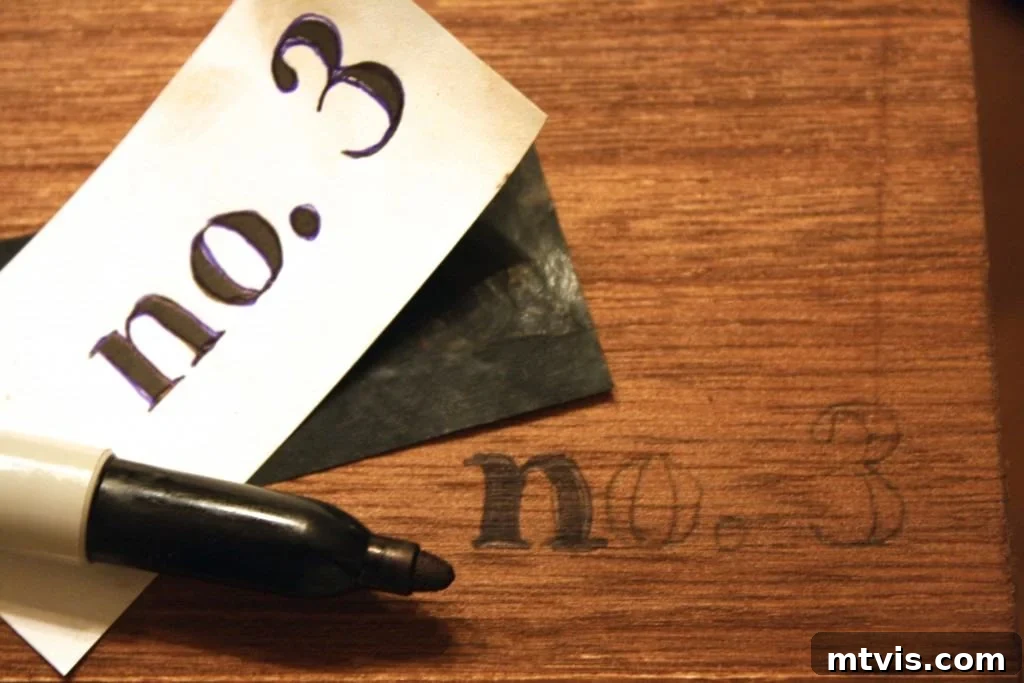
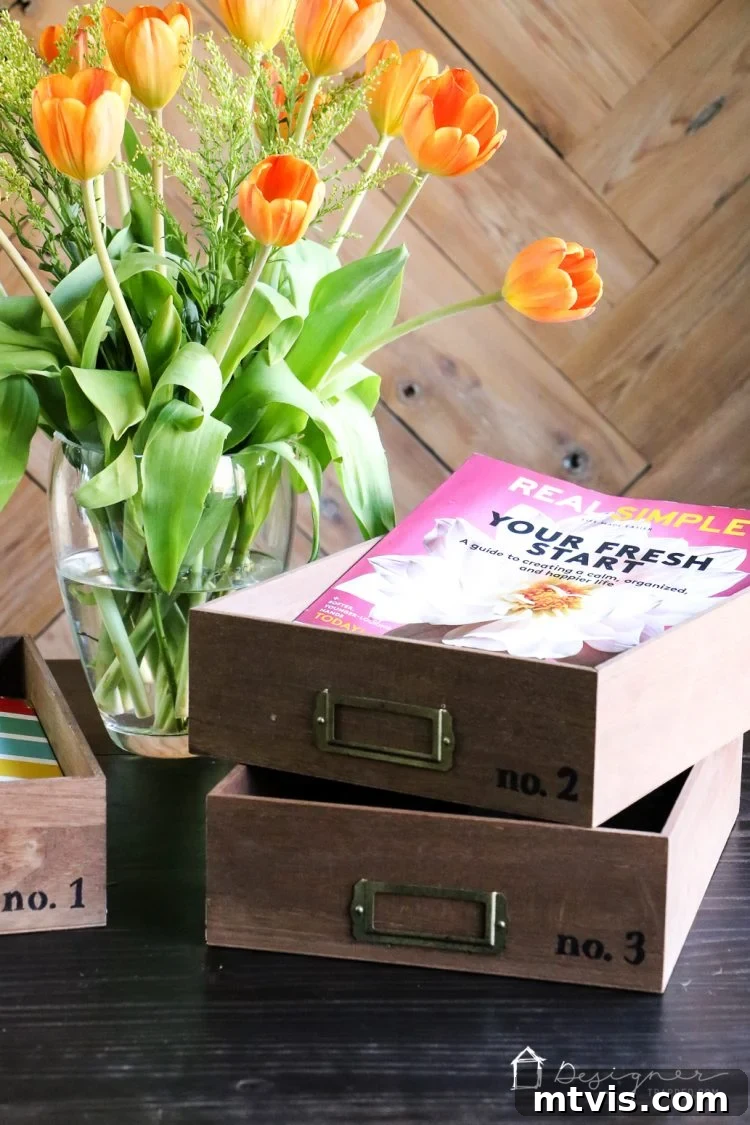
Step 3: Transfer Your Typography Outline. This step adds that professional, customized touch that truly makes these trays shine. Begin by typing out your desired text in any word processing software. For my trays, I used “No. 1,” “No. 2,” and “No. 3” to create a sequential filing system, employing the elegant Didot Font at size 60. This font choice exudes a classic, sophisticated vibe that perfectly complements the Anthropologie aesthetic. Print your typed text onto regular printer paper. Next, carefully cut out your printed text and a corresponding piece of carbon paper. Position the carbon paper face-down on your tray where you want the text to appear, then place your printed text on top of the carbon paper. Using a pencil or pen, firmly trace over the outline of your typed letters. The carbon paper will transfer a faint outline onto the wood. Repeat this for each tray, placing the numbers in two separate spots as pictured for versatility in stacking. Once the outlines are transferred, use your black Sharpie marker to carefully color in the outlined text. Take your time for crisp, clean lines. For those without carbon paper, you could also try a pencil transfer method (coloring the back of your printout with pencil, then tracing) or freehanding with a stencil.
Elevating the Hardware: Customizing the Cardholder
Step 4: Spray Paint Your Metal Cardholder. If your metal cardholder arrived in a shiny silver finish, like mine did, now is the time to give it a sophisticated upgrade. Head to a well-ventilated area and lay down a drop cloth. If your cardholder is very smooth, a light sanding or a coat of metal primer can help the paint adhere better. I had both gold and oil-rubbed bronze spray paint on hand, which allowed me to achieve a unique, layered effect. I started with a base coat of gold spray paint. While the gold was still slightly wet (but not tacky), I lightly misted it with the oil-rubbed bronze spray paint. This layering technique created a rich, antique-like finish, closely mimicking the aged metal details often found on high-end Anthropologie pieces. If you prefer a solid color, simply apply several light, even coats of your chosen spray paint, allowing each coat to dry slightly before the next to prevent drips. Once your cardholder is completely dry and cured, carefully replace it on your DIY desk organizer tray. Ensure it’s securely reattached to withstand daily use.
Final Assembly and Enjoyment
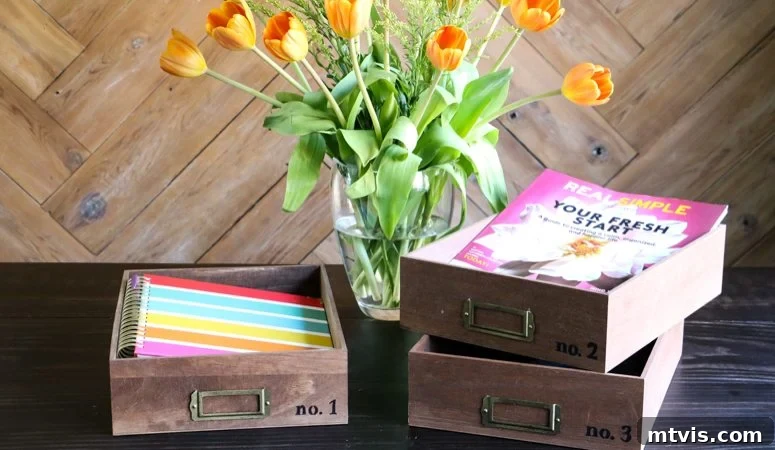
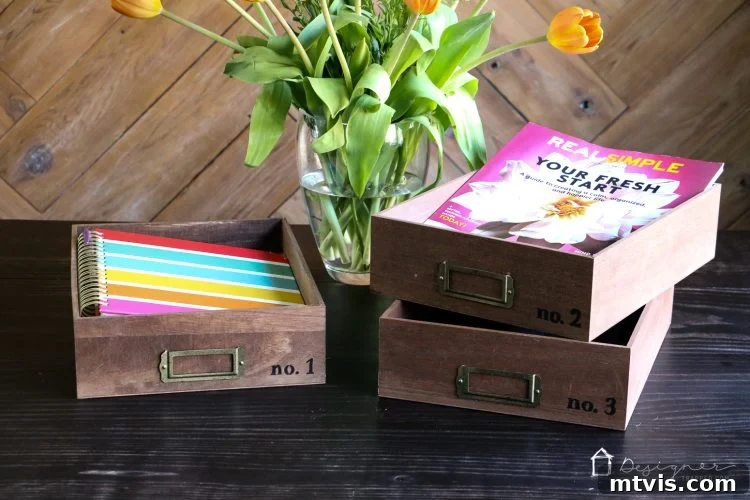
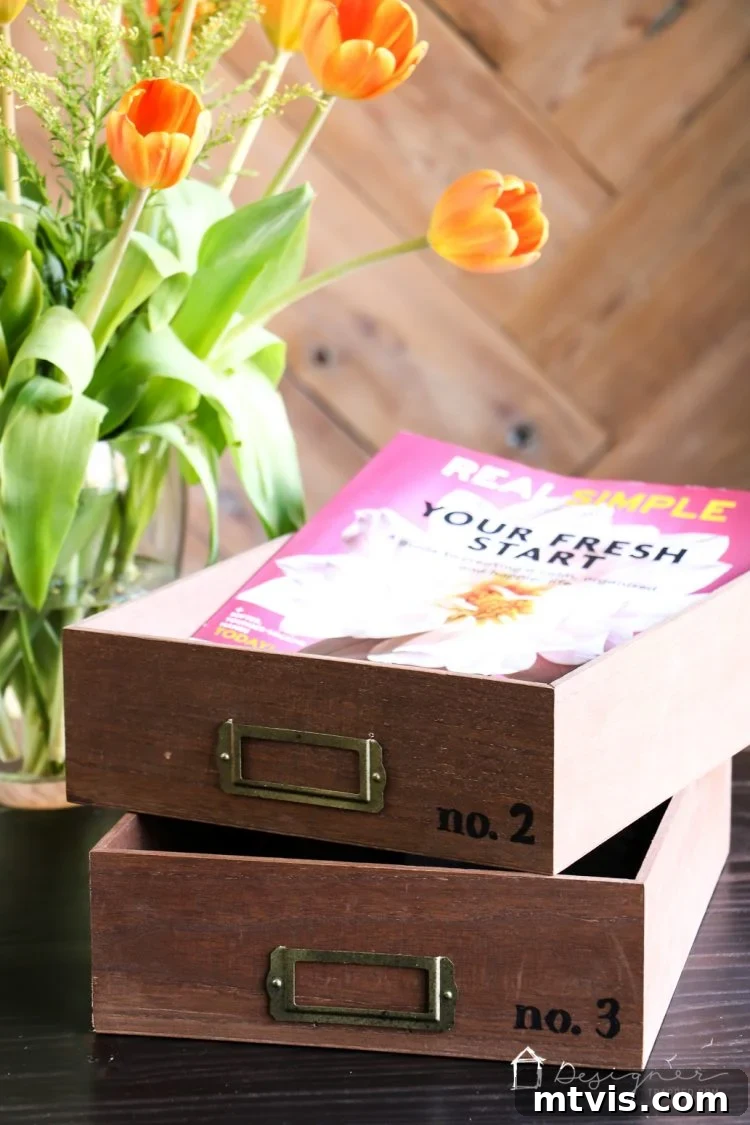
With the cardholders reattached and your custom typography complete, your DIY desk organizer trays are ready! Simply stack them in your preferred configuration and start organizing. I just love how my DIY desk organizer trays turned out. Since I had all the supplies on hand already, with the exception of the unfinished wooden boxes, I was able to make all three boxes for only $21.00! This incredible saving, coupled with the joy of creating something beautiful and functional, makes this project truly rewarding.
The Transformed Workspace: Organized, Functional, and Beautiful
Now, my desk is not only a bit more organized but also infinitely more stylish! The days of searching through chaotic piles are over, replaced by a system that keeps important papers neatly categorized and easily accessible. These DIY stacking trays have brought a sense of calm and efficiency to my daily routine. The custom touches—from the rich stain to the personalized numbering and elegant hardware—make them feel truly unique and high-end, without the luxury price tag. This project proves that you don’t need to spend a fortune to create a workspace that inspires and motivates you. The satisfaction of a well-organized and aesthetically pleasing desk, crafted with your own hands, is truly unparalleled.
Beyond the Trays: Maximizing Your Desk Organization
While these DIY stacking trays are a fantastic start, holistic desk organization often involves a few other elements. Consider incorporating vertical storage solutions like magazine files or wall shelves to utilize space efficiently. Cable management is another game-changer, tidying up unsightly cords and creating a cleaner look. Regularly decluttering your desk—even for just five minutes at the end of each day—can prevent new piles from forming. By combining these strategies with your new custom trays, you’ll create a truly functional and serene workspace that supports your best work.
Frequently Asked Questions (FAQ) About DIY Desk Trays
Can I use different types of wood boxes?
Absolutely! While unfinished pine boxes are common and affordable, you can adapt this tutorial for other wood types. Just be aware that different woods absorb stain differently, so always do a test patch first. You could even use pre-finished boxes and simply paint them instead of staining.
What if I don’t have carbon paper? Are there alternatives for transferring text?
Yes! If you don’t have carbon paper, you can try a pencil transfer method. Print your text, then heavily shade the back of the paper with a pencil where the letters are. Place the shaded side down on the wood and trace over the letters on the front. The graphite will transfer to the wood, creating an outline. Alternatively, you could use stencils for a similar effect.
How many trays should I make for optimal organization?
The ideal number of trays depends on your specific needs and the volume of papers you handle. I found that three trays (labeled No. 1, No. 2, No. 3) were perfect for categorizing ongoing projects, incoming mail, and essential documents. You might need more or fewer, depending on your workflow. Start with three and add more if you find yourself needing additional categories.
Can I paint the wooden boxes instead of staining them?
Certainly! Painting is a fantastic alternative to staining, especially if you want a pop of color or a more modern, opaque finish. For best results, lightly sand the unfinished wood, apply a primer, and then paint with at least two coats of your chosen acrylic or chalk paint. You can still apply the typography using the carbon paper method over paint.
Share Your Creations!
I would absolutely love to see how your DIY Anthropologie-inspired desk organizer trays turn out! Share your finished projects on social media and tag me, or leave a comment below with your tips and experiences. Happy crafting, and here’s to a beautifully organized workspace!

You Might Also Like:
- DIY Anthropologie-Inspired Monogram Clips
- How to Pick the Perfect Paint Colors for Your Home
- Budget-Friendly Home Office Makeover Ideas