
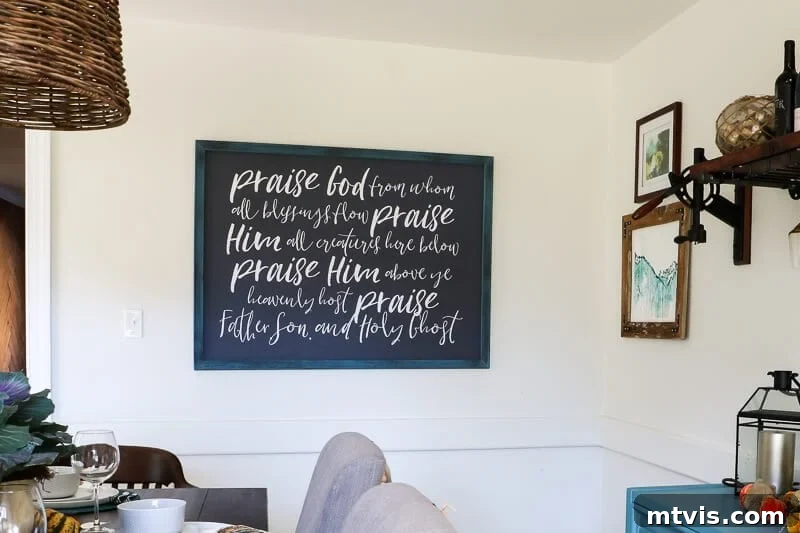
Craft Your Own Picture Frames: The Easiest DIY Method (No Power Tools Required!)
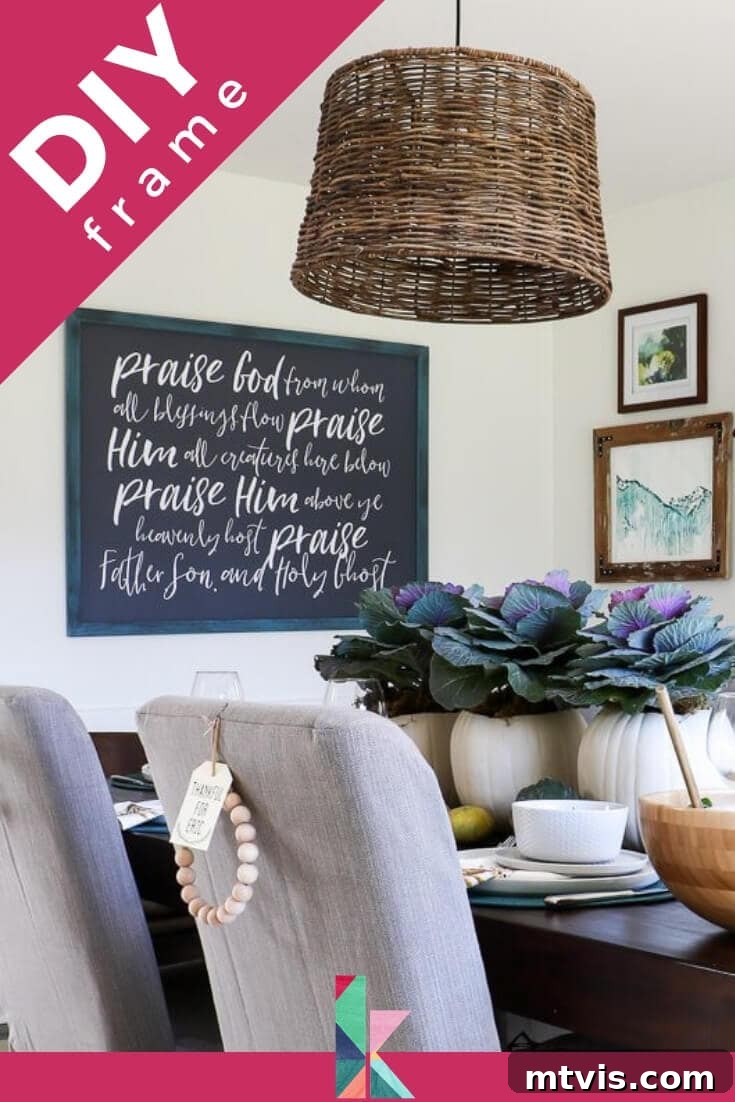
Hello, fellow DIY enthusiasts and home decor lovers! Have you ever found yourself frustrated by the exorbitant cost of picture frames, especially when you’re trying to showcase large-scale art or cherished photographs? The struggle to find frames that perfectly complement your style while also fitting your budget is a common one. For years, I’ve explored various framing methods, sharing tutorials on creating custom frames using materials like 1×2 pine boards or even reclaimed wood. While these methods yield beautiful results, they often require power tools and a certain level of craftsmanship that not everyone possesses.
Today, I am absolutely thrilled to unveil a game-changing DIY picture frame tutorial that simplifies the entire process. Imagine framing any artwork, big or small, without the need for a single saw or any power tools whatsoever – all for less than $20! This isn’t just a cost-effective solution; it’s a testament to how accessible and enjoyable home decor projects can be, even for absolute beginners.
This particular DIY picture frame method is so straightforward, literally anyone can master it. Whether you’re looking to frame a printed poster, a canvas, or a cherished photo, this approach is incredibly versatile. In fact, if you’re specifically working with canvas art, you might also find my DIY canvas frame tutorial incredibly helpful. The beauty of today’s project lies in its minimal tool requirement: no power tools, no hand saw, and while a heavy-duty stapler is recommended for stability, you could even improvise without it in a pinch. I’ll guide you through creating a stunning DIY frame primarily designed for large-scale art, though the technique is easily adaptable for almost any size.
Why Choose This No-Tool DIY Picture Frame Method?
Large-scale art has a transformative power in any room. It can instantly elevate a space, making a bold statement or serving as a captivating focal point, all without breaking the bank on the print itself. However, the true challenge often begins when it’s time to frame these impressive pieces. Traditional framing options for oversized artwork can easily cost hundreds, if not thousands, of dollars. Even DIY methods often demand specific tools, dedicated workspace, and a degree of woodworking experience. That’s where this revolutionary technique comes in!
My secret to affordable and effortless large-scale framing eliminates all those barriers. By utilizing readily available and inexpensive materials in an unconventional way, we can create custom frames that look professional and sophisticated. This method is perfect for renters who can’t make permanent changes, students on a tight budget, or anyone who loves the satisfaction of a handmade item without the steep learning curve. Get ready to transform your walls with beautiful, custom-framed art that reflects your style and your savvy!
A special thank you to DAP Products for sponsoring this post. This article contains affiliate links for your convenience. Please click here to read my full disclosure policy.
How to Build a DIY Picture Frame Without Any Power Tools
Looking for a convenient, printable version of this project? Simply click the image below to grab your free guide!
Supplies Needed for Your Easy DIY Picture Frame
Gathering the right materials is the first step to a smooth and successful DIY project. For this no-tool picture frame, you’ll find that all the supplies are easily accessible at your local craft store or online, making it incredibly convenient to get started. Here’s what you’ll need:
- Heavy-duty stapler: While you might be able to get by without it, a good quality stapler will make securing your artwork much easier and more durable. It provides a quick and strong bond.
- DAP Rapid Fuse: This is our secret weapon for strong, fast-drying bonds without clamps or extensive waiting. Its quick-setting nature is perfect for this project.
- Paint or stain and paint brushes: Personalize your frame! Choose a finish that complements your artwork and home decor. You might need a couple of brushes for different techniques.
- Canvas stretcher bars: These are the true stars of this tutorial. Available in various lengths (like 36″ or 48″, which I found at Hobby Lobby for $3.99 and $4.99 respectively), they are designed to slot together effortlessly, forming a perfect rectangular frame without any cutting or sawing.
- Eye hooks: Small, screw-in hooks that will be used on the back of your frame to attach the hanging wire.
- Picture hanging wire: Durable wire essential for safely hanging your finished masterpiece on the wall.
- An art print: The artwork you wish to frame! You can find the exact “Praise God” print I framed here, or choose any print that inspires you.
Step-by-Step Guide to Making Your DIY Picture Frame
1) Prepare Your Canvas Stretcher Bars with Paint or Stain
The first step in crafting your personalized picture frame is to add your chosen finish to the canvas stretcher bars. This is where you can truly let your creativity shine! For this particular frame, I started with a base coat of Enchanted Evening by Clark+Kensington, a beautiful, rich blue hue. Once this initial layer was completely dry (always allow adequate drying time to ensure proper adhesion and a smooth finish), I added some depth and character. I used Americana Decor Chalky Finish paint in Relic, a sophisticated dark gray, to dry brush some texture onto the frame. Dry brushing is a fantastic technique that involves using a minimal amount of paint on a dry brush, then lightly sweeping it across the surface. This creates a weathered, aged, or textured effect that adds tremendous interest without being overwhelming. Feel free to experiment with different colors, stains, or even multiple layers of paint to achieve the perfect look for your frame and artwork.
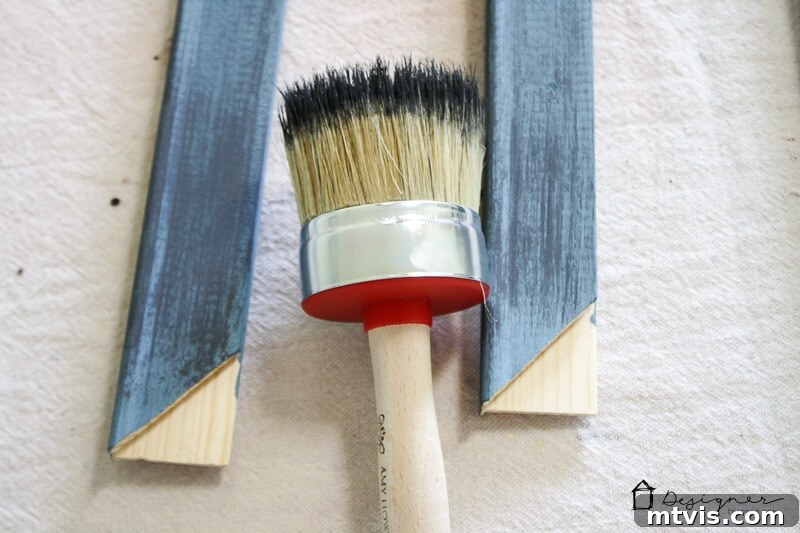
2) Assemble Your Frame with Precision and Strong Adhesive
Once your painted canvas stretcher bars are completely dry, it’s time for the magic of assembly. Flip your painted bars over so the finished side is facing down. The beauty of canvas stretcher bars lies in their ingeniously designed interlocking corners. They are precisely cut to fit together snugly without any need for sawing or complex joinery. Simply apply a small amount of DAP Rapid Fuse to the ends of each bar where they will connect. This adhesive is a game-changer for its incredibly fast-drying properties and superior bonding strength. Gently push the corners together, ensuring a tight, flush fit. You’ll hear and feel them lock into place. Hold each corner for a few seconds as the glue begins to set. It truly could not be easier to form a perfectly square or rectangular frame!
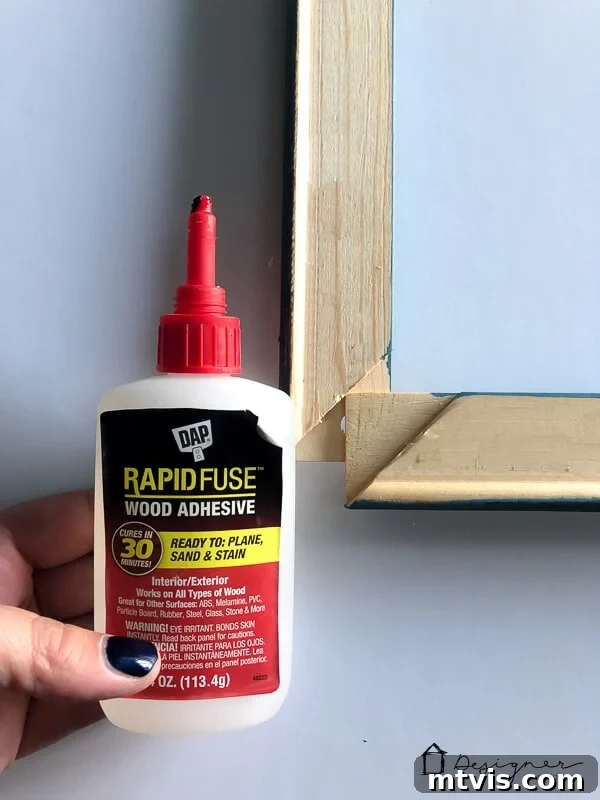
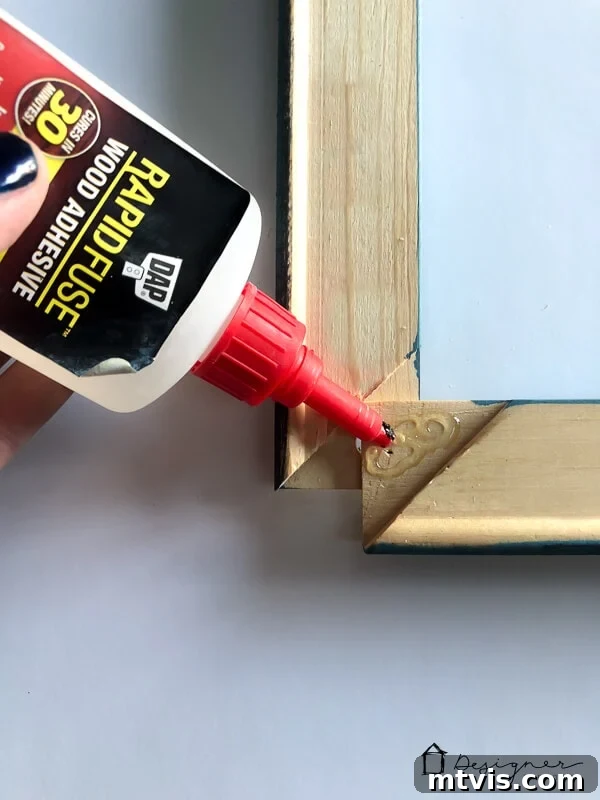
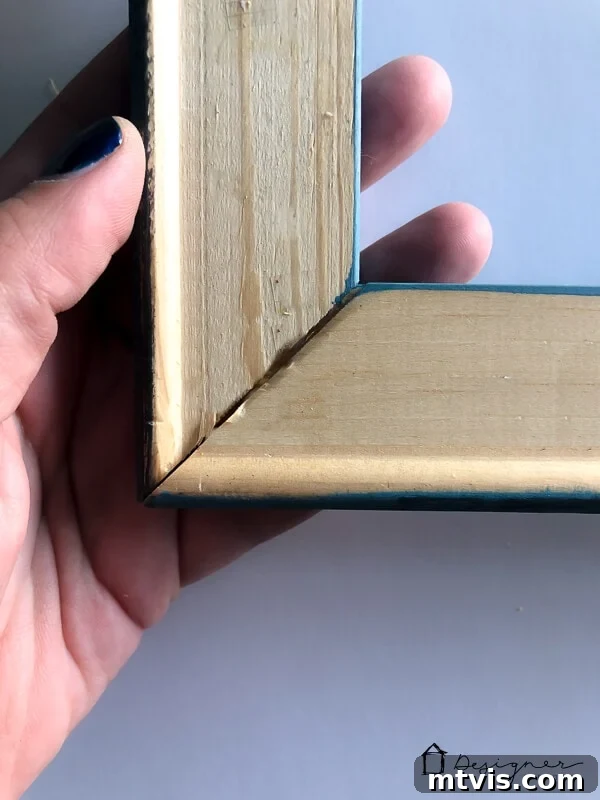
3) Secure Your Art Print within the Frame
After the DAP Rapid Fuse has fully dried (which happens incredibly quickly, a feature I absolutely adore about this product), your frame is ready for your artwork. Carefully place your chosen photo or print face down inside the back of the assembled frame. Ensure it is perfectly centered and aligned to your liking. Once positioned, use your heavy-duty stapler to secure the print to the inner edge of the stretcher bars. Staple around the perimeter, placing staples every few inches to create a firm and even hold. This will prevent your artwork from shifting or sagging over time. For detailed tips on effectively mounting large prints, especially how to ensure they are taut and wrinkle-free, I highly recommend checking out this dedicated post on our blog.
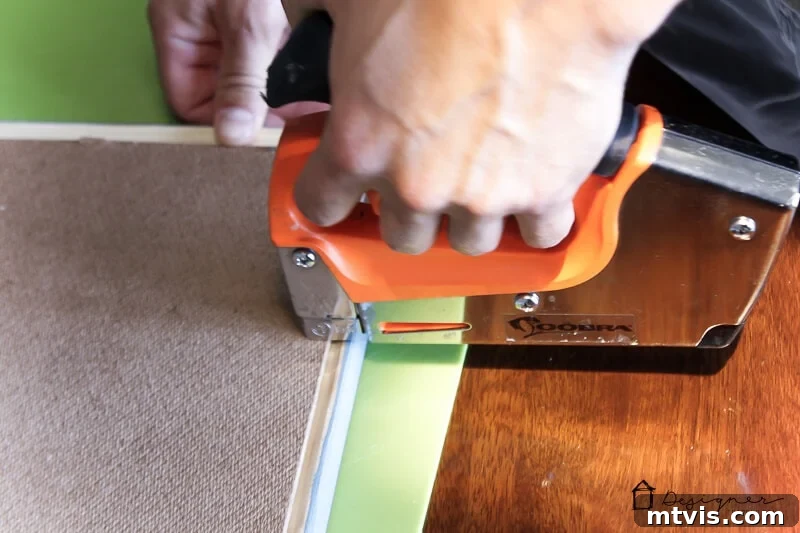
4) Attach Eye Hooks and Hanging Wire for Display
The final step is to prepare your newly framed art for hanging. On the backside of each vertical piece of your frame, approximately one-third of the way down from the top, carefully screw in a small eye hook. Make sure these are aligned at the same height on both sides to ensure your frame hangs level. Once the eye hooks are securely in place, thread your picture hanging wire through both eyes. Leave a generous amount of excess wire on both ends. This extra length is crucial for securely twisting the excess wire around the main hanging line and the eye hooks, effectively creating a strong, self-locking knot that will hold your artwork safely. Double-check that all twists are tight and secure, then test the strength of your hanging wire before placing it on the wall.
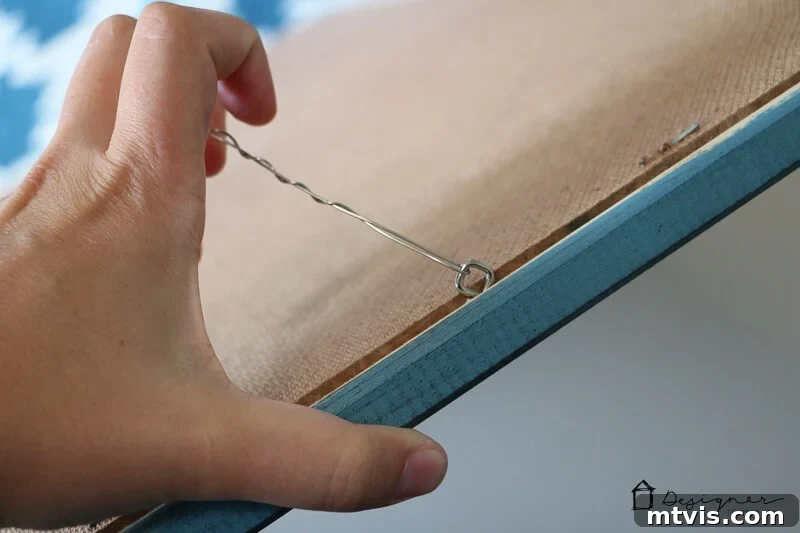
Behold Your Beautiful, Budget-Friendly Masterpiece!
That’s it! Wasn’t that incredibly easy? In just a few simple steps, without any intimidating power tools or complicated measurements, you’ve created a stunning custom picture frame. The final product speaks for itself. This huge 36 x 48-inch art piece, including both the print and the handcrafted frame, came in at an astonishingly low cost of around $30. Compare that to professional framing services for a piece of this size, which can often run into hundreds of dollars, and you’ll see just how significant your savings are. You now have a beautiful, personalized piece of wall art that not only enhances your home but also fills you with pride knowing you made it yourself!
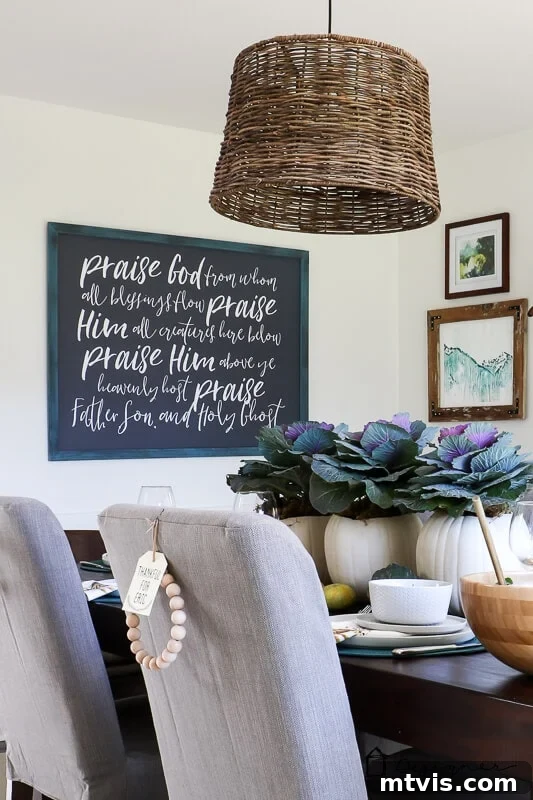
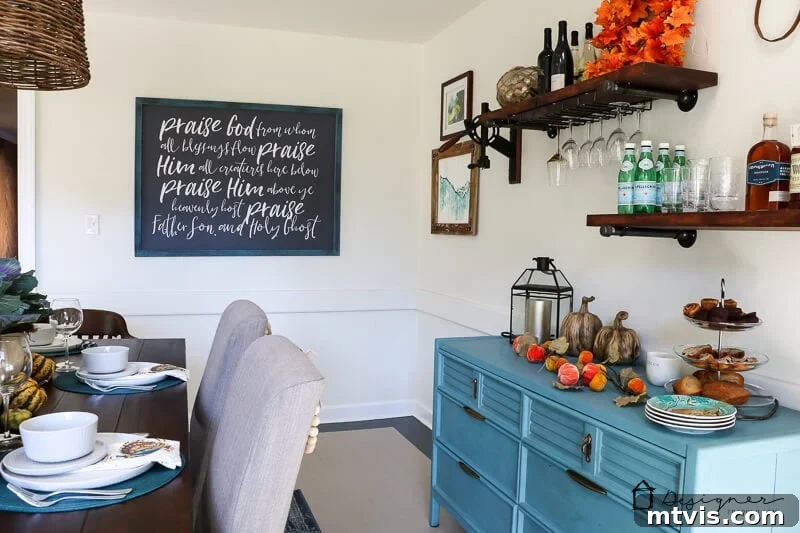
If you’re now on the hunt for equally affordable and striking large print options to fill your fantastic new frame, I invite you to explore my printable art shop, Kaleidoscope Living. You can even discover the exact “Praise God” print beautifully hanging in our dining room right here, among a vast collection of other captivating designs. The concept is simple yet brilliant: you purchase a digital print, which you can then have printed at your local print shop or online service in sizes as grand as 36″ x 48″, often for less than $10 each. It’s an incredibly budget-conscious way to achieve the coveted look of high-end art without the hefty price tag.
This art shop has been a true passion project of mine for quite some time, and there’s nothing I enjoy more than sharing my creative designs with my wonderful readers. You can click here to see my entire inventory and find the perfect piece to complement your newly framed artwork.
Before you dash off to start your framing adventure, don’t forget to become a Kaleidoscope Living VIP! By signing up, you’ll unlock exclusive access to an expansive digital library filled with all my art printables, invaluable design guides, and so much more. It’s your one-stop resource for elevating your home decor and embracing your inner designer. Join our community today and make your home truly reflect you!
Discover More Popular DIY Projects!
If you loved this easy picture frame tutorial, you’ll find plenty more inspiration in our collection of popular projects:
- Budget-Friendly Wall Art Ideas
- Quick Home Refresh Projects for Any Room
- Creative Storage Solutions You Can DIY
- Transform Furniture with Paint: A Simple Guide