Creating custom pillows is a fantastic way to infuse personality, color, and texture into any living space. You might think that making a pillow cover with a zipper is a daunting task reserved for expert sewers, but it’s actually much simpler than you imagine! This detailed, step-by-step tutorial will guide you through the process, making it easy for even beginners to achieve professional results. Get ready to elevate your home decor with beautiful, handmade zippered pillow covers that are not only stylish but also incredibly practical.
This comprehensive guide was kindly contributed by Jen from Fresh Crush.
Hello, fellow DIY enthusiasts! I’m Jen from Fresh Crush, and I’m absolutely thrilled to share this fantastic tutorial on Kaleidoscope Living today. I recently created these zippered pillow covers for my daughter’s bedroom, and I can tell you firsthand that while “making a pillow cover with a zipper” might sound complex, it truly isn’t! I promise you don’t need years of sewing experience or advanced skills to craft one yourself. If I can do it, so can you!
Please note: This post contains affiliate links for your convenience. Click here for my full disclosure policy.
Supplies Needed for 1 Zippered Pillow Cover
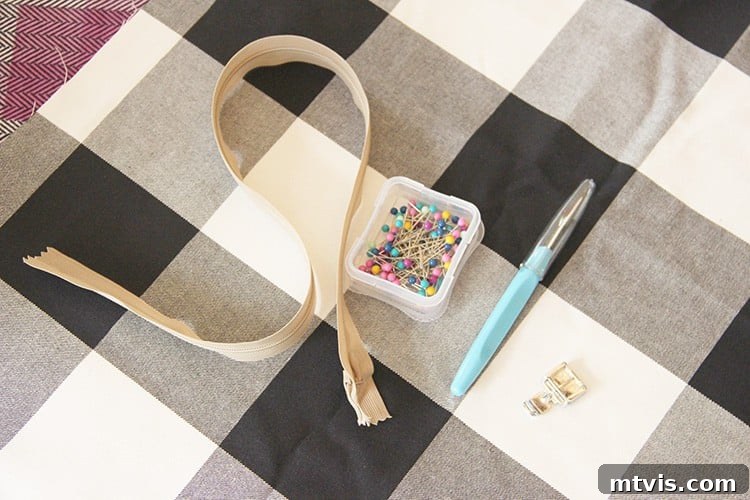
Before diving into the exciting world of sewing, it’s essential to gather all your materials. Having everything ready ensures a smooth and enjoyable crafting experience. Here’s a detailed list of what you’ll need for one zippered pillow cover:
- Two Coordinating Fabrics:
- Choose fabrics that complement each other and the existing decor of your room. You can opt for a playful print on one side and a solid color on the other for versatility. Consider using heavier fabrics like cotton canvas or upholstery fabric for a more structured, durable pillow, or lighter options like linen or decorator cotton for a softer feel. Tasha’s favorite place to order unique fabrics is Spoonflower – their selection is truly incredible and offers endless creative possibilities!
- A Down-Filled Pillow Form:
- These forms are excellent for achieving that coveted “karate chop” look and offer superior comfort. IKEA often has the best prices for down inserts, but if you don’t live near one, Amazon also provides some great deals on quality inserts. Make sure to choose a size appropriate for your desired finished pillow.
- Zipper:
- Select a zipper that’s at least 2-3 inches shorter than the width of your pillow form. The color should either match one of your fabrics seamlessly or provide a subtle, coordinating contrast.
- Straight Pins: Essential for holding your fabric and zipper in place before sewing.
- Seam Ripper: A must-have tool for correcting any small mistakes – every sewer needs one!
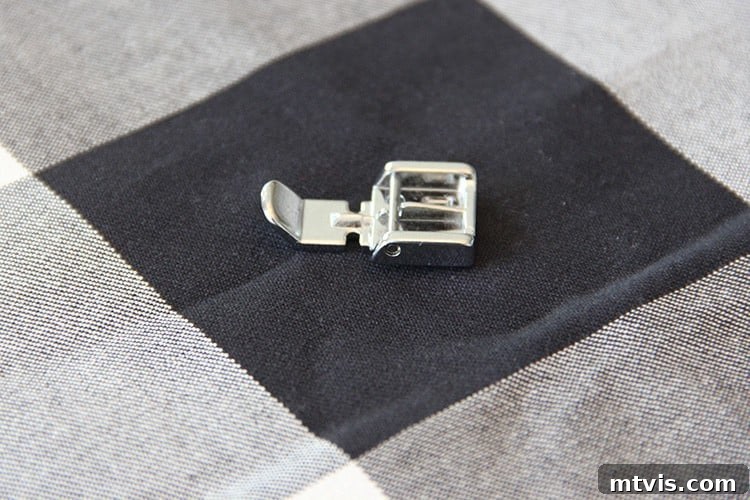
- Zipper Foot: This specialized sewing machine foot is crucial for neatly installing zippers. If your machine didn’t come with one, they are inexpensive and readily available.
- Sewing Machine: (This is the current version of Tasha’s sewing machine that she LOVES) Any functional sewing machine capable of a straight stitch will work perfectly.
Step-by-Step Tutorial for Making a Pillow Cover With a Zipper
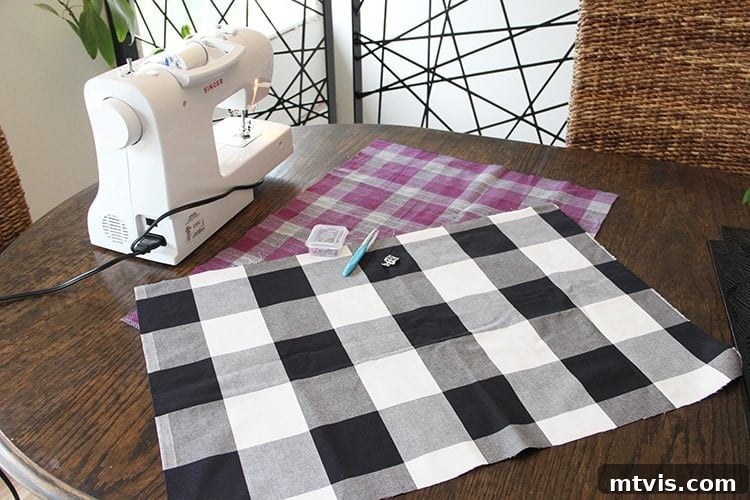
Ready to create a stunning, custom pillow cover? Follow these detailed steps to craft a beautiful and functional zippered pillow cover with ease. This entire project can typically be completed in about an hour, making it a perfect weekend DIY!
-
1. Choose Your Fabrics Wisely.
The journey to a perfect pillow cover begins with fabric selection. Before cutting, take time to choose two fabrics that not only coordinate with each other but also harmonize with the overall aesthetic of the space where the pillow will reside. Consider the material: a heavier fabric like cotton duck or canvas will yield a sturdier, more structured pillow, ideal for decorative purposes. For a softer, more inviting pillow, opt for breathable fabrics such as linen, silk, or a lighter decorator cotton. If you’re hesitant about mixing patterns, using the same fabric for both sides is always an option. However, I personally love the dynamic look of two different fabrics, allowing me to flip the pillow for an instant decor refresh! For expert advice on seamlessly blending various patterns, Tasha offers wonderful insights in her popular course, Designer in a Binder.
-
2. Select and Measure Your Pillow Form.
For that luxurious, high-end feel and the ability to achieve a crisp “karate-chop” styling, down-filled pillow forms are my top recommendation. I’ve found that IKEA often has them at incredibly reasonable prices, but if you don’t have an IKEA nearby, Amazon is another excellent source for quality down inserts. Once you have your pillow form, accurately measure its length and width. This is a crucial step! For your fabric measurements, you’ll want to cut your fabric to the exact size of your pillow form, then add a generous 1 inch (approximately 2.5 cm) on all four sides for your seam allowance. For example, if your pillow form is 18×18 inches, your fabric pieces should be cut to 20×20 inches.
-
3. Precisely Cut Your Fabric Pieces.
With your measurements in hand, it’s time to cut your fabric. Lay your fabric flat and smooth it out to avoid any distortions. Using a clear ruler or measuring tape and a sharp pair of fabric scissors or a rotary cutter and mat, carefully measure and cut both of your chosen fabric pieces. Remember to account for the 1-inch seam allowance on both the length and width of each piece. Accuracy here will ensure your pillow cover fits perfectly and looks professional.

-
4. Prepare and Pin Your Zipper.
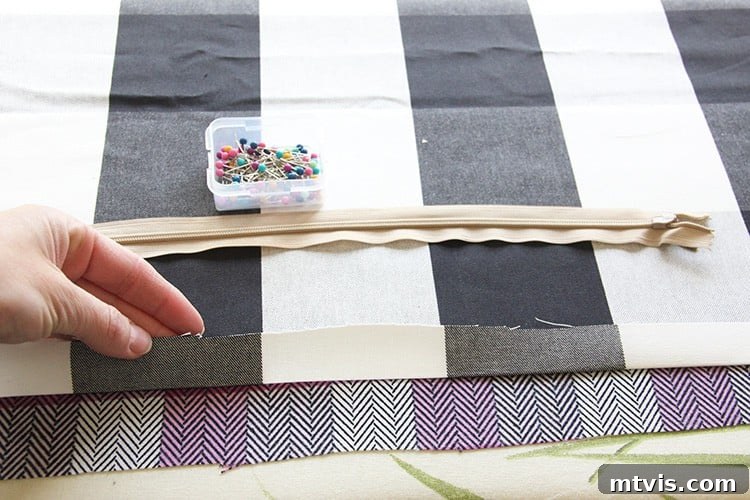
Take one of your cut fabric pieces. Along the edge where you intend to install your zipper, press the seam allowance (the extra 1 inch) up towards the wrong side of the fabric. This creates a neat, finished edge for your zipper.
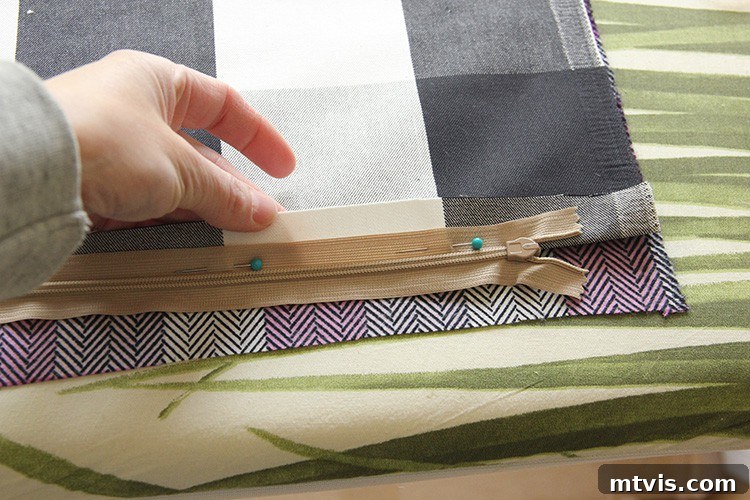
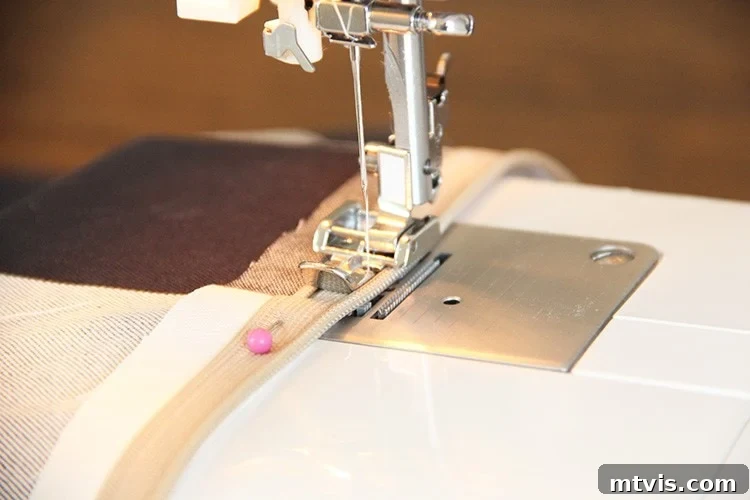
Next, position your zipper. Center it along the pressed edge of the fabric. The folded edge of your fabric should gently “kiss” or just touch the teeth of the actual zipper, covering the zipper tape. Pin the zipper in place to the wrong side of the pressed fabric, ensuring the right side of the zipper (the side with the pull tab) is facing down towards the right side of your fabric. This creates a hidden zipper effect.
-
5. Attach the Zipper Foot to Your Sewing Machine.
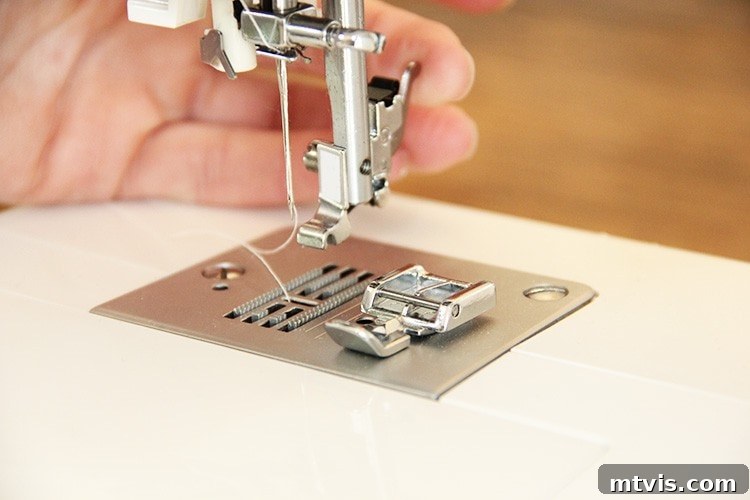
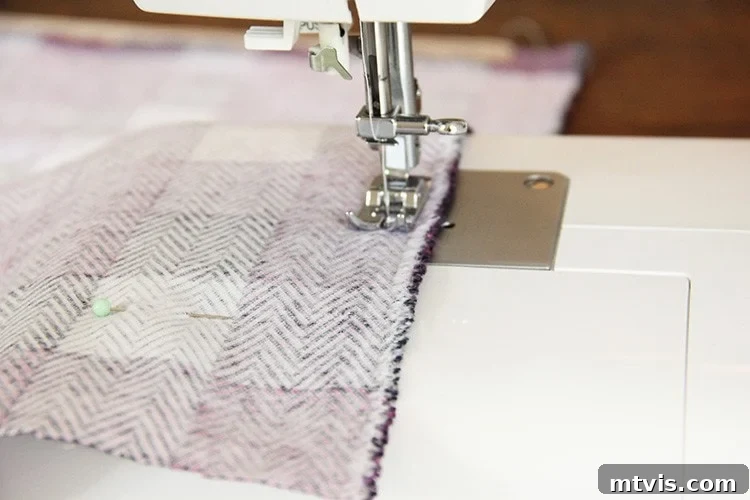
If you’re new to sewing zippers, the zipper foot will quickly become your best friend. This specialized foot is designed with a narrow profile, allowing you to stitch incredibly close to the zipper teeth without accidentally sewing over them. I had never used one until I bought my Singer sewing machine, which came with one, and I honestly can’t imagine sewing a zipper without it now!
To attach it, locate the small arm or lever at the back of your sewing machine that releases the standard presser foot. Remove the regular foot and attach the zipper foot. On most machines, the zipper foot can be attached to either the right or left side of the needle, depending on which side of the zipper you are currently sewing. This flexibility is what makes it so indispensable.
-
6. Sew the First Side of Your Zipper.
With your zipper foot securely in place, align your pinned fabric and zipper under the needle. Here’s a crucial tip: make sure your zipper is OPEN before you start sewing! This allows the unzipped slider to pass easily under the zipper foot as you stitch. Begin sewing immediately beside the zipper teeth, maintaining a consistent seam allowance. The zipper foot will guide you, preventing accidental stitches over the zipper itself. Stitch along the entire length of your fabric edge to firmly attach the first side of the zipper.
-
7. Prepare the Second Fabric Piece.
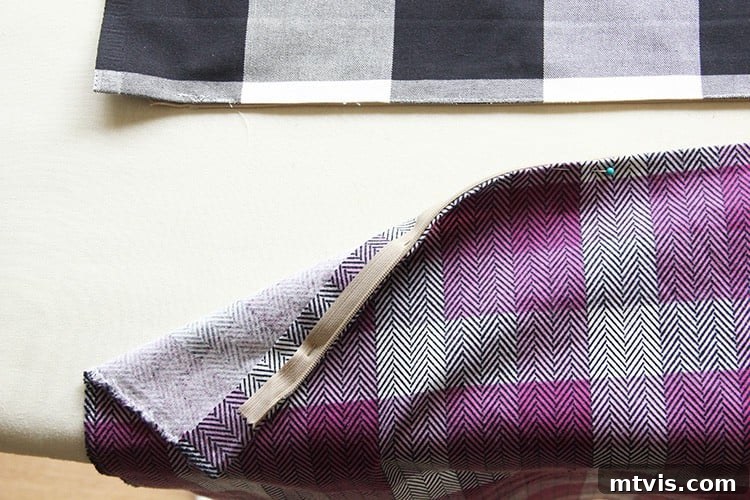
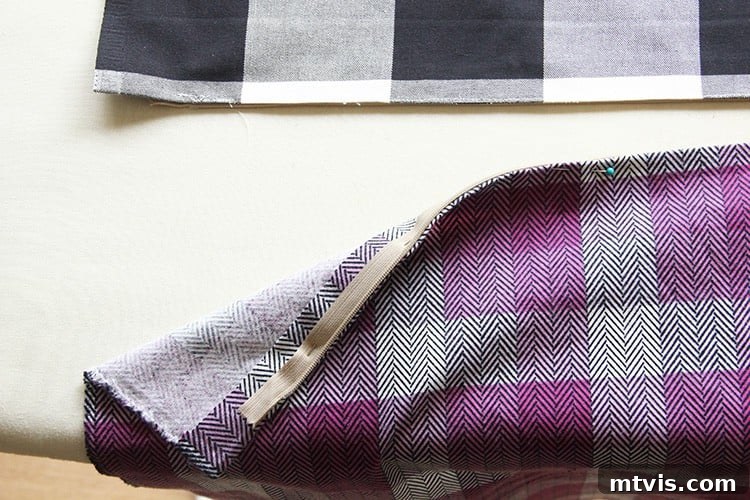
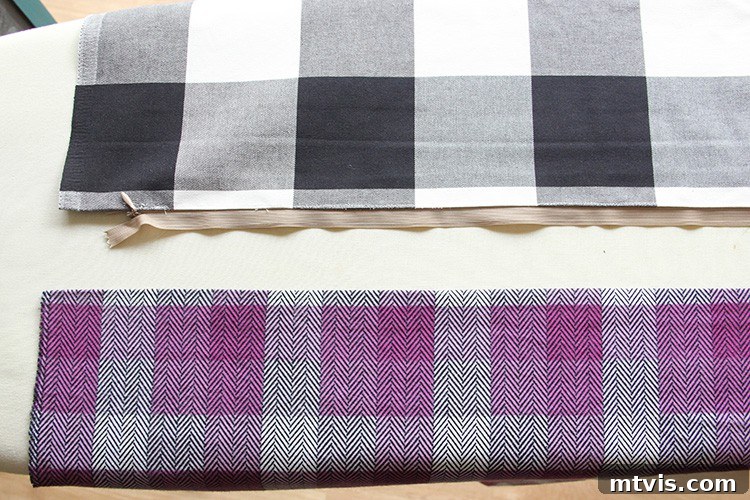
Now, take your second piece of coordinating fabric and prepare it just as you did the first. Press the seam allowance up onto the wrong side of the fabric along the edge that will connect to the zipper. Once pressed, you should have something that looks like the photo below. This visual shows the two “right sides” of your fabric, with the zipper already attached to the first piece, right side facing up. This arrangement helps ensure a clean, professional finish.
-
8. Zip Up and Pin the Second Fabric Piece.
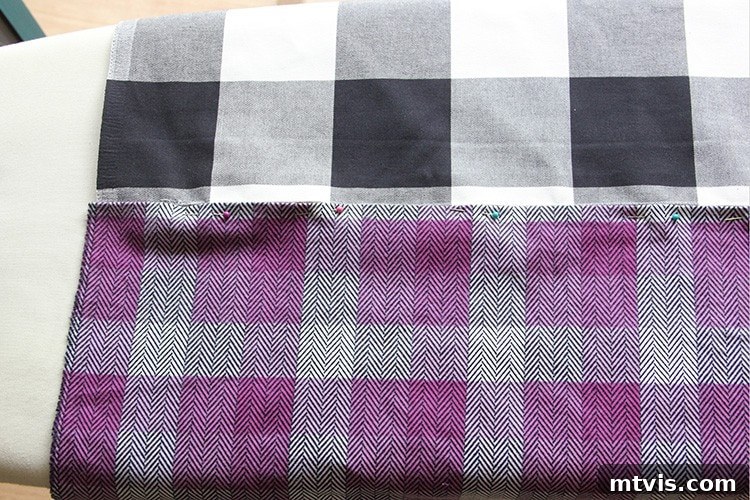
After preparing your second fabric piece, zip up the zipper. Take your second fabric piece and align its pressed seam allowance directly against the unsewn side of the zipper, which is already attached to your first fabric piece. Ensure the edges are perfectly aligned and the fabric fold gently touches the zipper teeth. Pin this second piece securely in place, making sure everything is straight and taut.
-
9. Sew the Second Side of Your Zipper.
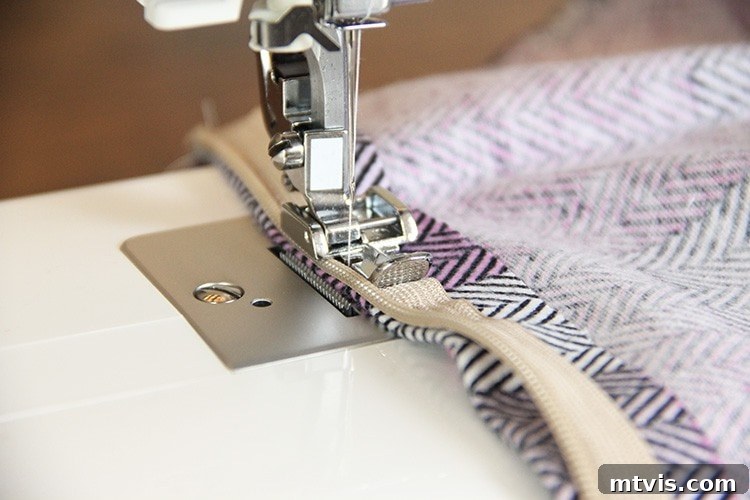
Once again, unzip the zipper. If necessary, switch your zipper foot to the other side of your sewing machine’s needle (or adjust its position if it’s a dual-sided foot) to allow for clear stitching. Sew this second side of the zipper in place, precisely as you did the first side. Take your time to ensure a straight and even stitch line, which will result in a professional-looking finish.
-
10. Prepare Remaining Three Seam Allowances.
Now that your zipper is securely attached, it’s time to assemble the rest of your pillow cover. Lay your two fabric pieces right-side to right-side, so the patterned or “good” sides of the fabric are facing each other. You should now be looking at the wrong sides of both fabrics and the wrong side of your zipper. Double-check your initial pillow form measurements to ensure your final pillow cover will be the correct size. Since one edge (where the zipper is) is already complete, you only need to create seam allowances on the remaining three sides. Pin along your designated sewing line on these three unsewn edges. Ensure your pins are perpendicular to the seam line for easy removal as you sew.
-
11. Sew the Three Remaining Edges.
With your fabrics pinned right-sides together, take your pillow cover to your sewing machine. It is critical to leave your zipper OPENED SLIGHTLY (at least halfway) before you start sewing the final three sides. If you forget to do this, you won’t be able to turn your pillow cover right-side out! Using a standard straight stitch, sew along the three remaining edges, following your pinned seam lines. Backstitch at the beginning and end of each seam for added reinforcement.
-
12. Add Your Pillow Insert and Final Hand Stitching.
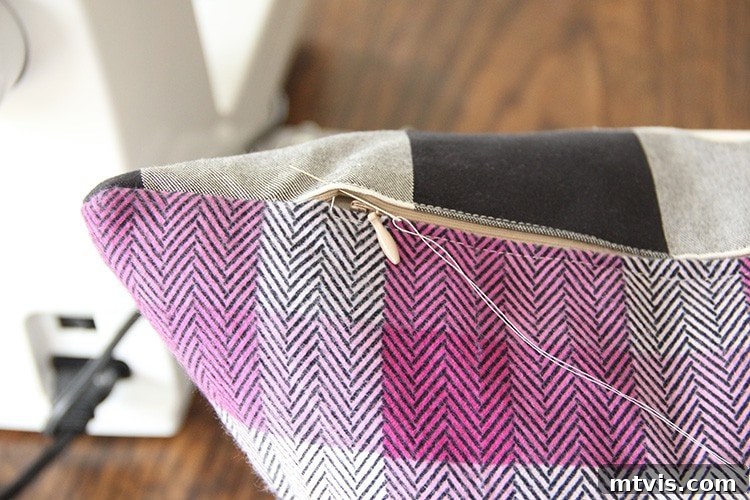
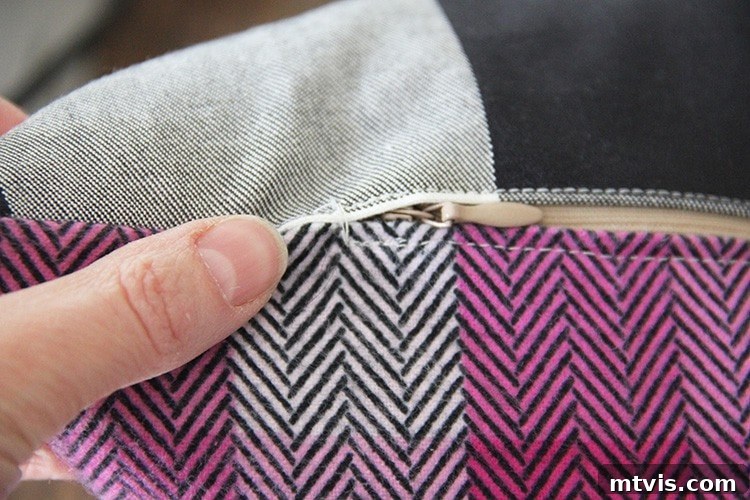
Once all your sewing is complete, trim any excess fabric from the corners (being careful not to cut your stitches) to reduce bulk, which will help create sharp corners when turned right-side out. Now, fully unzip your finished pillow cover and carefully flip it right-side out. Use a point turner or a blunt object to gently push out the corners, ensuring they are crisp and well-defined. Insert your pillow form into the cover. For added durability and to prevent any small gaps from appearing between the actual zipper teeth and the fabric tape at its ends, I recommend a tiny bit of hand stitching. Using a needle and thread that matches your fabric, sew a few small, secure stitches across the two sides just beyond the top and bottom stops of your zipper. This reinforces the zipper ends and gives a truly finished, professional look.
Why Choose Zippered Pillow Covers?
Beyond their aesthetic appeal, zippered pillow covers offer significant advantages over traditional envelope-style or sew-on closures. Firstly, they provide a snugger, more tailored fit for your pillow inserts, preventing excess fabric from bunching and ensuring a crisp silhouette. This is especially true when working with high-quality down inserts that benefit from a well-fitting cover to maintain their shape. Secondly, the zippered opening makes it incredibly easy to remove the cover for washing, a crucial feature for pillows used frequently or in homes with pets and children. No more struggling to squeeze a fluffy insert through a narrow opening! Finally, a well-installed zipper gives your DIY project a polished, professional finish that rivals store-bought options, adding perceived value and durability to your handmade creations.
Styling Your New Custom Pillows
Congratulations, you’re done! You’ve successfully learned how to make a pillow cover with a zipper! When you break it down step-by-step, the process truly isn’t as intimidating as it first sounds. Remember, I started as a total beginner when sewing zippered pillow covers, and if I can do it, I have absolute confidence that you can too!
Here’s a look at how my custom pillow covers turned out:
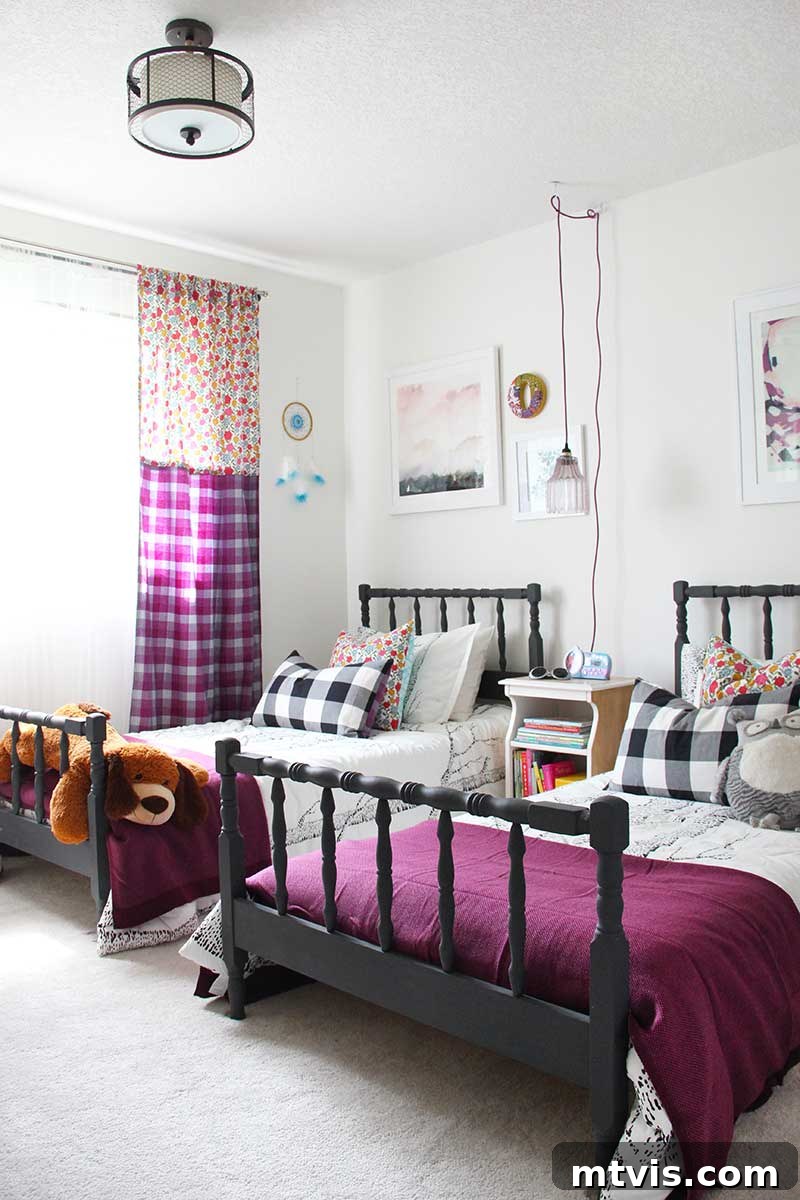
I created a total of four zippered pillow covers for my daughter’s room using this exact method, and every single one was a success! They are holding up beautifully, enduring everything a five-year-old can throw at them – from elaborate fort-building sessions to imaginary lily pad hopping and spirited pillow fights. They truly stand the test of time and play!
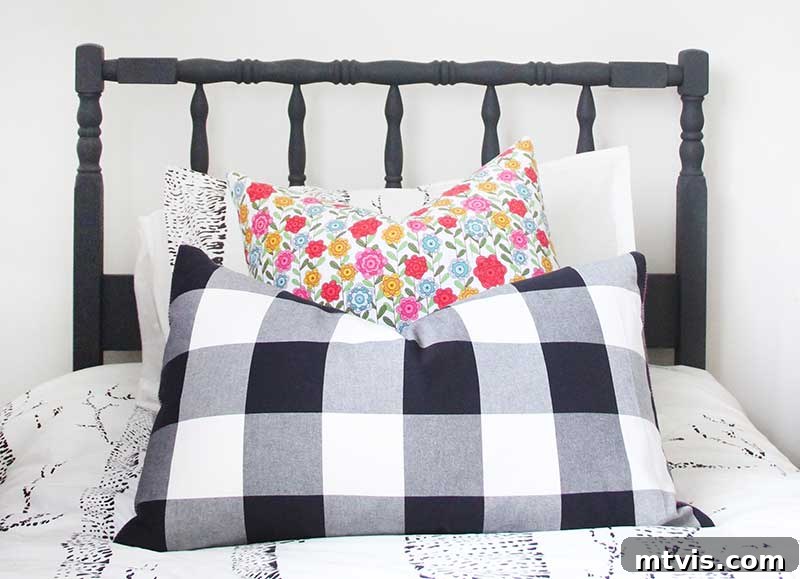
The beauty of making two-sided pillows, especially with coordinating but different fabrics, is that it grants you incredible flexibility. You can effortlessly switch up the look and feel of your decor with a simple flip of the pillow. This provides so much “bang for your buck” after putting in the effort to create such beautiful, custom pieces, don’t you agree?
I sincerely hope you now feel empowered and inspired. By following these straightforward steps, you can create a beautiful throw pillow that is incredibly easy to remove and wash whenever needed. Once you’ve mastered your first zippered pillow cover, the possibilities are endless! Experiment with different fabric textures, patterns, and even embellishments to design unique statement pieces for every room in your home. Happy sewing!
If you enjoyed this project and are looking for more creative inspiration, be sure to check out my other DIY ventures over at Fresh Crush!
A huge thank you to Jen for this wonderfully insightful and easy-to-follow tutorial!
More DIY CURTAINS & PILLOW Projects
SEE ALL TEXTILE POSTS
-
How to Make DIY Curtains With Tassels
-
Cheap & Easy Oversized Lumbar Pillow (No Sewing Skills Needed)
-
How to Make a Pillow Cover With a Zipper
-
22 Amazing DIY Curtains That Look Expensive
-
How to Make Curtains The No-Sew, Lazy Way
-
DIY Bed Canopy from Flat Sheets
Curious about how I approach transforming rooms and spaces in our home? Be sure to explore Designer in a Binder® – it’s an invaluable resource for simplifying your decorating process!
For exclusive content, behind-the-scenes sneak peeks, and fresh DIY ideas delivered straight to your inbox, don’t forget to subscribe before you go!