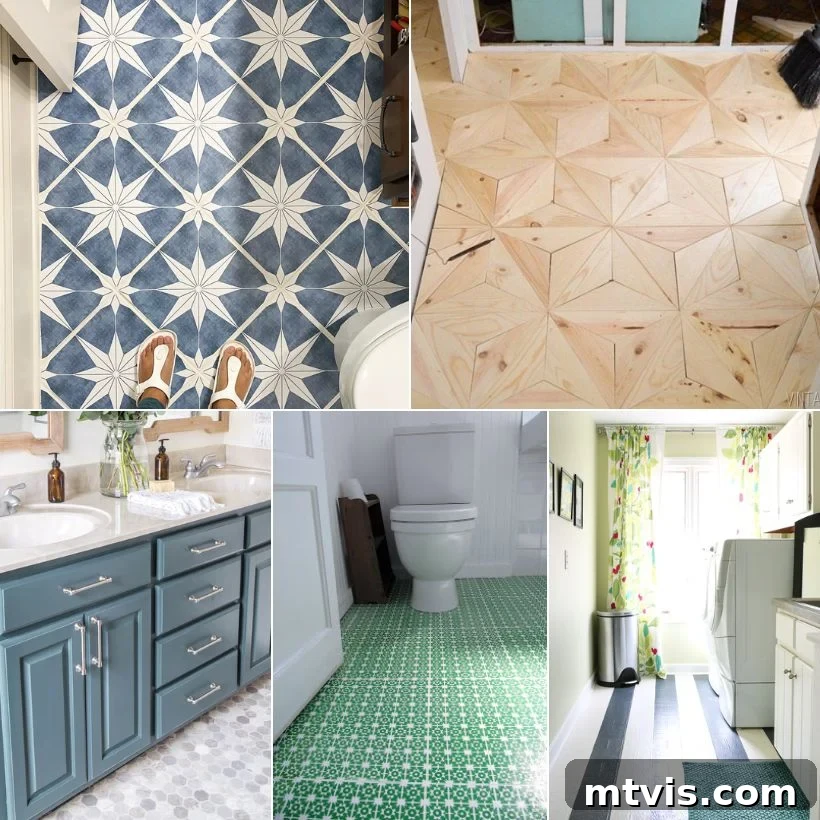
Transform Your Home: 16+ Budget-Friendly & DIY Flooring Ideas That Look Amazing
Ugly, outdated, or damaged flooring can significantly diminish the appeal of any room in your home. While the thought of a complete floor overhaul often conjures images of exorbitant costs and lengthy professional installations, the truth is, updating your floors doesn’t have to break the bank. In fact, flooring is typically one of the most expensive elements to replace in a home, often requiring specialized installers and carrying a hefty price tag. But what if we told you there are numerous ingenious, budget-friendly ways to transform your floors, making them look absolutely gorgeous without spending a fortune?
As a seasoned DIY enthusiast, I’ve personally tackled many of these affordable flooring projects in my own homes over the years. My husband and I have renovated five homes in the past 22 years, and countless times, we’ve faced the challenge of needing new flooring without the budget for traditional options. This forced us to get creative, explore cost-effective materials, and embrace DIY-friendly installation methods to save on professional labor costs. This experience has taught me that beautiful, durable floors are entirely achievable on a tight budget, and the results can be truly stunning.
In this comprehensive guide, I’m excited to share some of my favorite low-cost flooring methods that we’ve used, alongside a wealth of brilliant ideas from fellow DIYers. From painted floors and tile stickers to vinyl plank installations and DIY wood floors crafted from plywood, this list is packed with inspiration. Please note that all the options discussed here are for interior rooms. If you’re looking for garage flooring solutions, I have a separate post dedicated to garage flooring options.
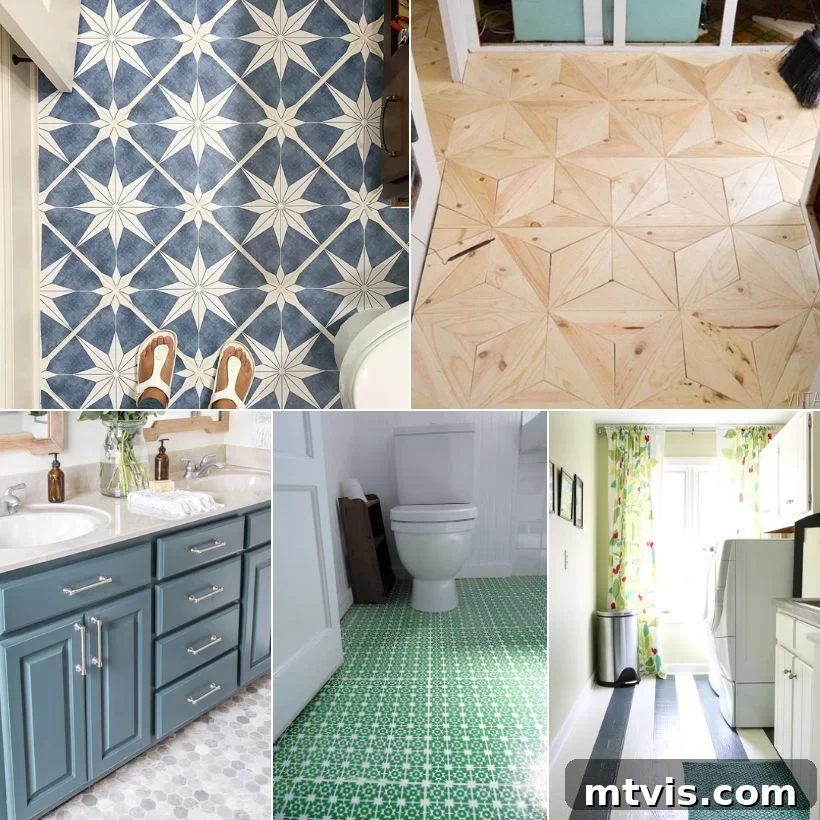
Table of Contents
This post contains some affiliate links for your convenience. Click here to read my full disclosure policy.
Why Affordable Flooring Matters: The DIY Advantage
For many homeowners, the cost of updating flooring is a significant barrier to refreshing their living spaces. Traditional options like solid hardwood, premium tile, or high-end carpet can quickly deplete a renovation budget. This financial hurdle often leaves people feeling stuck with floors they dislike. However, the rise of innovative materials and accessible DIY techniques has revolutionized the way we approach flooring updates. By choosing budget-friendly and DIY-compatible options, you not only save substantially on material costs but also eliminate expensive professional installation fees, making ambitious home transformations genuinely attainable.
Our personal journey through numerous home renovations has consistently reinforced the value of these smart, economical choices. We’ve proven that with a bit of creativity and elbow grease, you can achieve results that rival professional installations in both beauty and durability. The satisfaction of walking on a floor you transformed yourself, knowing you saved thousands in the process, is an incredible reward. Let’s dive into some of the most impactful and stylish solutions available today.
Over 16 Brilliant DIY Flooring Options That Won’t Break the Bank
1. Revitalize with Paint: Vinyl or Linoleum Floors
One of the most dramatic and budget-friendly transformations you can achieve is by painting your existing vinyl or linoleum floors. I successfully demonstrated this back in 2013 when I gave our laundry room a complete makeover for a mere $71. The original floor was an old, uninspiring brown vinyl, and replacing it wasn’t an option within our budget. So, I decided to paint our vinyl floor, spending just $30 on the paint. The outcome was phenomenal – simple, elegant stripes completely revitalized the space, and the finish held up incredibly well for over 7 years!
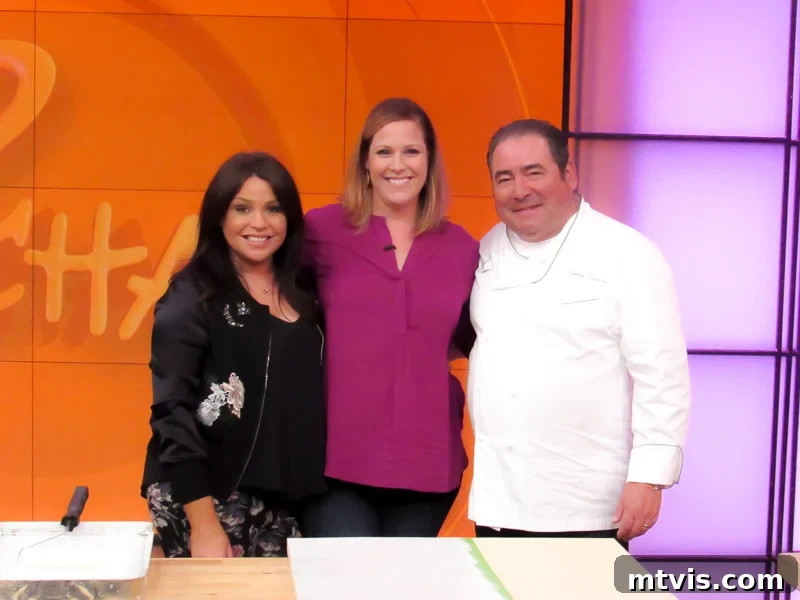
The key to such lasting results lies in using a high-quality porch and floor paint. This type of paint is specifically formulated to withstand heavy foot traffic and moisture, making it exceptionally durable. Contrary to popular belief, a separate topcoat is often unnecessary when using the right floor paint. This project was so impactful that I was even invited to appear on the Rachael Ray show to share my process!
2. Elevate with Luxury Vinyl Tile (LVT) Over Existing Floors
If painting isn’t your preference, or if your existing floors are too damaged to paint, Luxury Vinyl Tile (LVT) offers an incredible solution. This material can often be installed as a floating floor directly over outdated or damaged surfaces, eliminating the need for extensive demolition. The floating installation method is significantly quicker and easier than traditional glue-down or nail-down techniques, making it highly appealing for DIYers.
We personally installed a vinyl tile floating floor in our laundry room, and the results are stunning. Beyond its beauty, LVT is incredibly durable, resistant to scratches, and often completely waterproof (or at least highly water-resistant), making it ideal for high-moisture areas like bathrooms and kitchens. The cost-effectiveness is another major draw, with our choice of faux marble floating tile costing just $4 per square foot. LVT has come a long way in design, offering realistic textures and patterns that mimic natural stone, wood, and ceramic at a fraction of the price.
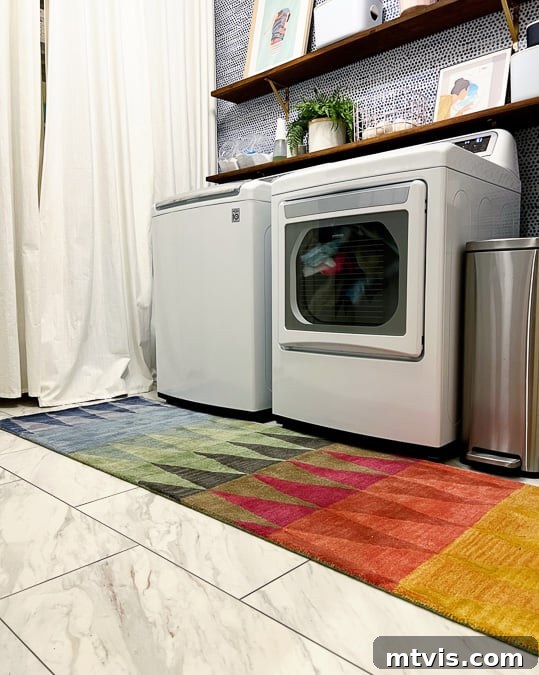
You can see how straightforward the installation was by viewing a short video on the process here.
3. Instant Makeover: Tile Stickers for Outdated Surfaces
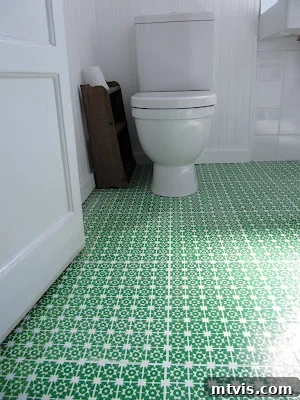
For an effortlessly chic update without any messy demolition, tile stickers are a game-changer. These innovative vinyl decals allow you to completely transform outdated tile floors with minimal effort. Made from durable, waterproof vinyl, tile stickers are designed to adhere smoothly to existing ceramic, porcelain, or other smooth-surfaced tiles. They offer a significant cost saving compared to traditional tile installation, which typically ranges from $15 to $20 per square foot. In contrast, vinyl tile stickers can cost around $6.00 per square foot and are incredibly quick and easy to install yourself.
We’ve successfully used tile stickers three times in our home, achieving stunning results every time. While they are perfect for smooth surfaces, it’s important to note that they are not recommended for textured tiles like travertine or slate, as proper adhesion requires a flat foundation. Additionally, while highly durable, they are best suited for areas with moderate traffic, making them an ideal choice for bathrooms, laundry rooms, and entryways. You can learn everything you need to know about tile stickers, including a video update on their longevity after 16+ months, on my dedicated post.
Watch an overview of installing tile stickers here to see the simple process.
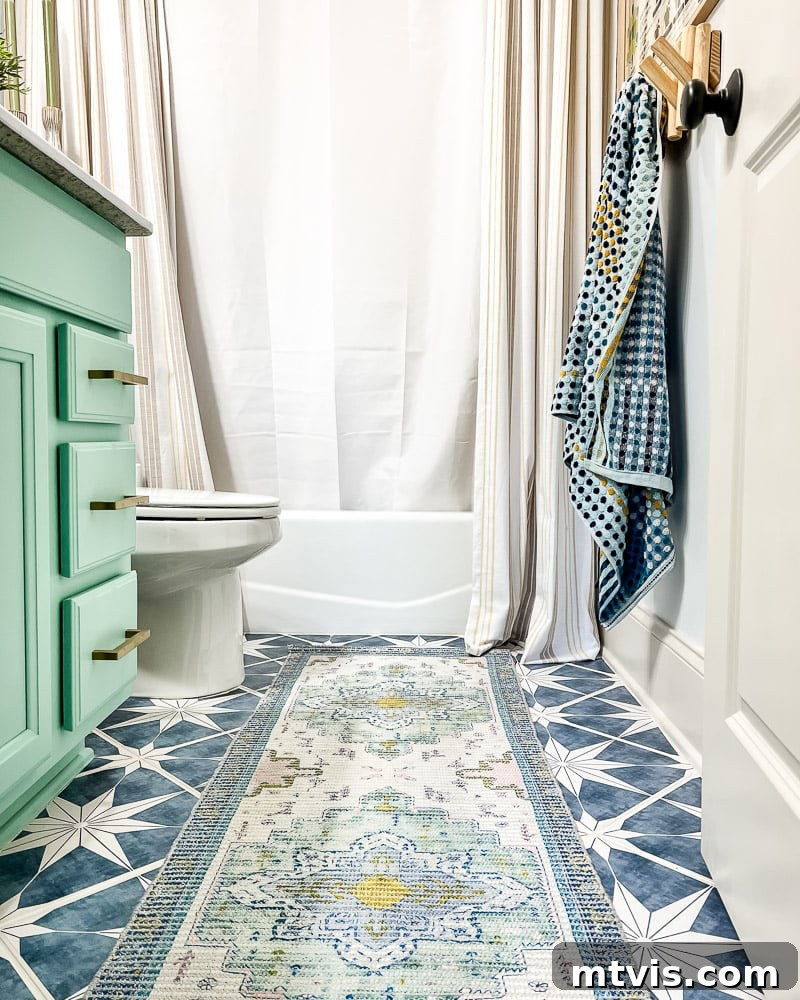
In our current home, I’ve integrated tile stickers into Avery’s bathroom makeover. We used these specific tile stickers to achieve a fresh, modern look.
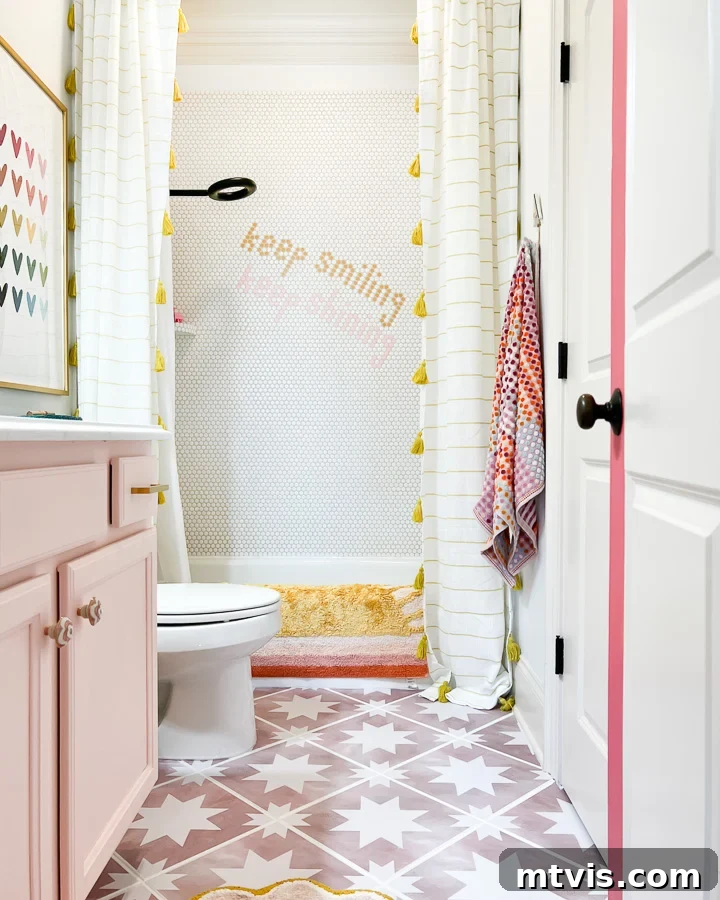
Similarly, we used tile stickers to update the floor in Attley’s budget-friendly bathroom makeover. The tile stickers we chose for Attley’s bathroom provided another fantastic transformation.
4. Seamless Style: Install Vinyl Sheet Flooring
For a truly seamless and incredibly affordable flooring solution, consider installing vinyl sheet flooring over your existing tile. My friend Lauren from Bless’er House masterfully utilized this method to transform her bathroom floor. Vinyl sheet flooring has long been recognized for its affordability, typically costing a mere $1.00 to $2.00 per square foot. However, modern manufacturing has elevated its aesthetic appeal, making it easy to find stylish and trendy designs that perfectly mimic more expensive materials like marble or wood.
The beauty of sheet vinyl lies in its large format, which means fewer seams, making it an excellent choice for moisture-prone areas where a continuous, water-resistant surface is desired. Installation, while requiring careful measurements and cutting, is a manageable DIY project that can dramatically refresh a space without the extensive labor or cost of traditional tiling.
5. The Allure of Laminate: Wood-Look Floors Without the Hardwood Price Tag
Laminate flooring has undergone a remarkable evolution over the past 15 years, transforming from a utilitarian option to a genuinely beautiful and highly sought-after material. Modern hand-scraped laminate floors are now so convincing, they often rival the aesthetic of many real hardwood floors. Furthermore, in our extensive experience, laminate has proven to be significantly more durable than traditional hardwoods, particularly in homes with pets and active families.
We deliberately chose to install laminate floors throughout our previous home because the cost of installing hardwood was simply prohibitive. While hardwood typically ranges from $7 to $25 per square foot, we paid a mere $1.76 per square foot for the thick, hand-scraped laminate we selected (and even cheaper options under $1.00 per square foot are available!). The installation was straightforward, utilizing a simple click-lock method, and the integrated underlayment prevented any hollow sounds when walked upon. We installed it ourselves, room by room, resulting in substantial savings. We absolutely adored our laminate floors, and surprisingly, I sometimes miss them! Our current home features real hardwoods, and while beautiful, they easily show scratches from our dogs’ nails—an issue we rarely encountered with our durable laminate. Understanding the pros and cons of different flooring types is crucial, and for us, laminate offered an unbeatable blend of style, durability, and value.
6. Artistic Touch: Paint and Stencil Existing Tile Floors
Transforming an outdated tile floor with paint and stencils offers an incredible opportunity for personalization and artistic expression, all while staying within a tight budget. The key to a successful and long-lasting painted tile floor lies in meticulous preparation and the use of the right products. Ensure your tiles are thoroughly cleaned, prepped, and that you use a durable porch and floor paint specifically designed for high-traffic areas. When these steps are followed diligently, your painted and stenciled floor can maintain its beauty for many years without the need for a topcoat.
This method allows you to infuse unique patterns, colors, and designs into your space, turning a dull floor into a striking focal point. Imagine geometric patterns, intricate mandalas, or simple, elegant stripes. The possibilities are endless, and the cost is minimal compared to ripping out and replacing old tiles. Just look at the beautiful examples below to see the stunning impact a painted and stenciled tile floor can have!
7. Breathe New Life into Damaged Hardwood with Paint
For hardwood floors that are heavily damaged, deeply scratched, stained, or simply no longer align with your aesthetic preferences, painting them offers an exceptional and cost-effective alternative to expensive refinishing or replacement. This approach not only conceals imperfections but also allows for a complete style transformation, whether you prefer vibrant hues or serene neutrals.
I have personally painted and stenciled hardwood floors, and I can confidently attest that with proper preparation and the exclusive use of high-quality porch and floor paint, you absolutely do not need to worry about chipping or peeling. A topcoat is truly unnecessary if you select the correct type of durable floor paint. This method is brilliant for hiding years of wear, evening out discoloration, and adding a fresh, customized look to any room. Painted wood floors can dramatically enhance your home’s character, irrespective of your decorating style.
Consider Liz Marie’s farmhouse, where she painted her hardwoods a beautiful creamy white, perfectly complementing her neutral decor. The effect is utterly stunning and creates a bright, airy foundation for her space.
If you’re drawn to a more vibrant aesthetic, the painted green floors by White Dog Vintage are sure to inspire. They introduce incredible depth and personality, making a bold statement without overwhelming the room.
And for a touch of classic elegance amidst colorful decor, Teri Moore’s choice to paint her historic hardwoods white is a testament to the versatility of painted floors. They provide a crisp, clean base that allows other design elements to truly pop.
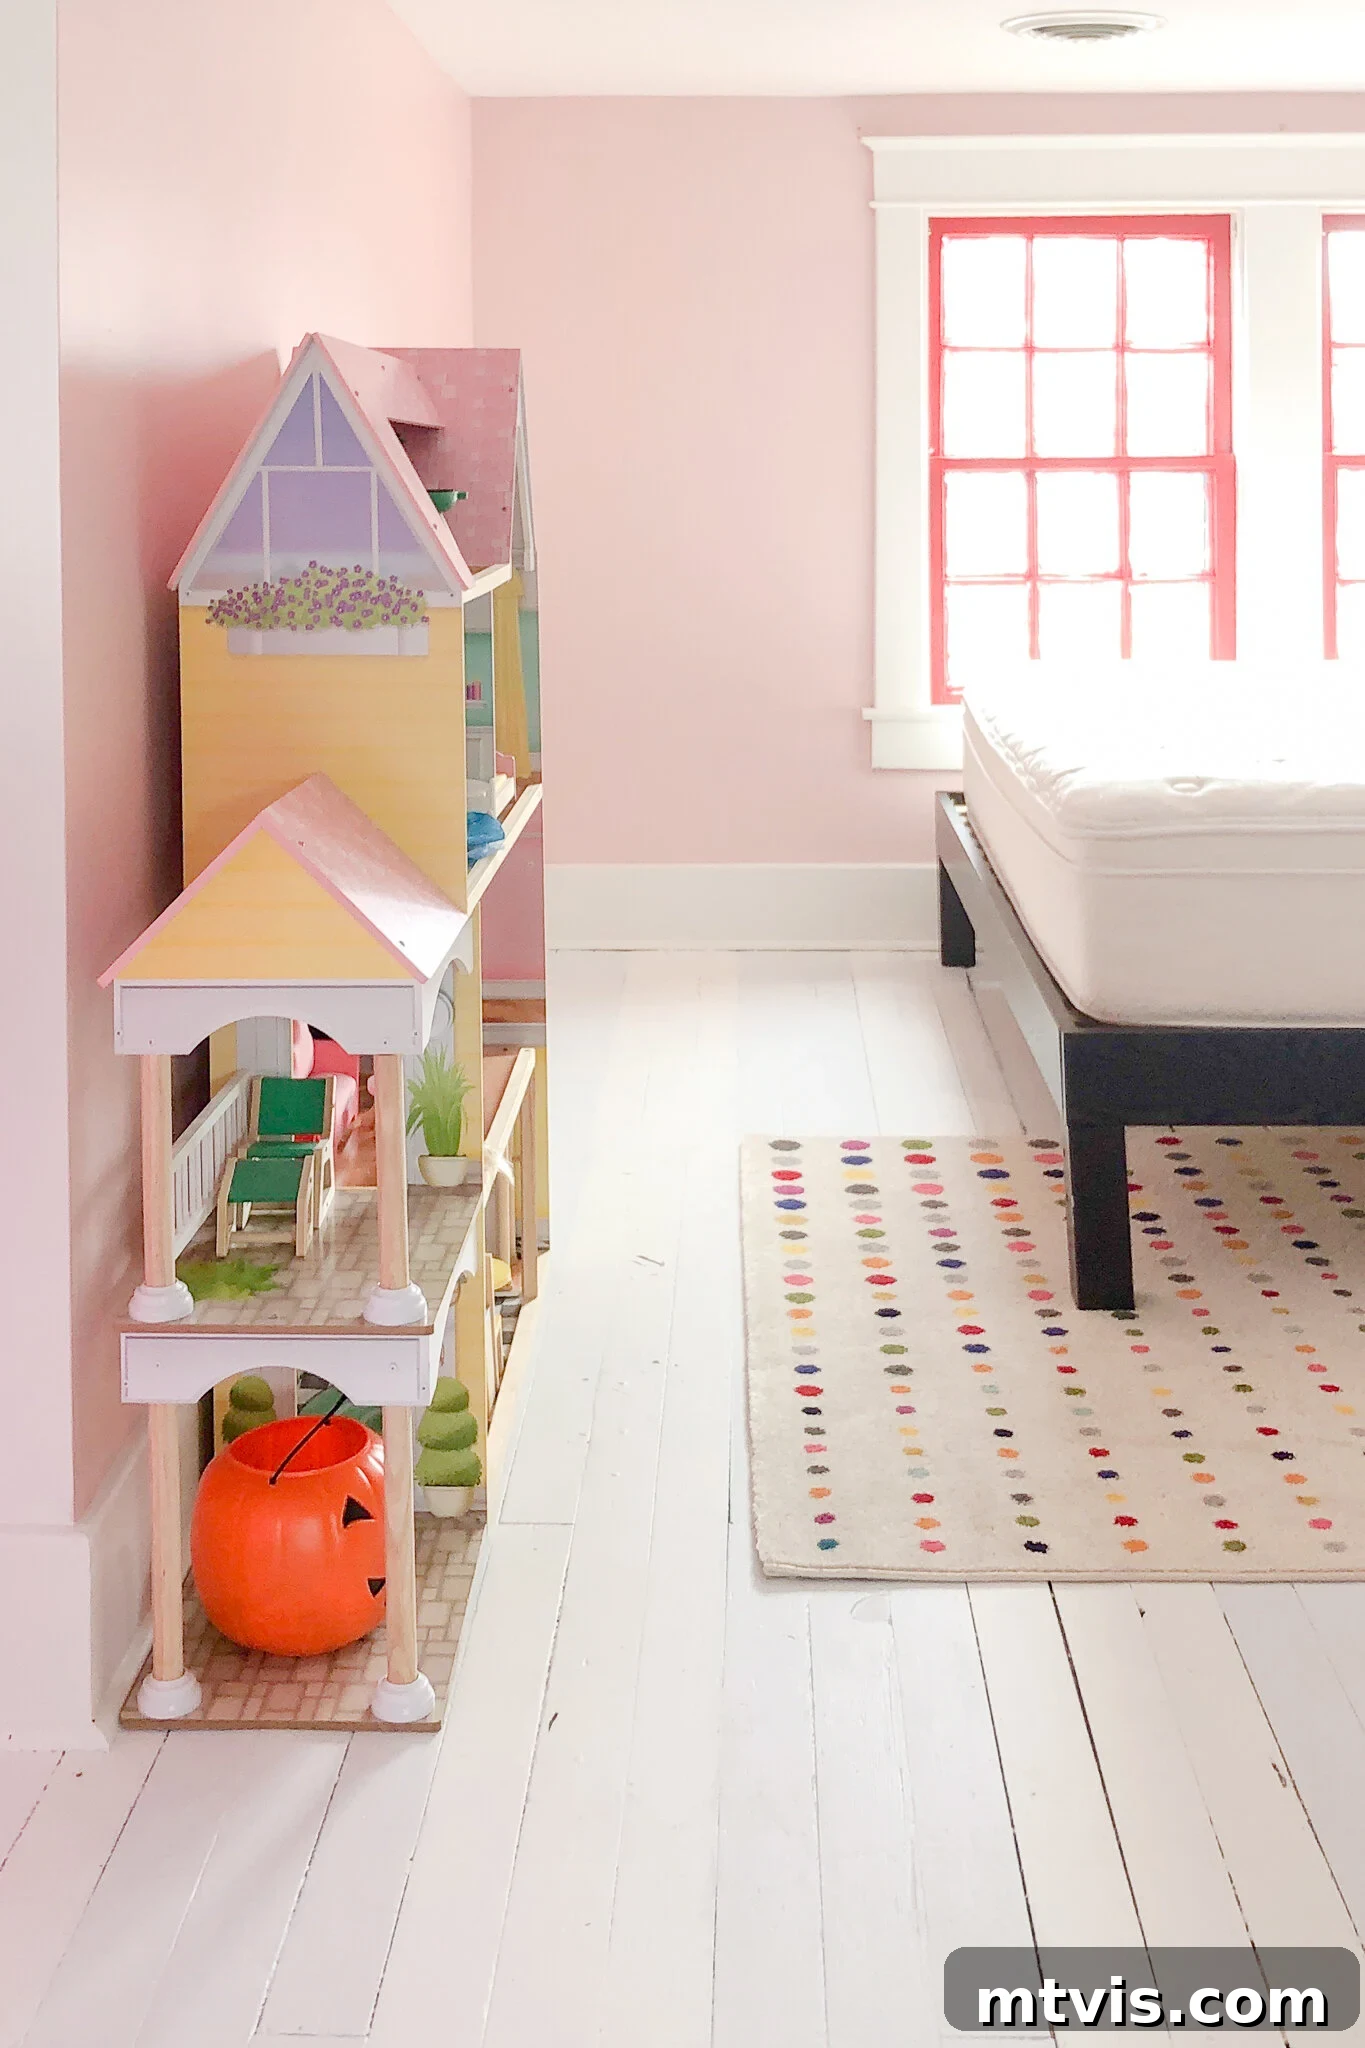
8. Warm Up Spaces: Painted Concrete Floors
Concrete floors, while inherently durable and often associated with modern industrial aesthetics, can sometimes feel cold or overly austere for certain interior designs. If you appreciate the robustness of concrete but desire a warmer, more inviting atmosphere, painting your concrete floor is an excellent and affordable solution. This simple DIY project can dramatically alter the perception of a space, introducing color, pattern, and a sense of coziness that bare concrete often lacks.
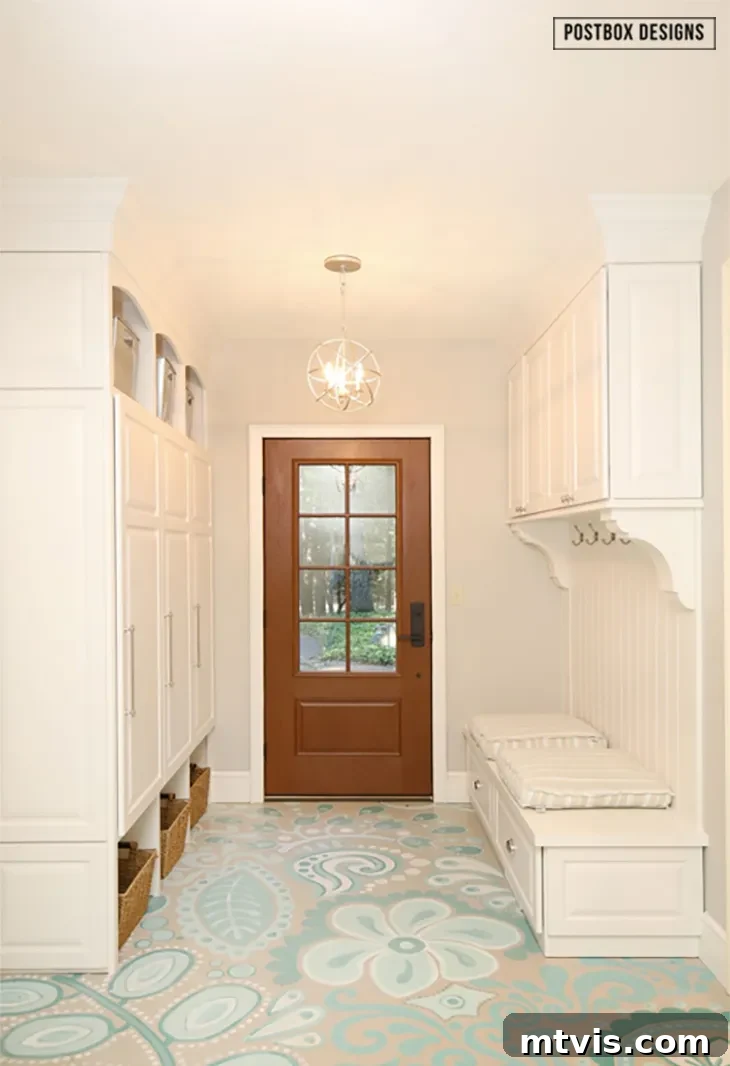
Postbox Designs perfectly exemplifies this in her mudroom transformation, which cost a mere $80. She utilized paint to add warmth and character, making the functional space feel much more integrated and stylish. When painting concrete, ensure proper cleaning and etching of the surface for optimal adhesion. High-quality concrete or porch and floor paints will offer a durable finish, and you can further enhance the look with stencils, geometric patterns, or a solid, inviting color that complements your decor. This method provides an incredible opportunity to customize a utilitarian floor into a beautiful design element.
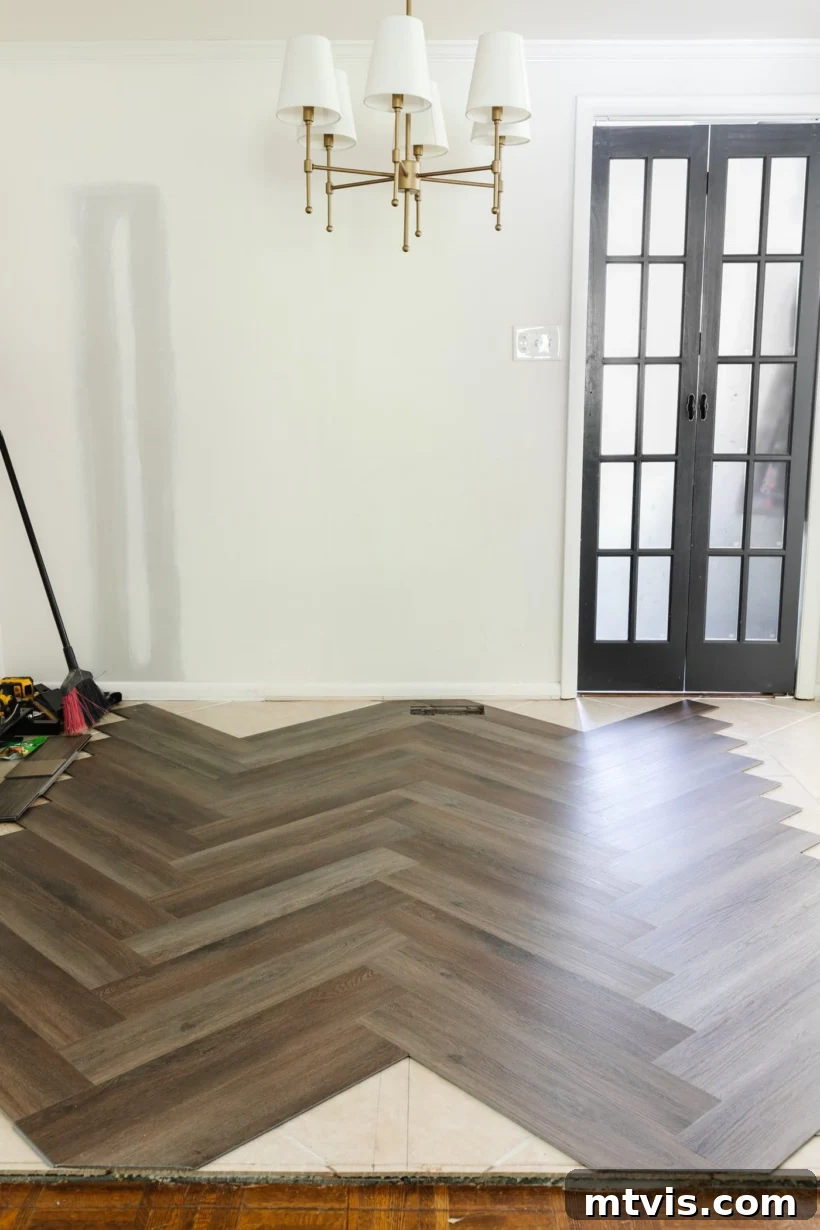
9. Sophisticated Patterns: Herringbone Luxury Vinyl Planks
Luxury Vinyl Planks (LVP) offer the realistic appearance of hardwood with enhanced durability and water resistance, making them a fantastic choice for any room. Beyond their practical benefits, LVP also provides incredible design flexibility. My friend Lauren, once again, showcased this beautifully by installing her LVP flooring in a sophisticated herringbone pattern over her outdated tile floor. The result is a truly elegant and high-end look that belies its affordable price point.
Installing LVP in a herringbone pattern, while requiring a bit more precision and planning than a straight lay, is absolutely achievable for a diligent DIYer. The distinctive zig-zag pattern adds visual interest, depth, and a touch of classic luxury to a space, making a powerful style statement. This method is particularly effective for upgrading entryways, living areas, or even bedrooms, where you want the warmth and aesthetic of wood with the practical advantages of vinyl.
10. Unveiling Potential: Painted Plywood Subfloors
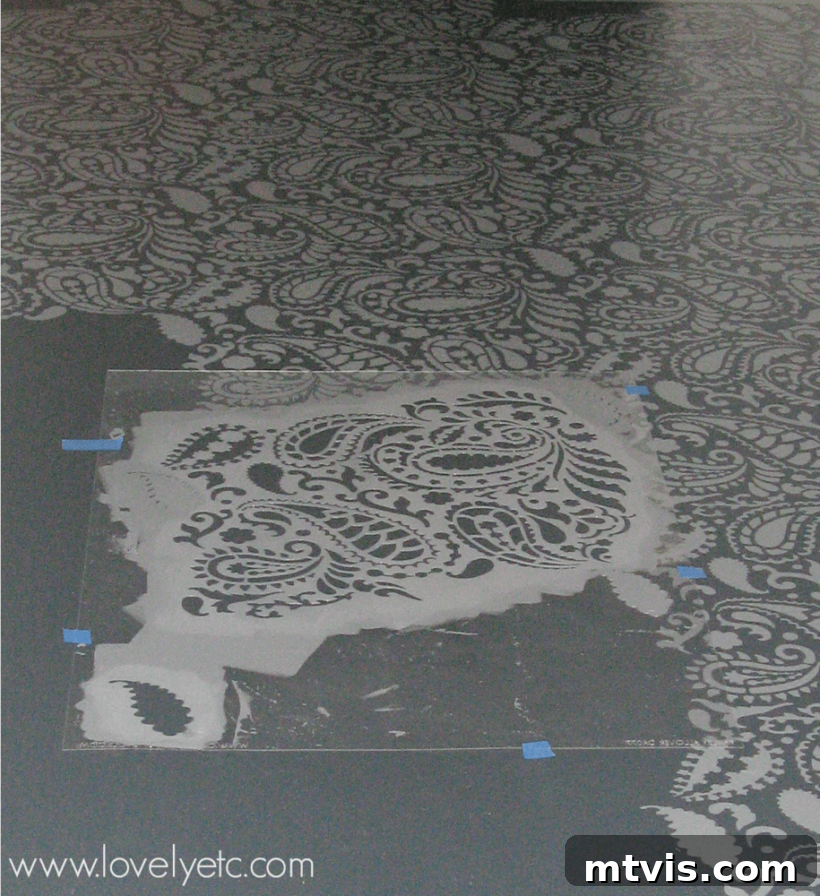
Who would have thought that the humble plywood subfloor, typically hidden beneath layers of more expensive flooring, could be transformed into a stylish and incredibly affordable floor finish? Yet, that’s precisely what Carrie at Lovely Etc. achieved, proving that innovative thinking can lead to stunning, budget-friendly upgrades. Painting a plywood subfloor is an ingenious way to create a fresh, modern surface when traditional flooring options are out of reach.
This DIY method involves properly preparing the plywood (sanding smooth any rough spots, cleaning thoroughly), priming it, and then applying durable floor paint. You can opt for a solid color for a clean, minimalist look, or take it a step further by adding stenciled patterns for a custom design, as Carrie did. The beauty of a painted plywood floor lies in its extreme cost-effectiveness and the ability to personalize it completely. It’s a testament to the fact that you don’t need fancy materials to make a big impact in your home.
11. Simplicity & Style: Peel & Stick Vinyl Tiles
Peel & Stick vinyl tiles represent the ultimate in quick, easy, and affordable flooring upgrades. While they may resemble luxury vinyl tiles, their installation method is even simpler, making them a favorite for renters and those seeking a temporary yet stylish solution. You can find a vast array of beautiful designs, often for under $2.00 per square foot, providing an immediate visual refresh without the mess or commitment of traditional methods.
We used peel & stick luxury vinyl tiles as part of our colorful laundry room makeover, and the installation took approximately an hour with beautiful results. These tiles are designed to adhere to any clean, flat surface, including existing vinyl sheet floors, linoleum, hardwood, or even bare subfloors. If you plan to install them over grouted tile, a crucial step is to fill and level the grout lines beforehand to ensure a smooth, uniform surface for proper adhesion. This simple preparation prevents indentations and ensures a professional-looking finish. Peel & stick tiles are a fantastic choice for bathrooms, pantries, or small entryways where a rapid and budget-conscious update is desired.
12. Unexpected Elegance: Wallpaper Your Floor
For those truly seeking an unconventional and eye-catching floor update, consider wallpapering your floor! This ingenious and temporary solution is particularly appealing for renters or anyone looking for a unique, low-commitment design statement. Medina from Grillo Designs bravely updated the scratched laminate flooring in her rental entryway with wallpaper, proving just how transformative and creative this method can be.
Using durable, high-quality wallpaper (preferably peel-and-stick for ease of removal) and a strong adhesive or sealer can create a truly custom look. While perhaps not suited for extremely high-traffic areas or spaces prone to heavy moisture, wallpapered floors can add incredible pattern, color, and personality to a bedroom, office, or a lightly used entryway. It’s a fantastic way to experiment with bold designs and inject instant style without the permanence or expense of traditional flooring materials.
13. Rustic Charm: Stained Plywood Subfloors
If your heart is set on the warmth and character of hardwood floors but your budget simply won’t allow it, staining your plywood subfloor is an incredibly clever workaround. Ana White’s stunning stained plywood subfloor demonstrates just how effectively this method can replicate the rich, inviting look of traditional wood flooring at a fraction of the cost. This DIY approach leverages the existing structural material of your home, transforming it into a beautiful, finished surface.
The process involves careful sanding of the plywood to ensure a smooth, splinter-free surface, followed by applying wood stain in your desired shade. From light, airy tones to deep, rich hues, staining offers a wide range of aesthetic possibilities. Once stained, a durable polyurethane topcoat is essential to protect the surface from wear and tear, ensuring longevity. The outcome is a rustic, authentic-looking floor that exudes charm and can be perfectly tailored to your home’s style.
14. Custom Hardwood Look: DIY Plywood Plank Floors
Taking the plywood concept a step further, you can create the distinct look of traditional hardwood planks using plywood sheets. This DIY project involves cutting large sheets of plywood into narrower strips, which are then laid down like individual hardwood boards. The beauty of this method lies in its incredible versatility; the resulting “planks” can be either stained to emulate various wood species or painted to introduce custom colors and patterns, providing a highly personalized floor.
The process typically includes cutting the plywood into uniform widths, carefully securing them to the subfloor, and then filling any gaps or imperfections. Once installed, the planks can be sanded, stained, and sealed with multiple coats of polyurethane for a durable finish. This technique offers the authentic appearance of hardwood at a significantly reduced cost, allowing you to achieve a custom floor design that perfectly suits your home’s aesthetic, whether you prefer a classic, rustic, or modern look.
15. Unique Design: Geometric Wood Floors
For the truly adventurous and patient DIYer, crafting your own geometric wood floors can result in a breathtakingly unique and artistic statement piece. Mandi from Vintage Revivals famously created stunning geometric wood floors that I absolutely adore and aspire to install somewhere someday! This project, while more intensive and demanding a higher level of skill and precision, yields an unparalleled custom look that is guaranteed to impress.
The process involves cutting small pieces of wood into various geometric shapes (triangles, hexagons, squares, etc.) and meticulously arranging them into an intricate pattern across the floor. Each piece is carefully adhered, creating a mosaic-like effect. Once installed, the entire surface is typically sanded smooth, then stained or painted, and finally sealed with multiple coats of a durable finish. This method allows for endless creativity in terms of pattern and color, offering a bespoke flooring solution that transforms any room into a work of art and provides immense personal satisfaction.
16. Beyond the Conventional: Creative & Unusual Floor Coverings
Sometimes, the most striking floor transformations come from thinking completely outside the box and utilizing materials in unexpected ways. If you’re looking to create a truly one-of-a-kind statement floor that reflects your unique personality, these unusual flooring ideas offer unparalleled inspiration.
Imagine walking on a floor made of Scrabble tiles! This incredible creation, seen in a bathroom by Mullo Designs, is not only visually fascinating but also a delightful conversation starter. Each tile forms a letter, creating a playful and intellectual aesthetic that is unlike anything else. While the labor involved is significant, the result is a custom floor that embodies extreme creativity and a sense of whimsy.
Equally impressive are the gorgeous green art paper floors by Lazy Cozy. This highly creative approach involves covering the floor with carefully arranged art paper, then sealing it with multiple coats of a protective finish. The result is a vibrant, textured surface that is both artistic and surprisingly durable for low-traffic areas. These examples demonstrate that with imagination and a willingness to experiment, almost any material can be repurposed to create a memorable and affordable floor. These unique methods truly elevate flooring from a functional necessity to an integral part of a room’s artistic design.
More FLOORING IDEAS
SEE ALL flooring POSTS
-
20 Stylish But Cheap Flooring Ideas (With Lots of Photos)
-
How to Install a Stair Runner: A Step-by-Step Tutorial
-
The Best Garage Flooring Options For A Fresh Update
-
Everything You Need to Know About Tile Stickers
-
How to Paint Vinyl Floors for Long-Lasting Results
-
The Easy Way to Update Bathroom Tile Without Replacing It!
Ready to Redesign Your Space?
I am so impressed with all of these affordable flooring ideas! They are not only incredibly pretty but also brilliantly designed to ensure you don’t blow your makeover budget out of the water. Each option offers a unique way to refresh your home, proving that style and savings can go hand in hand. Which is your favorite? I find myself seriously in love with those vibrant green-painted floors, and the scrabble tile floor is undeniably clever and brimming with fun!
I sincerely hope these diverse and budget-friendly ideas have left you feeling inspired and empowered to tackle the flooring updates in your own home without fear of exorbitant costs. Remember, a beautiful home doesn’t require a limitless budget—just a little creativity, strategic planning, and the confidence to embrace DIY. Go ahead and transform those floors; your dream space is more attainable than you think!
Unlock Your Home’s Potential with Designer in a Binder®
Curious about my approach to transforming rooms and spaces in our home, achieving stunning results on a real-life budget? Dive into Designer in a Binder®. It’s my proven system for making interior design accessible and affordable for everyone.
And for exclusive content, behind-the-scenes sneak peeks, and more budget-friendly home decor tips delivered straight to your inbox, be sure to subscribe before you head out!