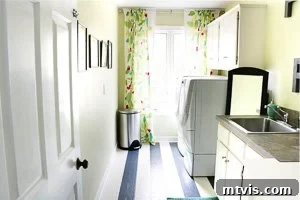
Transform Your Outdated Vinyl Floors: A Durable DIY Paint Makeover That Lasts Years
Are you looking at tired, old vinyl floors and dreaming of a fresh new look, but your budget won’t allow for a full replacement? Don’t despair! You can completely transform them with a simple, budget-friendly DIY project: painting your vinyl floors. And here’s the best part – when done correctly with the right supplies, painting vinyl floors is an incredibly durable option. My own painted vinyl floors remained flawless for an astounding seven years, enduring daily wear and tear without a single chip or peel!
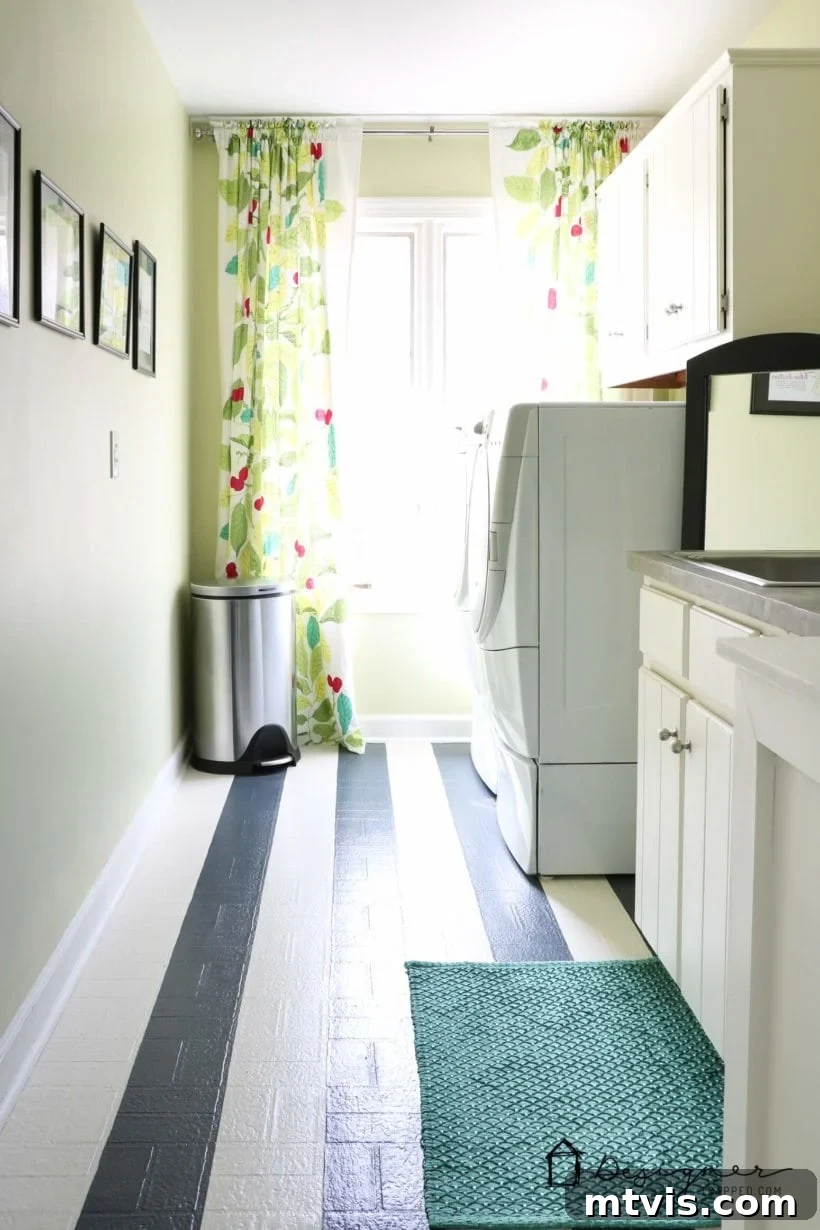
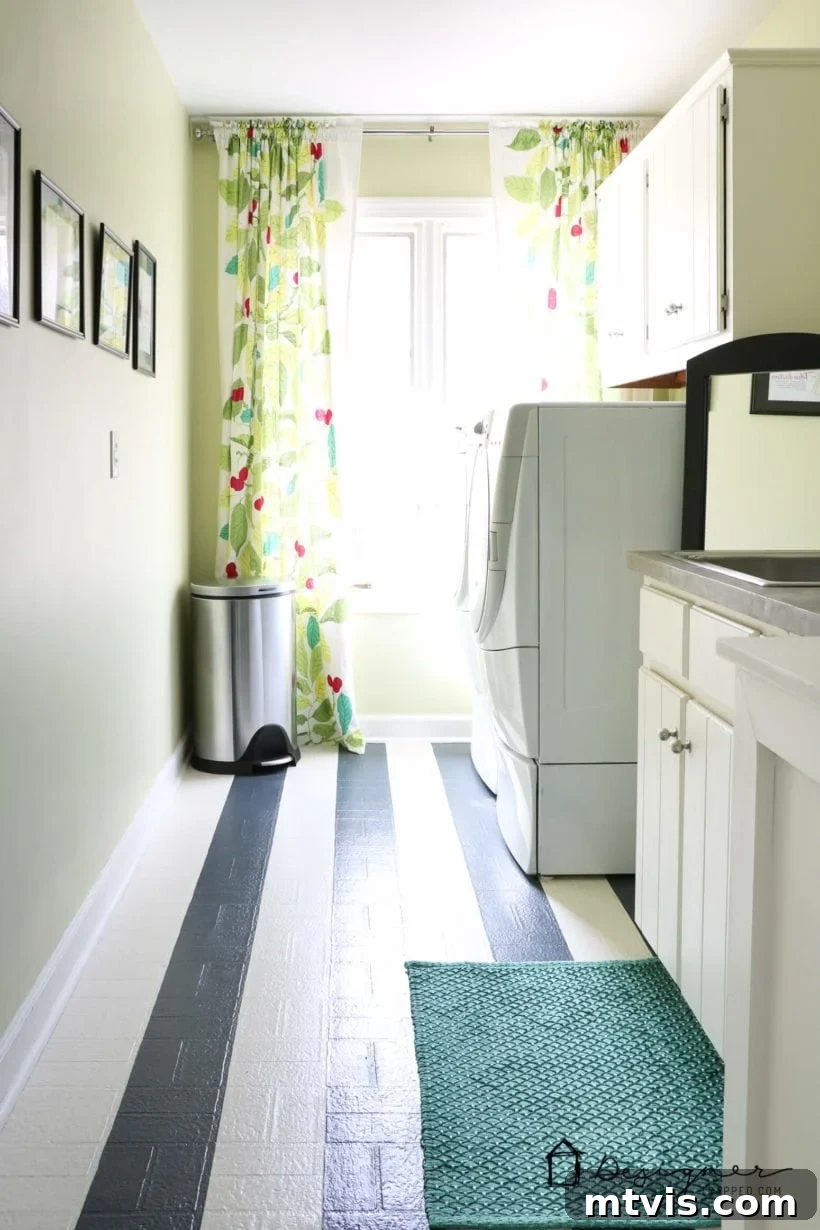
Many of you might remember my budget-friendly $71.00 laundry room DIY renovation. A highlight of that project, and one of my absolute favorite transformations, was the painted vinyl floor. Initially, I mistakenly referred to it as “linoleum,” which, as some observant readers pointed out (a bit rudely on Pinterest, I might add!), is technically different from vinyl. While flooring stores often use these terms interchangeably, my floors are indeed VINYL. Regardless of the technicality, my painted vinyl floors have proven to be exceptionally durable and beautiful for seven years now, showing no signs of chipping or peeling. It’s truly amazing!
This comprehensive guide, originally published in November 2013, has been fully updated in February 2023 with even more tips and insights for a long-lasting painted vinyl floor.
Say Goodbye to Drab: The Before & After of My Painted Vinyl Floor
To truly appreciate the transformation, let’s take a moment to reflect on what the floor looked like before I picked up a paintbrush. Ummm… yuck is an understatement!
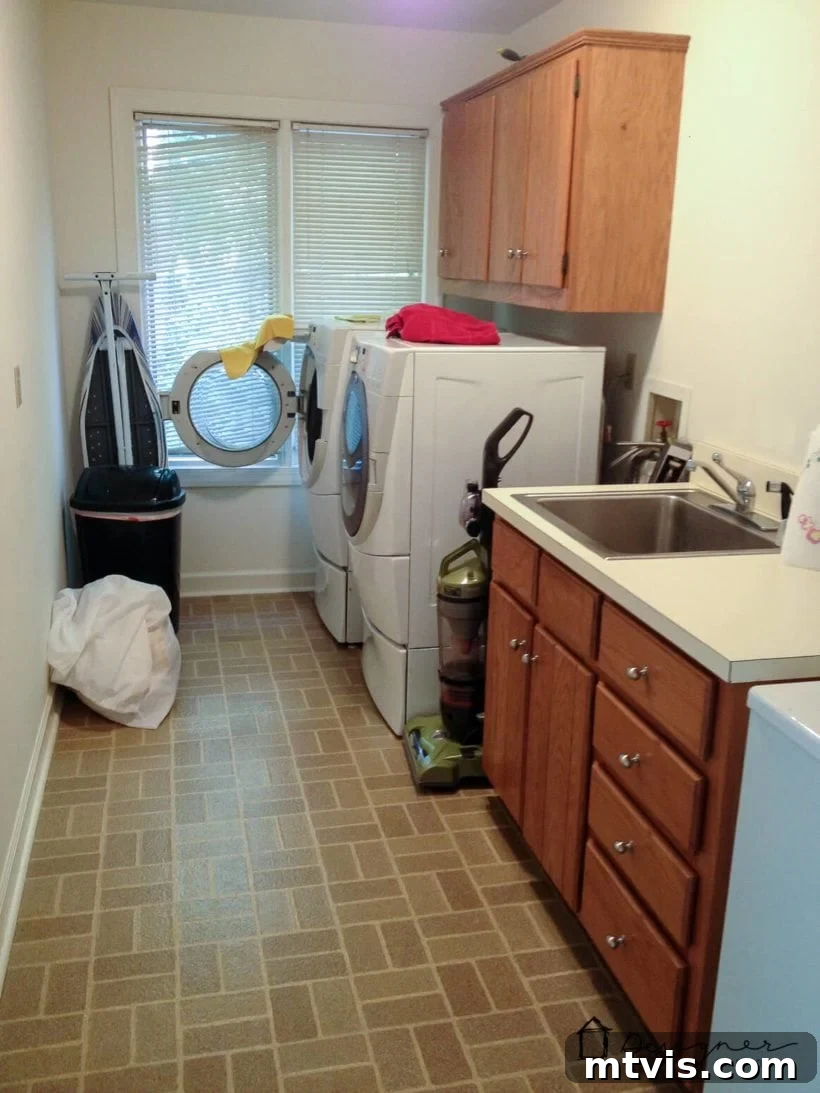
That outdated brick pattern vinyl was definitely not my style, and I wasn’t keen on spending a fortune to replace it. Having seen beautifully painted vinyl floors online, I decided to give it a try. The result exceeded all expectations, proving that painting vinyl floors is not only possible but also a remarkably effective way to update your home on a tiny budget.
This post contains some affiliate links for your convenience. Click here to read my full disclosure policy.
How to Paint Vinyl Floors: A Step-by-Step Tutorial for Durable Results
Transforming your vinyl floors with paint is a rewarding DIY project that can dramatically change the look and feel of a room. Follow this detailed tutorial for a long-lasting finish.
Planning Your Vinyl Floor Makeover: Colors & Patterns
Before you even open a can of paint, thoughtful planning is key. Consider the overall aesthetic of your room and how your new floor will contribute to it. I opted for a classic striped pattern using softer hues – an antique white and a charcoal gray – instead of stark black and white, to achieve a more subtle and inviting look in my laundry room. Stripes can elongate a room, while a checkerboard pattern adds a retro charm. A solid color can create a clean, minimalist canvas. The possibilities are endless!
Crucial Paint Choice: The single most important decision for a durable painted vinyl floor is selecting the correct paint. You absolutely MUST use porch and floor paint. This type of paint is specifically formulated to withstand heavy foot traffic, abrasions, and moisture, making it ideal for floors. Do NOT use regular wall paint, as it will not hold up to the demands of flooring and will chip and peel quickly. Most hardware stores like Lowe’s can custom mix porch and floor paint to virtually any color you desire. One quart of each color was sufficient for my laundry room project.
Essential Materials and Tools for Painting Vinyl Floors
Gathering all your supplies before you begin will ensure a smooth and efficient painting process. Here’s what you’ll need for a successful vinyl floor painting project:
- Porch and Floor Latex Satin Enamel Paint: As mentioned, this is non-negotiable for durability. I used antique white and charcoal gray. The satin finish offers a beautiful, subtle sheen that’s also easy to clean.
- KILZ General Purpose Interior Primer: A high-quality primer ensures maximum adhesion for your paint, especially important on non-porous surfaces like vinyl. It also helps block any stains from showing through your new paint.
- Paint Rollers: You’ll need a standard roller frame and several roller covers (e.g., ⅜ inch nap) for smooth surfaces to get an even finish.
- Angled Paint Brushes: Essential for “cutting in” around edges, corners, and for precise touch-ups. Choose a good quality brush for crisp lines.
- Paint Tray: For holding and distributing paint to your roller.
- Painter’s Tape: High-quality blue painter’s tape is critical for creating clean lines for striped or patterned designs. The width of the tape will determine the width of your stripes, so plan accordingly.
- Floor Cleaning Solution: I highly recommend TSP (trisodium phosphate) for its heavy-duty cleaning power, which is excellent for prepping floors. If not available, a more mild, degreasing floor cleaner will work, but ensure it leaves no residue.
- Vacuum and Mop: For initial cleaning and rinsing.
- Drop Cloths: To protect surrounding walls, furniture, and anything you don’t want painted.
- Stir Sticks: To thoroughly mix your paint and primer.
- Box Fan (optional but recommended): To speed up drying times between coats.
Steps to Painting Your Vinyl Floors
Time needed: 2-3 days (mostly for drying)
Transform your old vinyl floors into a stunning, durable surface with this detailed step-by-step guide. Achieve professional-looking results that last for years!
- 1. Clear and Thoroughly Clean the Floor Area.
This step is critical for paint adhesion and overall durability. Begin by completely clearing the room of all furniture, appliances, and rugs. If you’re working in a laundry room like mine, you’ll need to carefully move your washer and dryer out of the way – or even out of the room entirely if space is limited. Once the floor is clear, sweep and vacuum meticulously to remove all loose dust, dirt, and debris. Next, it’s time for a deep clean. I highly recommend using TSP (trisodium phosphate), a heavy-duty cleaner that effectively removes grease, grime, and any residues that could prevent the primer and paint from adhering properly. Mix according to package directions and mop the entire floor. Rinse the floor thoroughly with clean water multiple times to ensure no TSP residue remains, then allow it to dry completely. If you don’t have TSP, a good quality, mild degreasing floor cleaner (like Mrs. Meyer’s All Purpose Cleaner) can work, but make sure it leaves no film. Remember, a perfectly clean surface is the foundation of a long-lasting painted floor. No sanding is needed on vinyl floors, just a good clean!
- 2. Apply a High-Quality Primer.
With your floor spotless and dry, it’s time for priming. I used KILZ General Purpose Interior Primer. Primer is essential as it creates a strong bond between the vinyl surface and your paint, ensuring durability and preventing chipping. Pour the primer directly onto the floor in small sections and spread it evenly with a small to medium-sized paint roller. Work in manageable areas, rolling back and forth to achieve full, uniform coverage. Don’t forget to use an angled brush to get into corners and along edges where the roller can’t reach. One coat of primer is usually sufficient for vinyl floors. Ensure good ventilation in the room. I applied my primer around 9 PM one evening and allowed it to dry completely overnight, which is crucial for proper adhesion before the next step.

- 3. Paint Your Vinyl Floor with Your Base Coat.
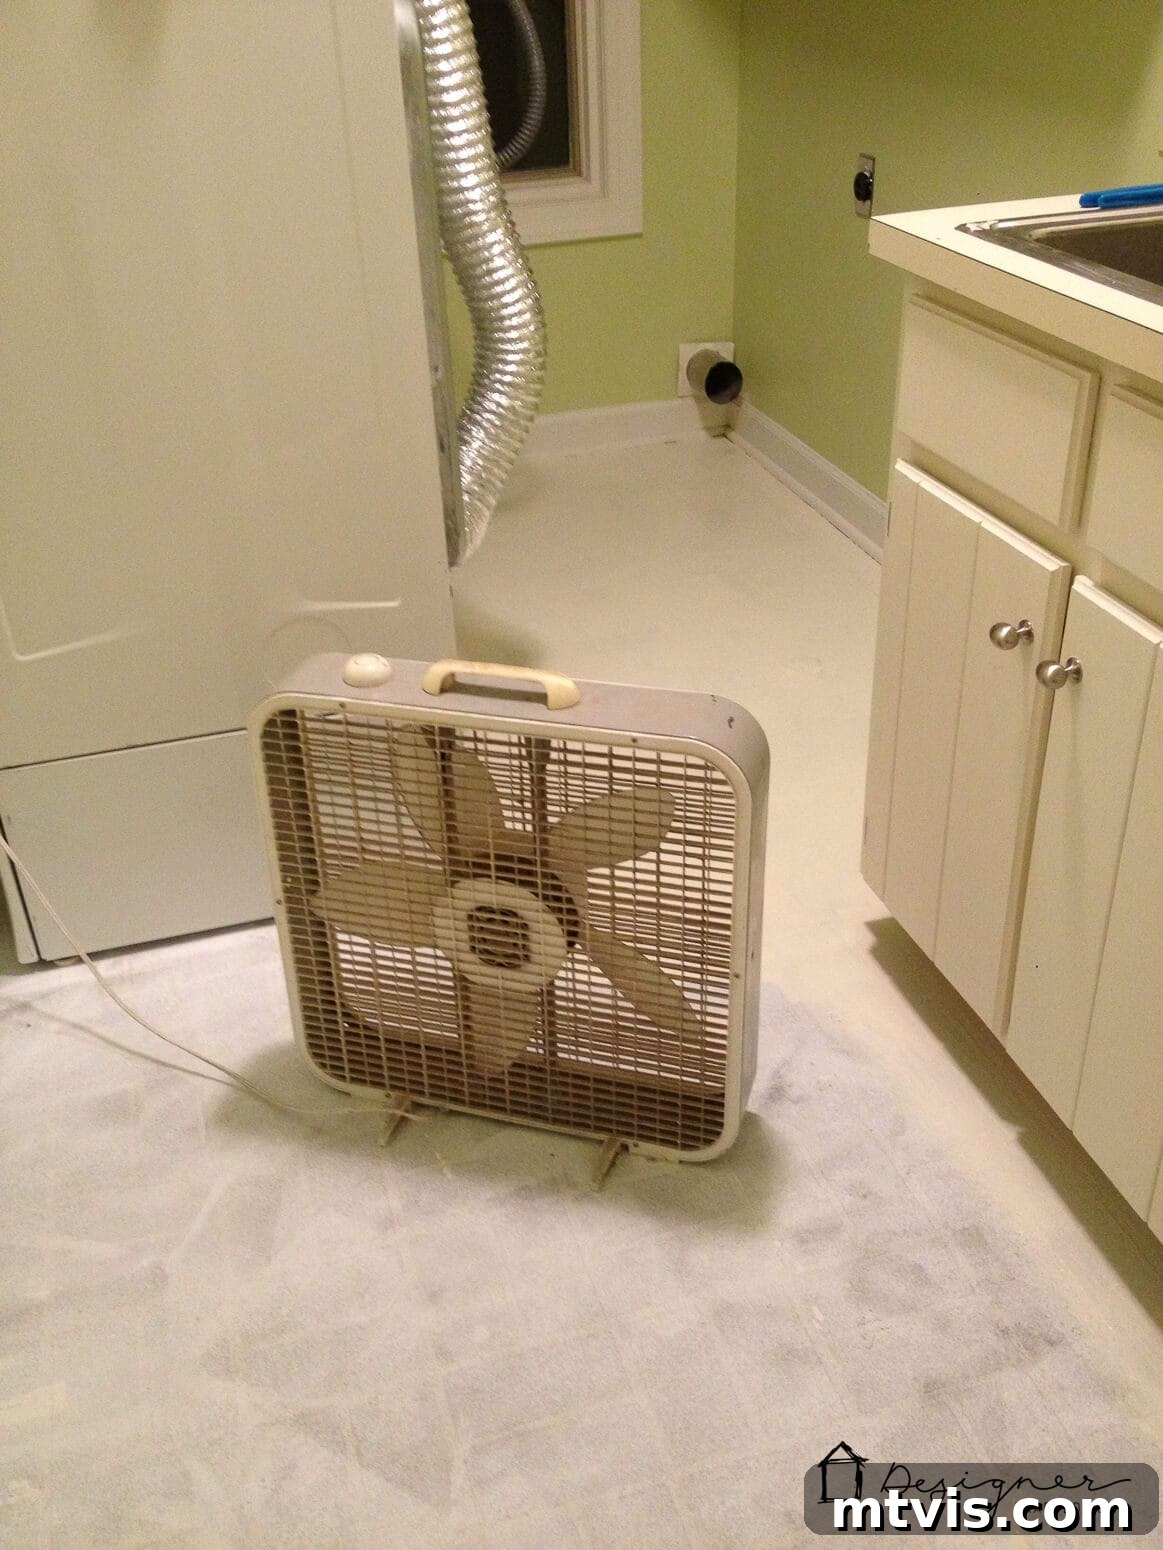
After the primer has dried overnight, apply the first coat of your chosen base color. I used antique white as my base. Pour some of the porch and floor paint into your paint tray and use your roller to apply it evenly. Start by cutting in the edges with an angled brush, then use the roller for the main floor area, working your way out of the room to avoid painting yourself into a corner. Two coats of the base color are highly recommended for full coverage and enhanced durability. Fortunately, porch and floor paint tends to dry relatively quickly, especially if you use a large box fan to circulate air and speed up the process. I was able to complete both coats in a single day, allowing ample drying time between them. After the second coat, let the base color dry thoroughly overnight. Be prepared, painting floors can be a bit messy, so wear old clothes and be ready to scrub your feet afterward!
- 4. Create Your Pattern: Tape Off and Paint Your Stripes.
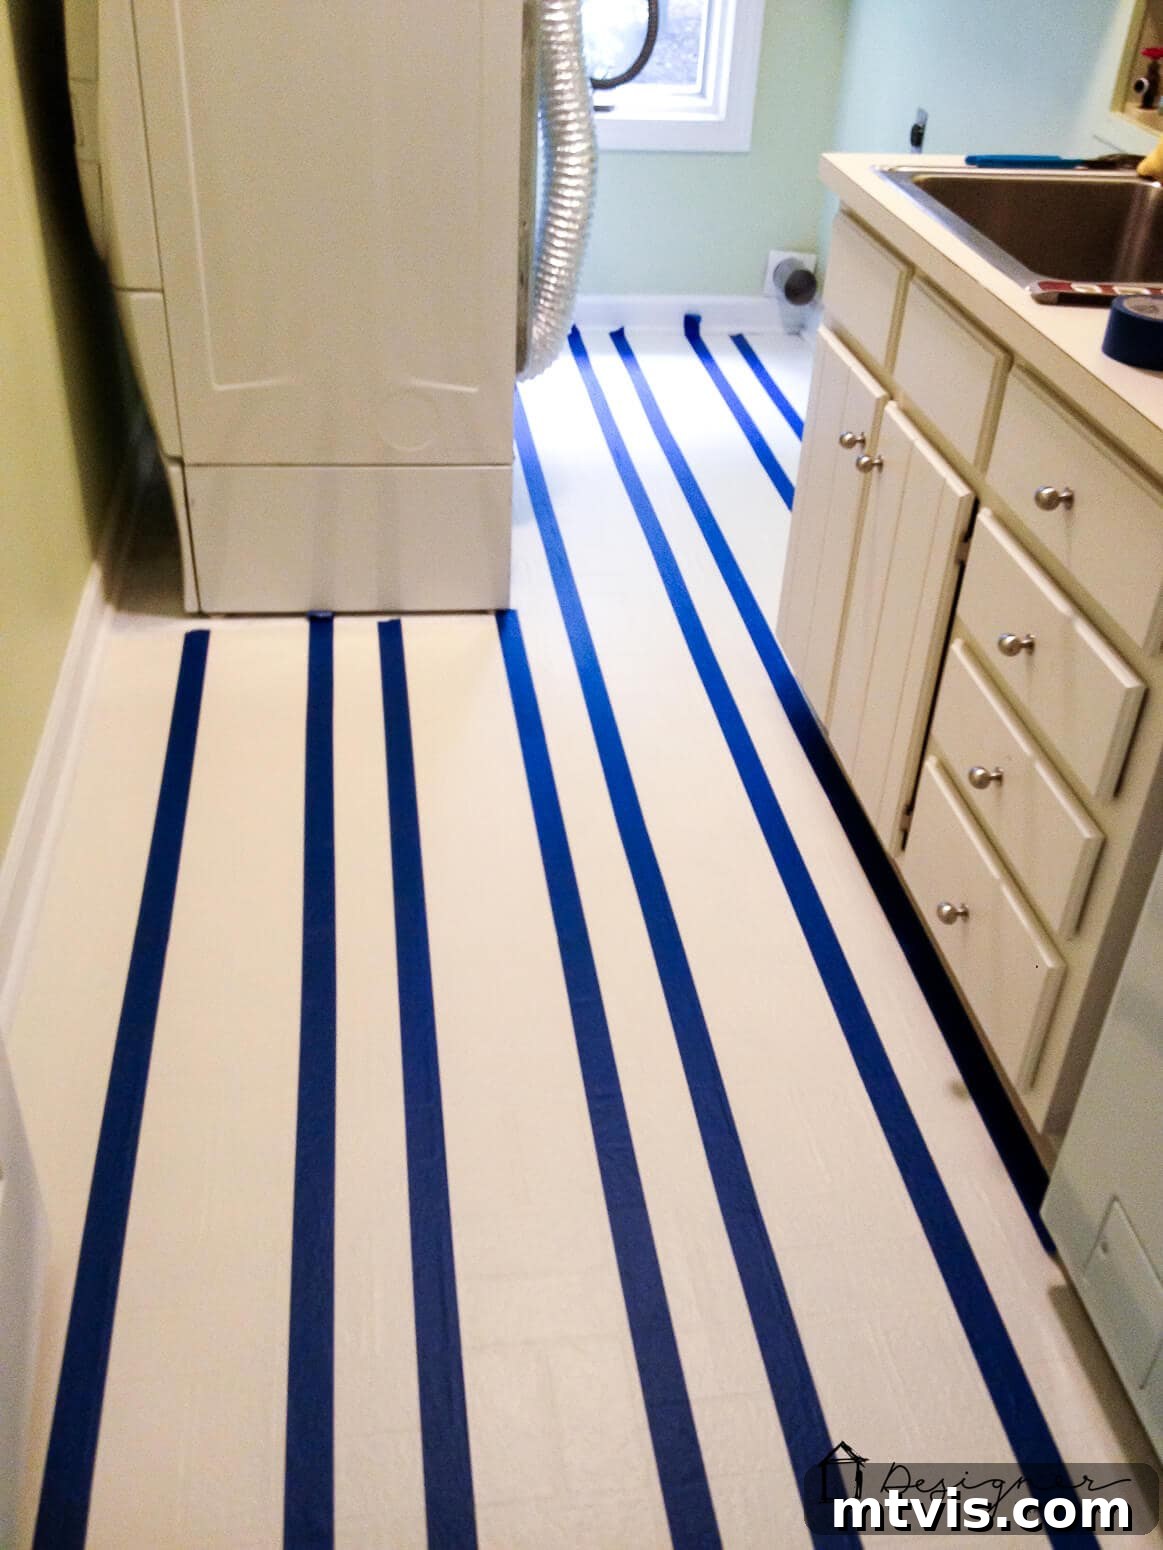
The following evening, once your base coat is completely dry, it’s time to create your pattern. If you’re doing stripes, carefully tape off your design using high-quality blue painter’s tape. I found it easiest to use the existing brick pattern of my vinyl floor as a guide for stripe width, which saved me from meticulous measuring. If your floor doesn’t have such a guide, you’ll need to measure and mark your lines lightly with a pencil before taping.
Now, here’s a professional trick, especially crucial for textured surfaces like many vinyl floors, to prevent paint bleeding under the tape: After you’ve applied all your painter’s tape, apply one thin coat of your base color (antique white in my case) directly over the entire floor, painting right over the tape lines. This seals the edges of the tape, filling any tiny gaps where paint could seep underneath. Let this coat dry completely. Trust me, this extra step takes minimal time and ensures incredibly crisp lines for your pattern.
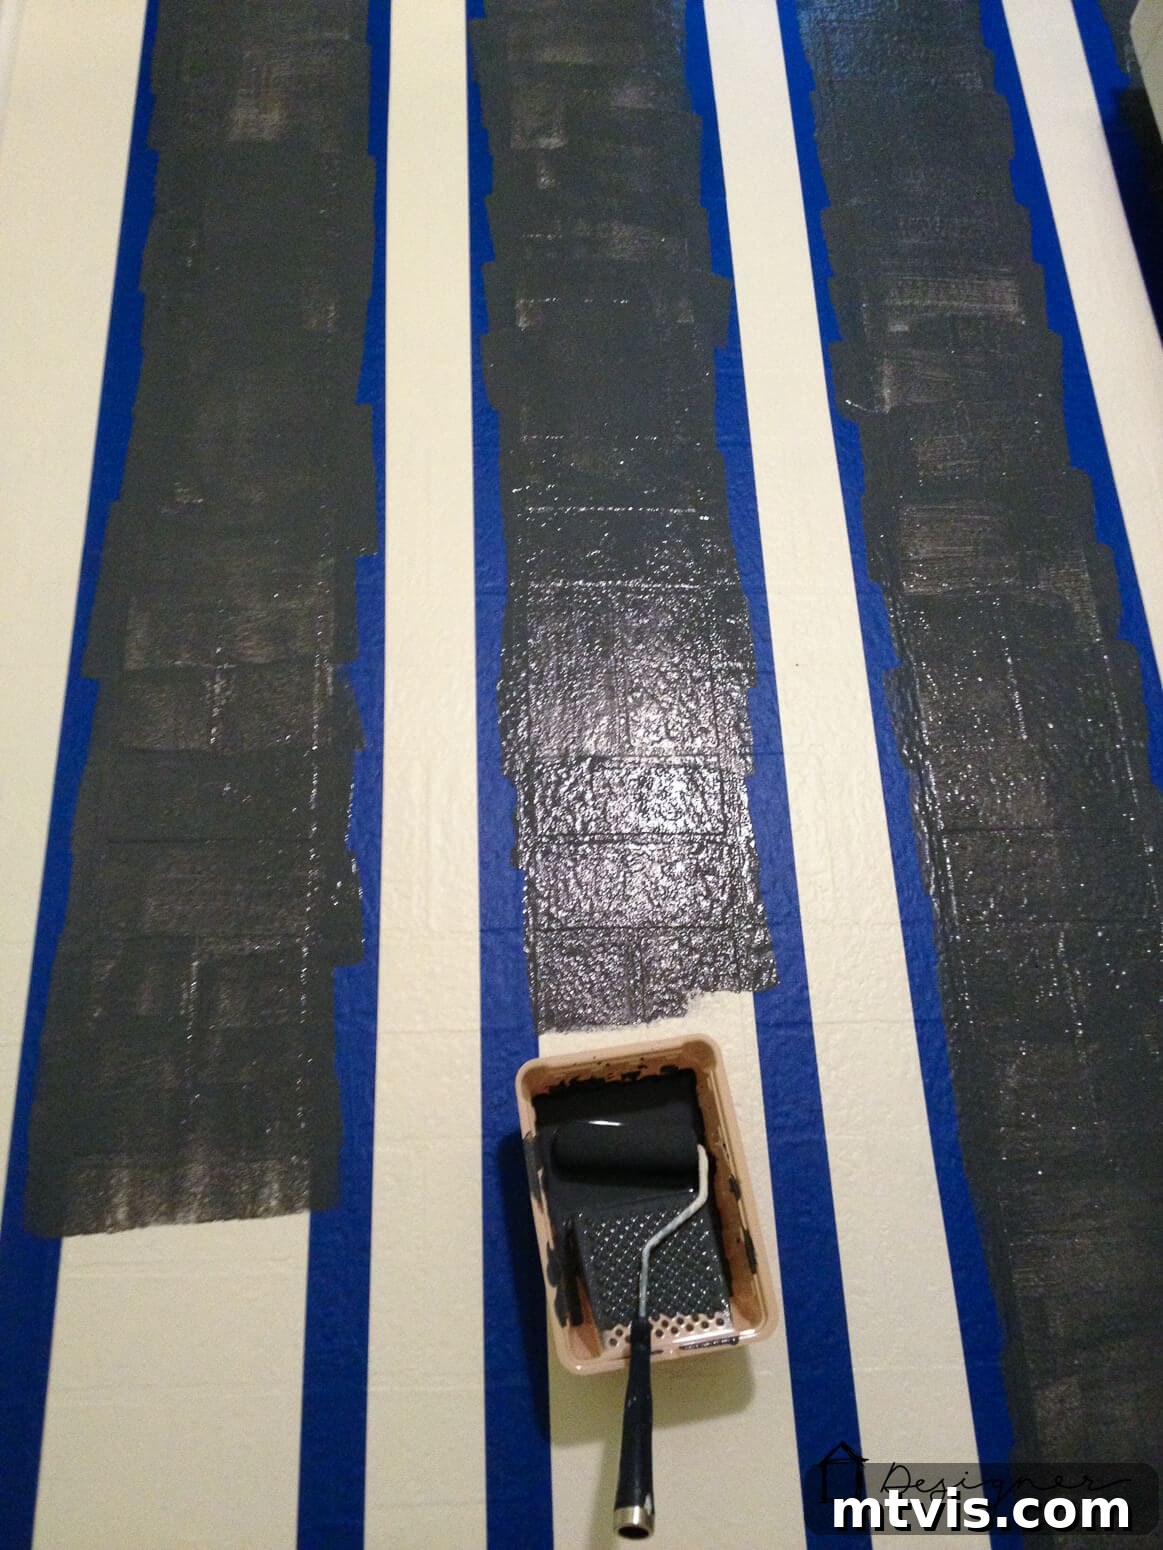
Once the sealant coat is dry, proceed to paint your stripes with your secondary color, charcoal dark gray. Apply two coats of this color for rich, opaque coverage. I let the first coat dry overnight (often due to it being late when I finished) and completed the second coat the next evening. This patient approach ensures each layer dries properly, contributing to the overall durability of your painted floor.
- 5. Remove Tape and Perform Any Necessary Touch-Ups.
Once your final coat of paint is dry to the touch (usually a few hours, but follow paint can instructions), carefully and slowly remove the painter’s tape. Peel it back at a 45-degree angle. Don’t panic if you notice any minor bleeding, especially if you skipped the sealant trick in Step 4. This is easily fixable! Grab your angled paint brush and use your base color to “cut in” along the lines, sharpening any fuzzy edges. This step is surprisingly quick and satisfying. For me, it took less than 15 minutes to perfect all the stripes in my laundry room. Allow the entire floor to cure for several days before placing heavy furniture back or subjecting it to heavy traffic, to ensure maximum hardness and durability.
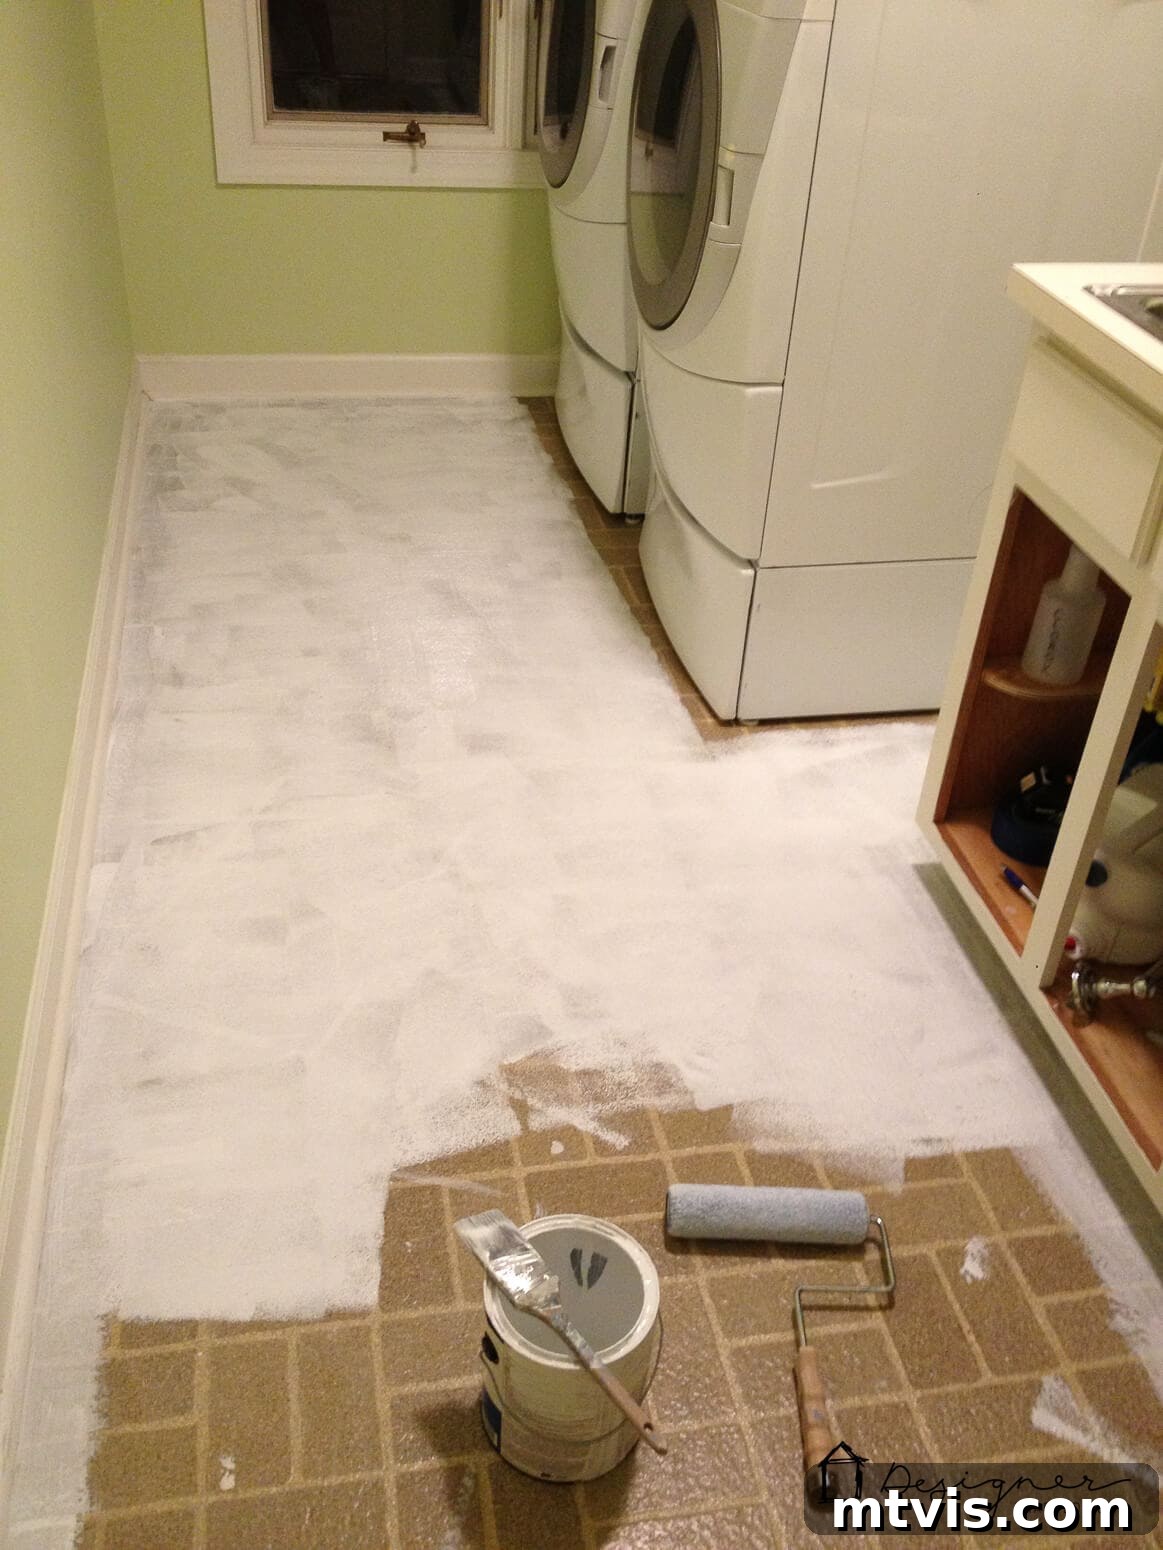
And that’s it! You now have the knowledge of how to paint vinyl floors effectively for long-lasting results. While it may seem like many steps, each stage is relatively quick, usually taking no more than 10 to 30 minutes of active work (excluding drying time). I found painting my floor to be much faster than painting walls. The total active painting time for all steps combined was less than 2 hours. This project is perfectly manageable in the evenings after work, leaving you refreshed for the next day.
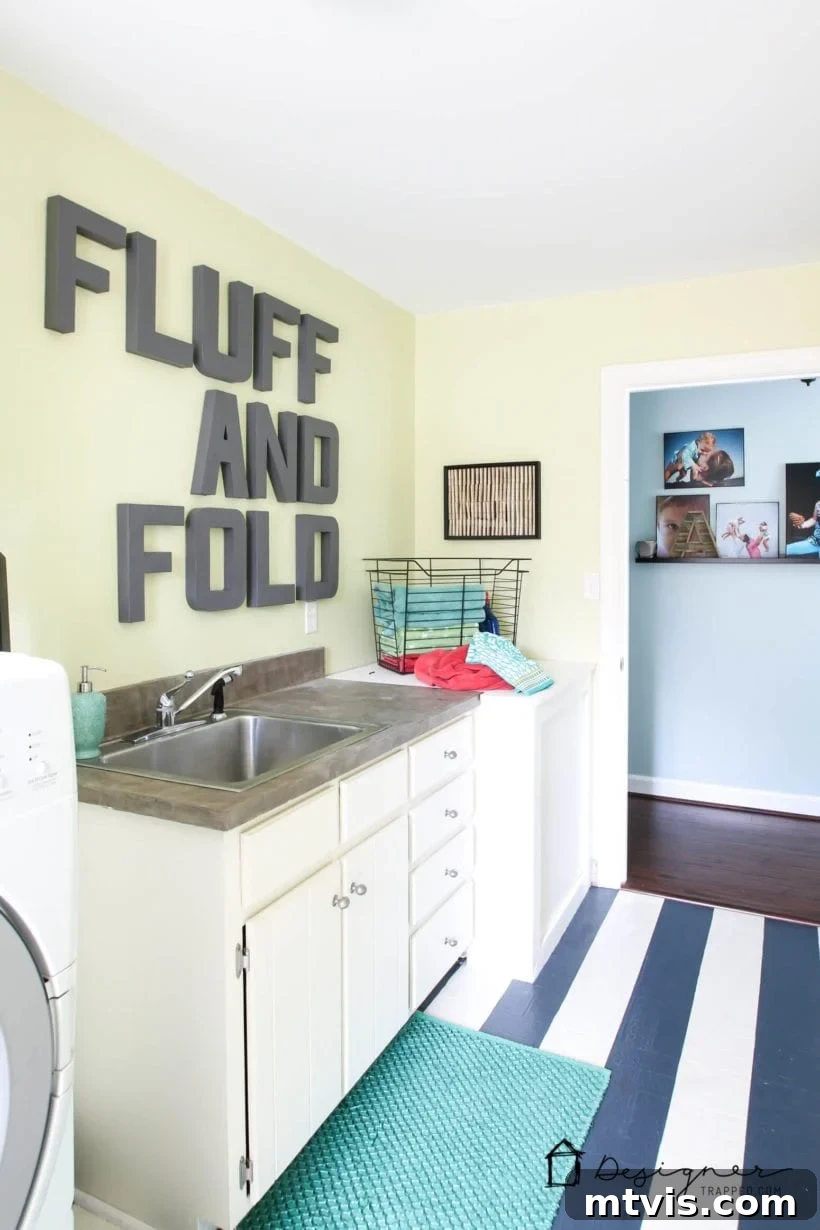
The end result is truly GORGEOUS! Painting our vinyl floors was, without exaggeration, the MOST WORTHWHILE 2 HOURS OF MY DIY LIFE! I absolutely adore this floor; it’s a testament to what you can achieve with a little effort and the right materials.
The Unbelievable Durability of Painted Vinyl Floors
One of the most common questions I get is about the durability of painted vinyl floors. And I’m thrilled to report that mine exceeded all expectations! I originally painted this floor in October 2013, and it remained absolutely perfect for over SEVEN years before we eventually covered it up with peel-and-stick marble tile during a laundry room refresh when we put our house on the market. We did not “baby” this floor at all. It endured typical household abuse: laundry baskets were scooted across it, shoes tracked in dirt, and it saw constant foot traffic.
Through all of that, there was no damage, no scratching whatsoever from daily use. The only incident was a few years ago when we had to remove and replace our water heater. The floor did get scraped in one area when the plumber dragged the old unit out, which was completely understandable given the circumstances. The good news? It was incredibly easy to touch up with a small brush, making the damage virtually invisible. This project truly stands the test of time, demonstrating that a painted vinyl floor can be a robust and long-lasting solution for any high-traffic area in your home.
Frequently Asked Questions About Painting Vinyl Floors
As mentioned, my painted vinyl floor in the laundry room lasted perfectly for over seven years with consistent daily use. It’s truly amazing how well it held up. The key to this longevity is using the correct materials – specifically, high-quality porch and floor enamel paint, applied over a proper primer. If you follow the steps, including thorough cleaning and proper drying times, you can expect similar results even in high-traffic areas. This durability was also observed on our painted and stenciled wood kitchen floors, which saw even more traffic and abuse, yet held up beautifully for years without any top coat.
Cleaning painted vinyl floors is incredibly simple and requires no special products. We typically used regular Swiffer wet pads for quick clean-ups. For deeper cleaning, you can simply mop them with warm water and a mild dish soap or an all-purpose floor cleaner, just as you would with any other hard floor. Avoid harsh chemical cleaners, abrasive scrubbers, or steam cleaners, as these could potentially damage the paint finish over time. Gentle, regular cleaning is all that’s needed to keep your painted floors looking fresh.
No, I did not sand my vinyl floors, and I generally do not recommend it for this project! Unlike many other painting projects, vinyl floors do not typically require sanding or liquid deglosser. The secret to strong adhesion lies in the quality primer (like KILZ) creating a bonding layer, and the thorough cleaning process before priming. A quick wipe down with a sponge or clean cloth after cleaning is all the surface prep you’ll need.
No, no, no, no, no. I cannot emphasize this enough: do NOT use a top coat! Porch and floor paint is specifically formulated with all the necessary components for durability, including a built-in protective finish. Adding a separate top coat, especially a polyurethane or clear coat, is very likely to cause yellowing over time, which will drastically alter the appearance of your beautifully painted floor. It can also introduce adhesion issues or create a surface that is harder to touch up later. Trust the product specifications; the porch and floor paint is designed to be your final, durable layer.
While there’s a technical difference between vinyl and linoleum, this painting method is generally suitable for both. Both materials are resilient flooring types that share similar non-porous surface properties, making them receptive to the same primer and porch/floor paint treatment. The key steps of thorough cleaning, proper priming, and using durable floor paint apply equally well to linoleum, ensuring a long-lasting and beautiful transformation.
Textured vinyl floors can pose a challenge for achieving crisp painted lines due to the uneven surface. However, the crucial tip for preventing bleeding (Step 4 in the tutorial) is especially effective here. By applying a thin coat of your base color directly over the painter’s tape, you effectively seal any gaps created by the texture. This creates a barrier, ensuring that your secondary color paint stays exactly where you want it, resulting in clean, professional-looking lines despite the underlying texture. It’s a game-changer for patterned floors on textured surfaces!
If you’re eager to tackle this project yourself, why not make it even easier by having the instructions at your fingertips? Fill out the form below to grab your free printable instructions!
[Printable instructions form will be displayed here]
Conclusion: Your Dream Floors are a Paintbrush Away!
What do you think? Are you tempted to paint your vinyl floors now? This incredible DIY project isn’t just limited to laundry rooms; it would also work beautifully in a bathroom, mudroom, or any other area with outdated vinyl flooring. You can easily incorporate a faux tile look with a stencil if you prefer that aesthetic, or even experiment with different geometric patterns.
While options like updating an outdated floor with tile stickers exist, painting offers a far more cost-effective and customizable solution. Don’t let the idea of a floor renovation intimidate you any longer! This tutorial demonstrates just how easy it truly is to transform your outdated vinyl or linoleum flooring into a fresh, stylish, and incredibly durable surface that you’ll love for years to come.
More Paint Posts for Your Next DIY Project
SEE ALL PAINT POSTS
-
9 Life-Changing Painting Hacks Everyone Should Know
-
How Durable are DIY Painted Kitchen Cabinets?
-
How to Paint Kitchen Cabinets (From a DIYer Who Has Done it 3 Times)
-
How Have Our Painted Countertops Held Up?
-
How to Paint IKEA Furniture and Mistakes to Avoid
-
How Much Paint Do I Need for My Room?
Other flooring posts you may enjoy:
- Gorgeous But Cheap Flooring Ideas
- How to Install a Floating Tile Floor
- The Pros & Cons of Flooring Types & How to Choose
Wondering how I approach transforming rooms and spaces in our home? Check out Designer in a Binder®, my signature system for stress-free home decorating.
And if you want exclusive content and behind-the-scenes sneak peeks, be sure to subscribe before you head out!
[Subscription form will be displayed here]